Crysis 3 Remastered All Collectible Locations
In this guide we will show you where to get 100% of the collectibles in Crysis 3 Remastered, this includes all Datapads, Blackboxes, Posters & Nanosuit Upgrades.
Quick note: The locations shown on the map screenshots on each collectible are NOT the location of the collectible itself, it’s the location of the first screenshot shown for that collectible.
Post Human
Blackbox #1: From the very start of the level you will go down a ramp to your left, the first collectible of the game can be found on the corpse at the bottom on the left.


Datapad #1: After equipping the silencer to your pistol you will come to a big room, here go down the stairs and all the way to the end, take a left and then another left as soon as you go though the door in front of you, now you will go up some stairs to find the collectible on your right.


Datapad #2: In the corner of the room you get your bow for the first time (same room as the game makes you look out the window).


Datapad #3: Eventually you will come to an area filled with enemies and red boxes, you will leave this area by going up some stairs (main path) the collectible will be in the next room.


Datapad #4: After opening the door when learning how to hack for the first time take a left into the room where the device was that you just hacked, the collectible will be inside.


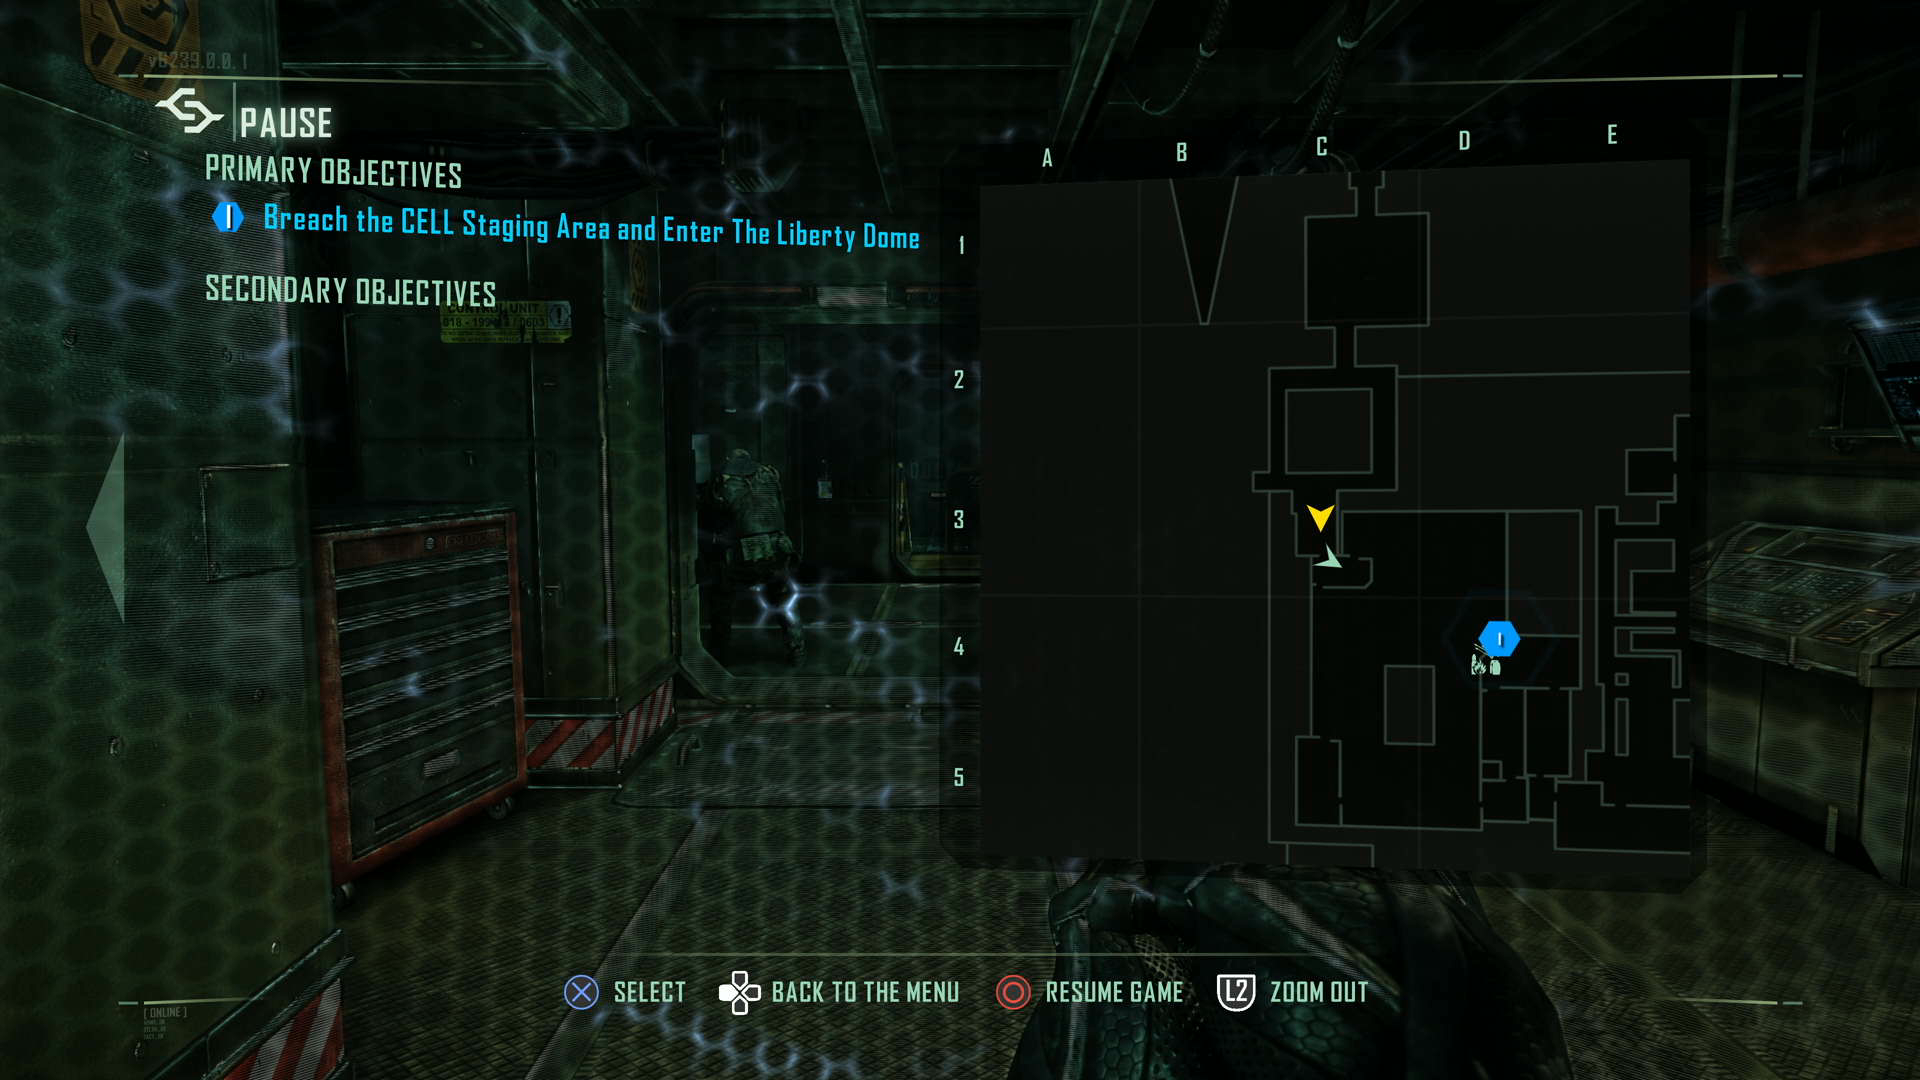
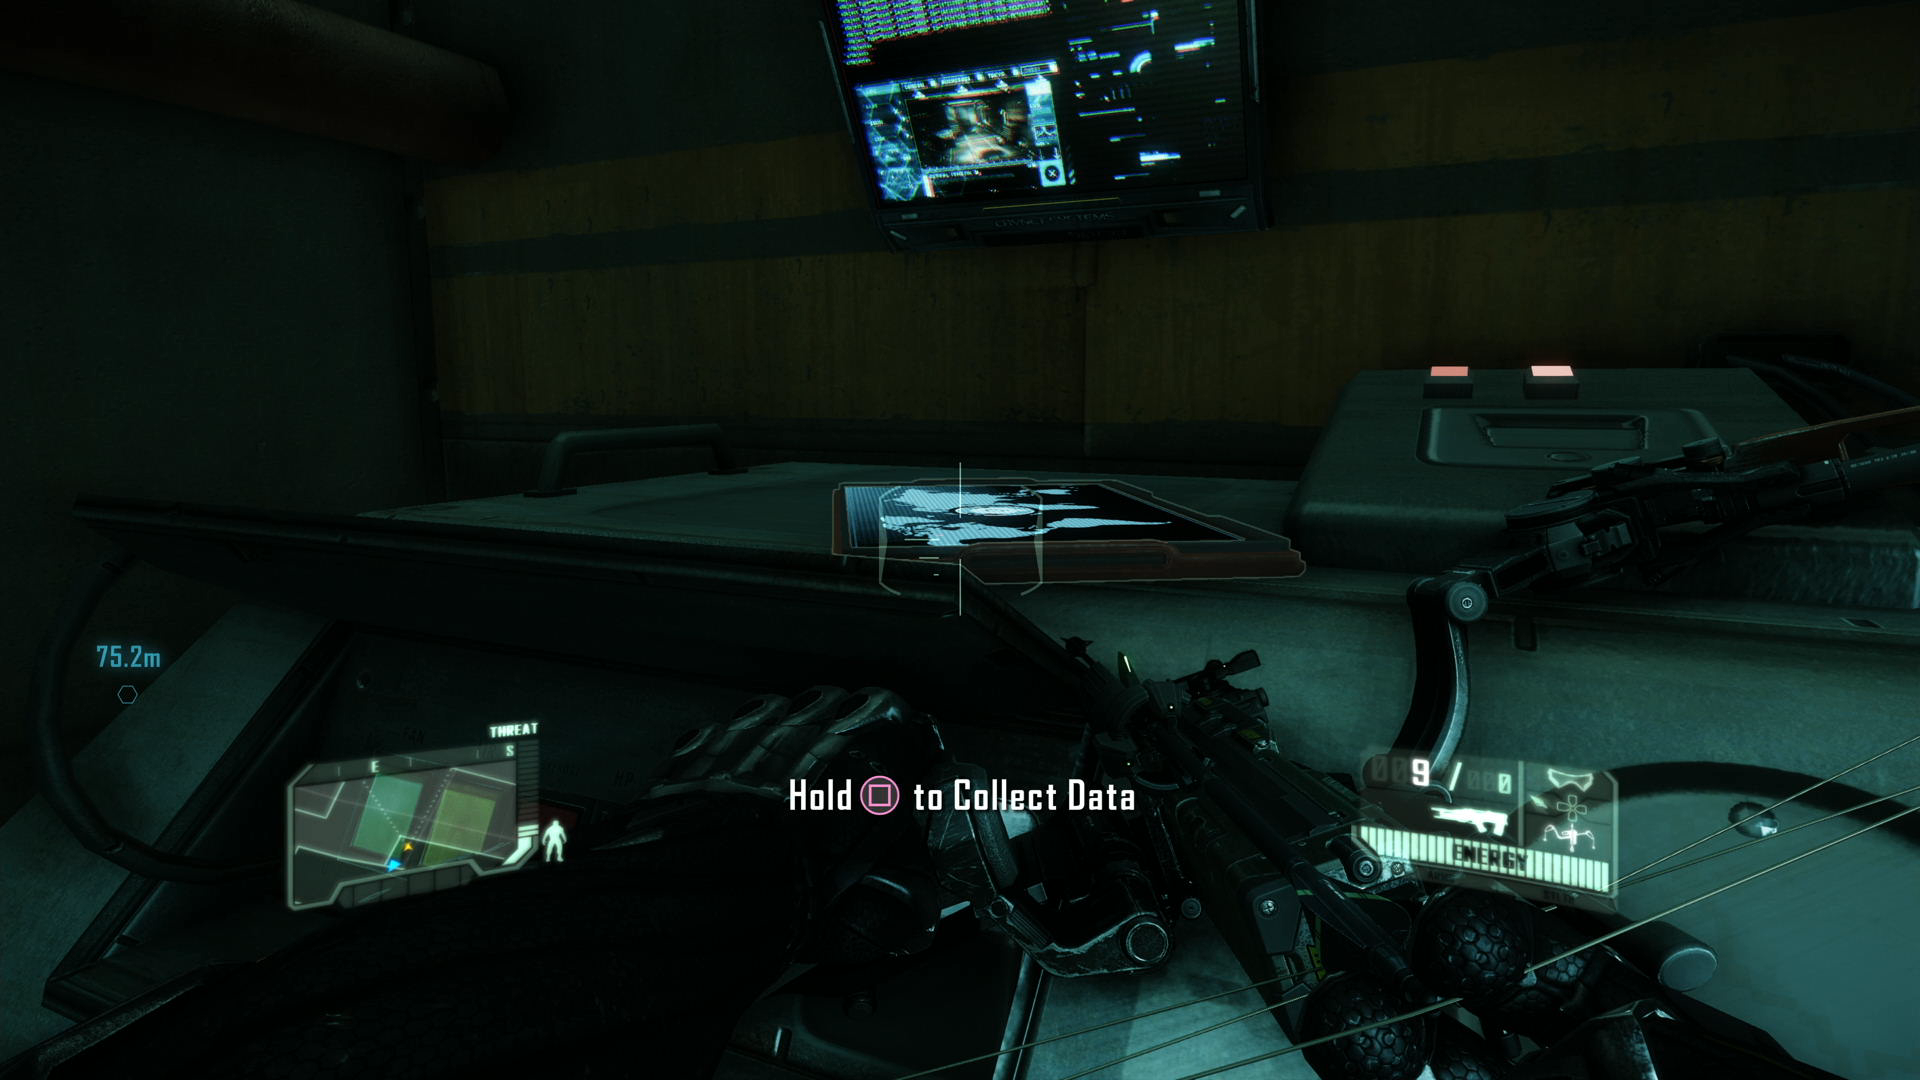
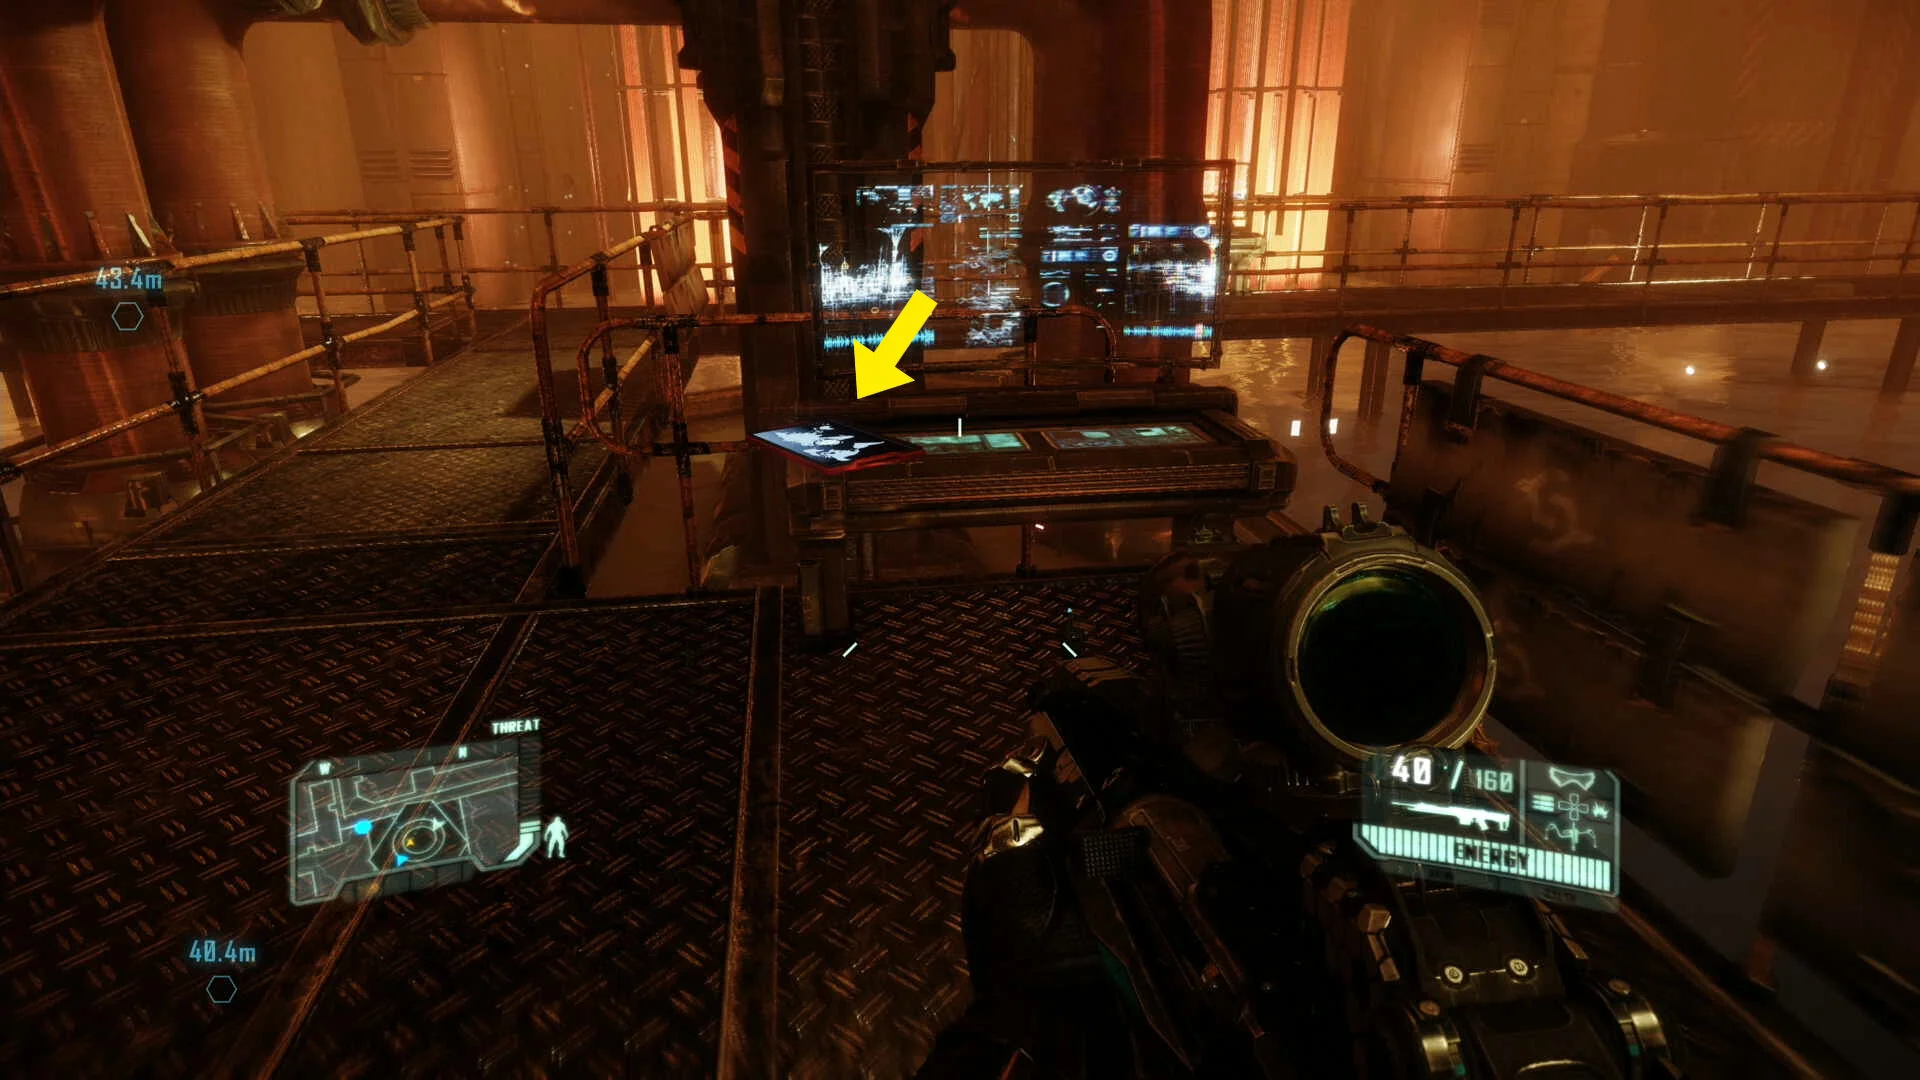
Datapad #5: After hacking the door for the first time take a right and go down the stairs (main path), the collectible is on the table just below the screen that you stay and watch for a little.


Datapad #6: From the room with the orange window looking out to a reactor of some kind take a right, continue all the wall to the end of this hallway and take another right at the very end to enter the little room with the collectible in it.


Datapad #7: By following the main objective you will go through a circular room with a screen in the middle, the collectible will be on the desk below the screen.


Blackbox #2: On a corpse in the same room as you join back up with your companion.


Welcome To The Jungle
Nanosuit Upgrade #1: Part of the main story (unmissable), you will pick this up at the start of the mission.
Propaganda Poster #1: Before you enter the main entrance of the park go to the left, go all the way to the end and then look to your right to find the poster, scan it to make it count.


Datapad #8: From where you pick up the bolt sniper (main objective) take a right, then jump up to to the higher ledge at the end to find the datapad on some boxes.


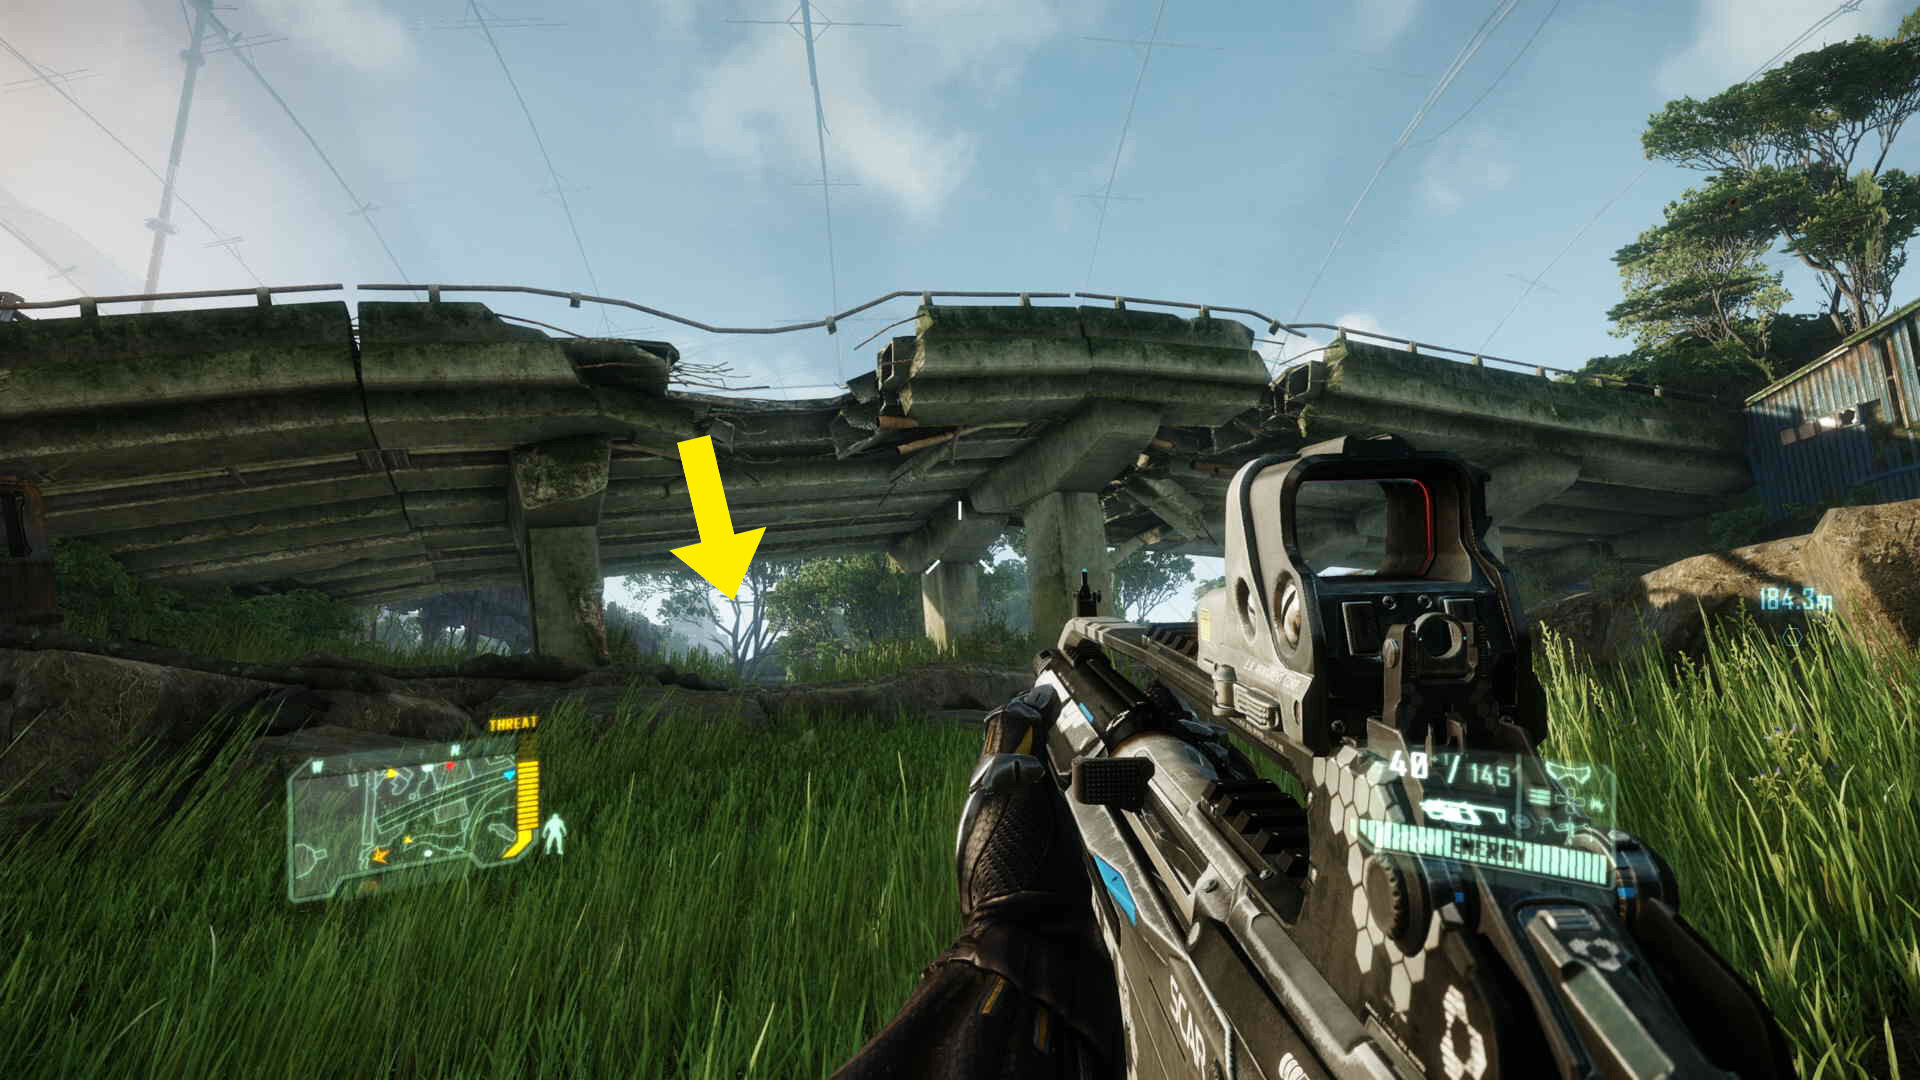
Nanosuit Upgrade #2 & Datapad #9: Go to the edge of the map (check the first screenshot) and look towards the overpass (north-west), go under it and you should eventually see a triangle structure at the end, hack it to get the Nanosuit Upgrade and pick up the Datapad that can be found on the floor next to it.


Blackbox #3: Continue on the main path until you have to jump across a gap to rejoin with Psycho, after you jump across enter the door on the left, then examine the corpse on the floor to find the collectible.


Blackbox #4: Once you get to the big overgrown train station with the big tree in the center, jump down and do a 180º turn to go under where you was standing above, here take a left to find the collectible.


Datapad #10: In the same overgrown train station as the last one, this time stick to the right side of the big tree and you will walk under an elevated train, here look to your left to find an underground entrance, inside you will find a small ventilation conduct that will take you to a small room with the collectible in it.


Nanosuit Upgrade #3: Following the main path you will use a zipline once you reach the top part of the overgrown train station, as soon as you get off the zipline look right and jump down to the train, enter it to find the collectible at the end.


The Root Of All Evil
Nanosuit Upgrade #4: Once you come to the open green area (very close to the start of the mission), take a left and stick to the wall, once you get to a tilted tower continue on the left, here you will see an entrance to the bottom of the dam, just inside you will see an orange contained you can hack, the upgrade is inside.


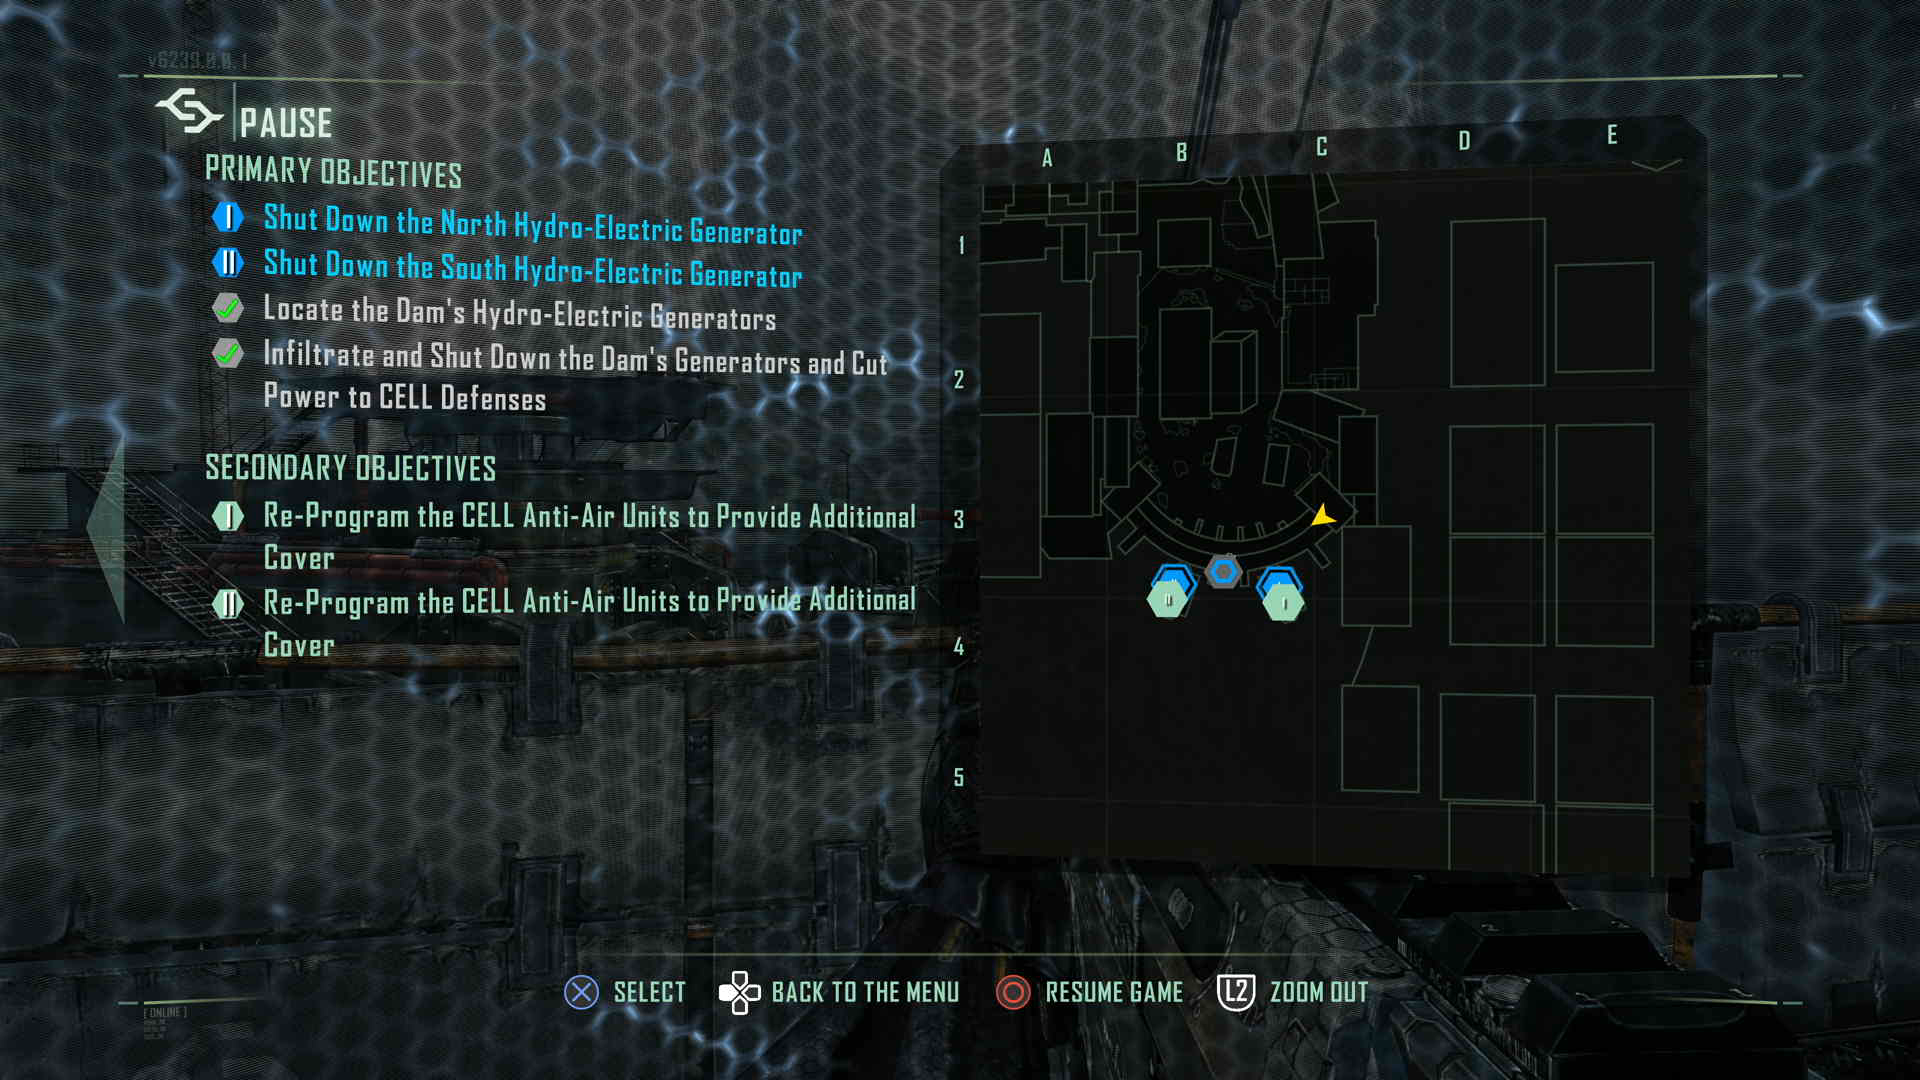
Datapad #11: Once you get to the top of the dam take the first left and enter the tower by hacking the panel next to the door, the datapad will be inside.


Nanosuit Upgrade #5: Under the desk in the same room as the main objective in the tower under the previous collectible.


Propaganda Poster #2: As soon as you regain control of your character after destroying the dam stick to the building on your right, soon you will see a poster on the wall the other side of the gap to your left, jump across and scan it to make it count.


Blackbox #5: From the previous collectible, jump down into the river, here continue forwards a little until you see some corpses on your left, the collectible will be with one of them


Nanosuit Upgrade #6: From the previous collectible continue up the river until you see a stone arch to the left with a dear running around, go through this arch to find the upgrade inside a downed helicopter.


Blackbox #6: Continue up the river past the enemies until you get to a fork in the road (you should have a yellow object floating to your left and a cave to your right), take the path to your right into the cave and go straight until you find a corpse on the ground with the collectible.


Nanosuit Upgrade #7: Enter the same cave as the previous collectible, however this time look for a tunnel to your right, the upgrade will be in the cave the other side.


Blackbox #7: After the cave/tunnel section you will emerge into an opening with a massive satellite structure in the middle, here you will want to stick to your left until you see a pit, in the pit there will be an entrance to a tunnel, the collectible will be inside!


Nanosuit Upgrade #8: After emerging from the tunnel where the previous collectible was, climb the stairs that are in front of you and take a right at the top, now stick to the left side until you find a pit with water, the upgrade is in the water.


Nanosuit Upgrade #9: Before heading down the elevator (main objective) cross the catwalk to the right and look for the upgrade in the blue hut.


Datapad #12 & Datapad #13: After going down the previously mentioned elevator you will be in an “orange” room, here take the left path to find the first of the 2 datapads, the other will be soon after taking a right as soon as you can just past the first.


Datapad #14: After going up the central elevator from the “orange” room, take a left to find the last collectible of this mission on a table.


Safeties Off
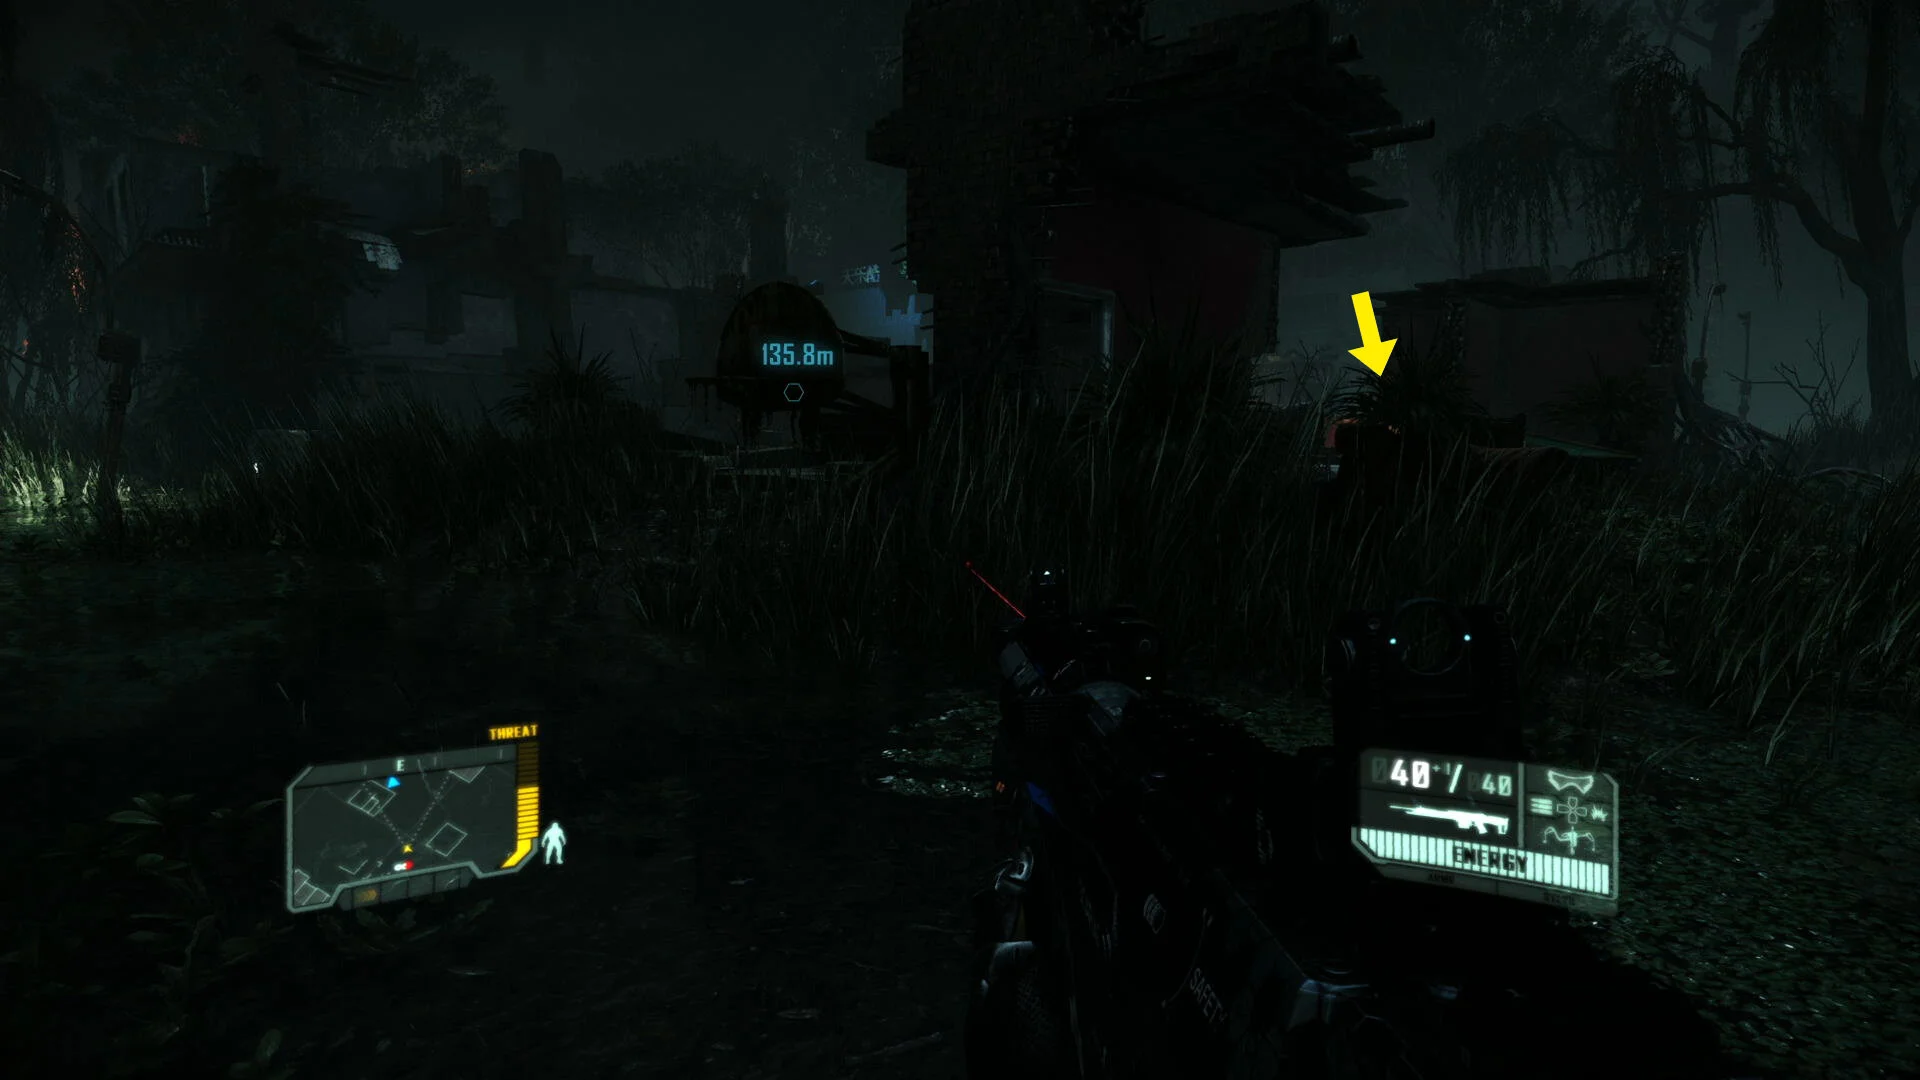
Nanosuit Upgrade #10: At the end of the street with the red hanging lights take a left, from where the destroyed buss is look for a room in the building in front of you that is covered by wood that you can break (look for the yellow arrow on image 3), the upgrade will be in in this room.


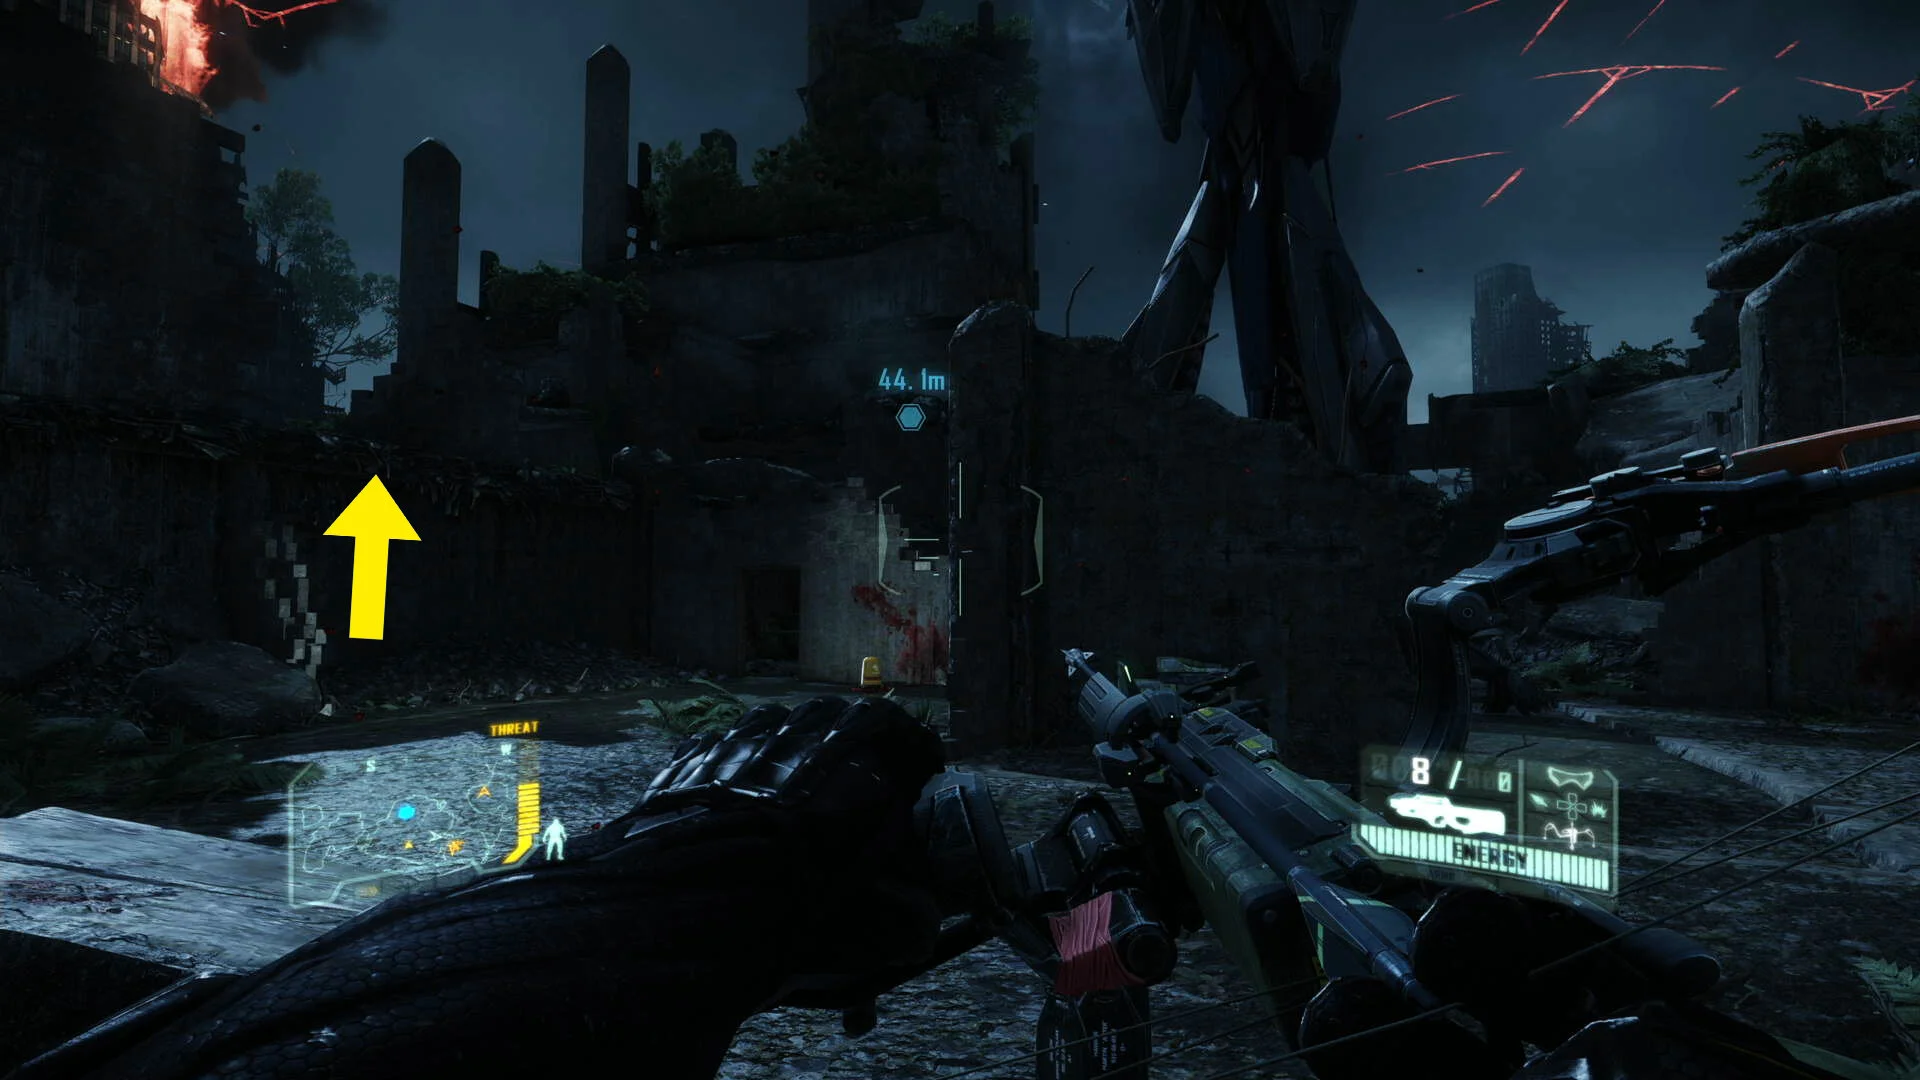
Datapad #15-20: From the previous collectible exit through the door to your left, next take a right, and then jump out of the building by going left into the area with the spotlight, when you see a building with a turret on it look to your left to see a downed helicopter, here you can find all 6 datapads, 3 will be on the ground close to the chopper and the other 3 will be on the building above to the right (scan the area if you are having any trouble finding them). NOTE: one of the 4 on the second floor is NOT a collectible and is a side quest objective.


Propaganda Poster #3: Once you get to a big Tori gate, look for a door to the right, the poster will be just inside (the poster that you have to scan is the one on the left).


Nanosuit Upgrade #11: The main objective marker will take you to a zipline, before you use it enter the door on the left to find the upgrade.


Datapad #21: In the same room as the previous collectible.
Blackbox #8: If you follow the main objective markers you will eventually see a cutscene where the Alpha Seph take out some helicopters, as soon as you regain control of prophet look to your left to find the blackbox on the NPC on the toilet.


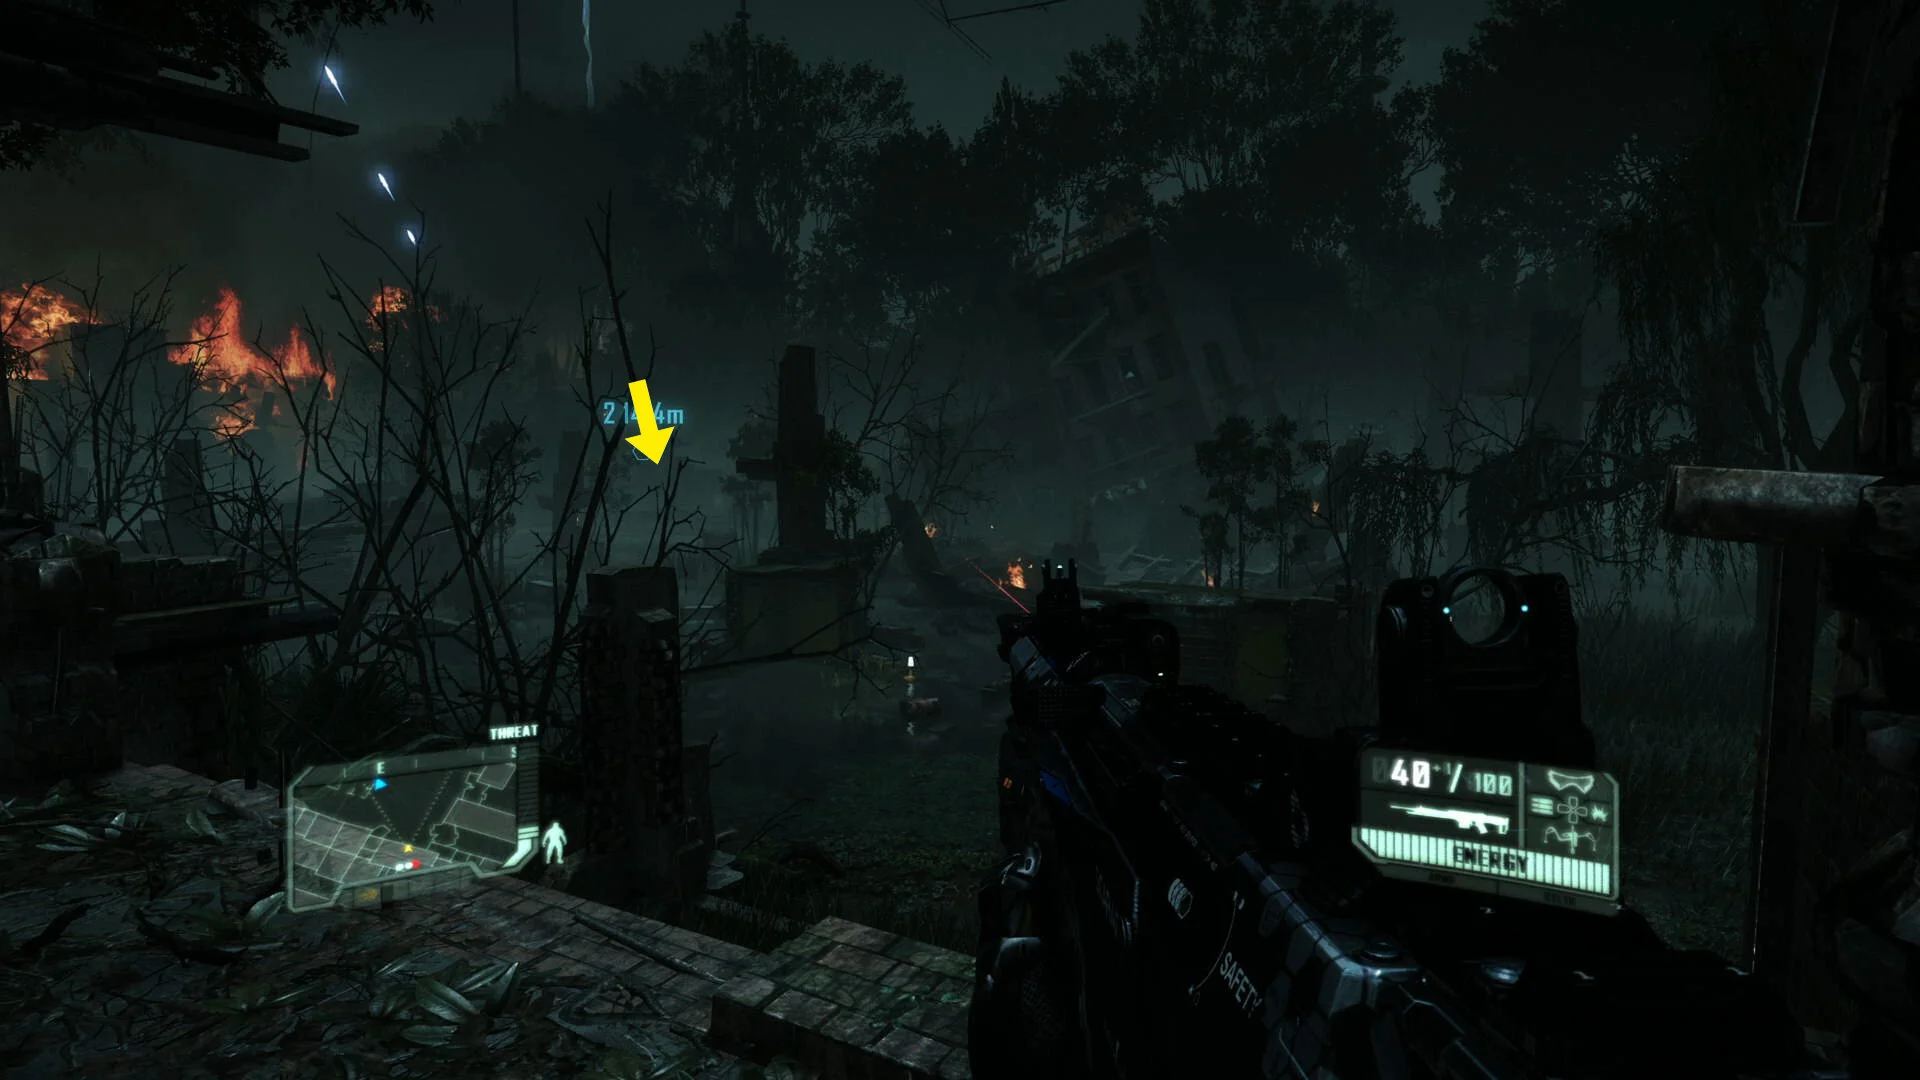
Nanosuit Upgrade #12: From where you see the Alpha Seph take out the helicopters you will jump down into an open field, here you want to head in the direction of the main objective marker, about half way through the field you should come to a destroyed red building with a basketball net & a pool table in the room behind it, the upgrade is on the way next to the pool table.


Datapad #22: After crossing the field from the last collectible (heading towards the main objective) you will come to the building with the alien structure on it, jump up and cross to the building on the left, the collectible will be here on a shelf.


Nanosuit Upgrade #13: After the previous collectible you will have to drop down to street level again, here you will see soldiers burning, here you will want to climb into the windows of the last building on the left, in this room you will find the upgrade on the wall.


Datapad #23 & Blackbox #9: Head out of the door to the left of the previous collectible, from this “balcony” you will be able to see both the datapad & the blackbox if you scan the area in front of you (one will be in the building opposite you and the other to the right in the street).


Blackbox #10: On the corpse in front of the entrance to the Pit (main objective).


Nanosuit Upgrade #14: Before you head into the entrance to the Pit (main objective), take a left until you see a small blue “building” with the upgrade inside.


Blackbox #11: While following Psycho in the Lab you will go passed some blue curtains on the left, the blackbox is on a corpse the other side of them.


Datapad #24: Very soon after the last collectible you will follow Psycho into a room with lots of capsules, in this room there will be some more blue curtains on the left, the datapad is in the area the other side of those curtains.


Nanosuit Upgrade #15 & Datapad #25: Eventually Psycho will stop at a door and wait until you open it, before you do this enter the room to the right, in this room you will find the last 2 collectibles of this mission.


Red Star Rising
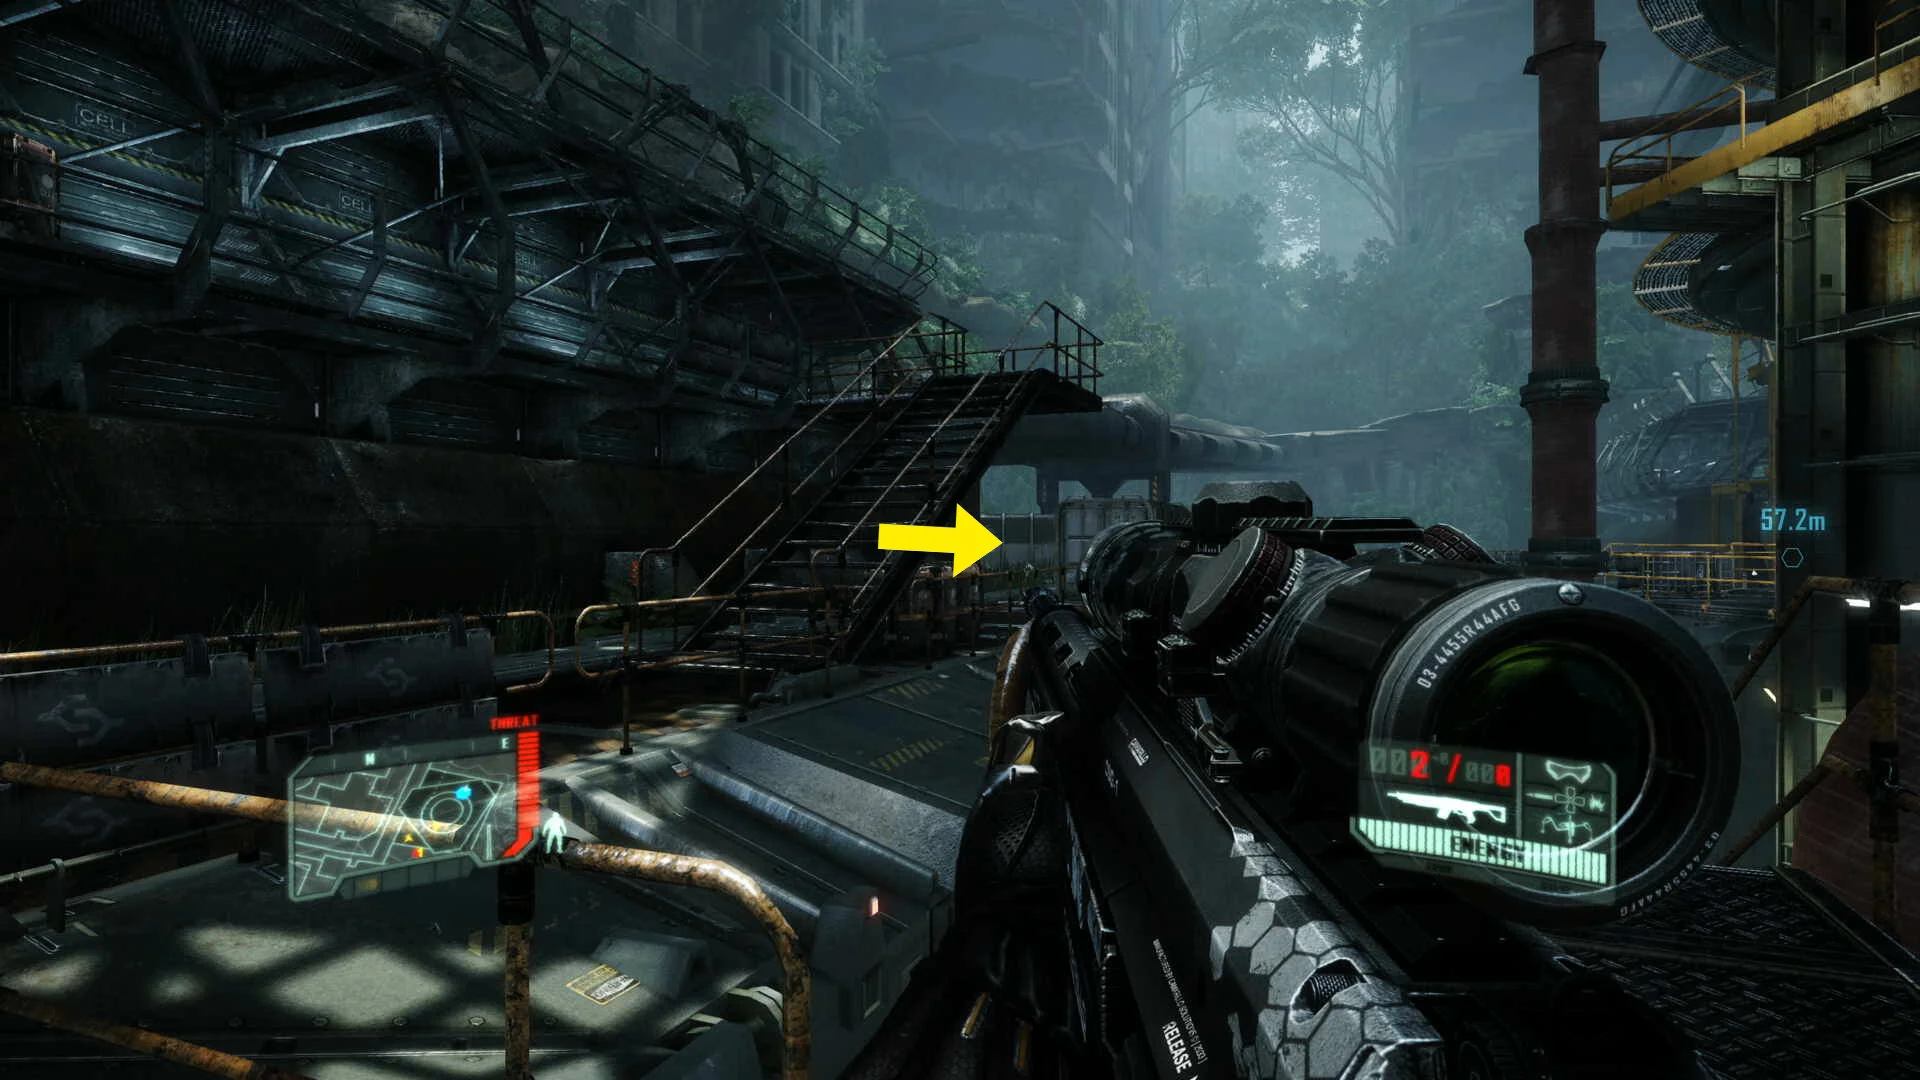
Datapad #26: At the very start of the level you will see a massive broken pipe in front of you, cross it to come to a second pipe, after crossing both of them you will see the datapad on some red boxes.


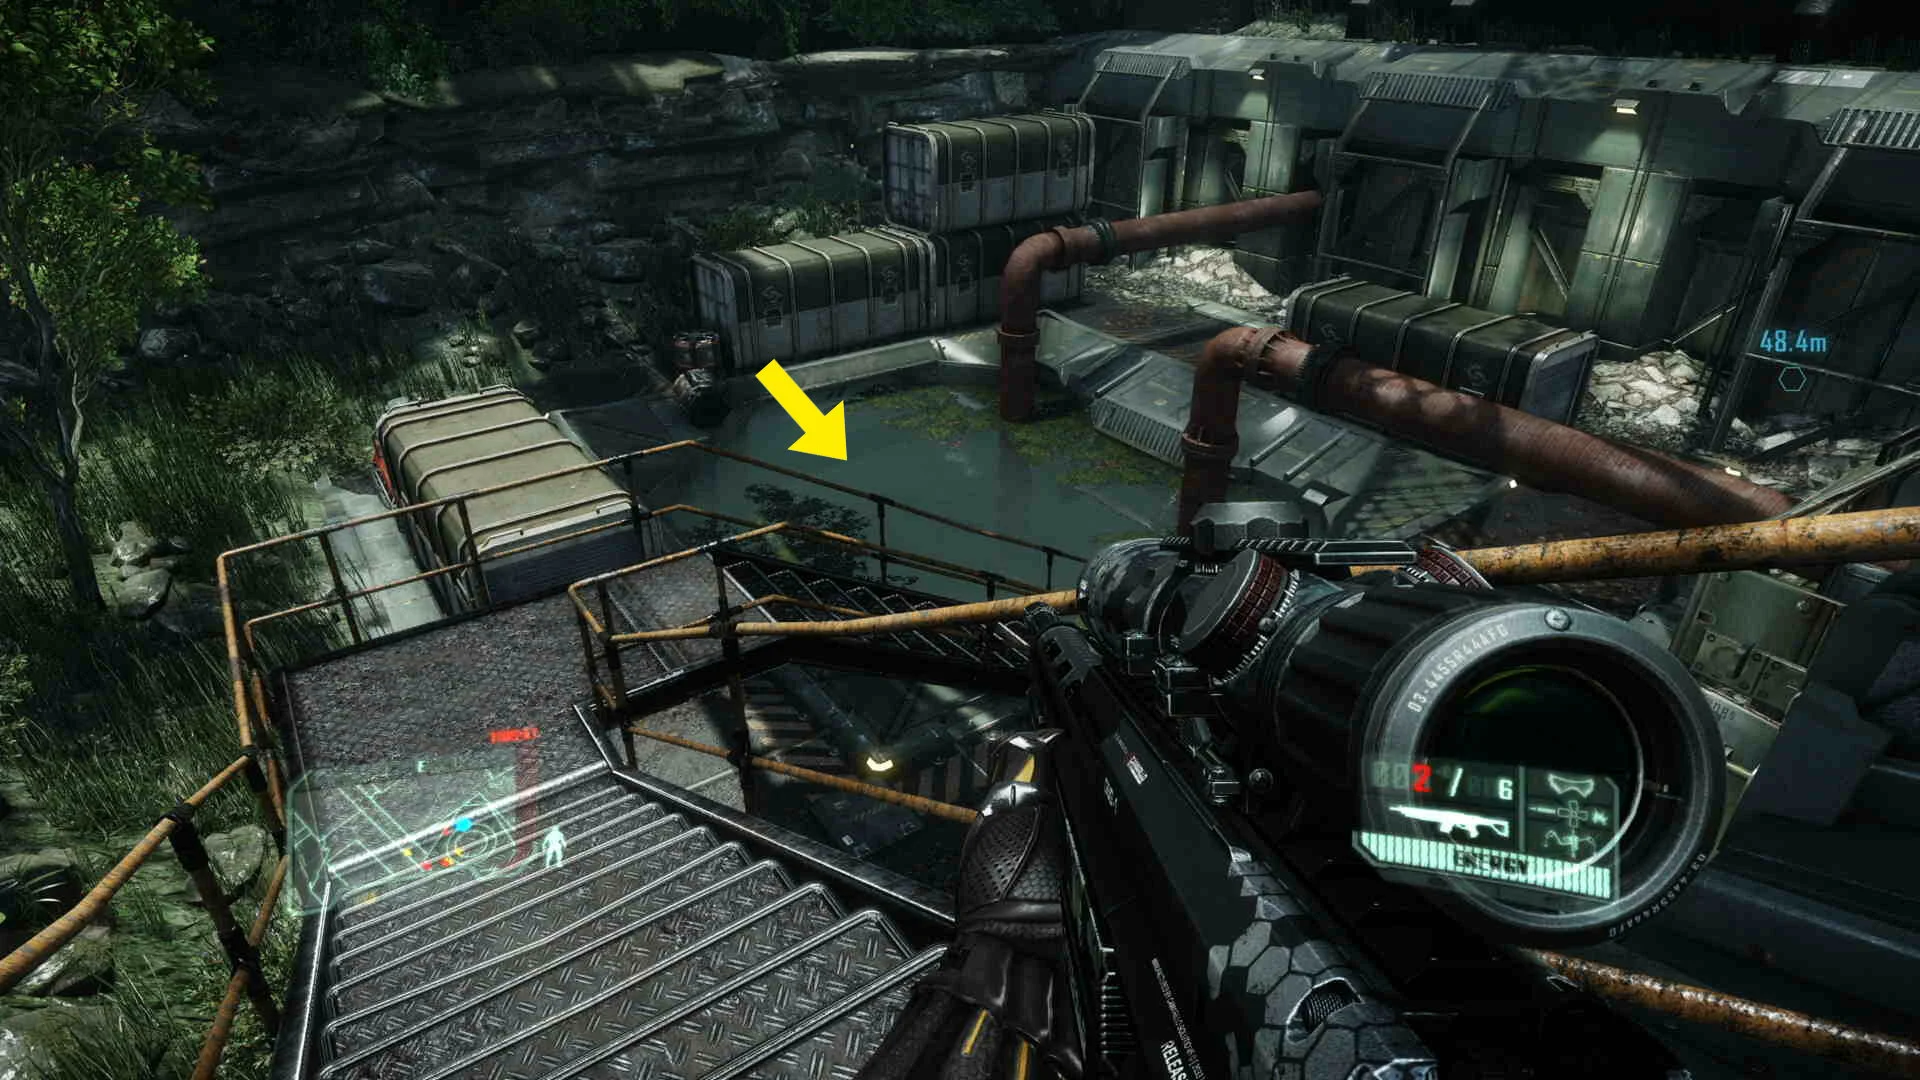
Nanosuit Upgrade #16: From the last collectible turn around and jump up to the roof of the building to the right of the pipe you came across before, now drop down into the building through one of the holes, the upgrade will be in the corner of the room.


Nanosuit Upgrade #17: Soon after the previous collectible you will find yourself in a semi open field, here you will find a downed helicopter, and a little further forwards a building, the upgrade in on the bottom floor of this building.


Blackbox #12: After interacting with the Seph totem and fighting a large Seph, go through the hole in the gate and take an immediate right, follow this path until you see a corpse on the ground with the blackbox.


Datapad #27: Continue on the same path past the previous collectible, you will soon overlook an open field with both types of enemies fighting each other, jump down and head into the building on the left with the yellow sign above it, the data pad will be in the top floor of the building.


Propaganda Poster #4: In the same room as the previous collectible behind the broken wall.


Nanosuit Upgrade #18: Leave the building from the previous 2 collectibles through the door to the right of the datapad you picked up, continue on this path until you come to a turret, just past the turret you will find the upgrade.


Datapad #28: Follow the level until you get to the part where you see a buggy, before you get in pick up the datapad next to the ammo crates.


Nanosuit Upgrade #19: In the same area as the previous collectible, behind one of the destroyed tanks.


Blackbox #13: After going across the top of the big bridge and hearing from Psycho again you will come to a 2nd buggy, before getting in pick up the collectible from the corpse next to the vehicle.


Blackbox #14 & Datapad #29: After the buggy section you will come to a big metal gate, the 2 collectibles are very close to each other in the area to the left.


Nanosuit Upgrade #20: Once you get to the area with the big tower (main objective) stick to the left and head towards the secondary objective, the upgrade will be very close to that objective.


Datapad #30: Once you get into the bottom part of the control tower area (you can access this from 2 different doors, screenshots taking from the west side), from here take the stairs that you can see in the distance to your right, the data pad is in the small hut at the top of those stairs.


Only Human
Propaganda Poster #5: Once you get to the roof with the AAA gun on it, climb up to the roof to your right, here do a 180º turn to see the poster on the wall.


Nanosuit Upgrade #21: This time climb up to the building on the left side of the AAA gun (towards the main objective) then take the ramp up to the room with the collectible in it.


Nanosuit Upgrade #22: After destroying the first AAA gun you will drop down into a massive open area, here you want to head to the south, look for a downed VTOL, go up to it and move the object blocking the entrance by grabbing it, the upgrade will be inside.


Datapad #31: In the big open area go to the location shown on the map below, here look for the datapad inside a destroyed helicopter.


Blackbox #15: From the previous collectible head south, here you will find a downed ship, the collectible is on a corpse inside.


Nanosuit Upgrade #23 & Datapad #32: In the same big open area as the previous collectibles, go to the place shown on the map below (about half way in between the two main objectives) look for an opening in the mountains with a destroyed VTOL at the end, the 2 collectibles will be inside.


Datapad #33: Staying in the big open area, found next to the tank that you can optionally help out by killing the aliens in the area, doing this will get you some mortar support for taking out the big enemies.


Datapad #34: Still in the big open area, look for the head of the statue of liberty, the collectible will be inside.


Nanosuit Upgrade #24: On a rooftop in the area where you can find a buggy parked (about 130m away from the north main objective).


Blackbox #16: Found on a corpse just below the north main objective in the big open area.


Datapad #35: Found in the same area as you fight the boss at the end of this level (same area as you get off the VTOL after the flight scene).


Gods And Monsters
Blackbox #17: Take a few steps forward from where you start to find the corpse with the collectible.


Propaganda Poster #7: The final poster in the game can be found on the ground a few steps forward from the previous collectible.


Datapad #36: A few steps forward from the poster you will see a metal structure hanging above you, go under it and then turn around 180º to see a piece of metal you can use as a ramp to get the datapad.


Blackbox #18: Continue a bit further through the cave until you see a bus, the collectible will be on the corpse inside.


Blackbox #19: Soon after the bus you will come to a fork in the cave, take the path on the left to find the corpse with the collectible.


Datapad #37 & Nanosuit Upgrade #25: After you emerge from the cave area you will still be underground but you will start to see alien structures, continue a little further on the main path (only possible path) to find the 2 collectibles close to each other.


Blackbox #20: After you encounter your first enemies and use the first alien structure you will continue through the caves, soon you will get to a room with some water coming through the ceiling of the cave, the collectible is just below you in this room.


Datapad #38: As soon as you finally exit the cave and come to a green area you will want to take a right as soon as you can, here you will see a car on the edge, jump down to find the final collectible in the game below you!


Video Guide
If you found this guide helpful and would like to support our work, you can do so by pressing the Ko-fi button below