Marvel’s Guardians Of The Galaxy All Collectible Locations
In this guide we will show you the locations of all the collectibles in Marvel’s Guardians Of The Galaxy, this included all archives, outfits, guardian collectibles & compendium items.
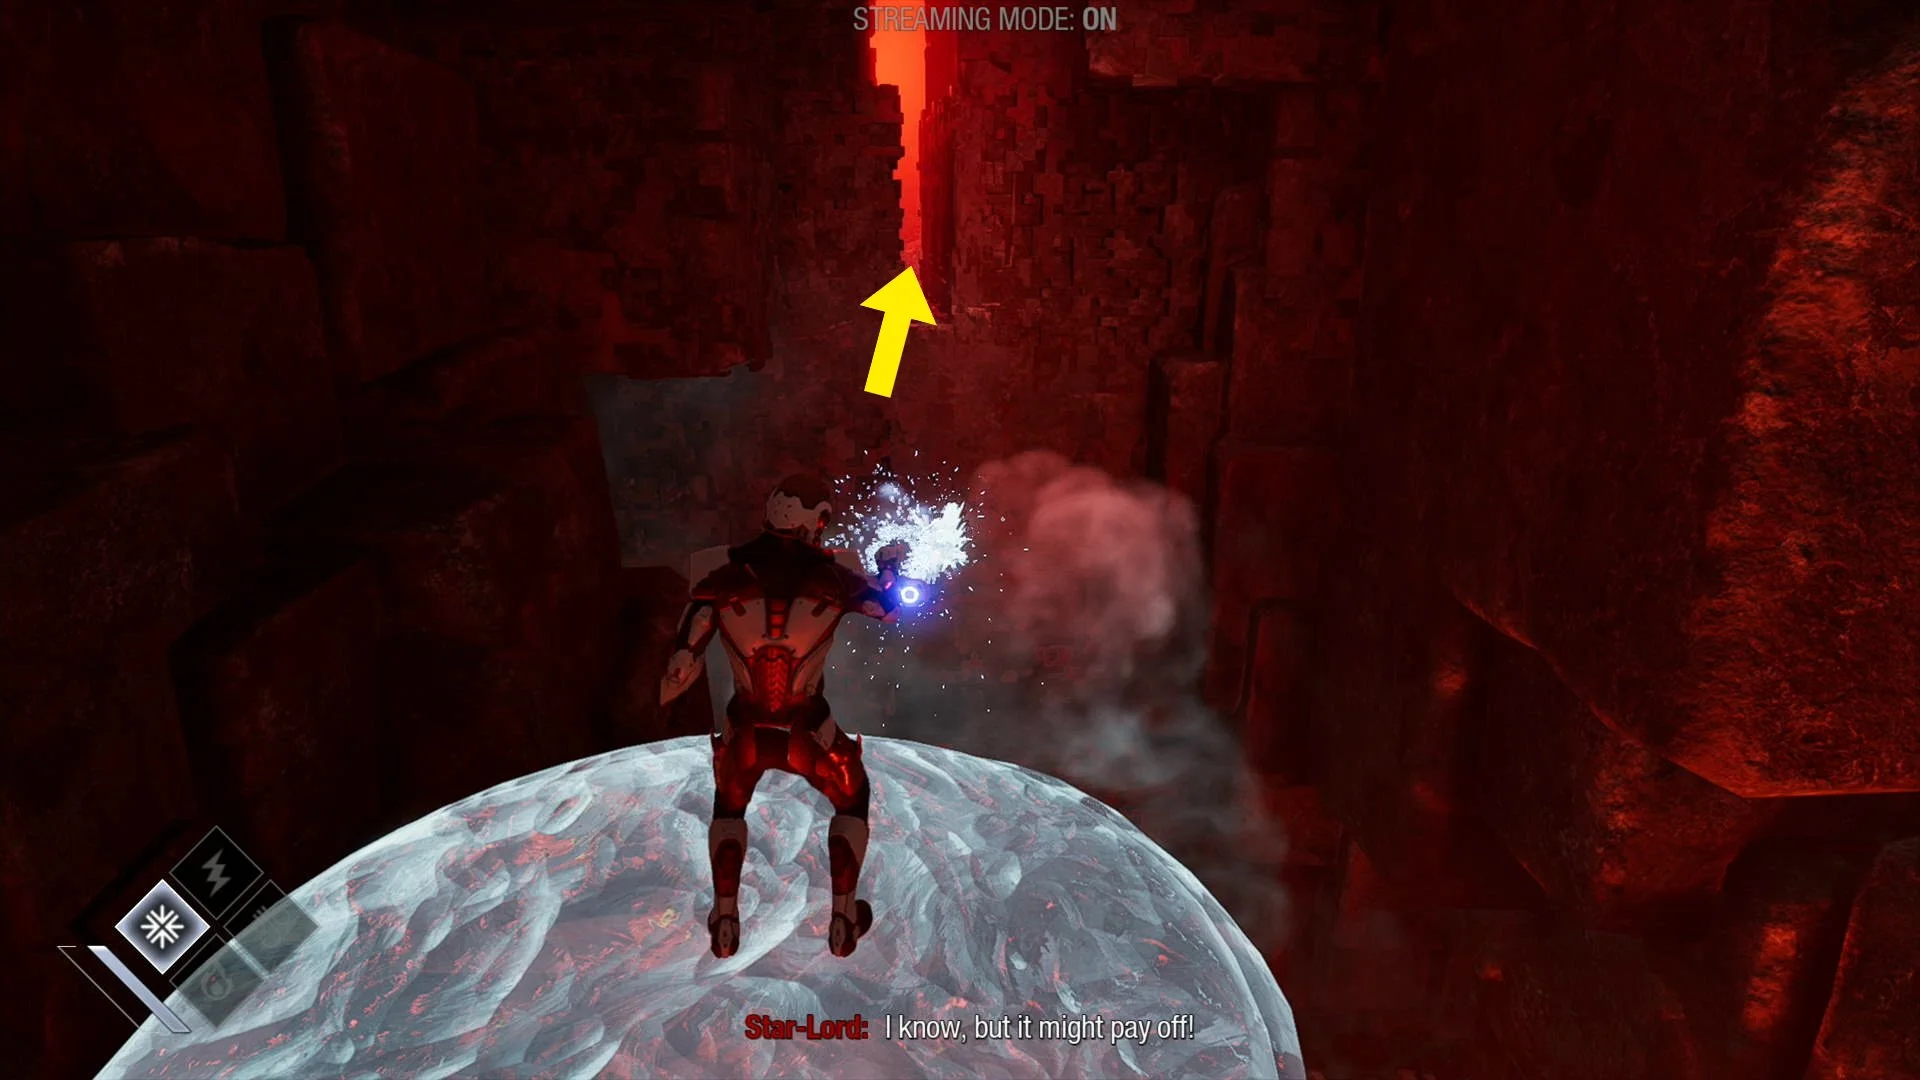
Chapter 1. A Risky Gamble
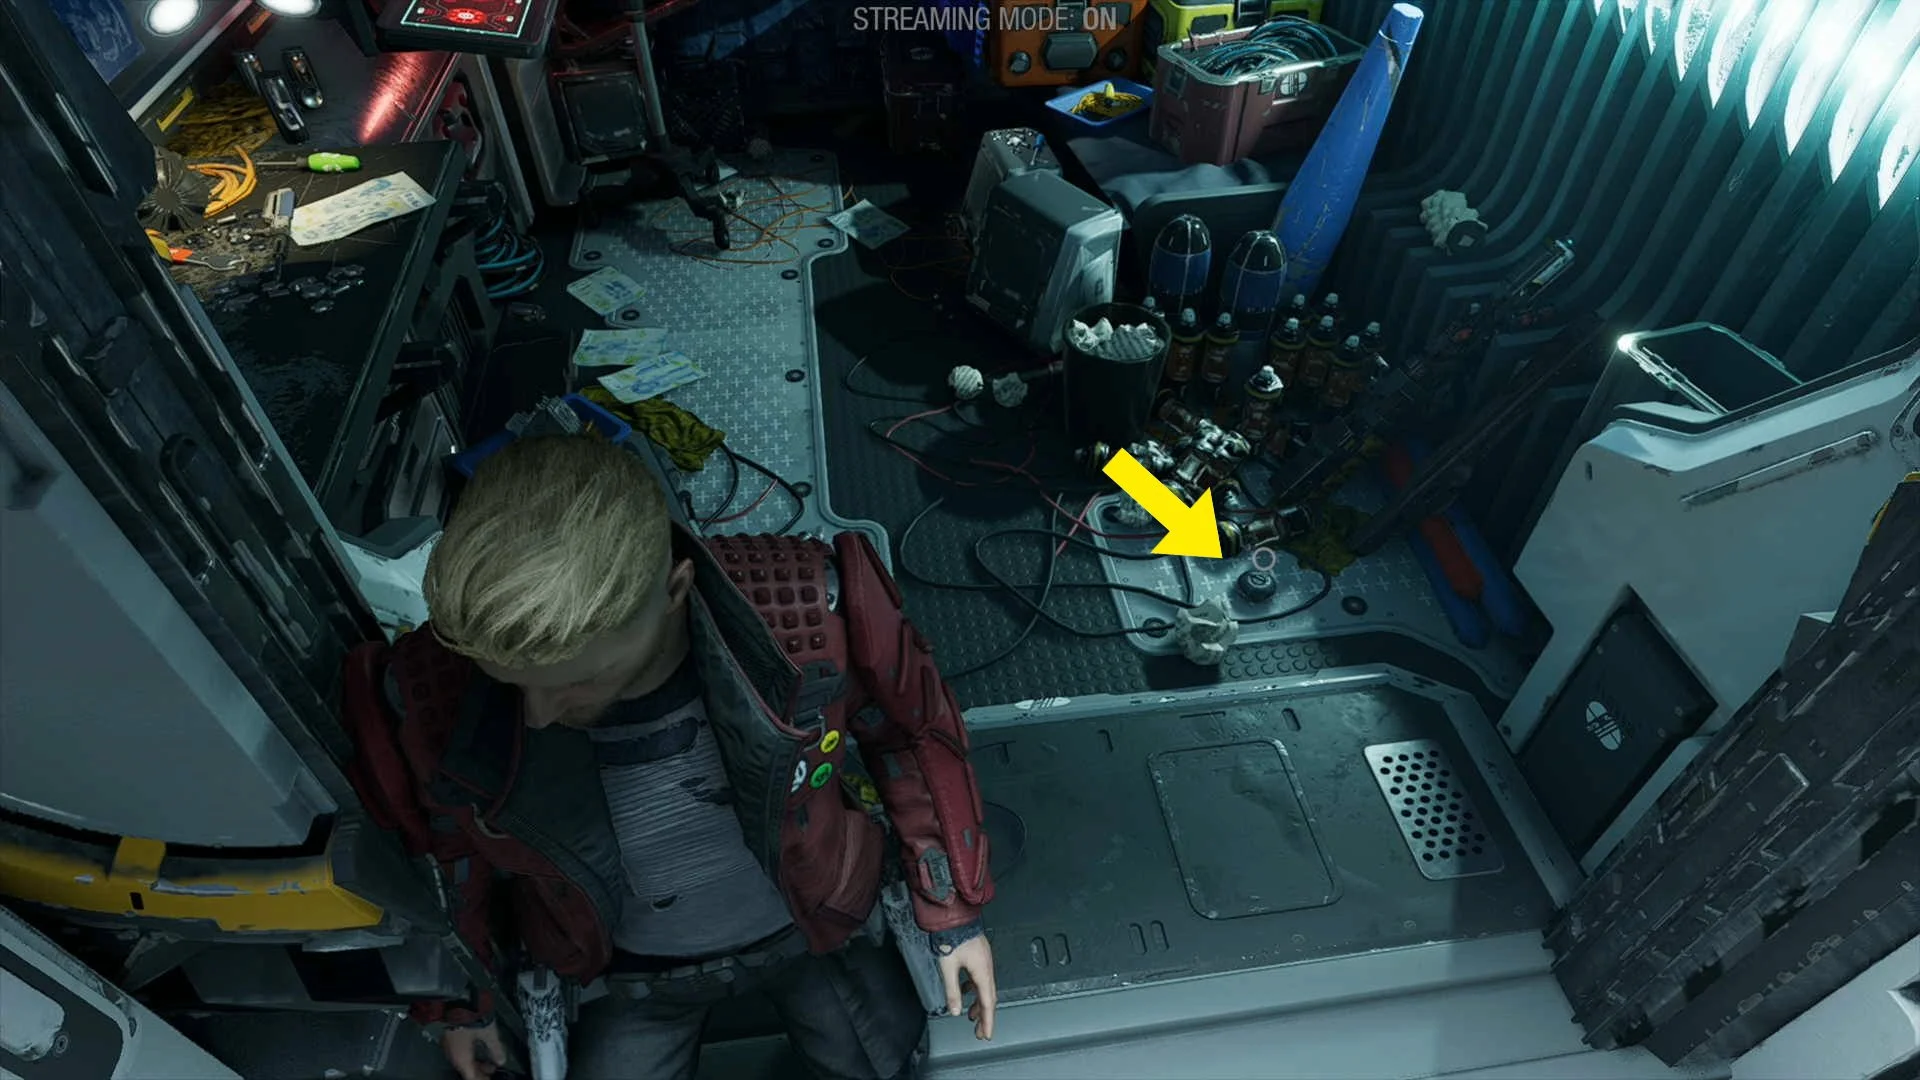
Archive #1. At the very start as soon as you leave your room after looking in the mirror, take a right and enter Rocket’s room to find the collectible on the floor.

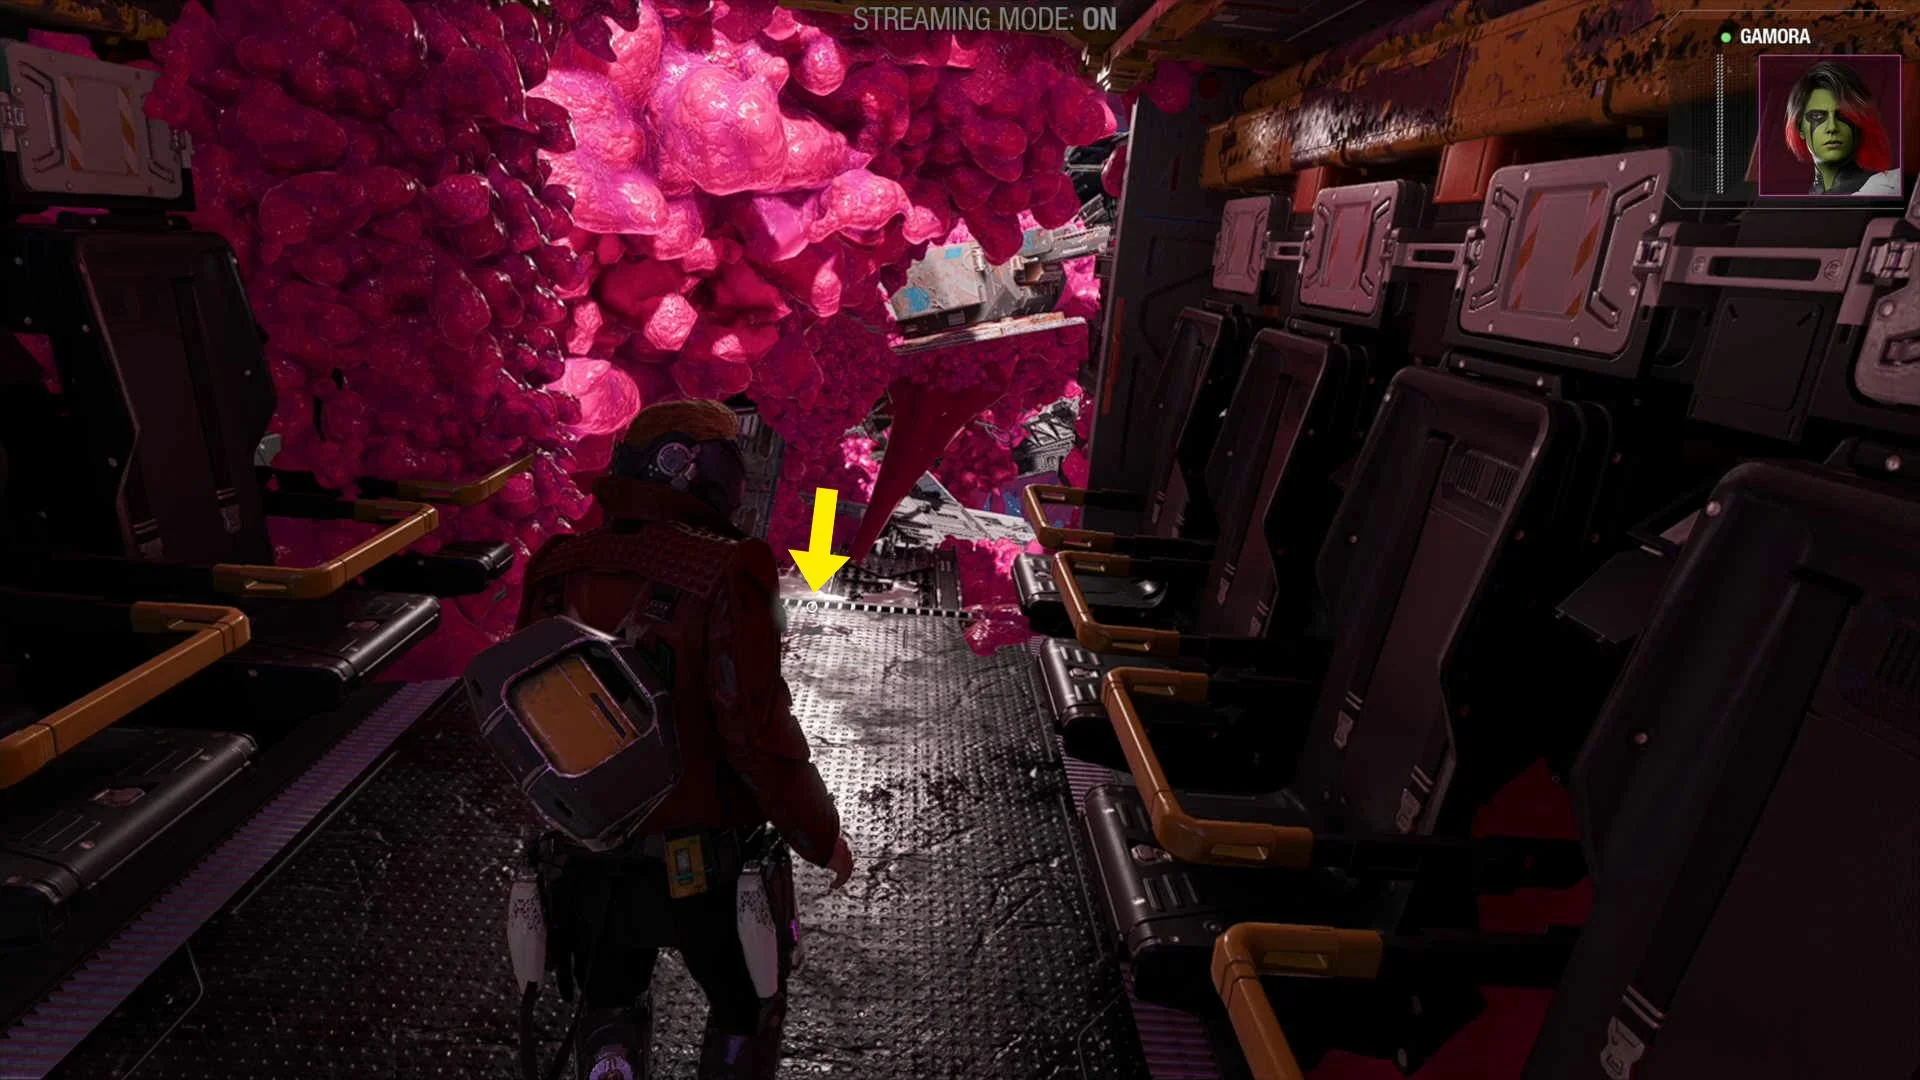
Archive #2. As soon as you gain control of your character on the pink “planet” look for the collectible on the yellow box to your left.
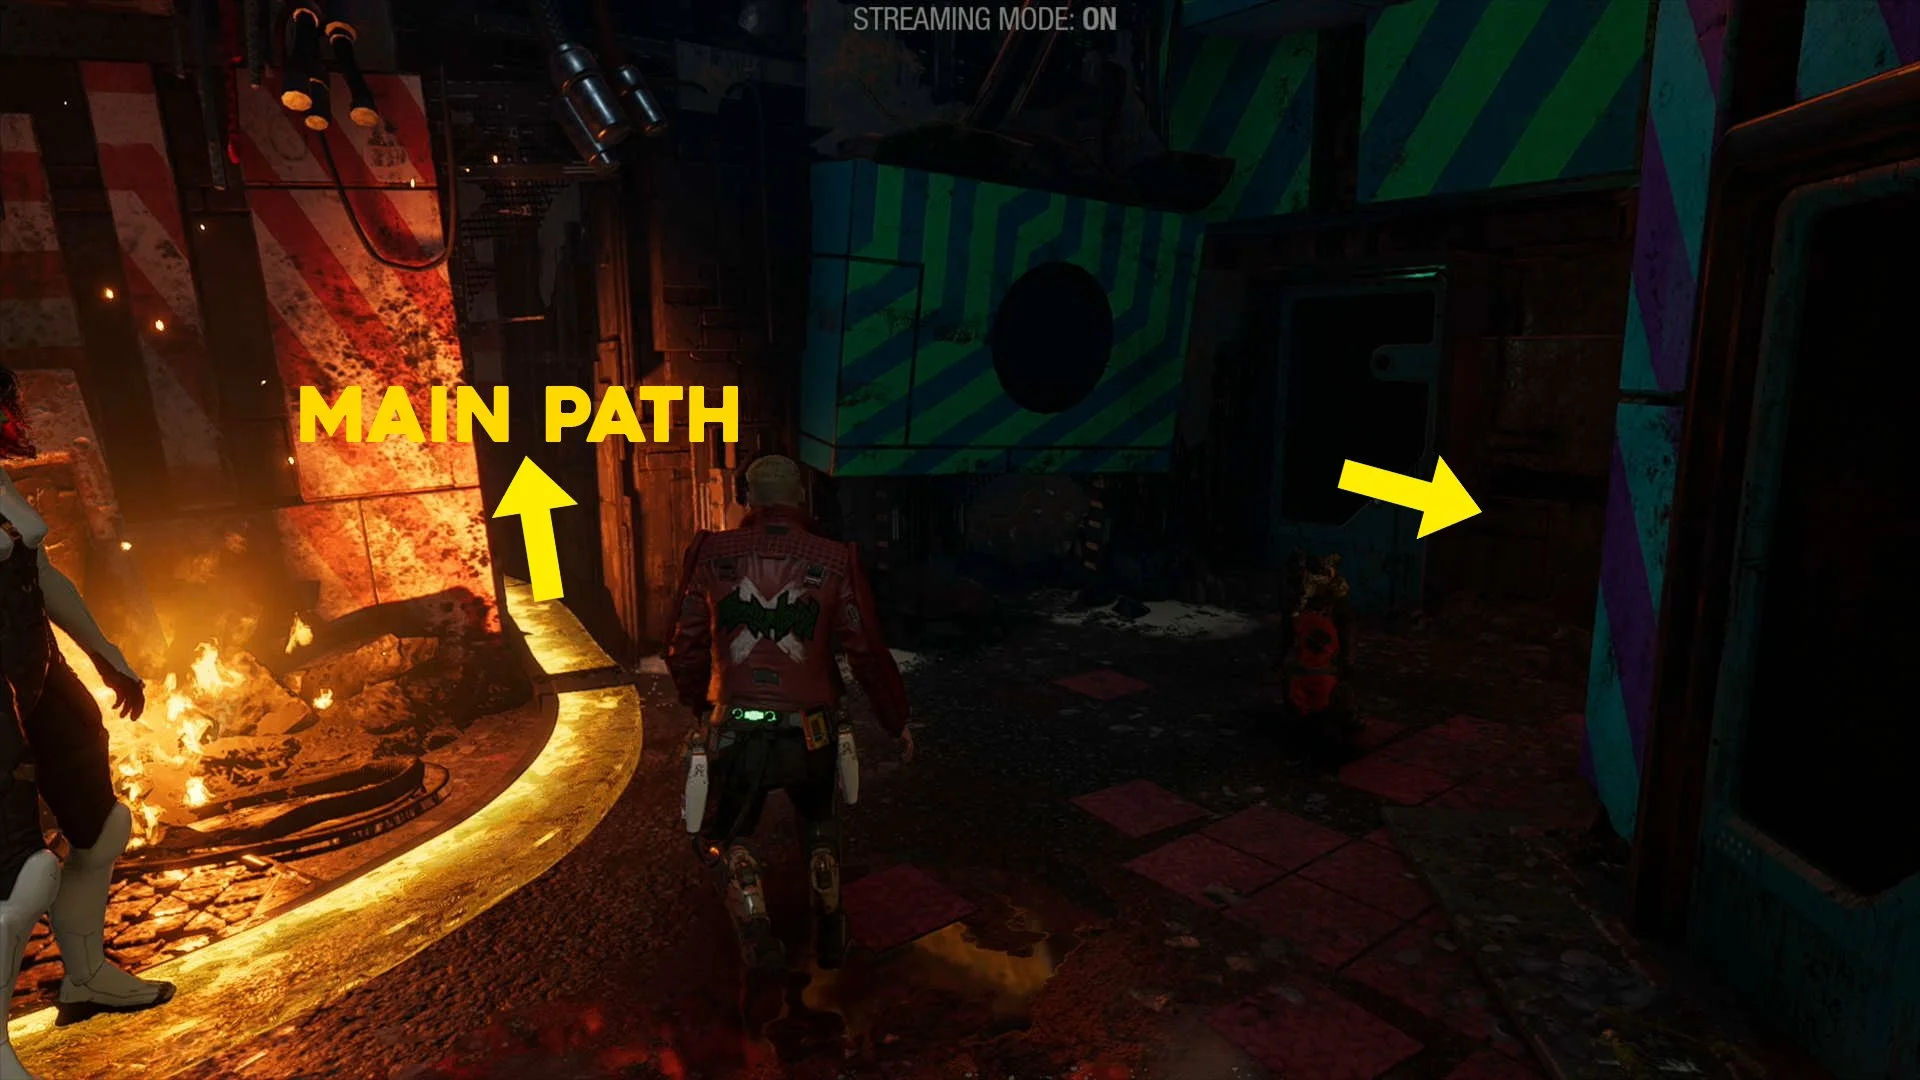
Outfit #1. Continue playing until you come to a fork in the path, at this time Rocket will mention a dead end, ignore him and go right anyway, here drop down to your left and find the collectible inside.


Archive #3. From the last collectible, go back to the fork in the path, this time take a left and then another left as soon as you get past the door that you crouch under.

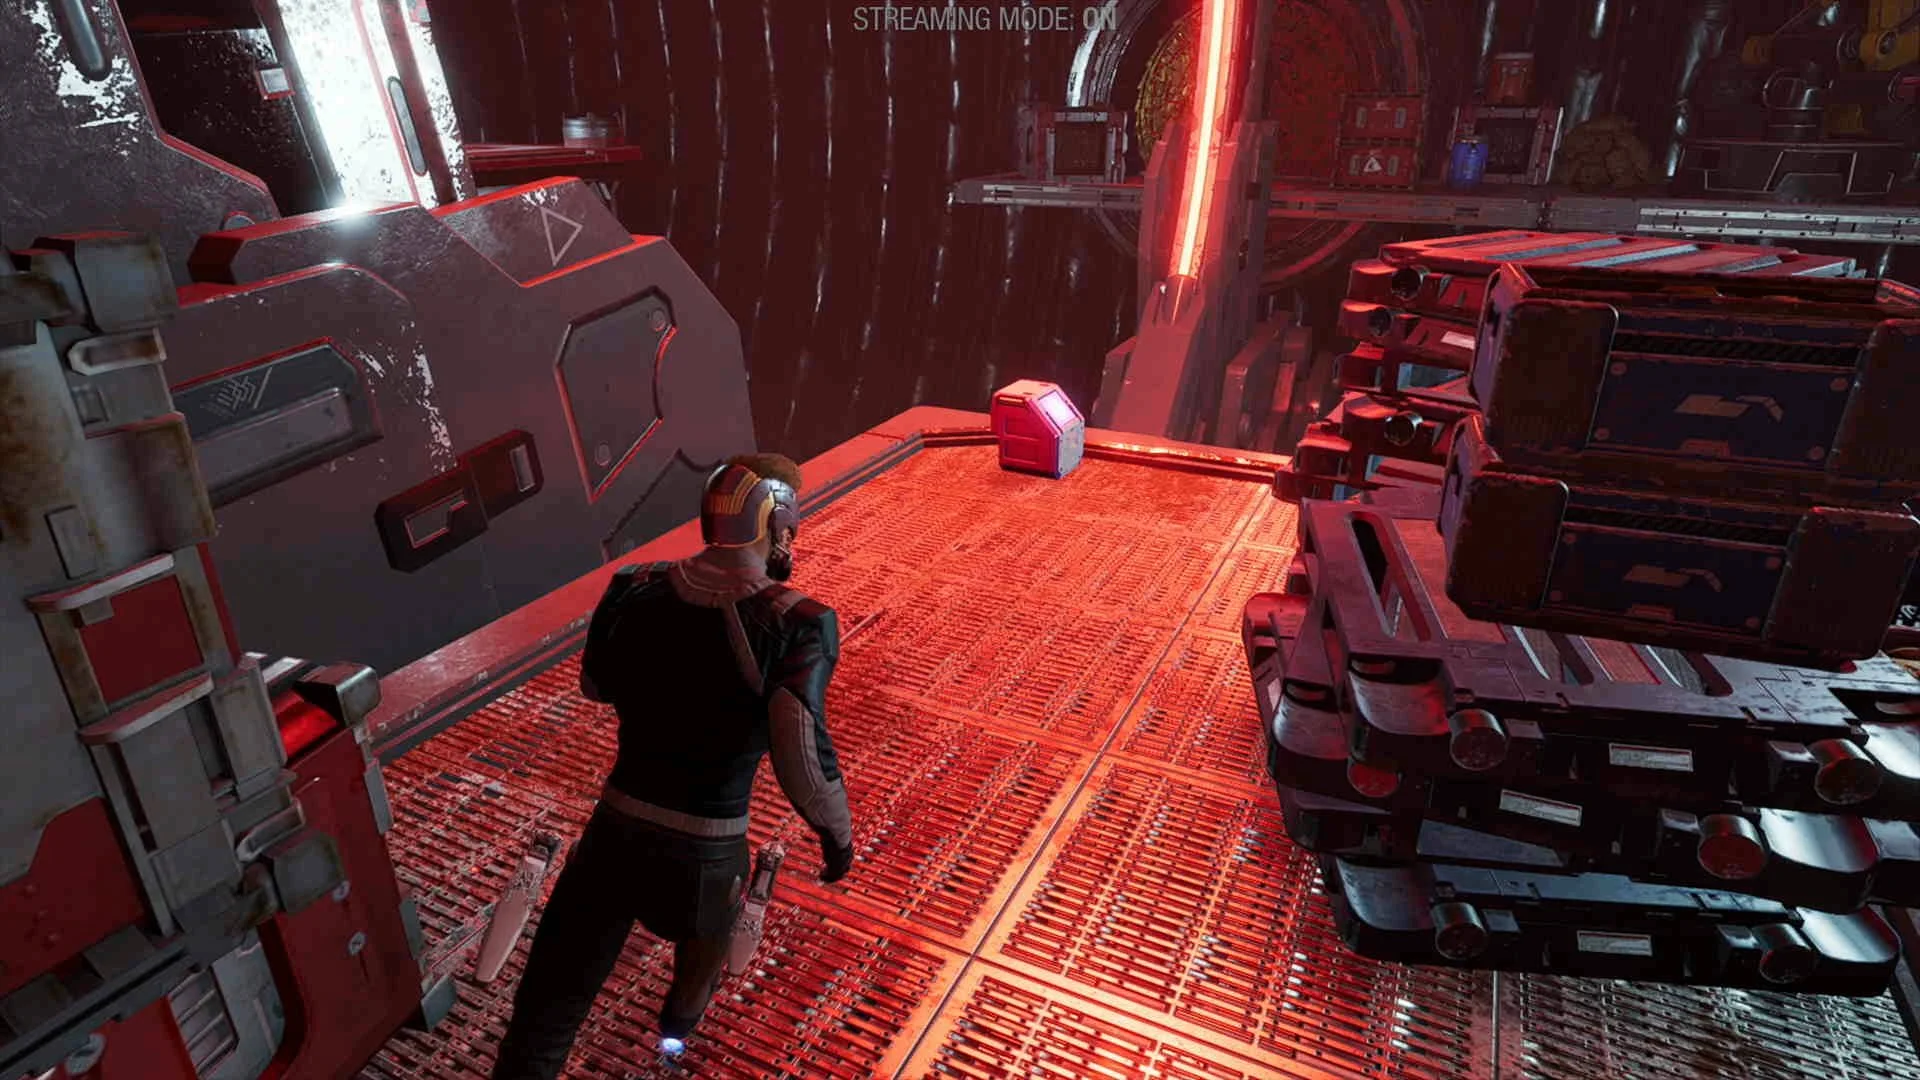
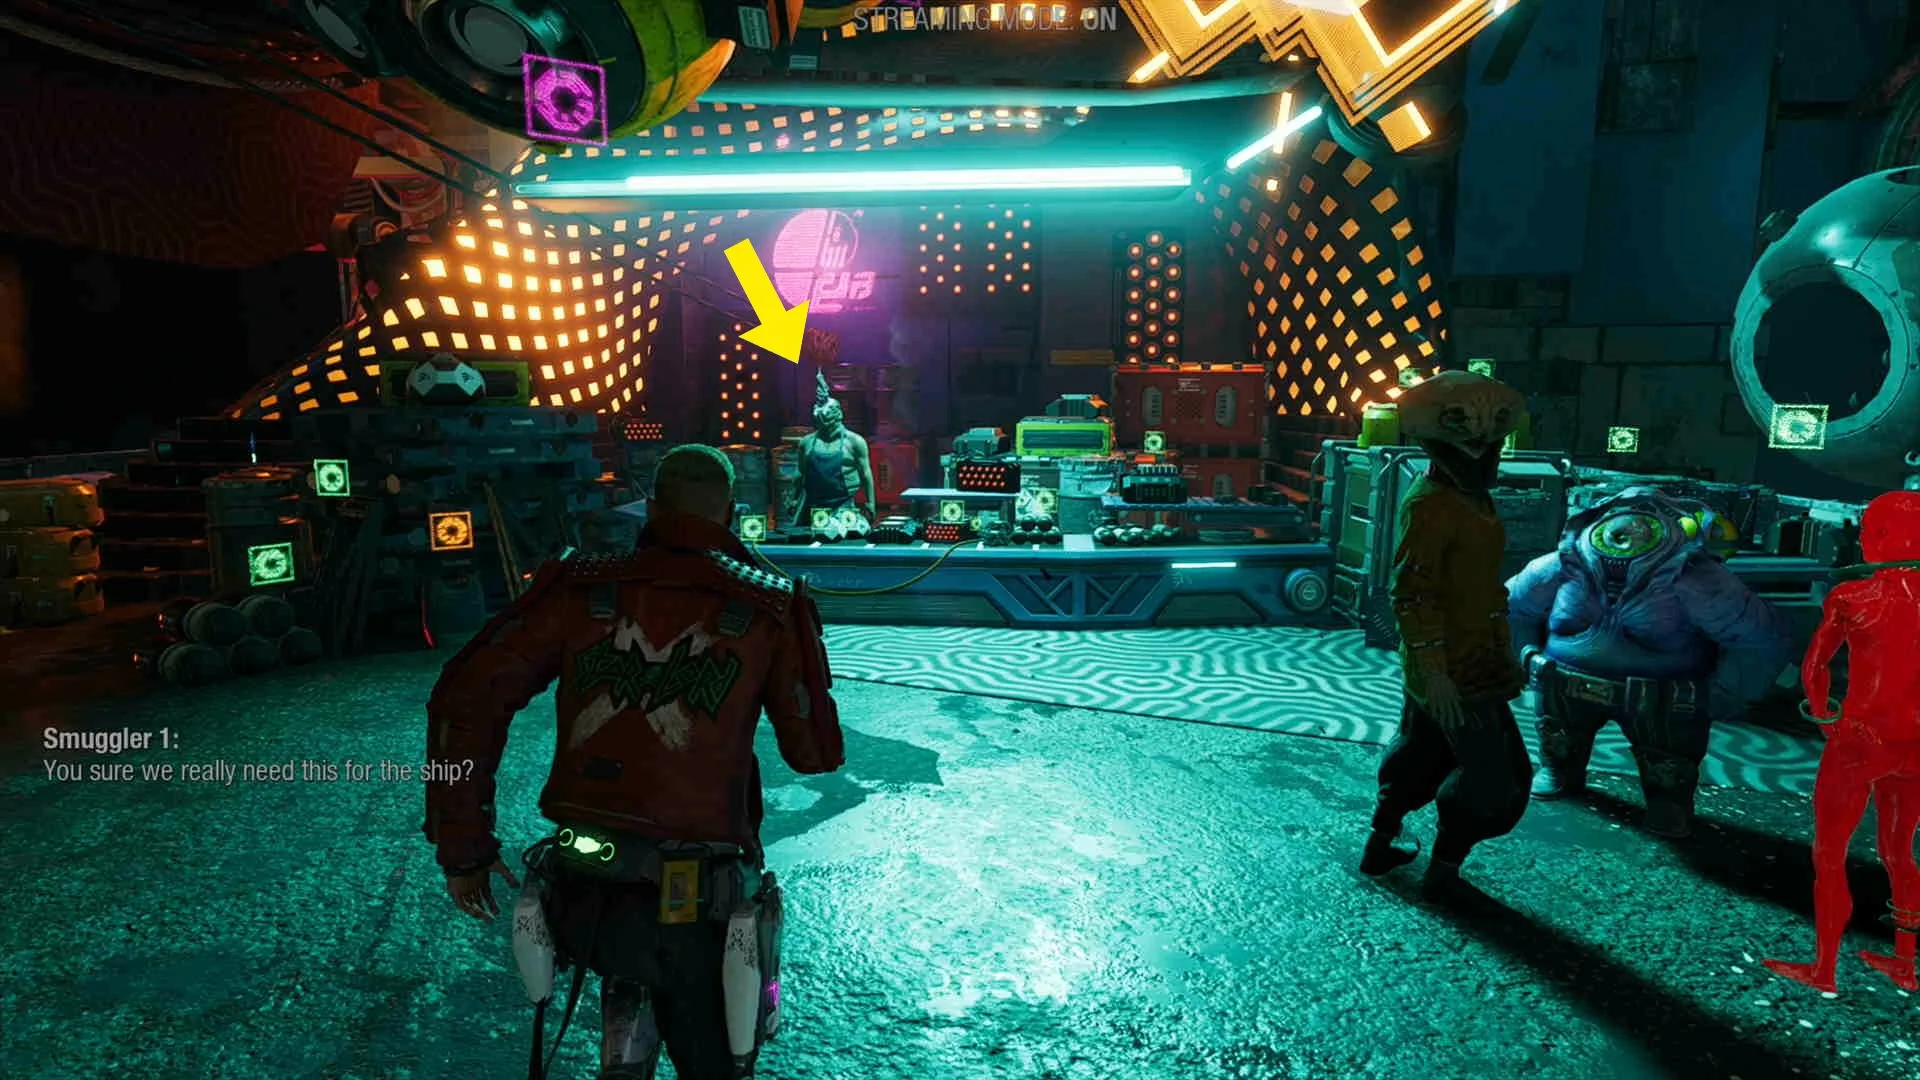
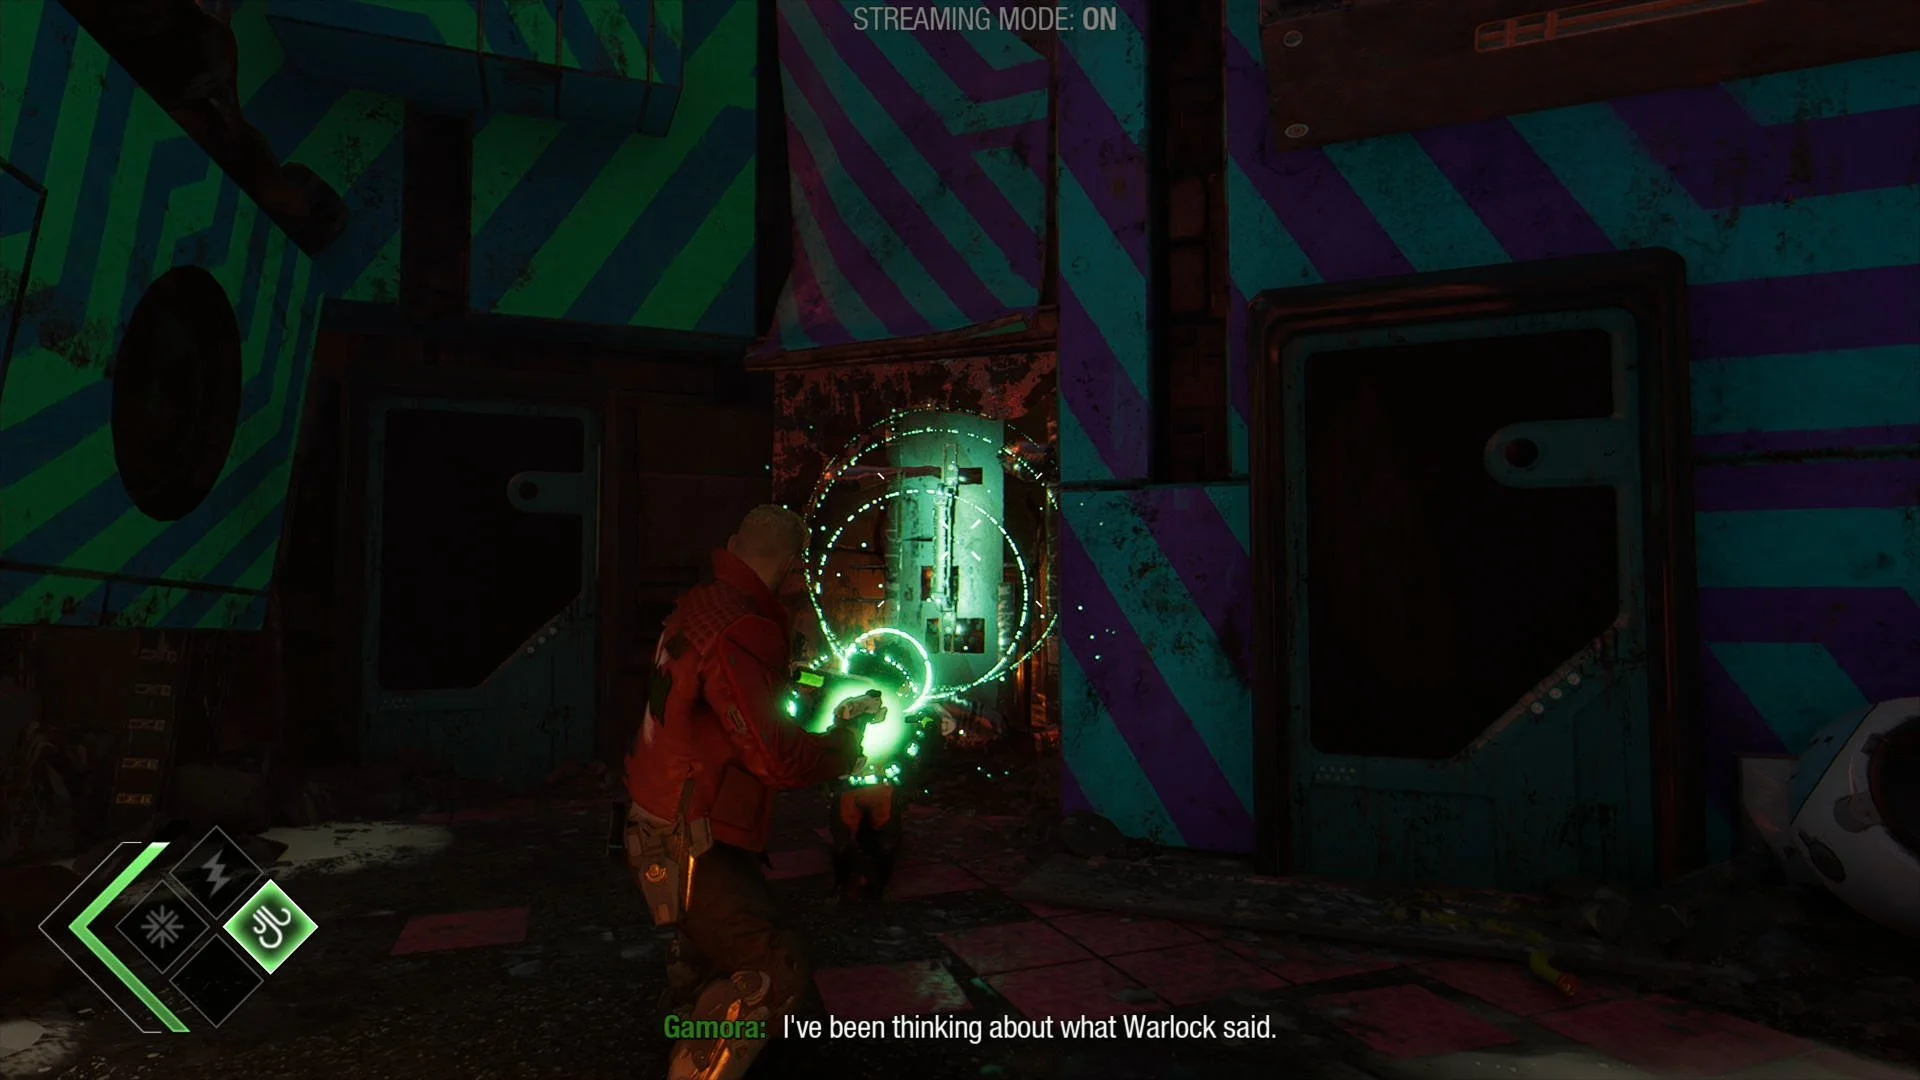
Archive #4. In the same room that you start the shooting challenge with Rocket.

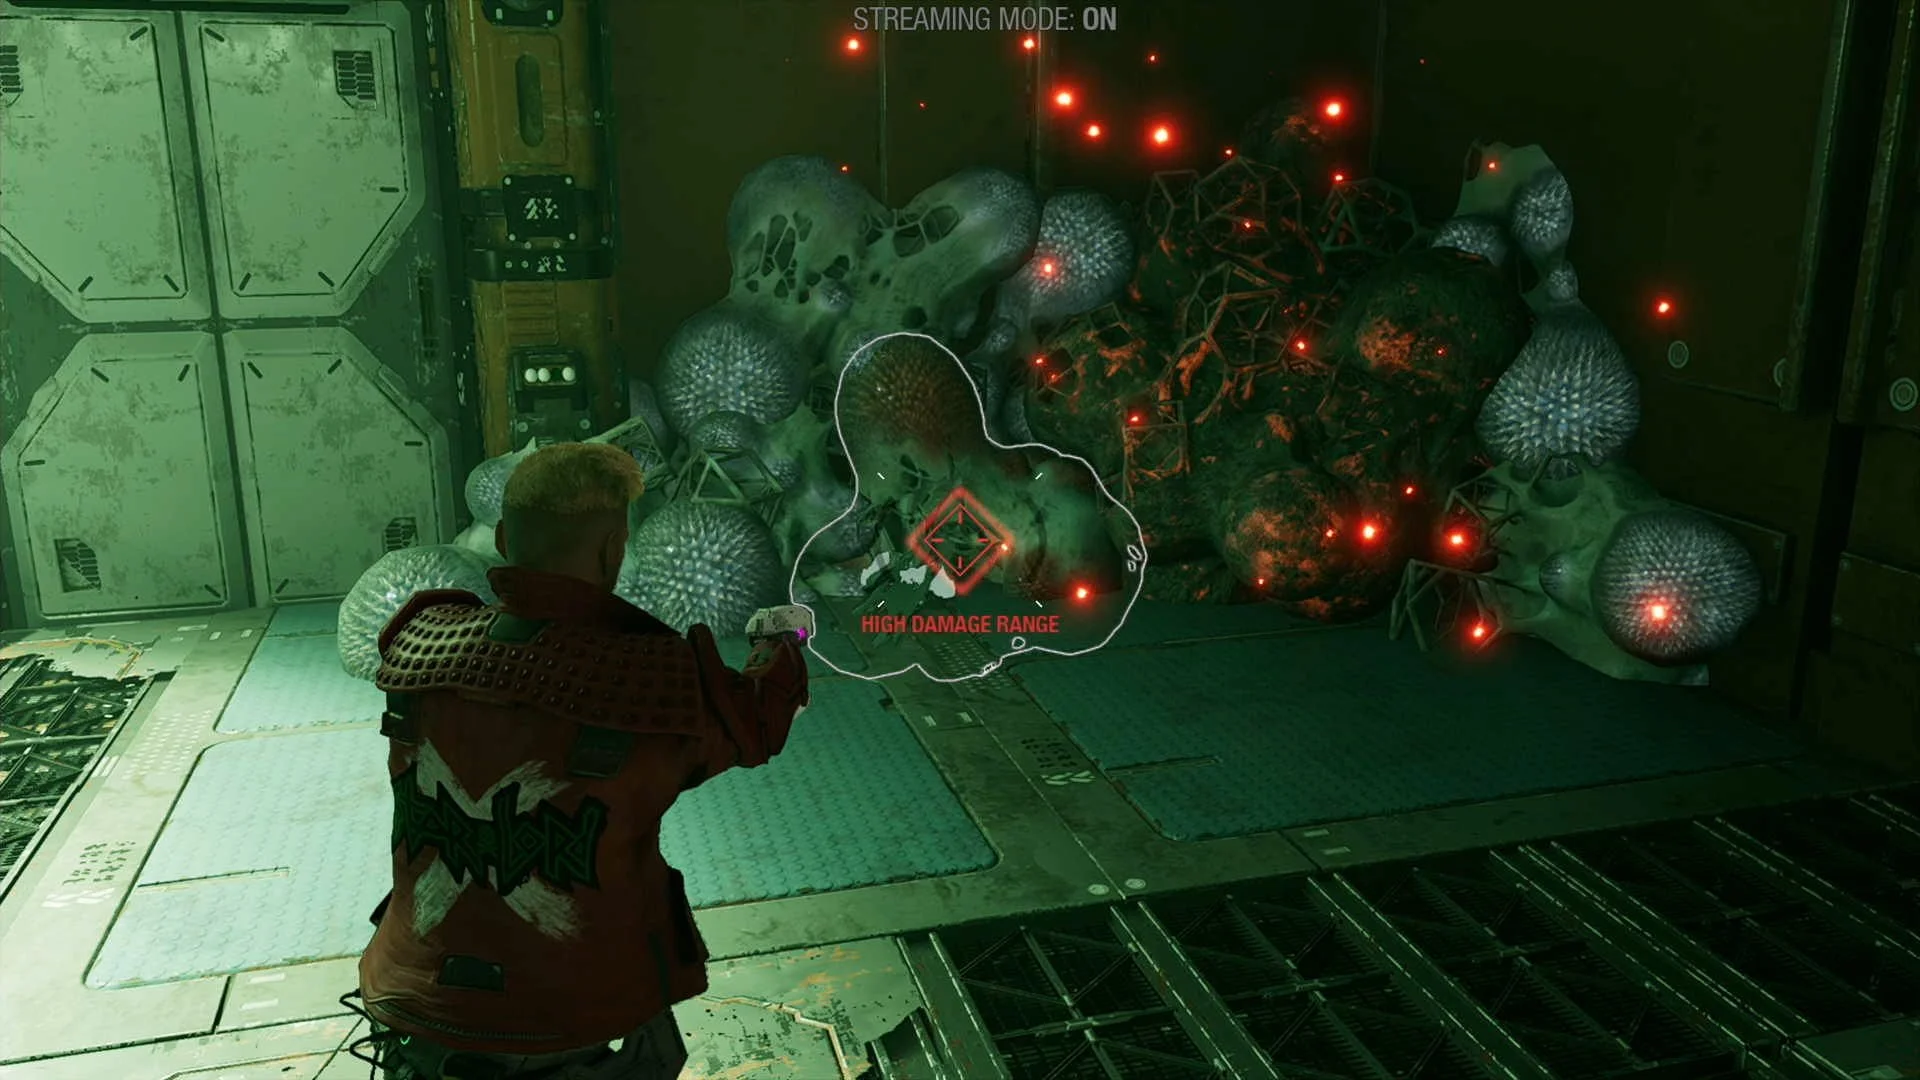
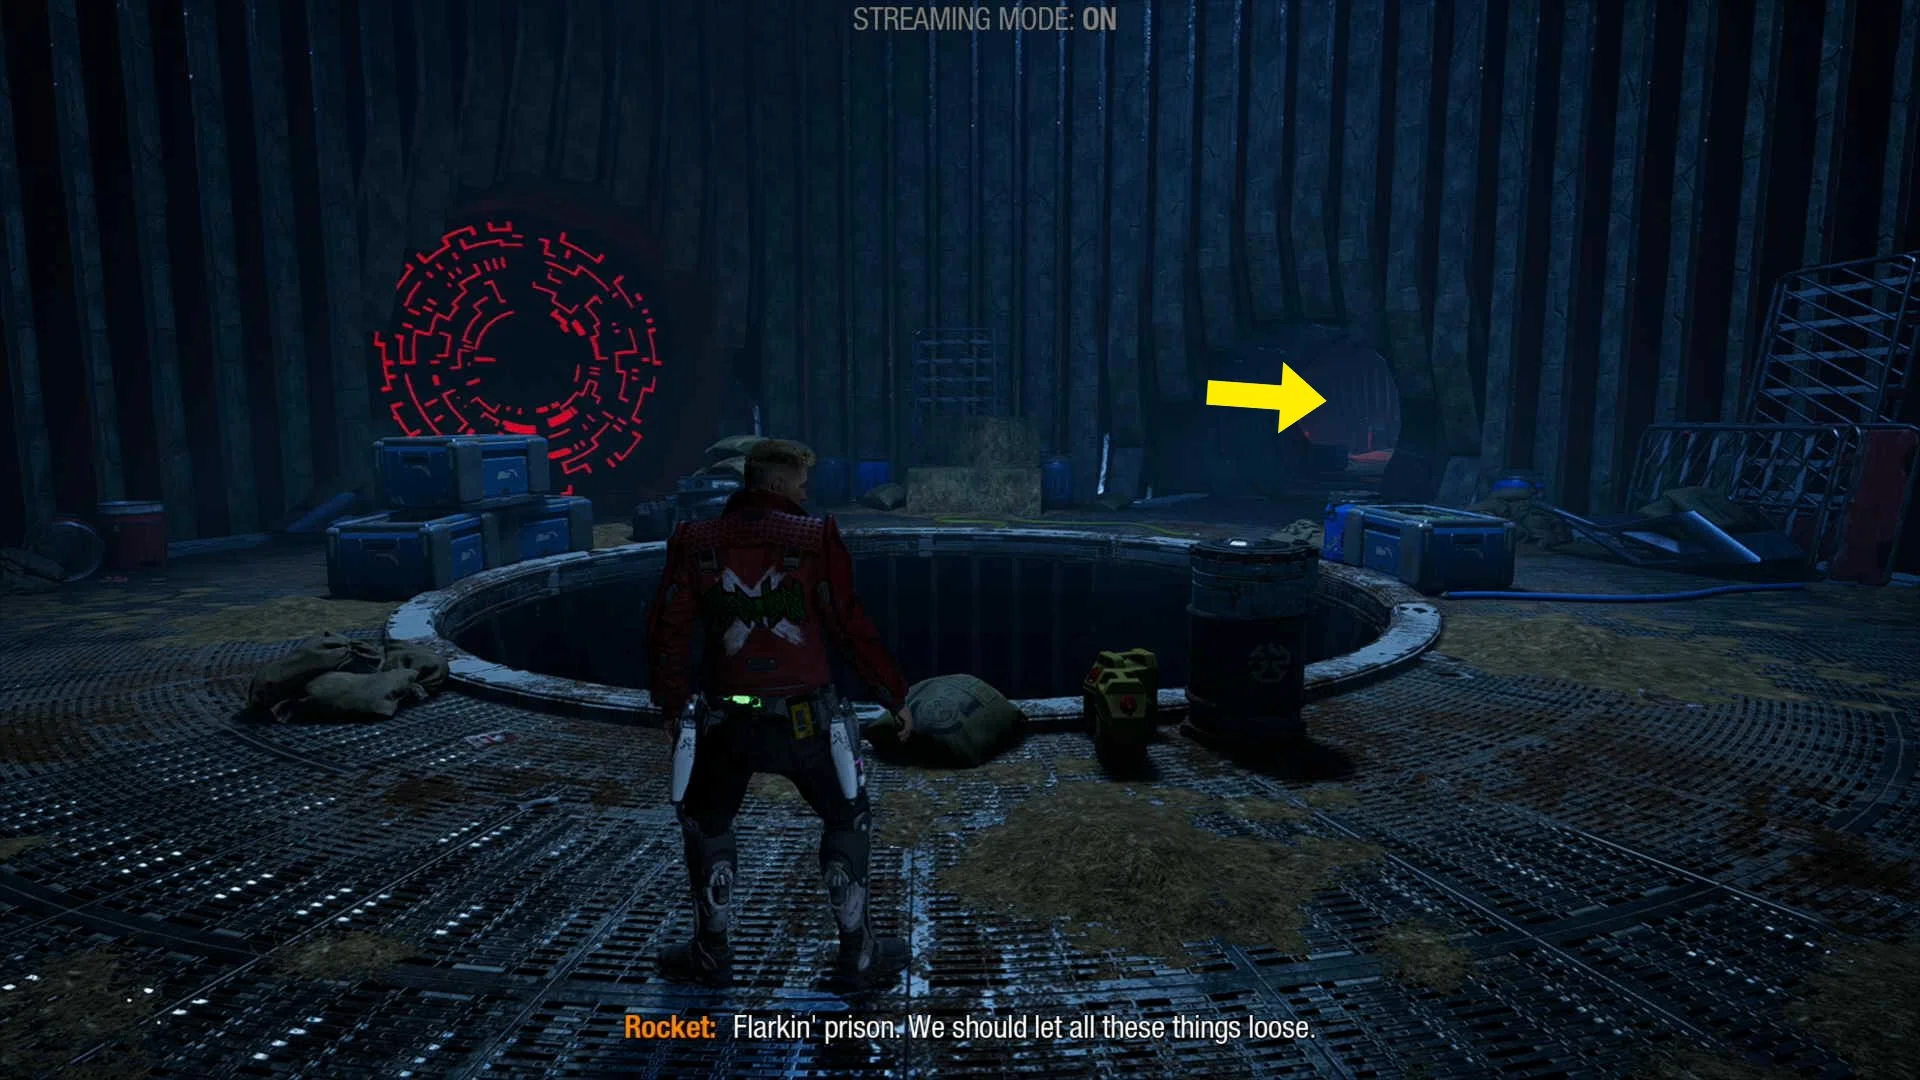
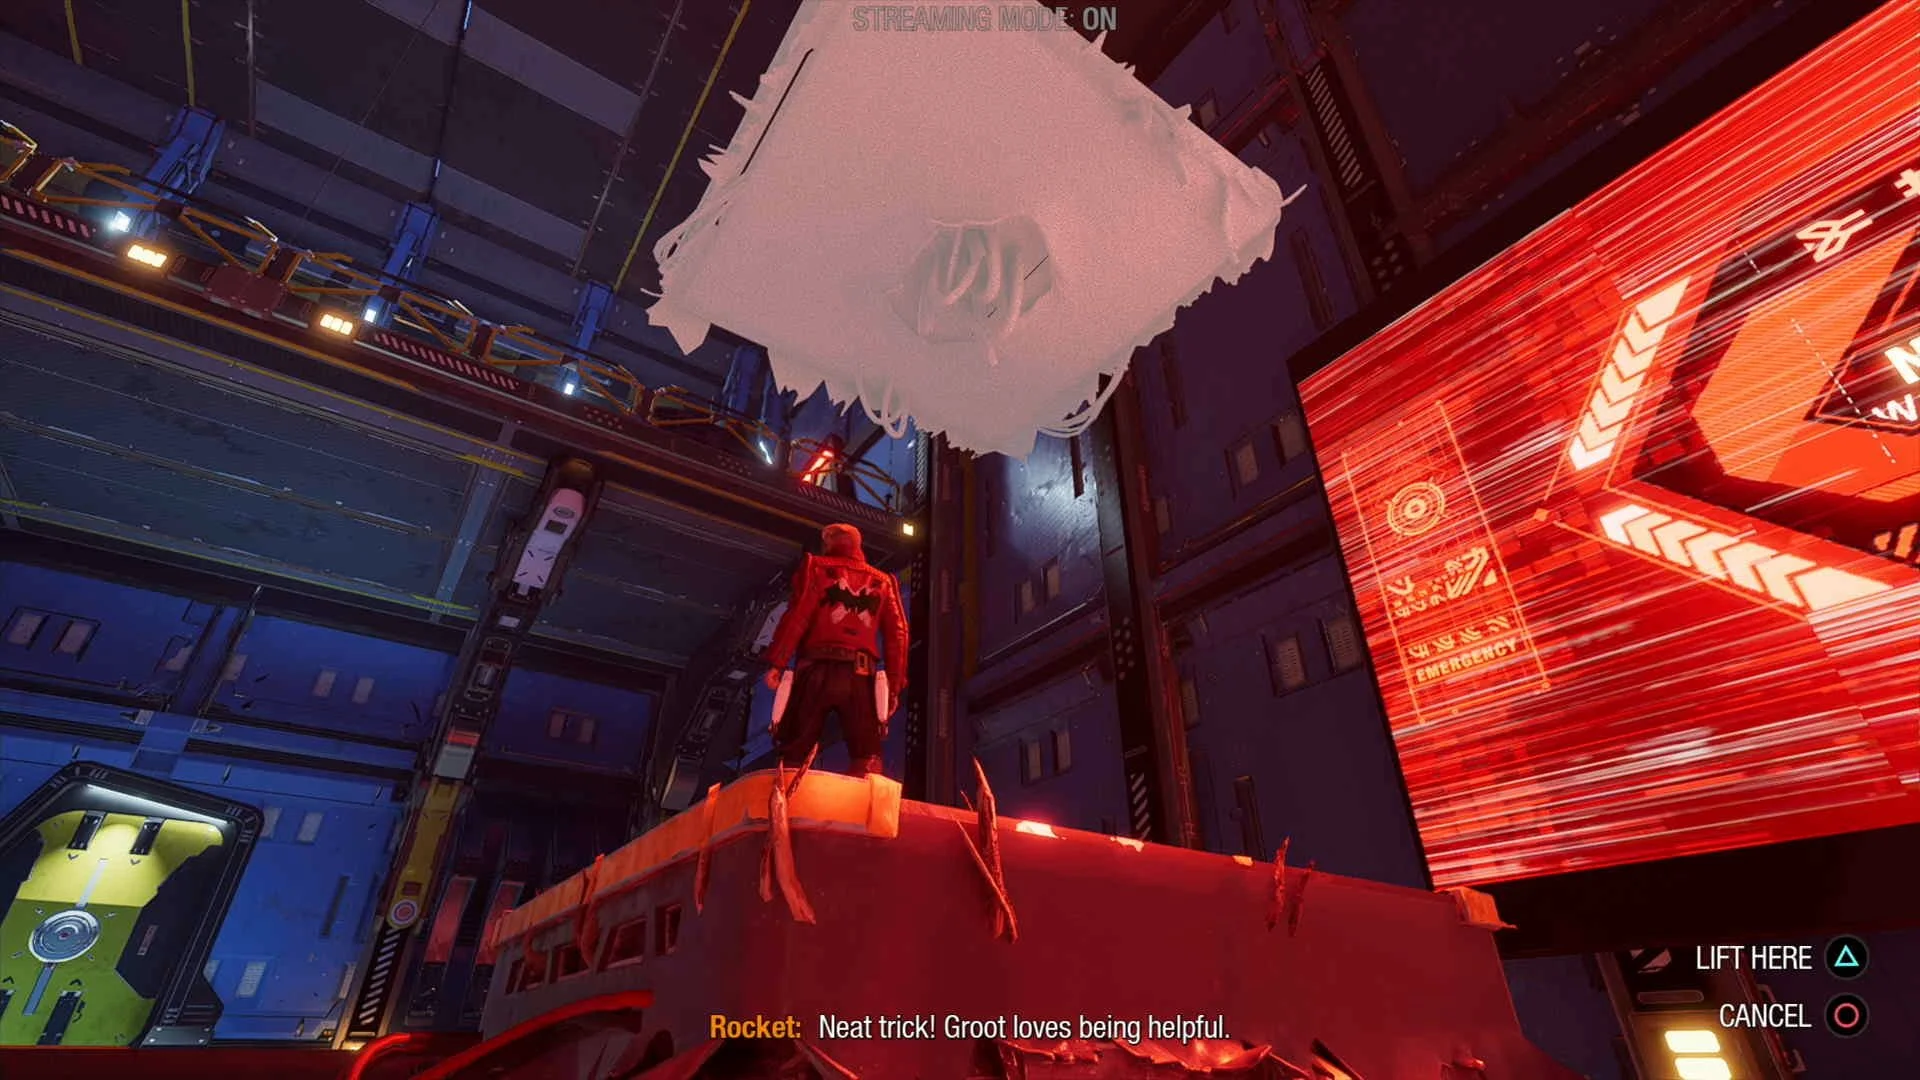
Guardian Collectible #1. After falling down a hole and crouching under some containers you can find this collectible under some “grey material” (destroyed by shooting it).


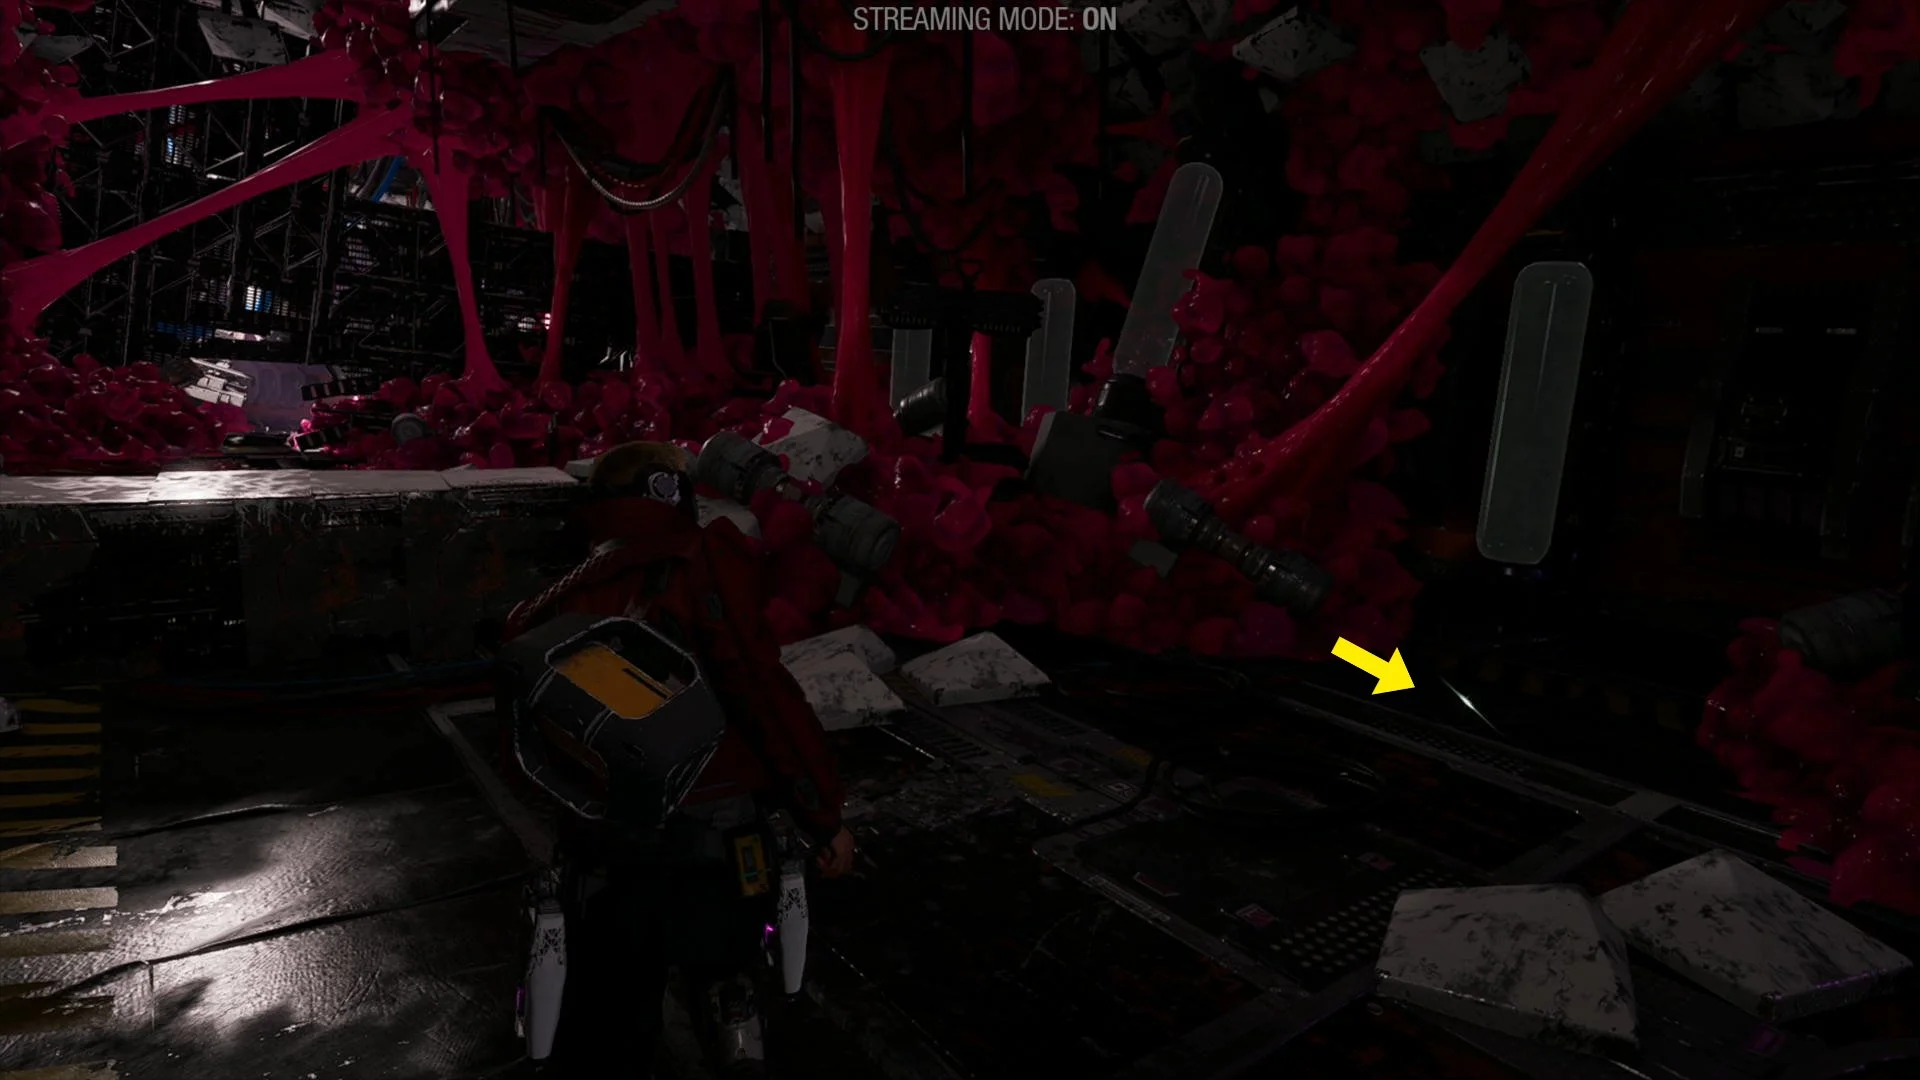
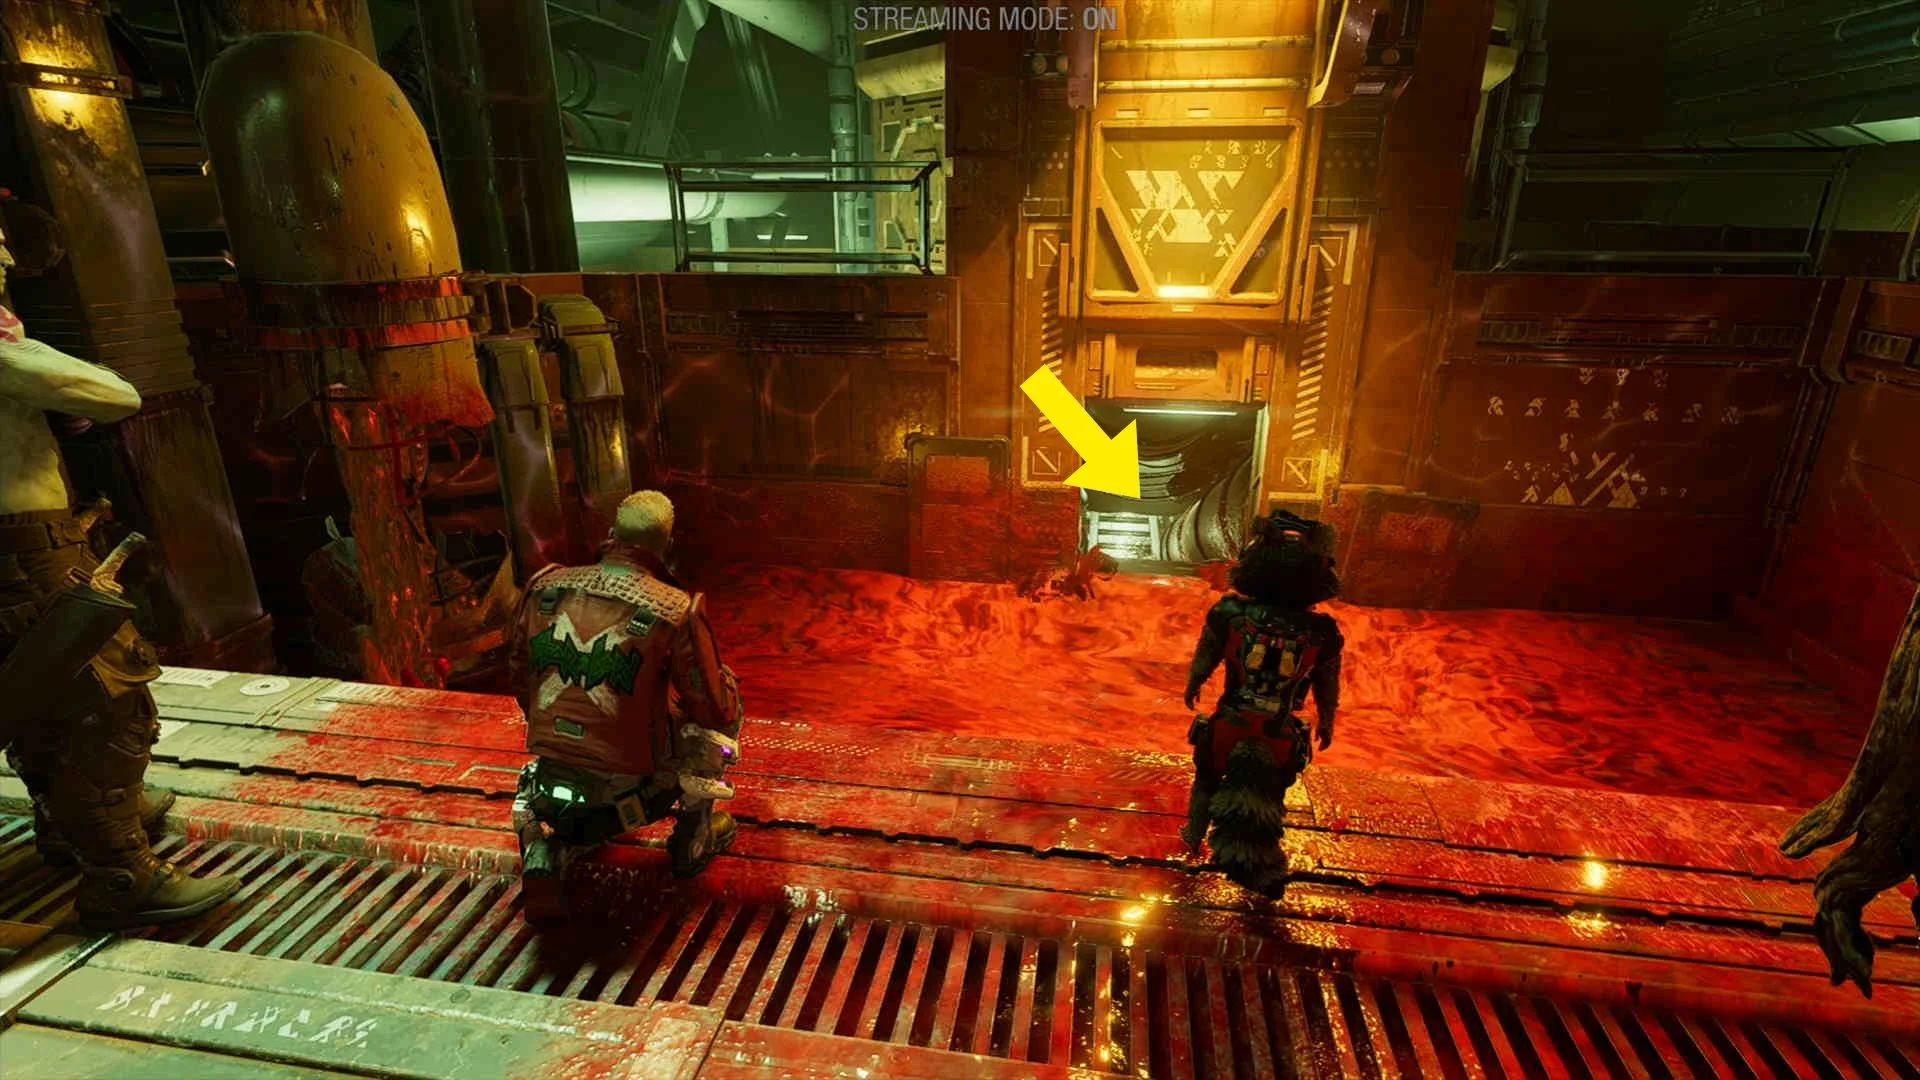
Archive #5. In the area above the first enemies you fight in the game.

Archive #6. In the big robots head (after you enter through the eye), you can find the collectible in the cage in the center.


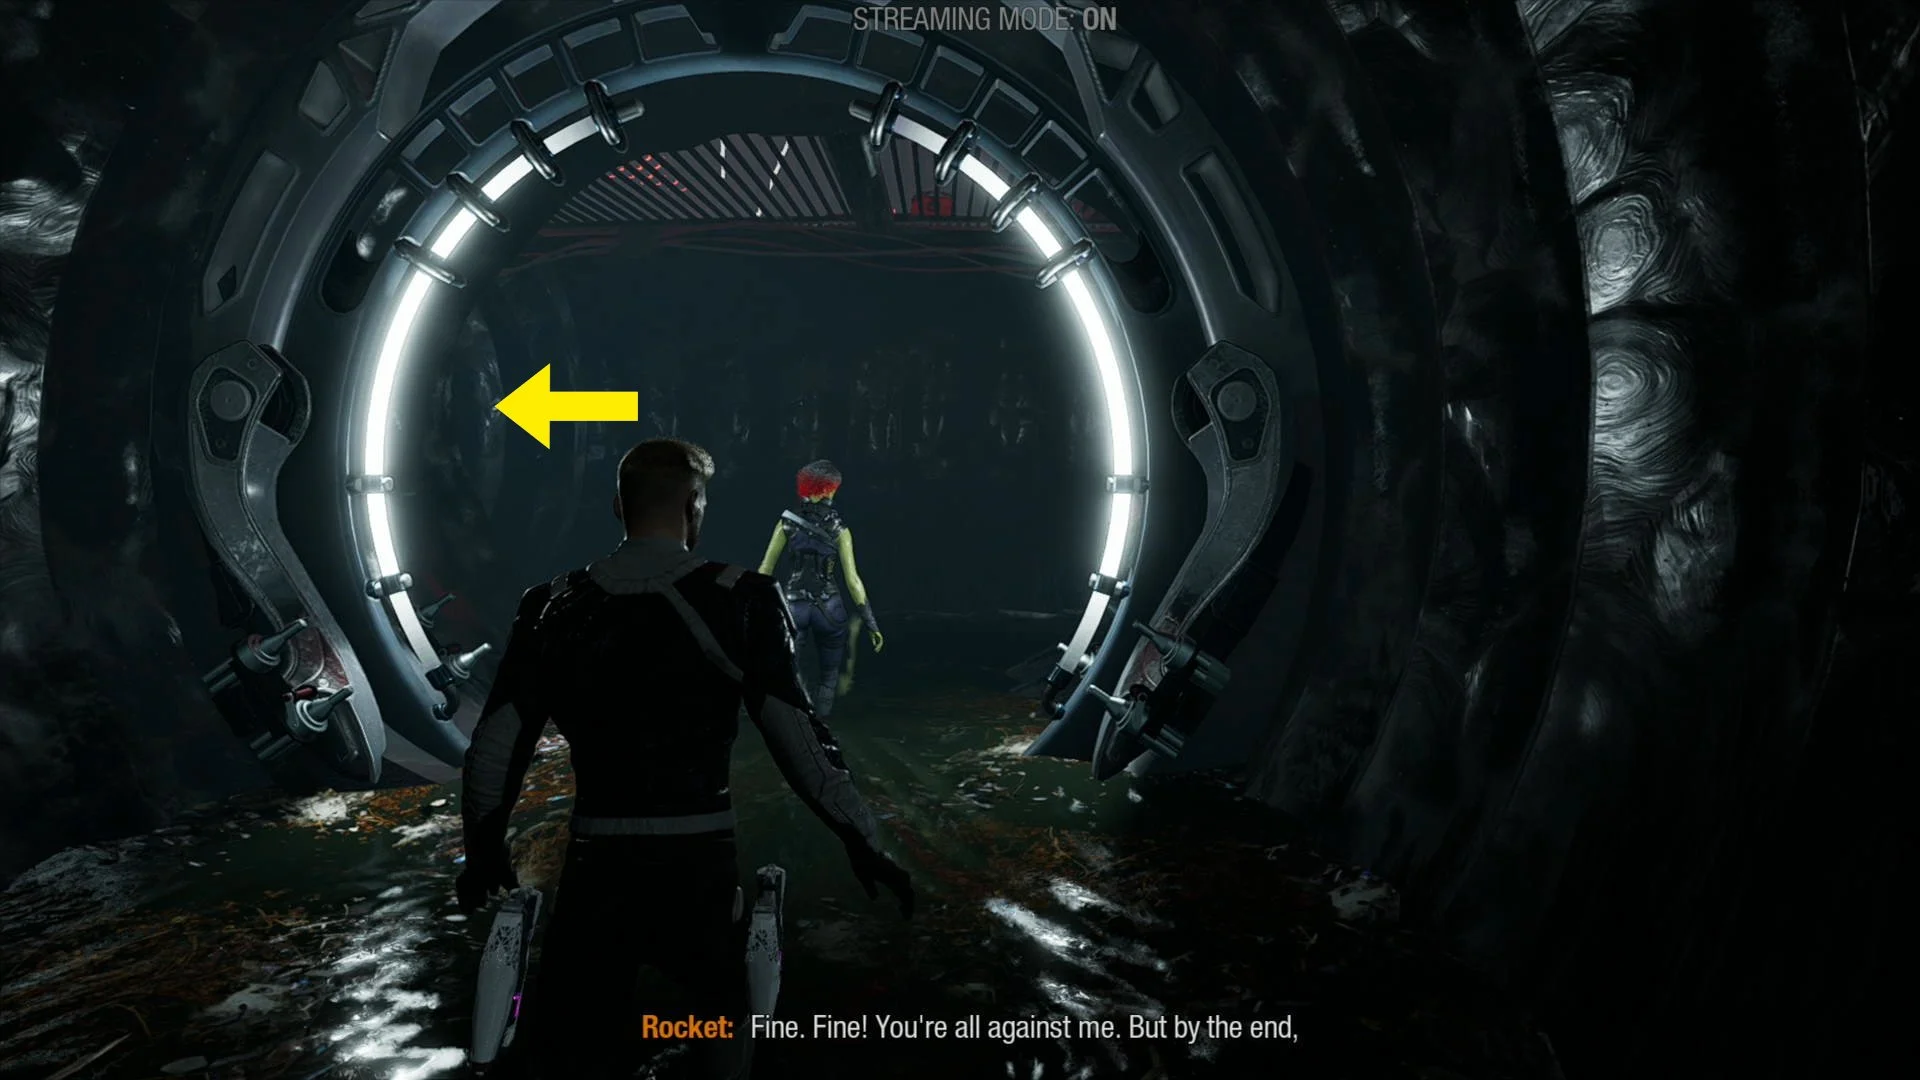
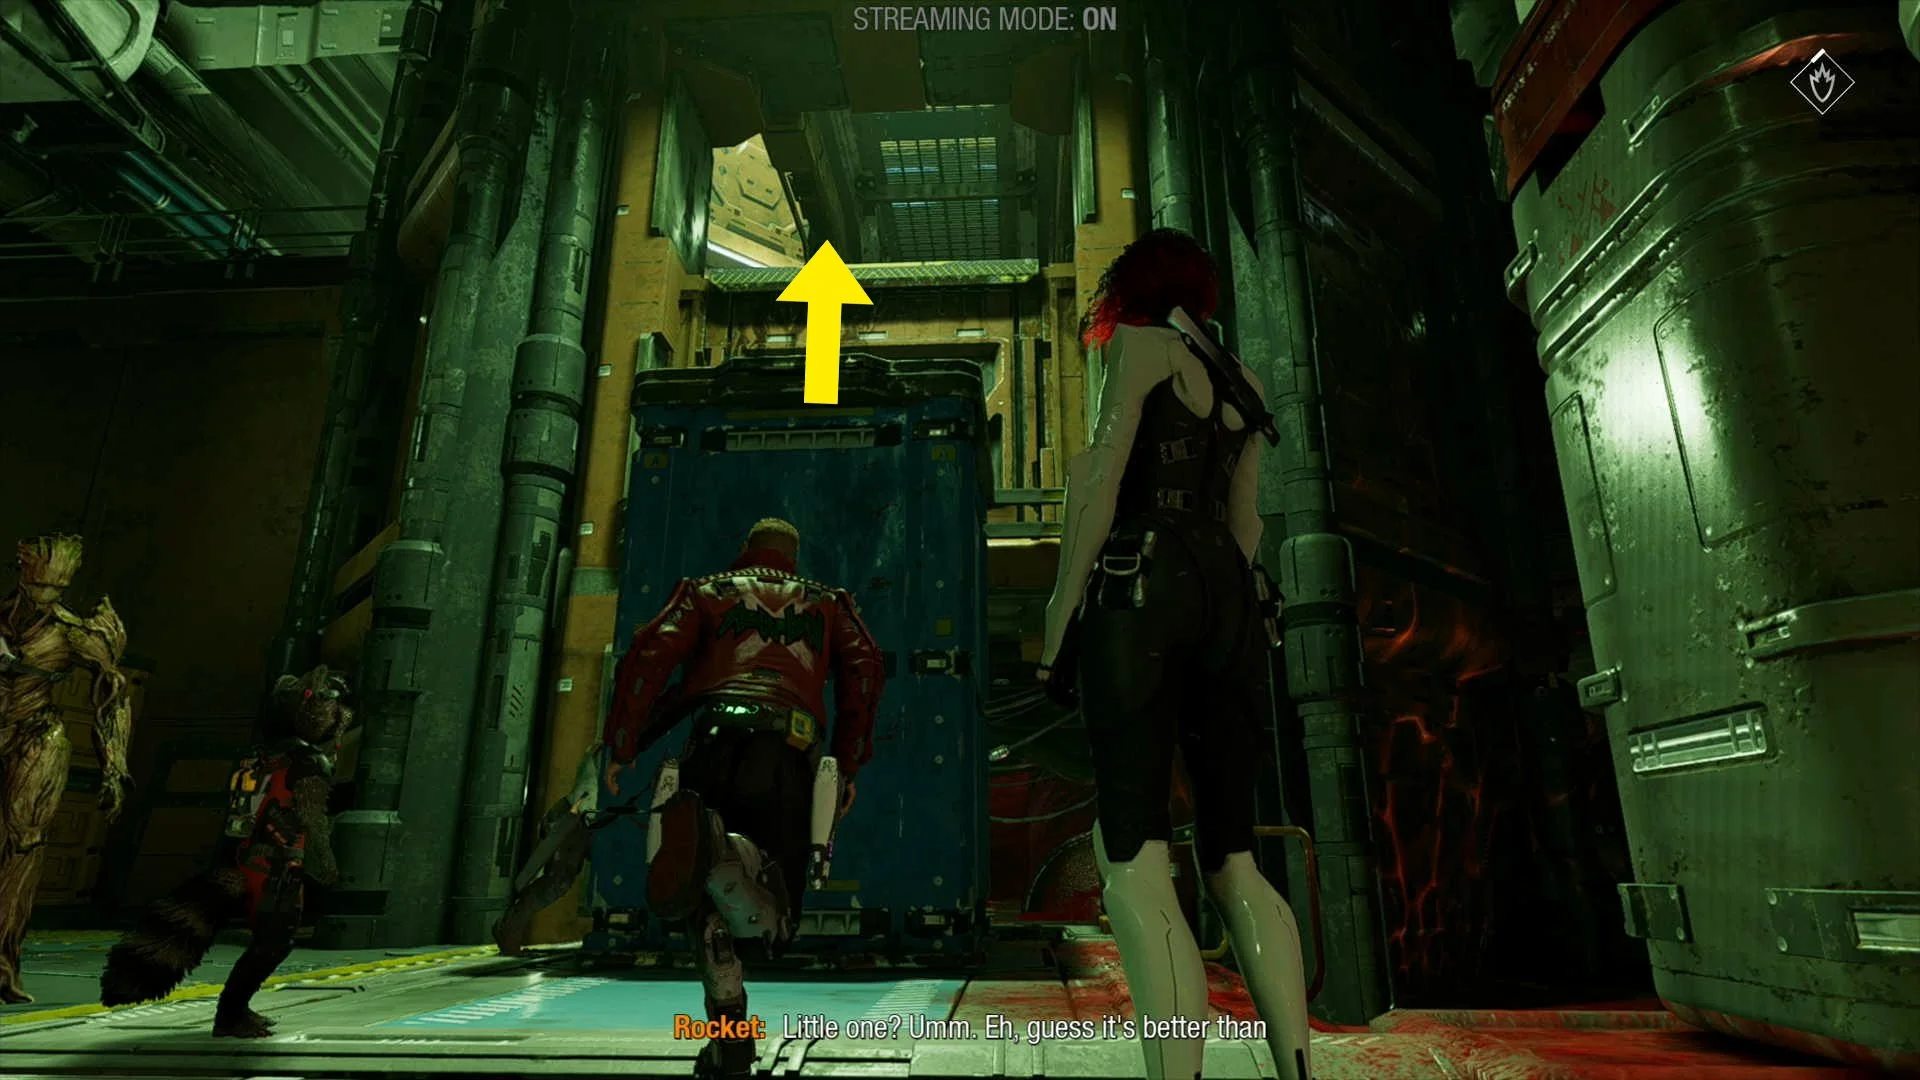
Outfit #2. Continue playing until you see a cutscene where you reunite with Groot, as soon as the cutscene is over , go to your right to find the collectible.


Guardian Collectible #2. Soon after getting the quick reload ability you will jump up to a platform on your right, from here turn around 180º and jump up to another platform, here use the quick reload ability to break the grey material to fin the collectible.

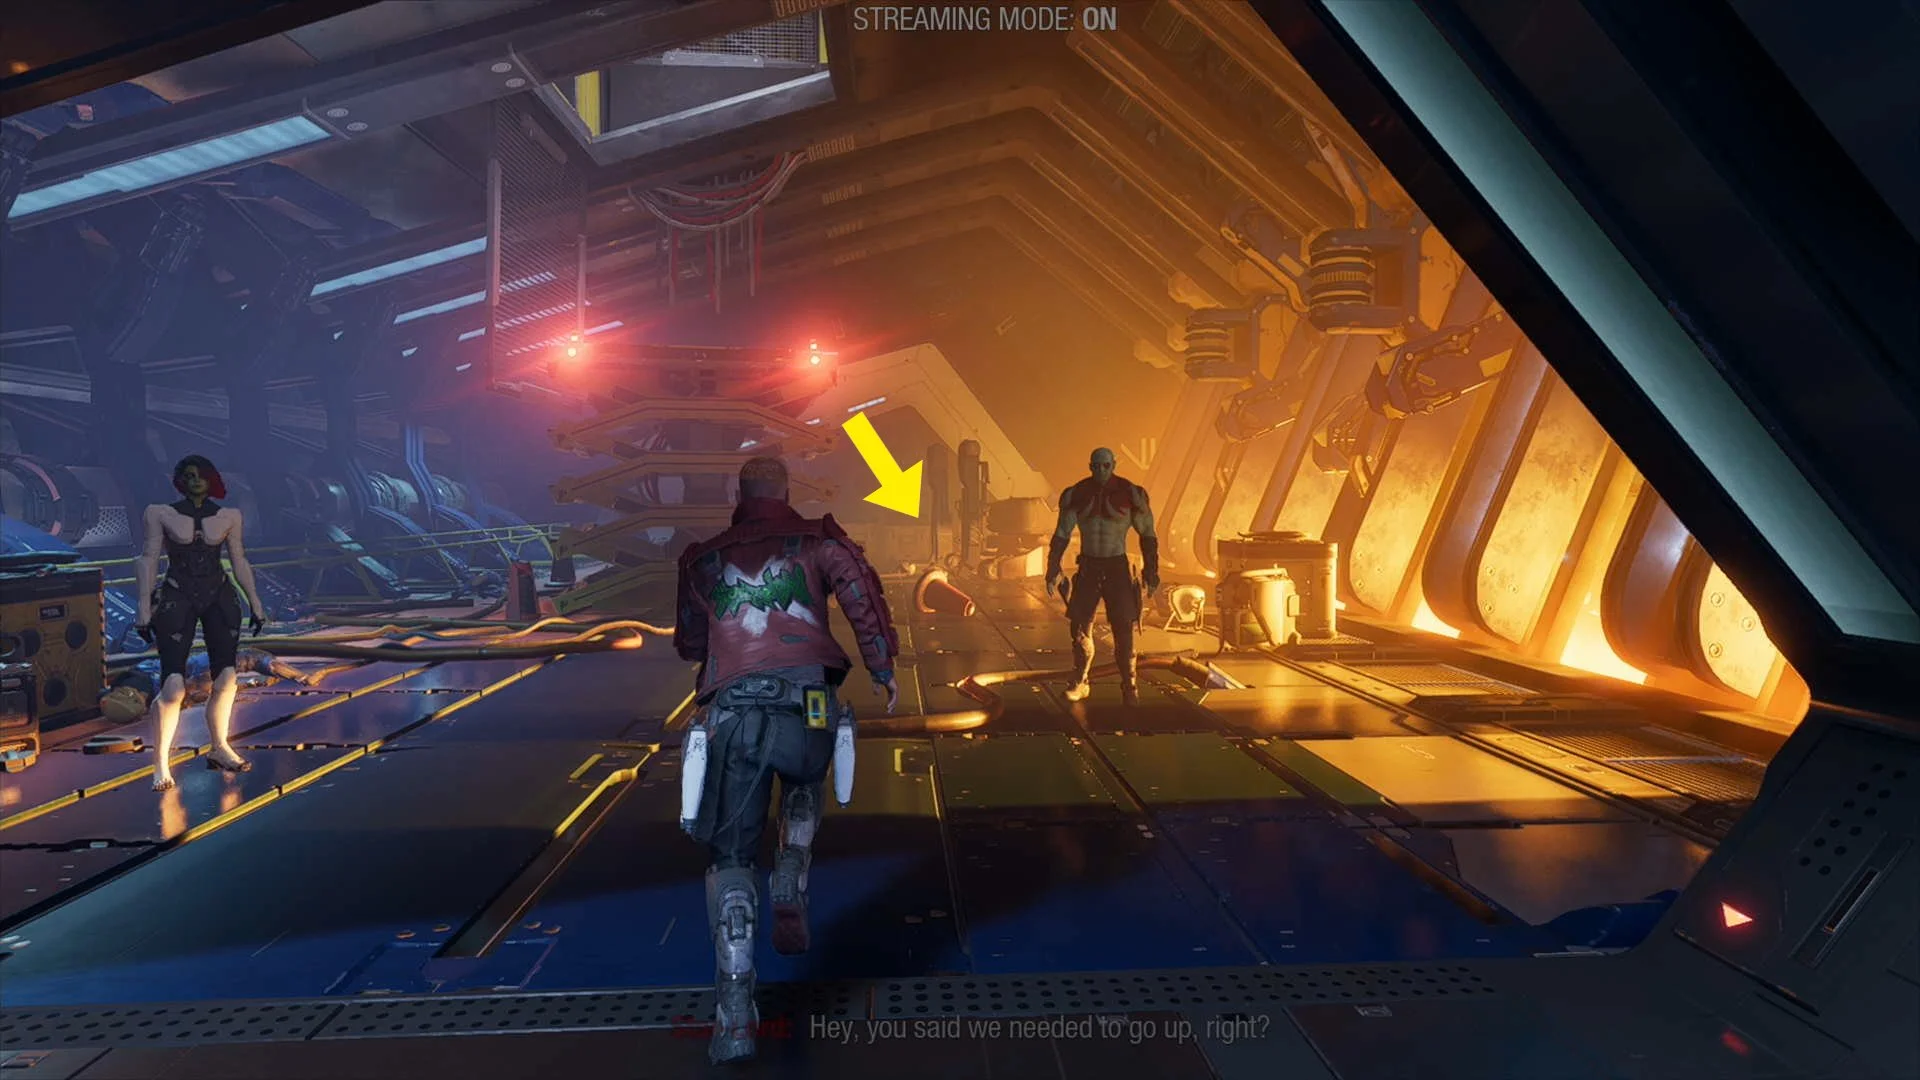
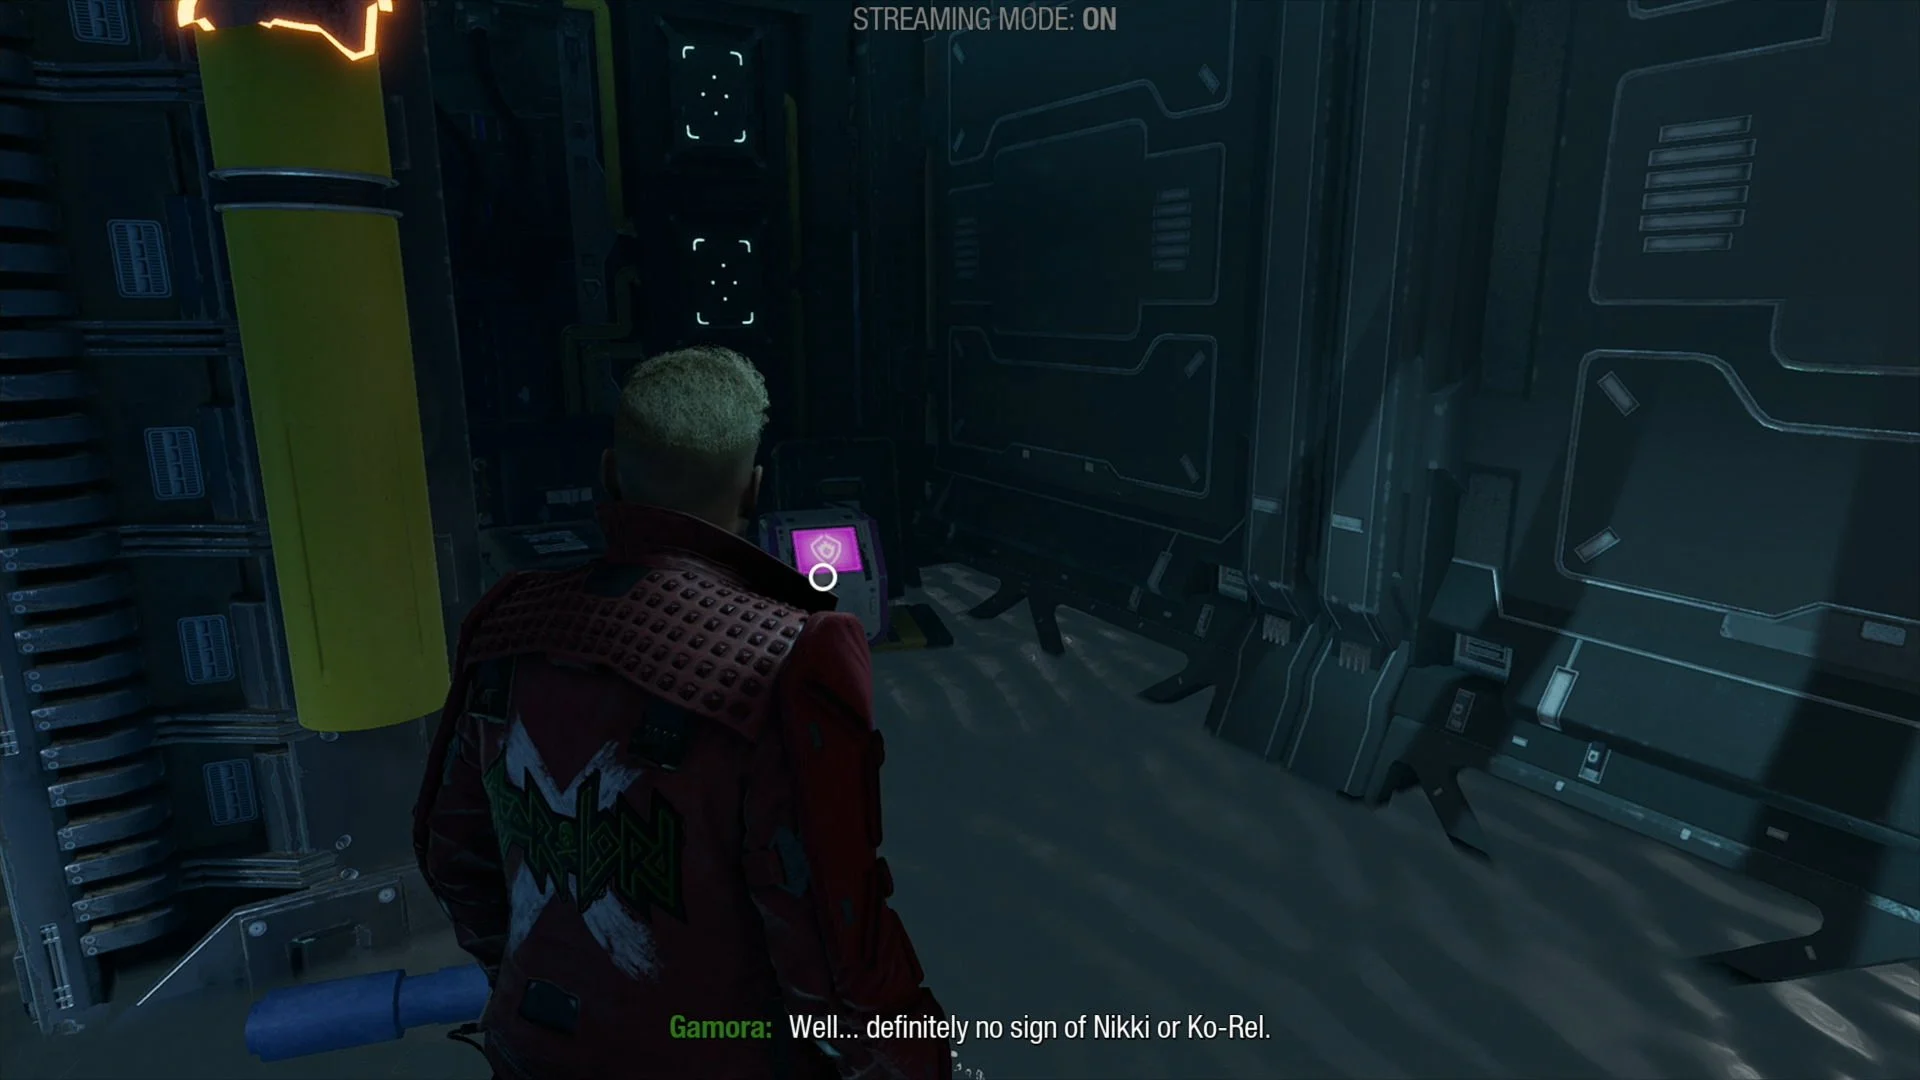
Archive #7. The final collectible in this level will be in the room next to some pipes just after Drax and Gamora help you get to a high platform with there abilities.

CHAPTER 1 VIDEO GUIDE
Chapter 2. Busted
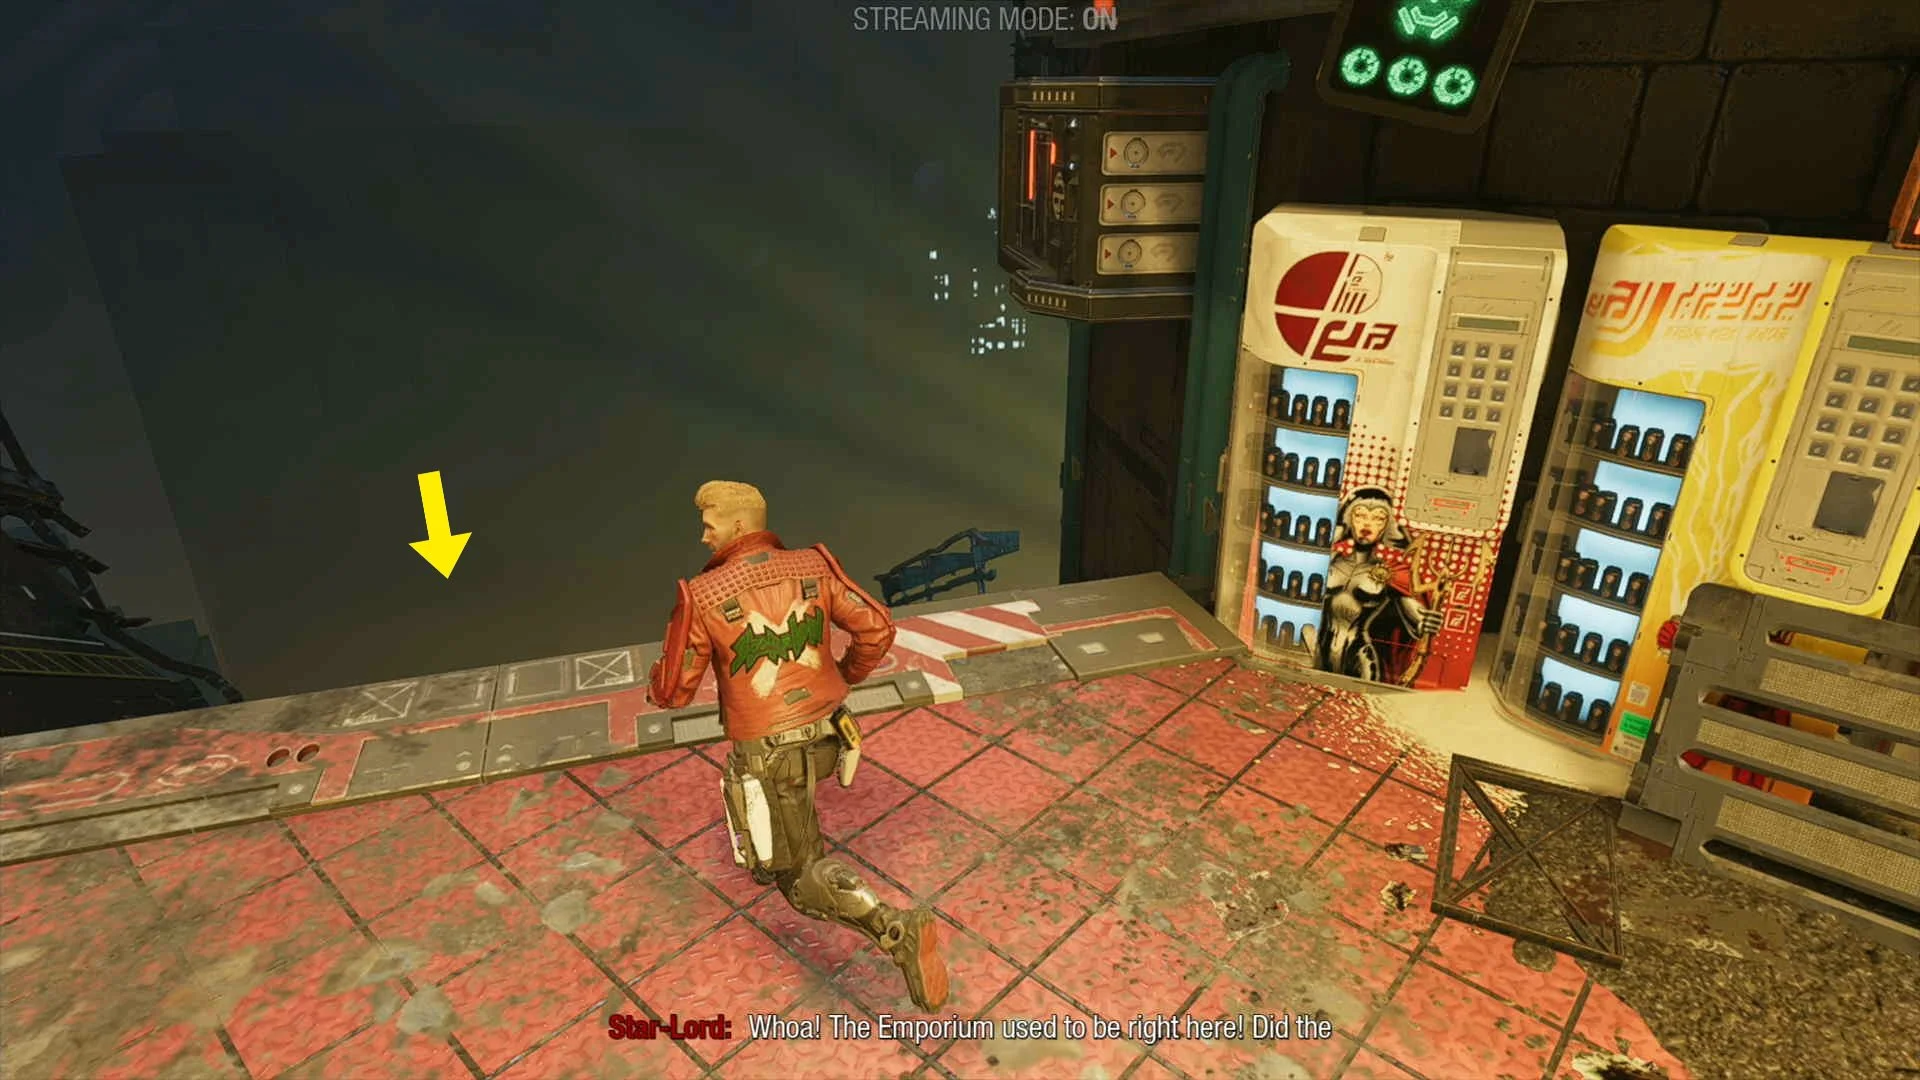
Outfit #1. During the scene where you are following Nikki you will come to an area where you have yellow pipes to your left and blue ones to your right, at the end do not follow Nikki, instead go straight through the gap to find the collectible.


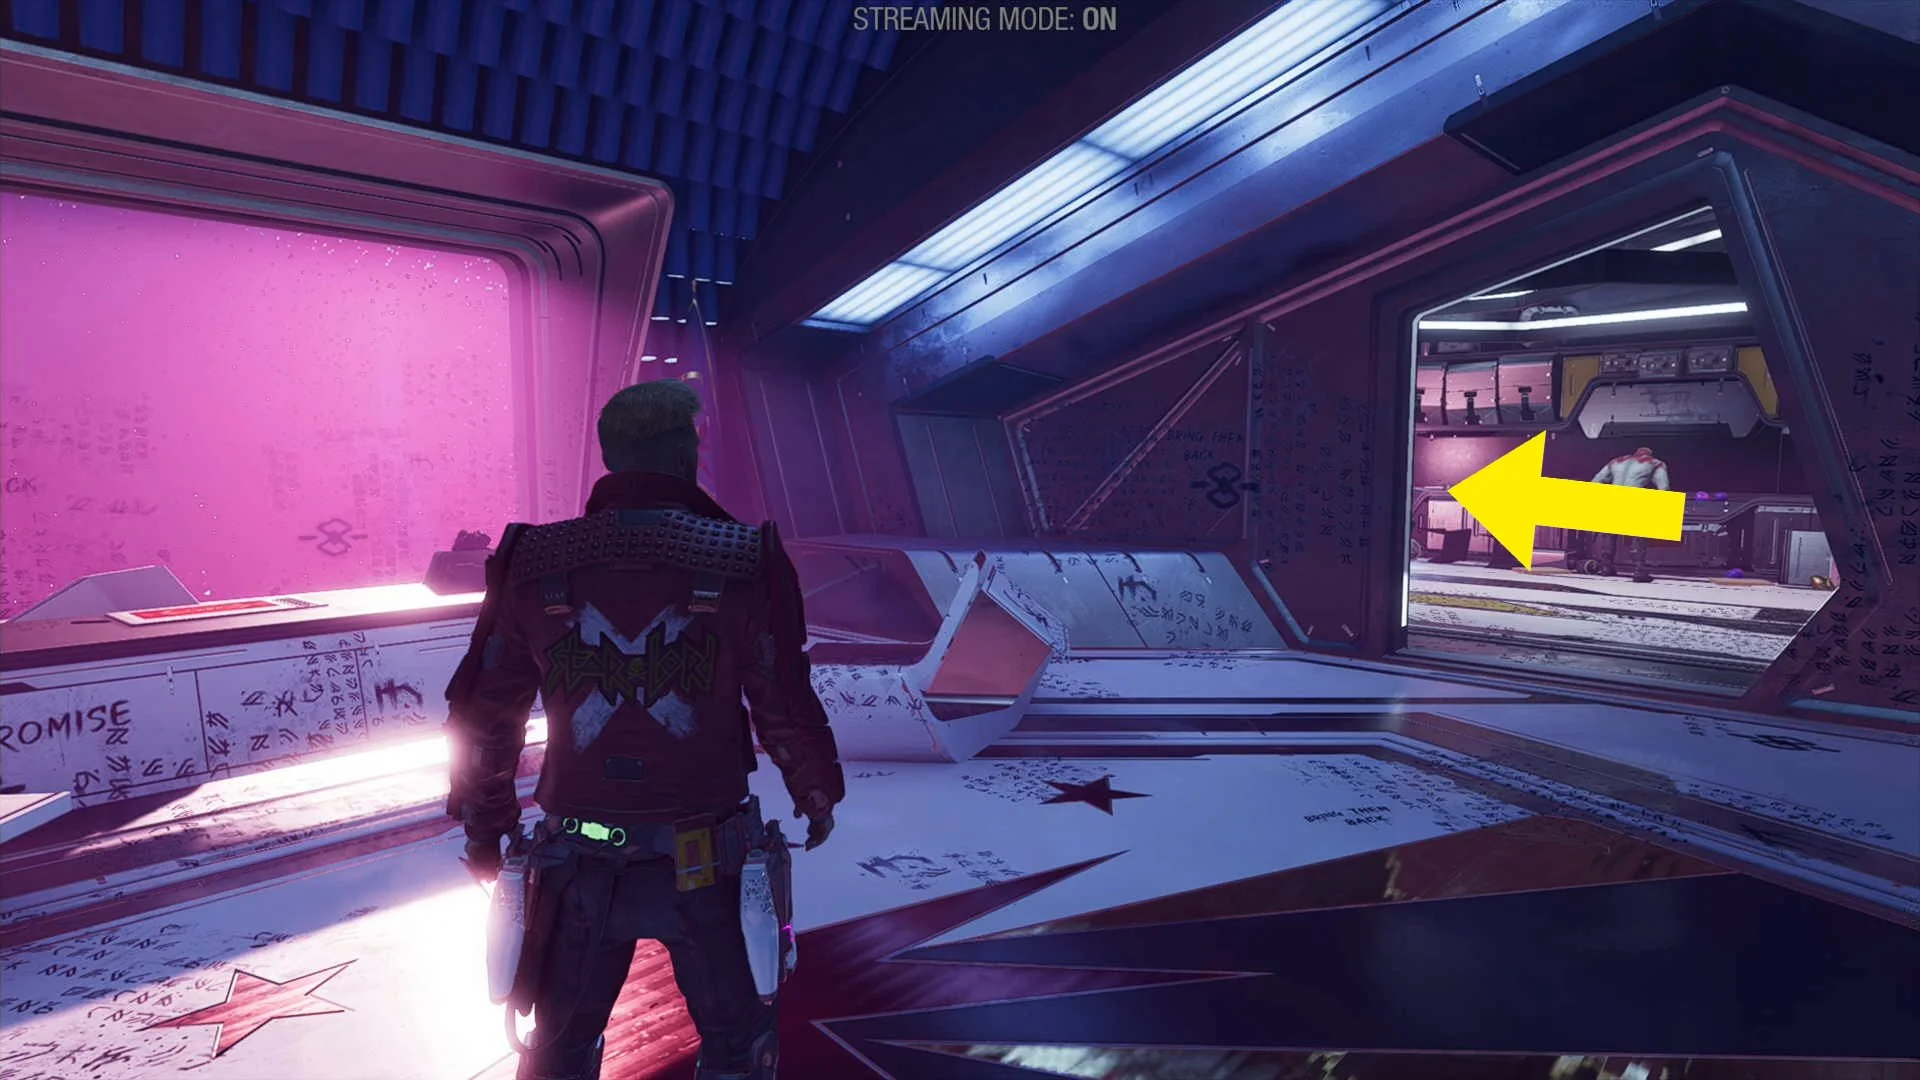
Guardians Collectible #1. In Nikki’s hideout next to the pink screens.


Compendium Item #1. During the elevator scene pick the following choices: Re-Activate Elevator > Try to Help Nikki > Take the Blame, this will get Nikki to give you her passkey.
CHAPTER 2 VIDEO GUIDE
Chapter 3. The Cost Of Freedom
Compendium Item #1. In the ship at the start of the mission, find this collectible in Rocket’s room, this collectible will only be there if you found it in Chapter 1, also make sure you exhaust all the dialogue to make it count, to check just go to the menu and look under Items.
Compendium Item #2. On the ship in Star-Lord’s room, just like the previous collectible, it will only be there if you found it in chapter 1, also exhaust all dialogue for it to count.
Compendium Item #3. This one is also found on the ship at the start of the mission, go downstairs and find it to your left as soon as you get to the bottom floor, it will only be there if you found it during chapter 2, also exhaust all dialogue to get it to count.


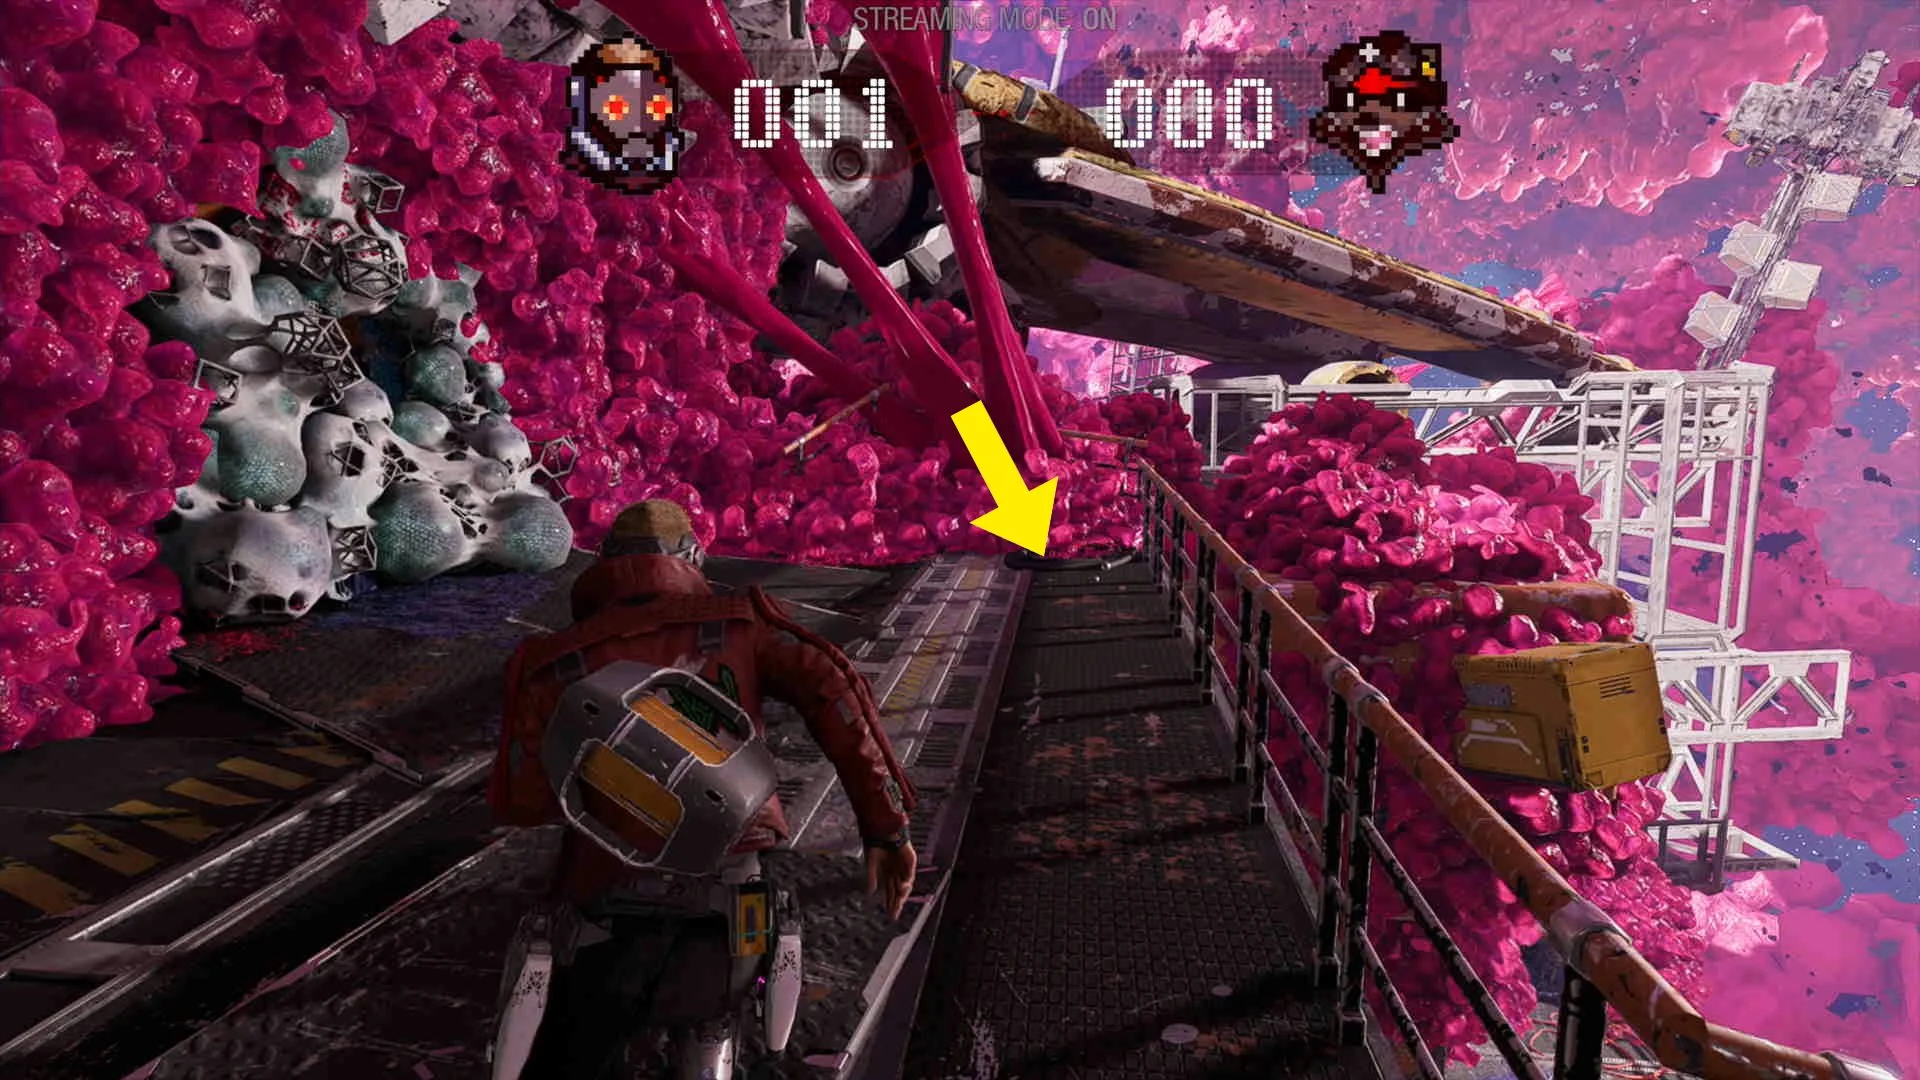
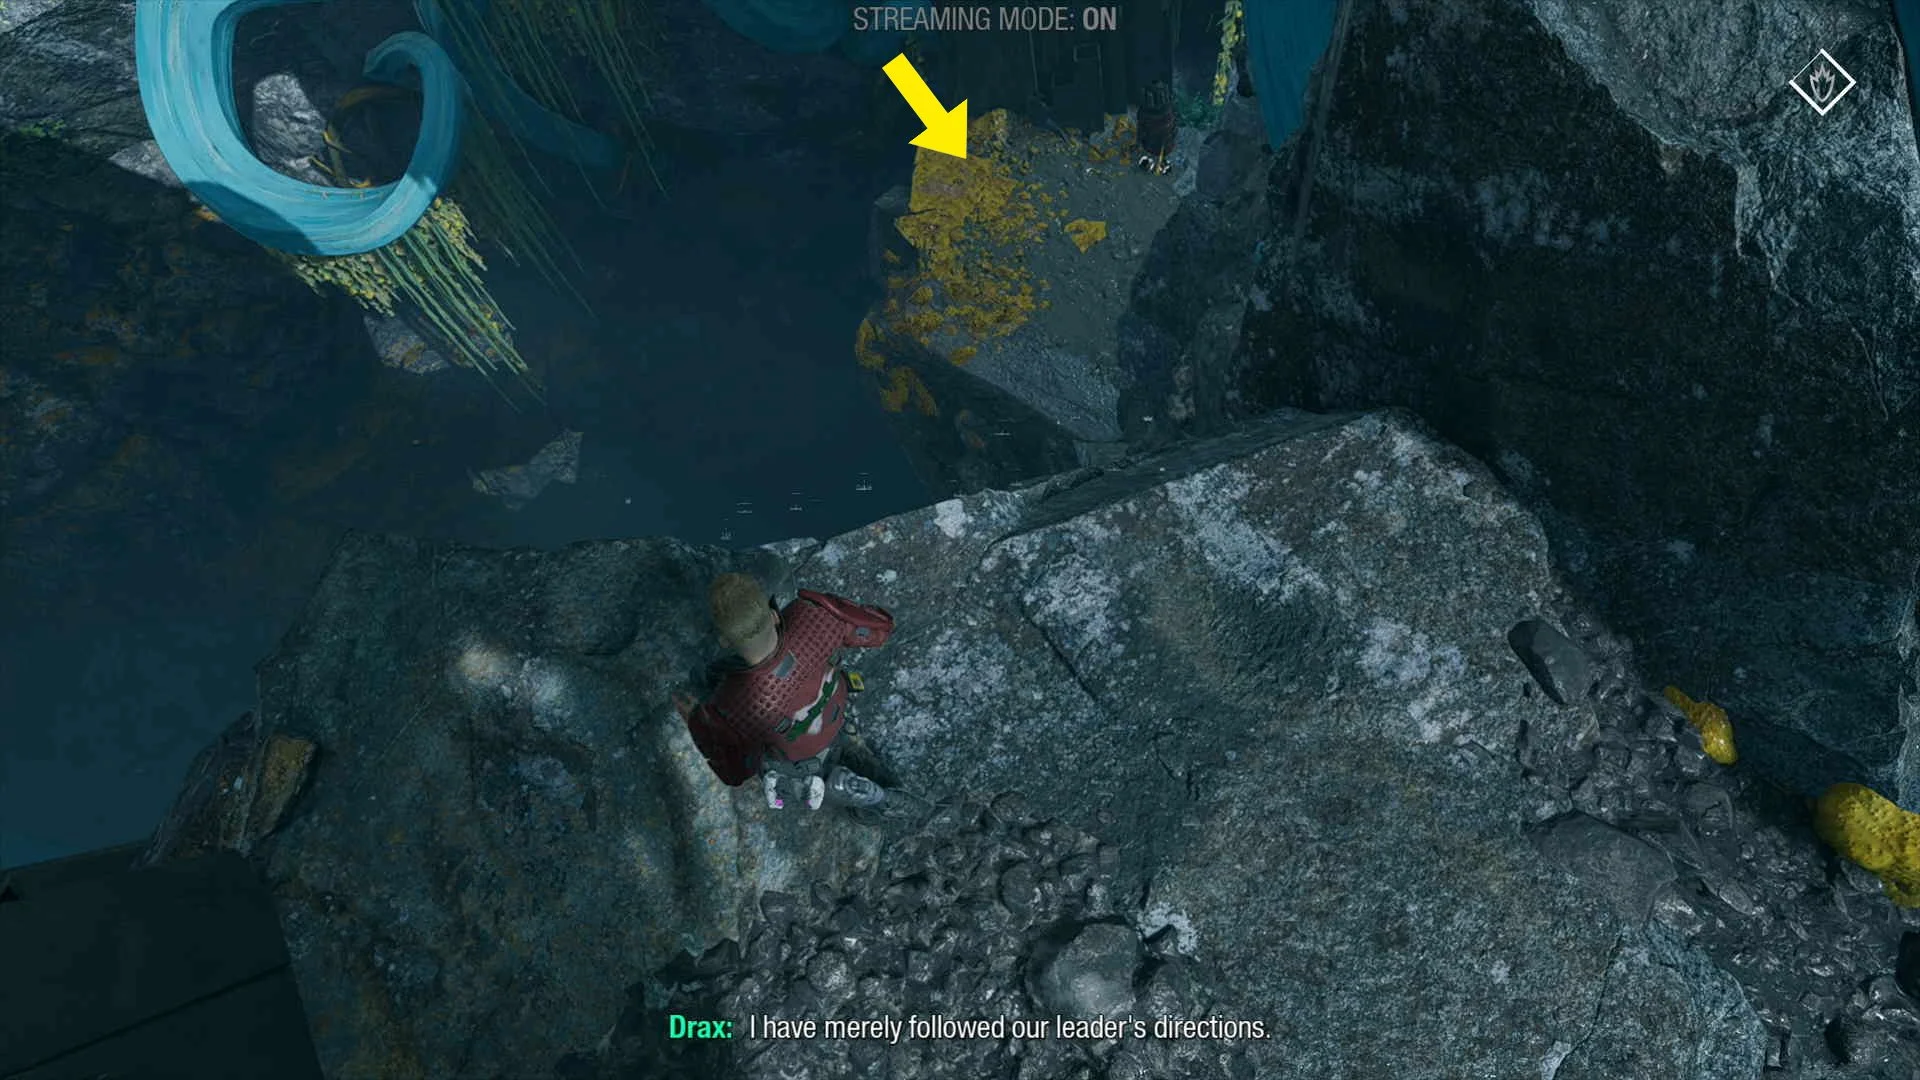
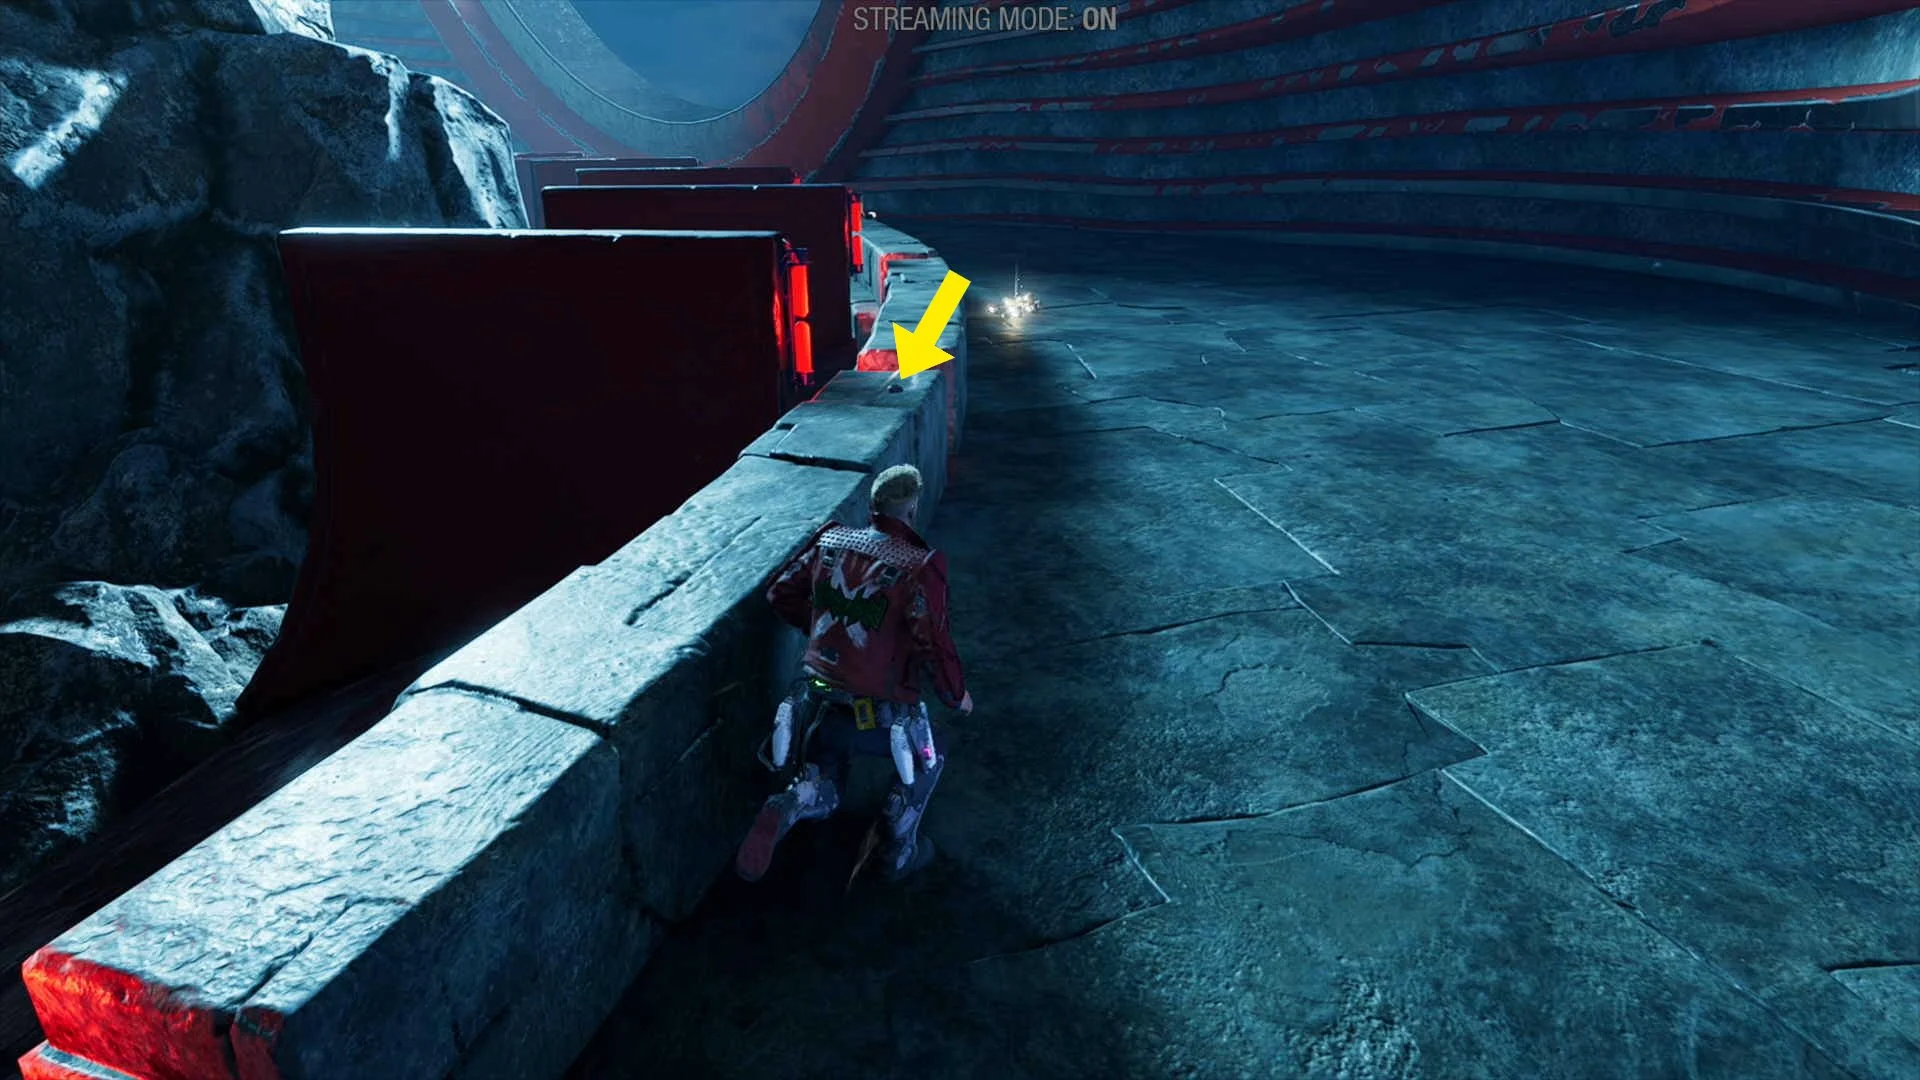
Archive #1. After the firs group of enemies you will climb up a red wing, after doing so go left and then all the way to the edge, the collectible will be on the ground.


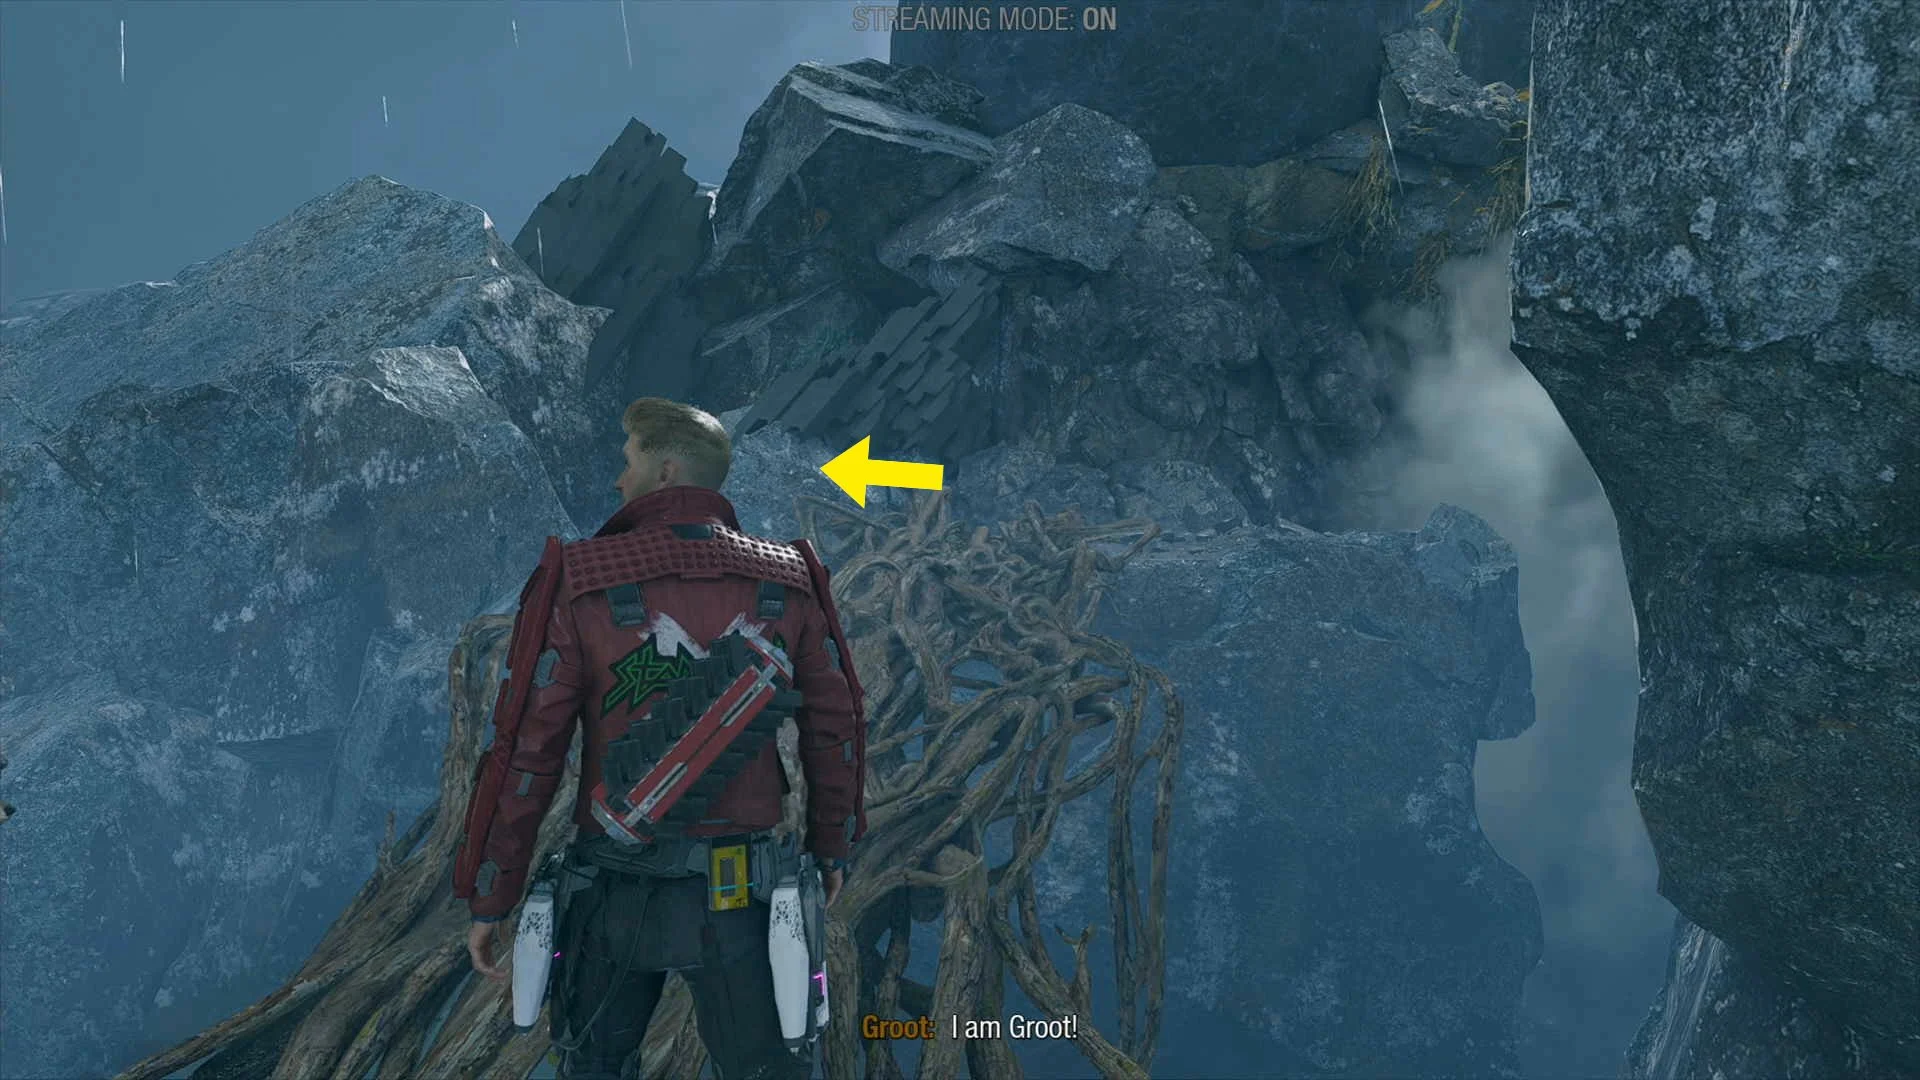
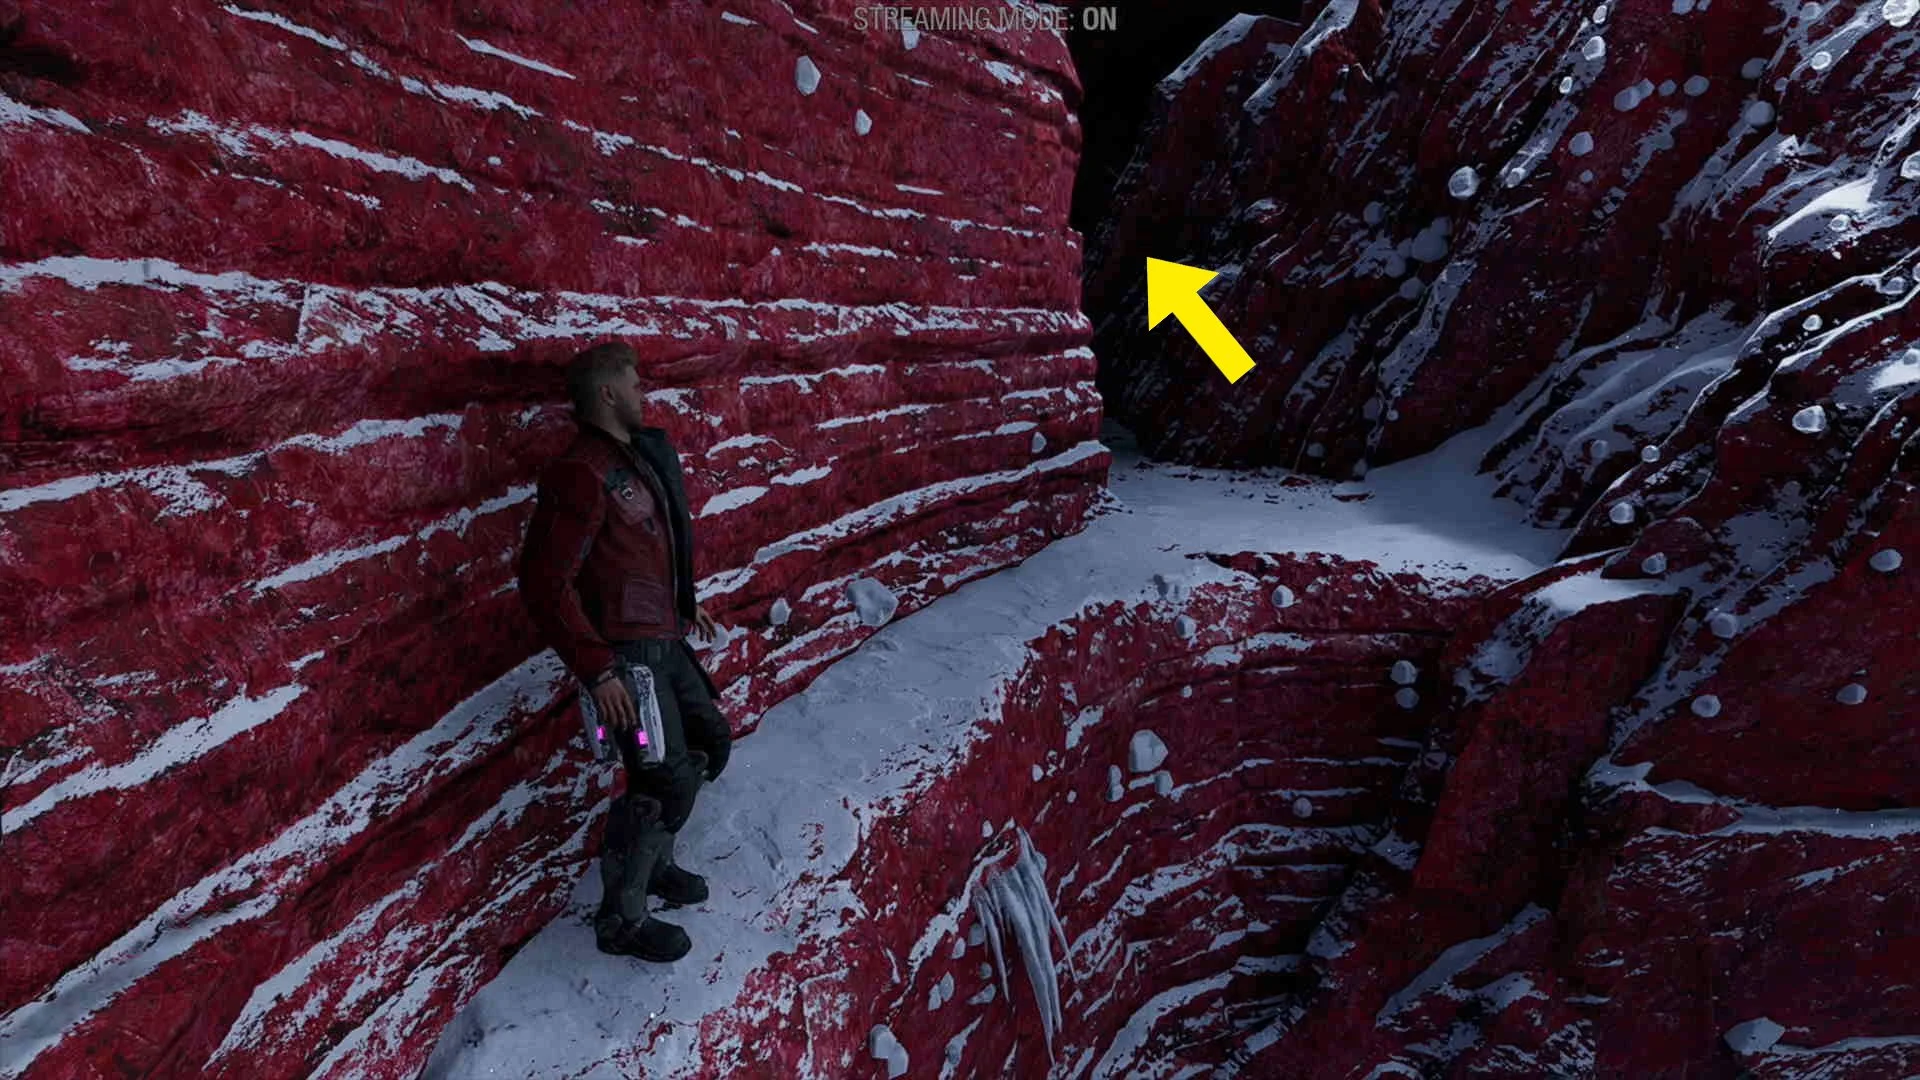
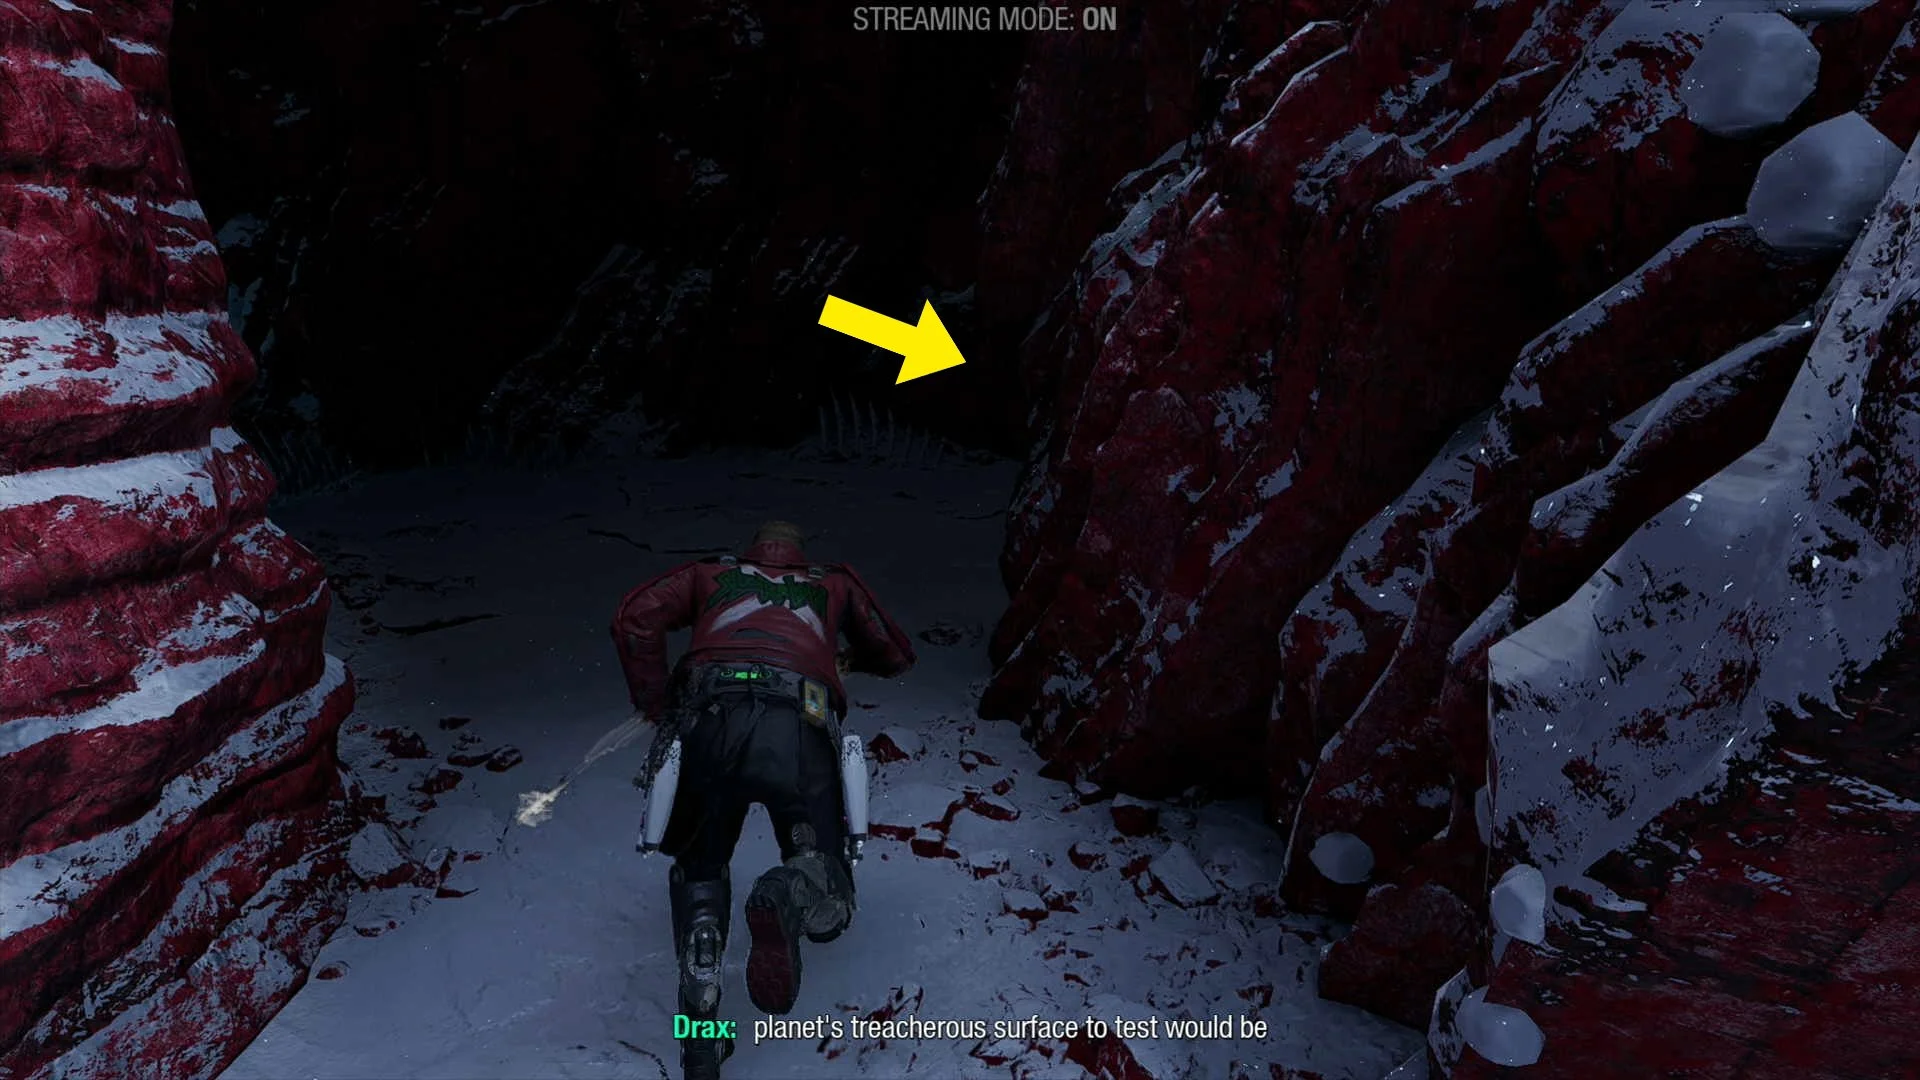
Outfit #1. From the previous collectible turn around 180º, here you will see a strange structure with red circles, before going under it, take a right and you will enter a cave, the collectible will be at the end of this cave.


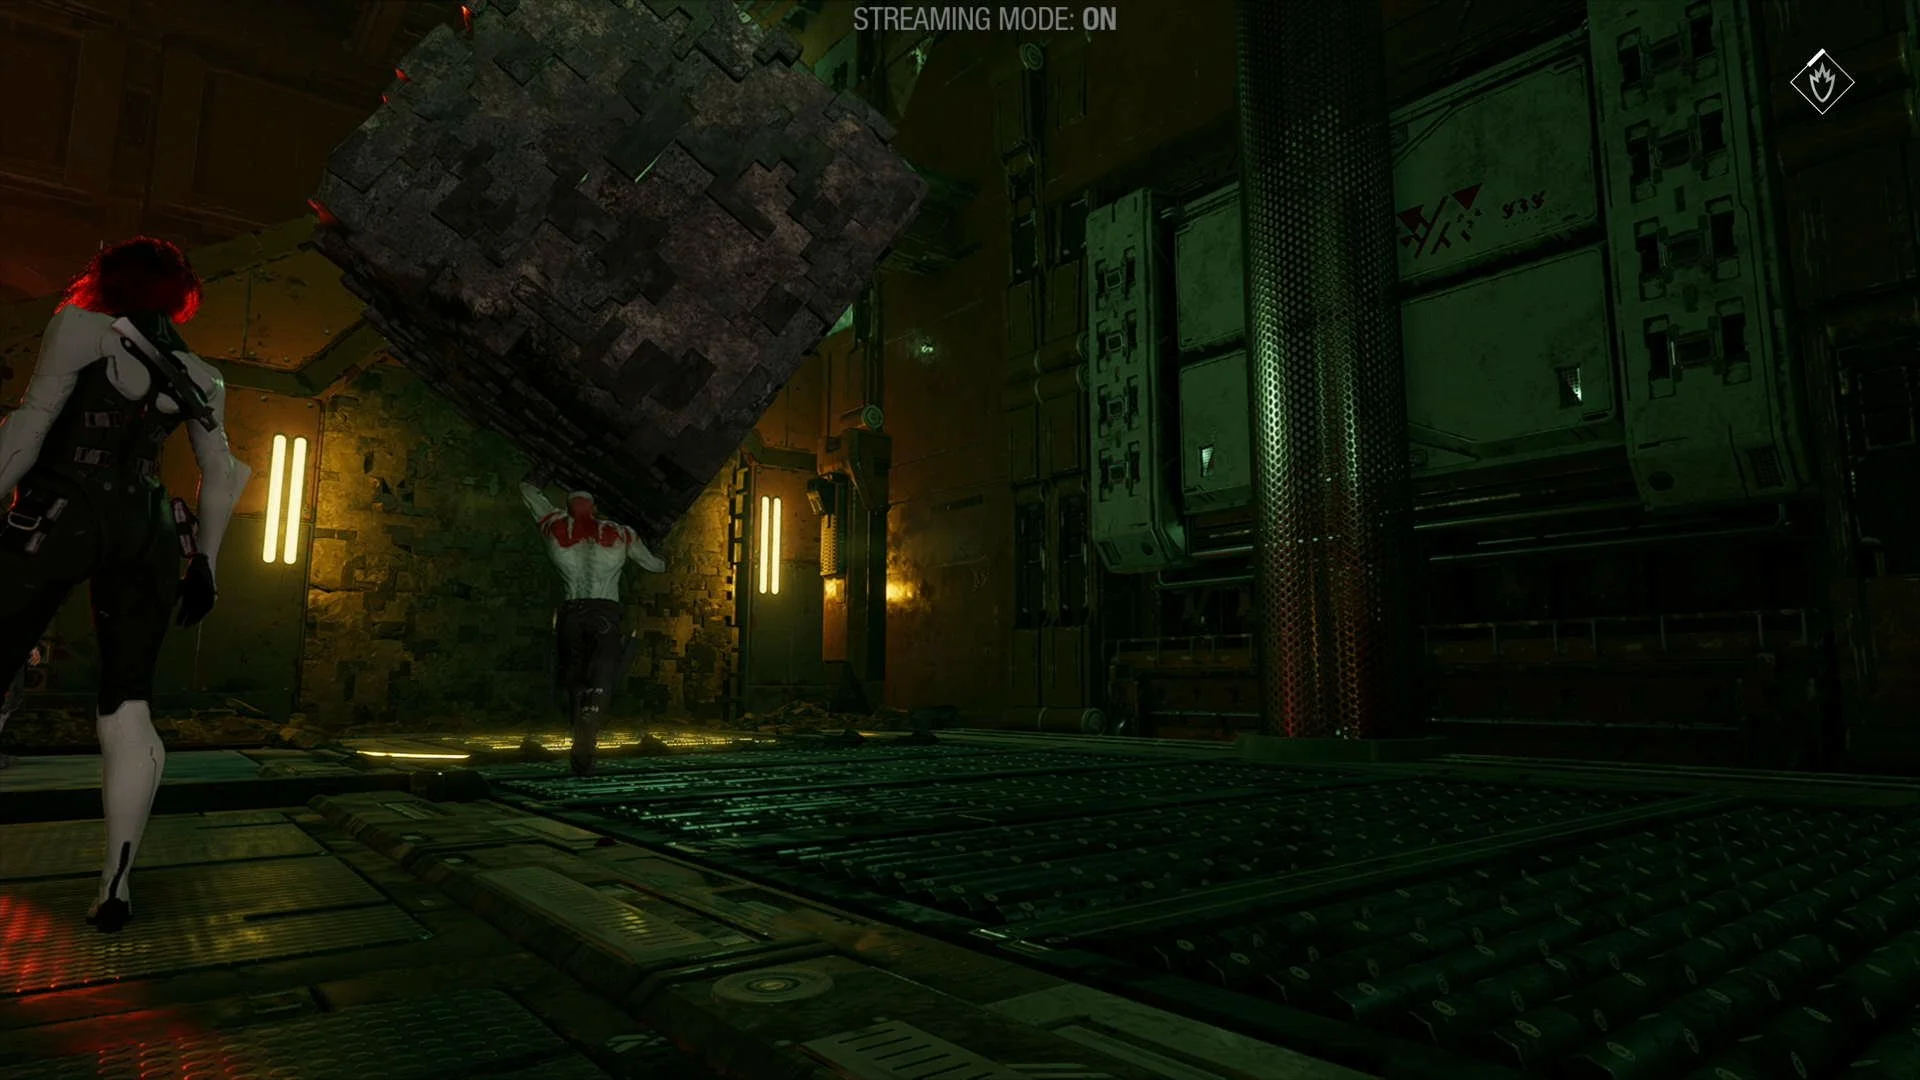
Guardians Collectible #1. After the battle with the new “dog” type enemy you will use Gamora to climb up and then shoot a metal block that Drax can move, tell him to take it to the opposite side than the wing (next to the blue structures), now jump up and then jump to a platform below you, the collectible will be here.


Archive #2. Using the same metal block from the previous collectible, this time place it below the yellow wing with all the cables, then use Gamora to cut them, this will knock the wing down allowing you to walk up it, the collectible will be on your left at the top.


Archive #3. Following the main path you will have to freeze 2 boxes and then climb up to a platform where Gamora will cut the cables blocking the way, just after the cables the collectible will be on the floor to your left before dropping down.
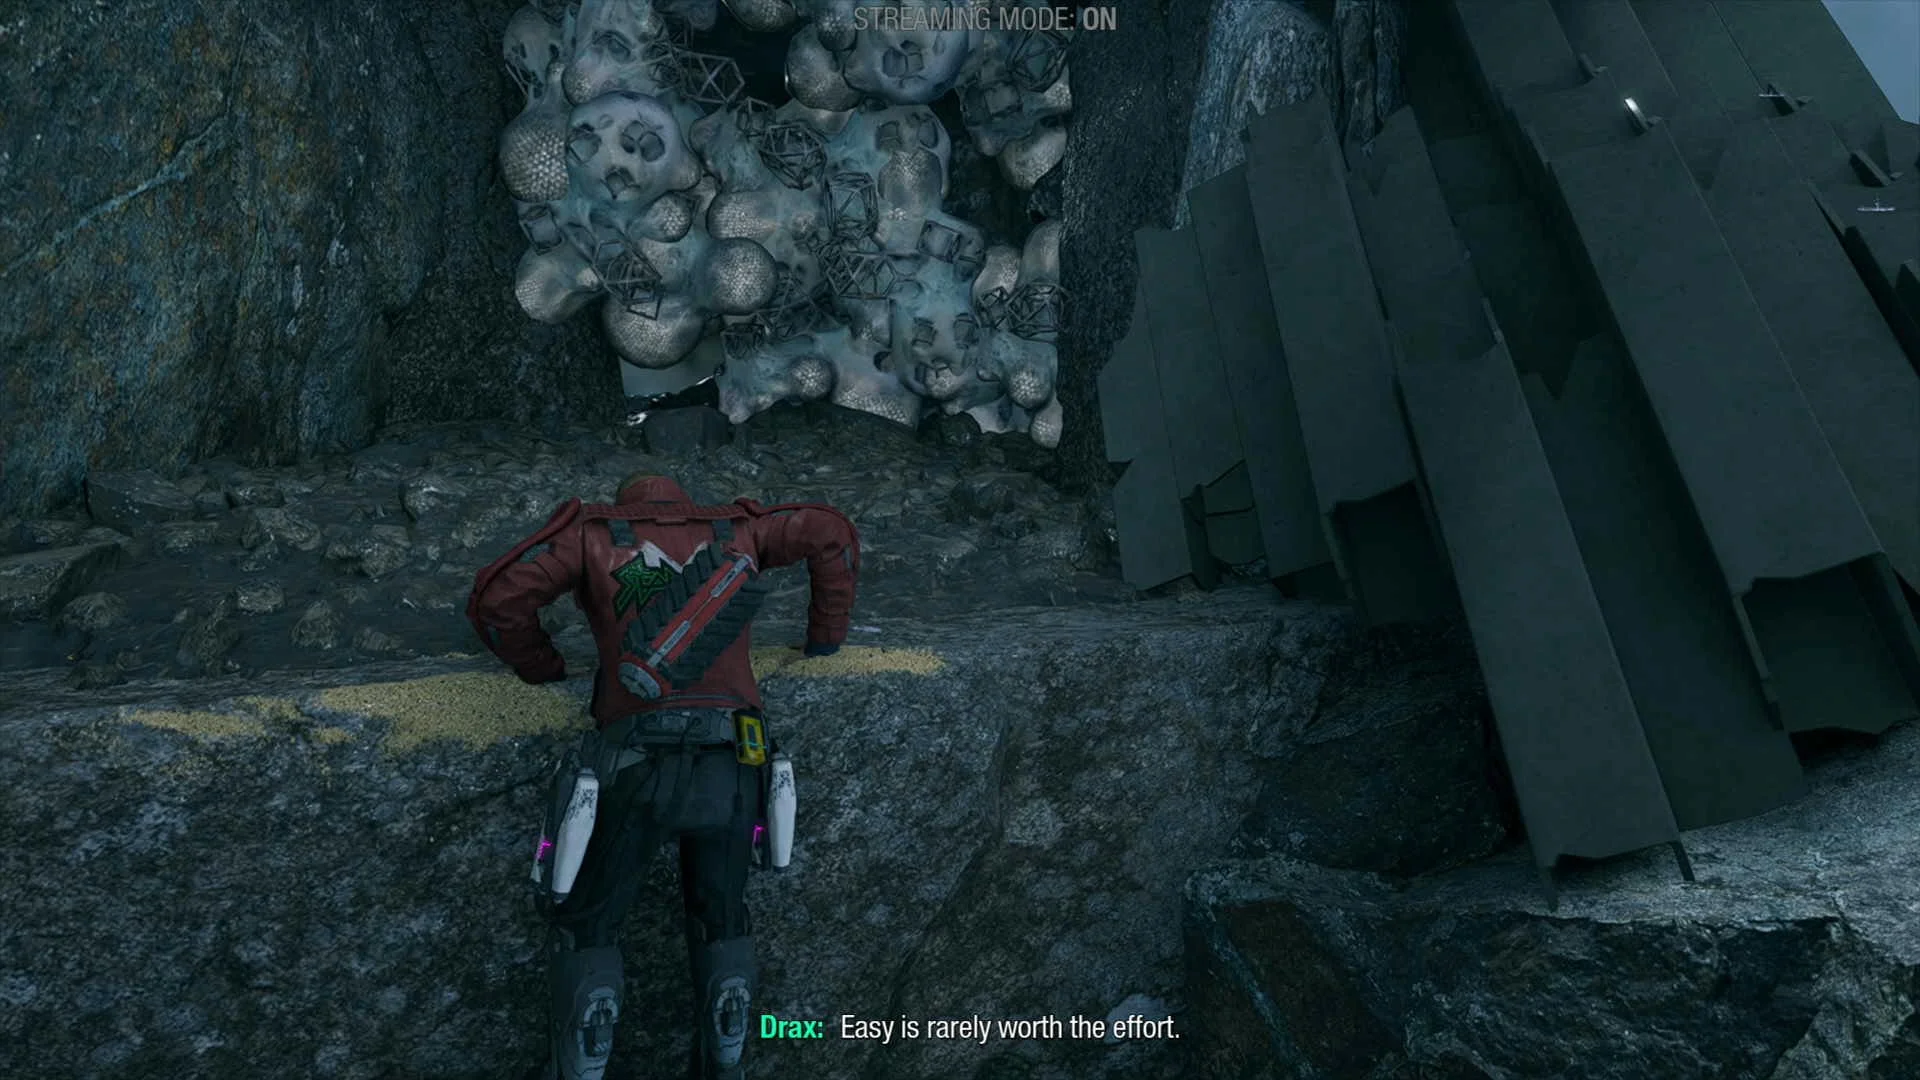
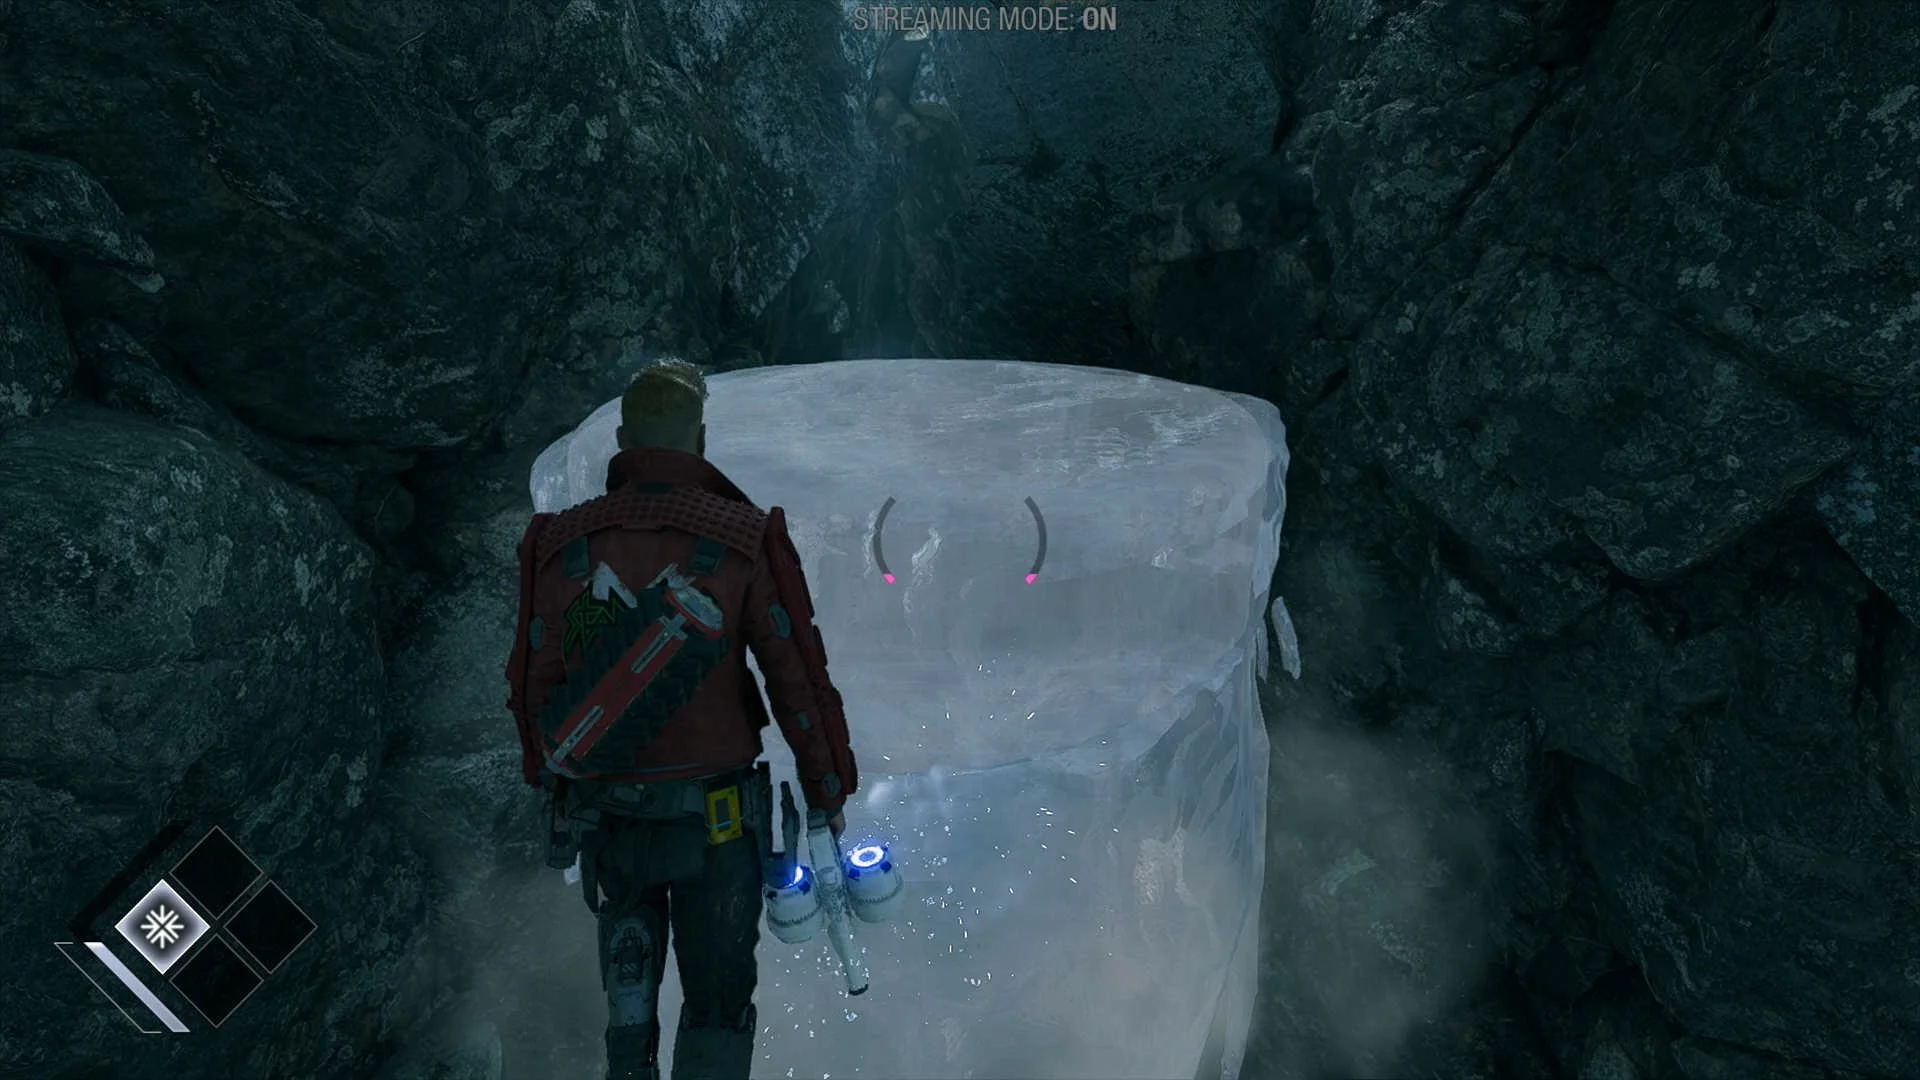
Outfit #2. Eventually you will get to a place where you will have to get Groot to make a bridge out of branches, cross it and go left, then you will find an entrance to a cave blocked by grey materia, shoot it to get in, then freeze the water to make a platform, the collectible will be soon after.

CHAPTER 3 VIDEO GUIDE
Chapter 4. The Monster Queen
This chapter is a little different from the previous ones, here you will visit 2 completely different areas depending on who you are planing on selling, however the collectibles will be the same. Below you can find the locations of all the collectibles in both paths.
IF SELLING ROCKET
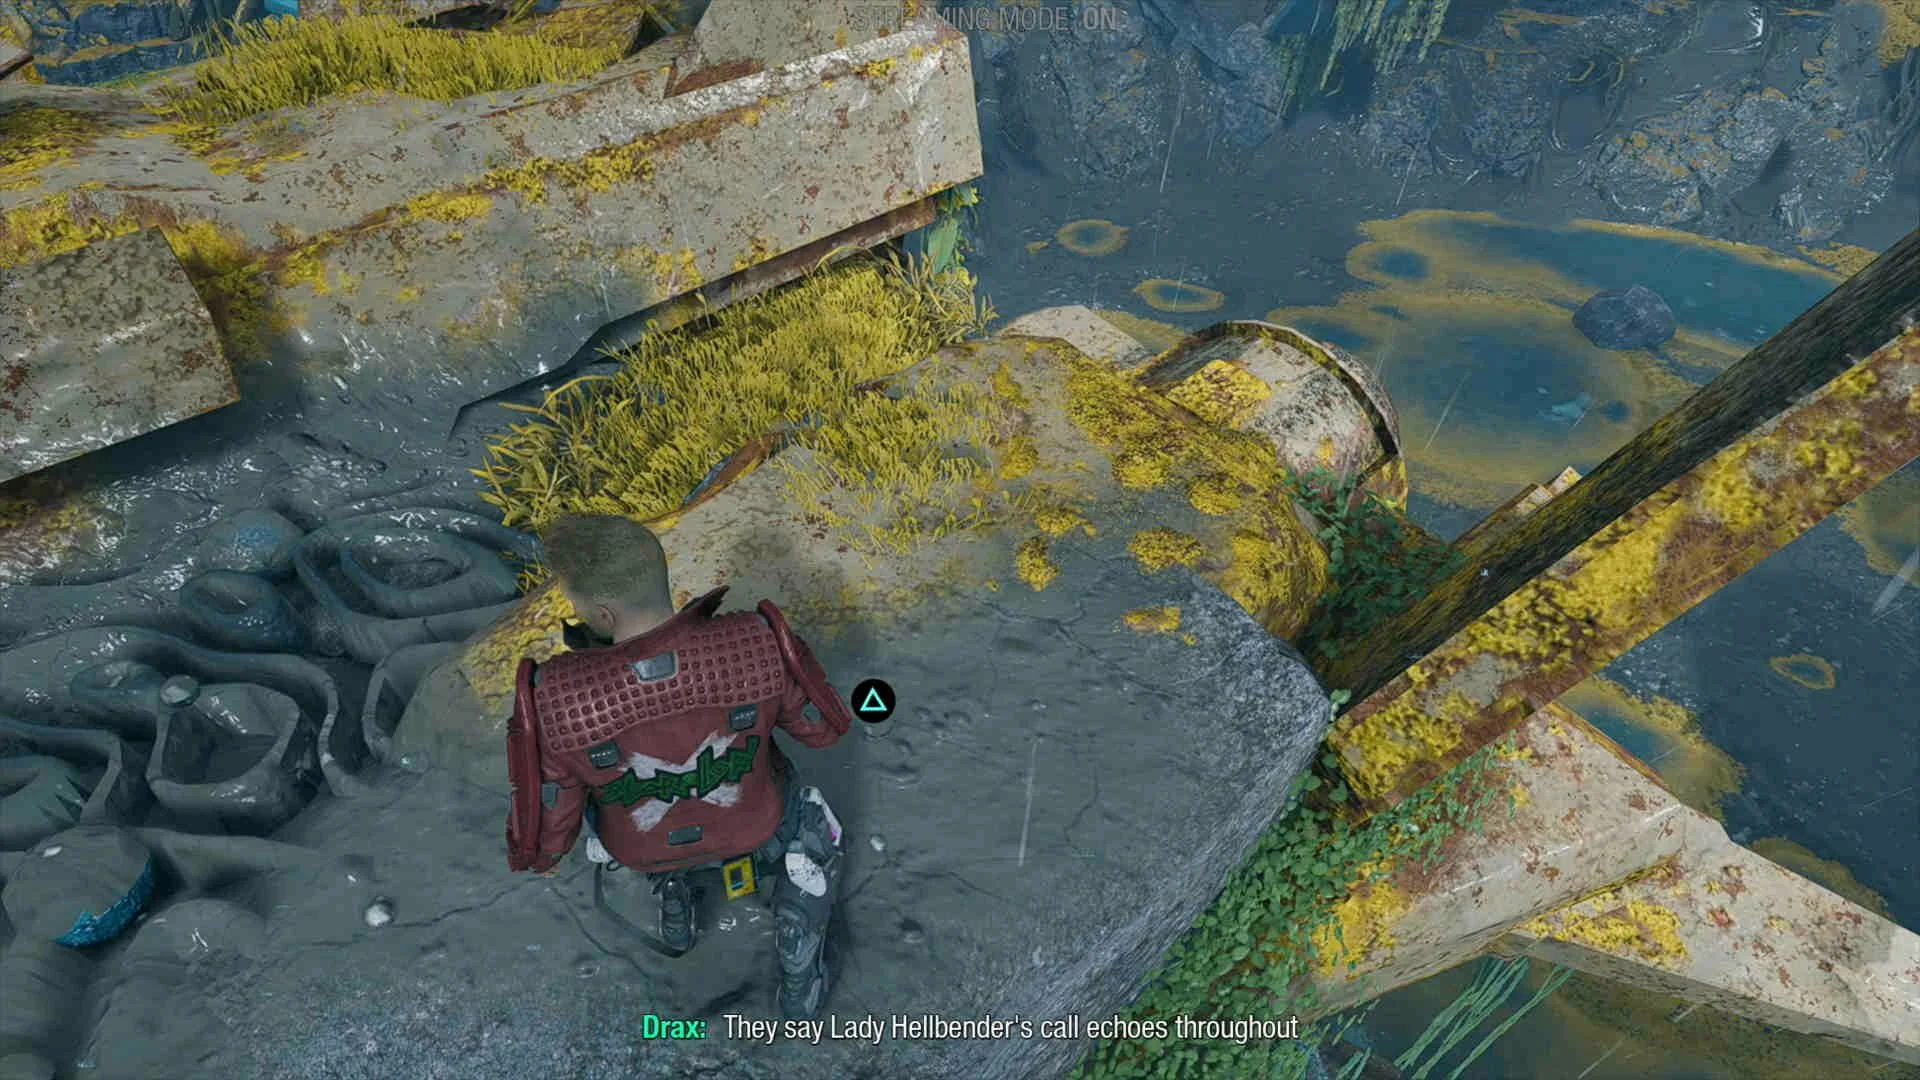
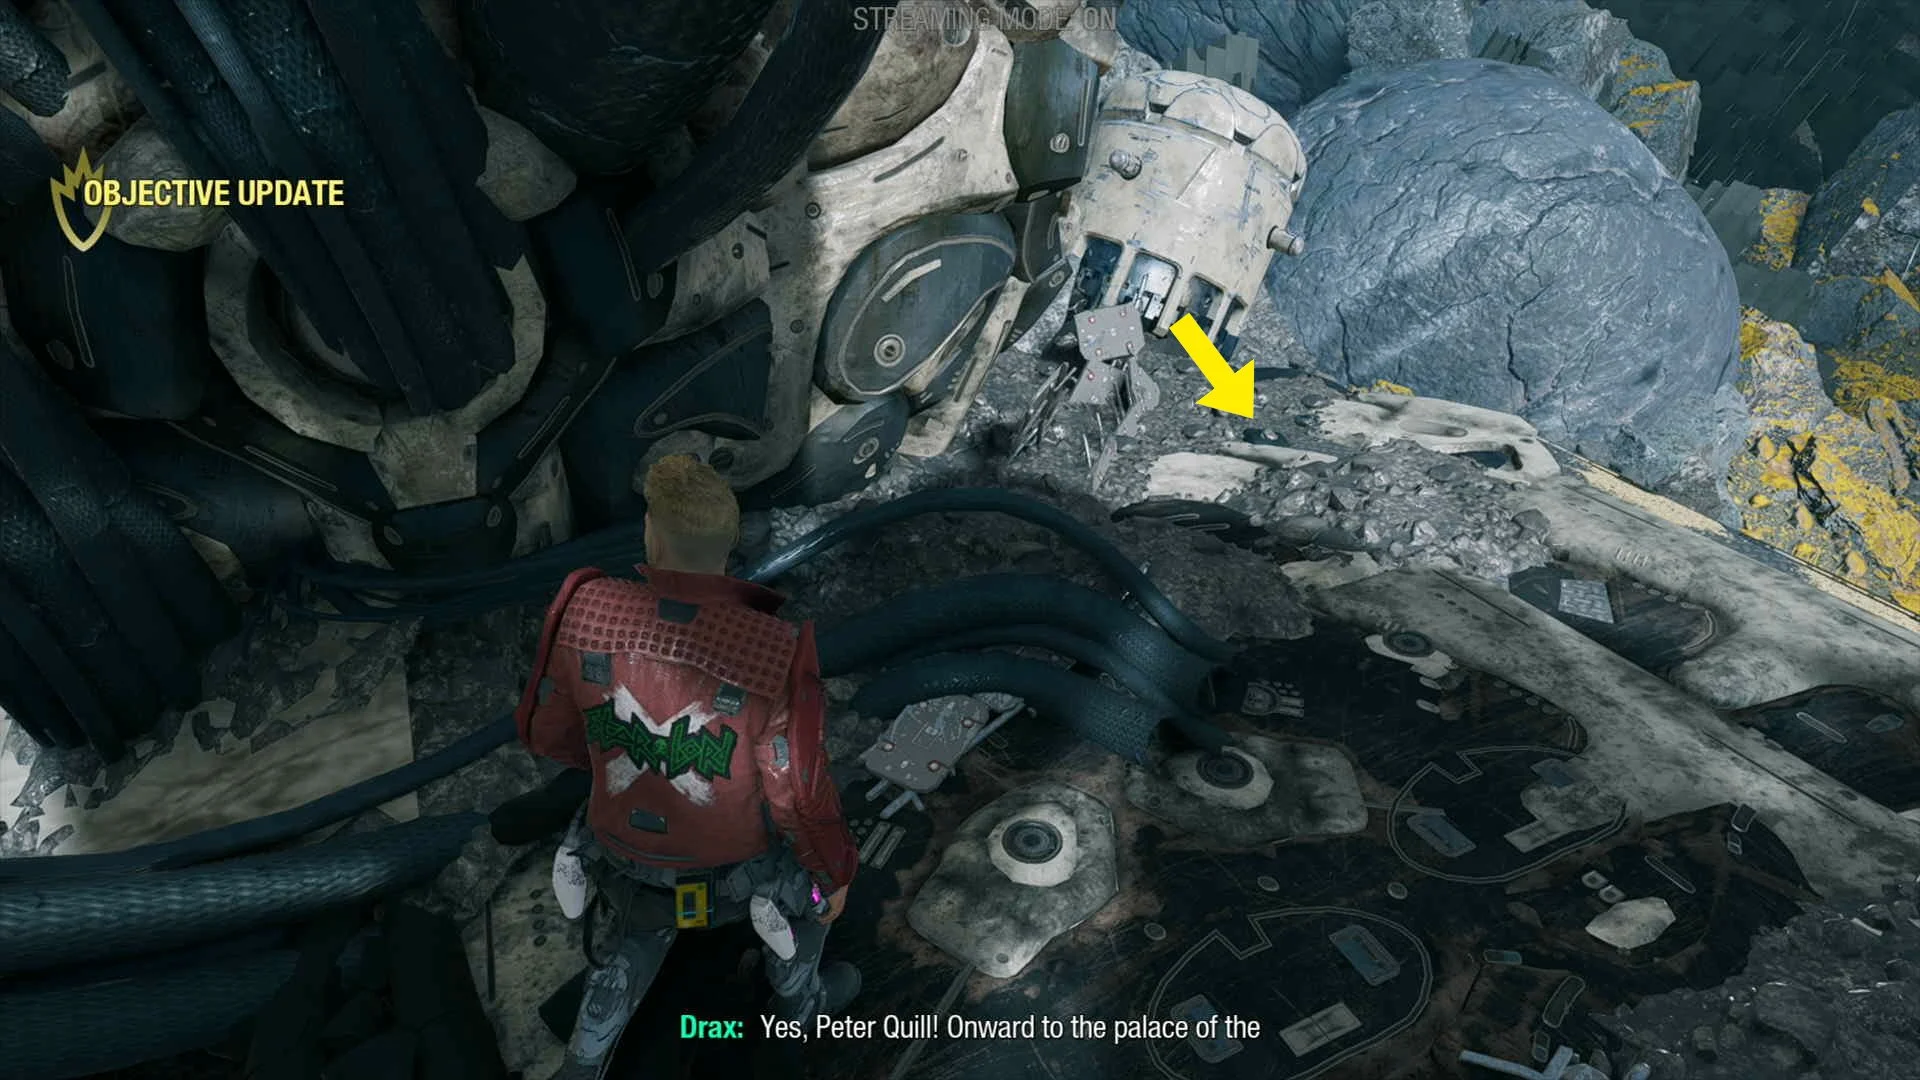
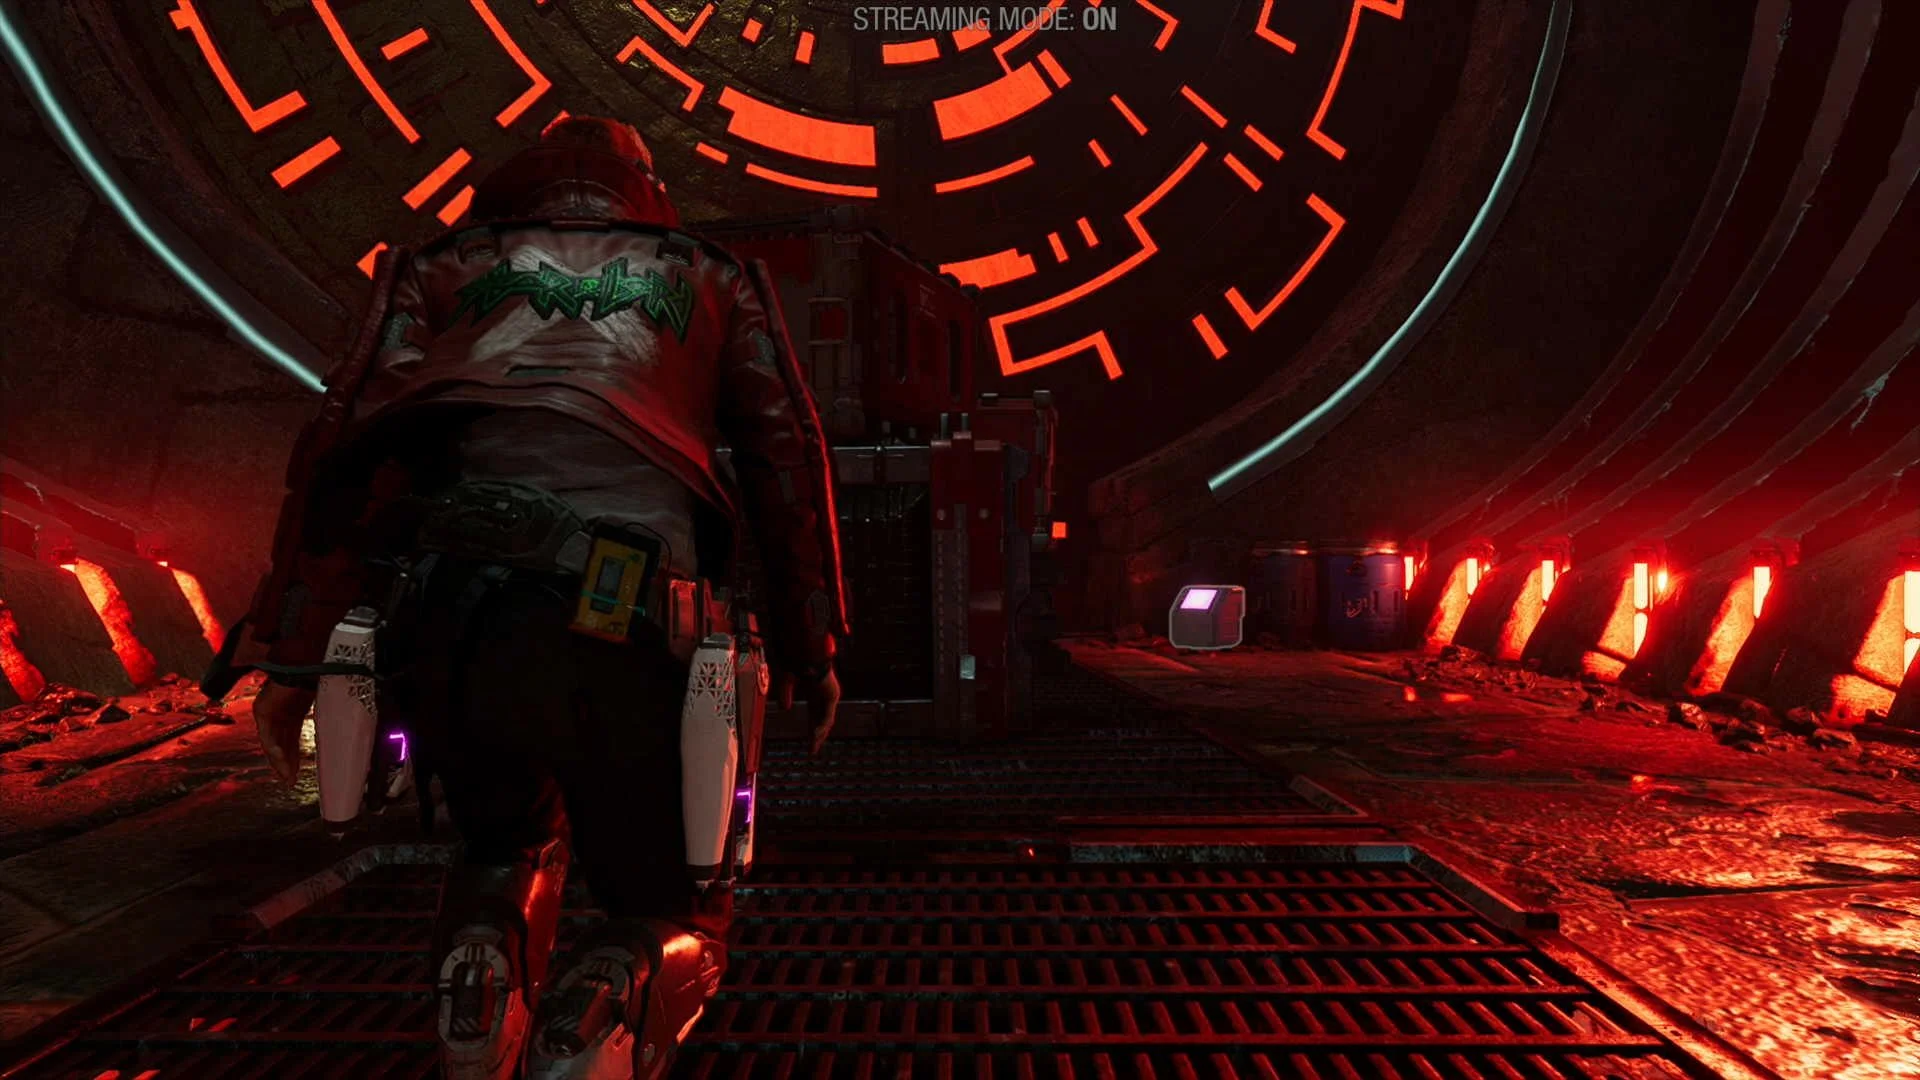
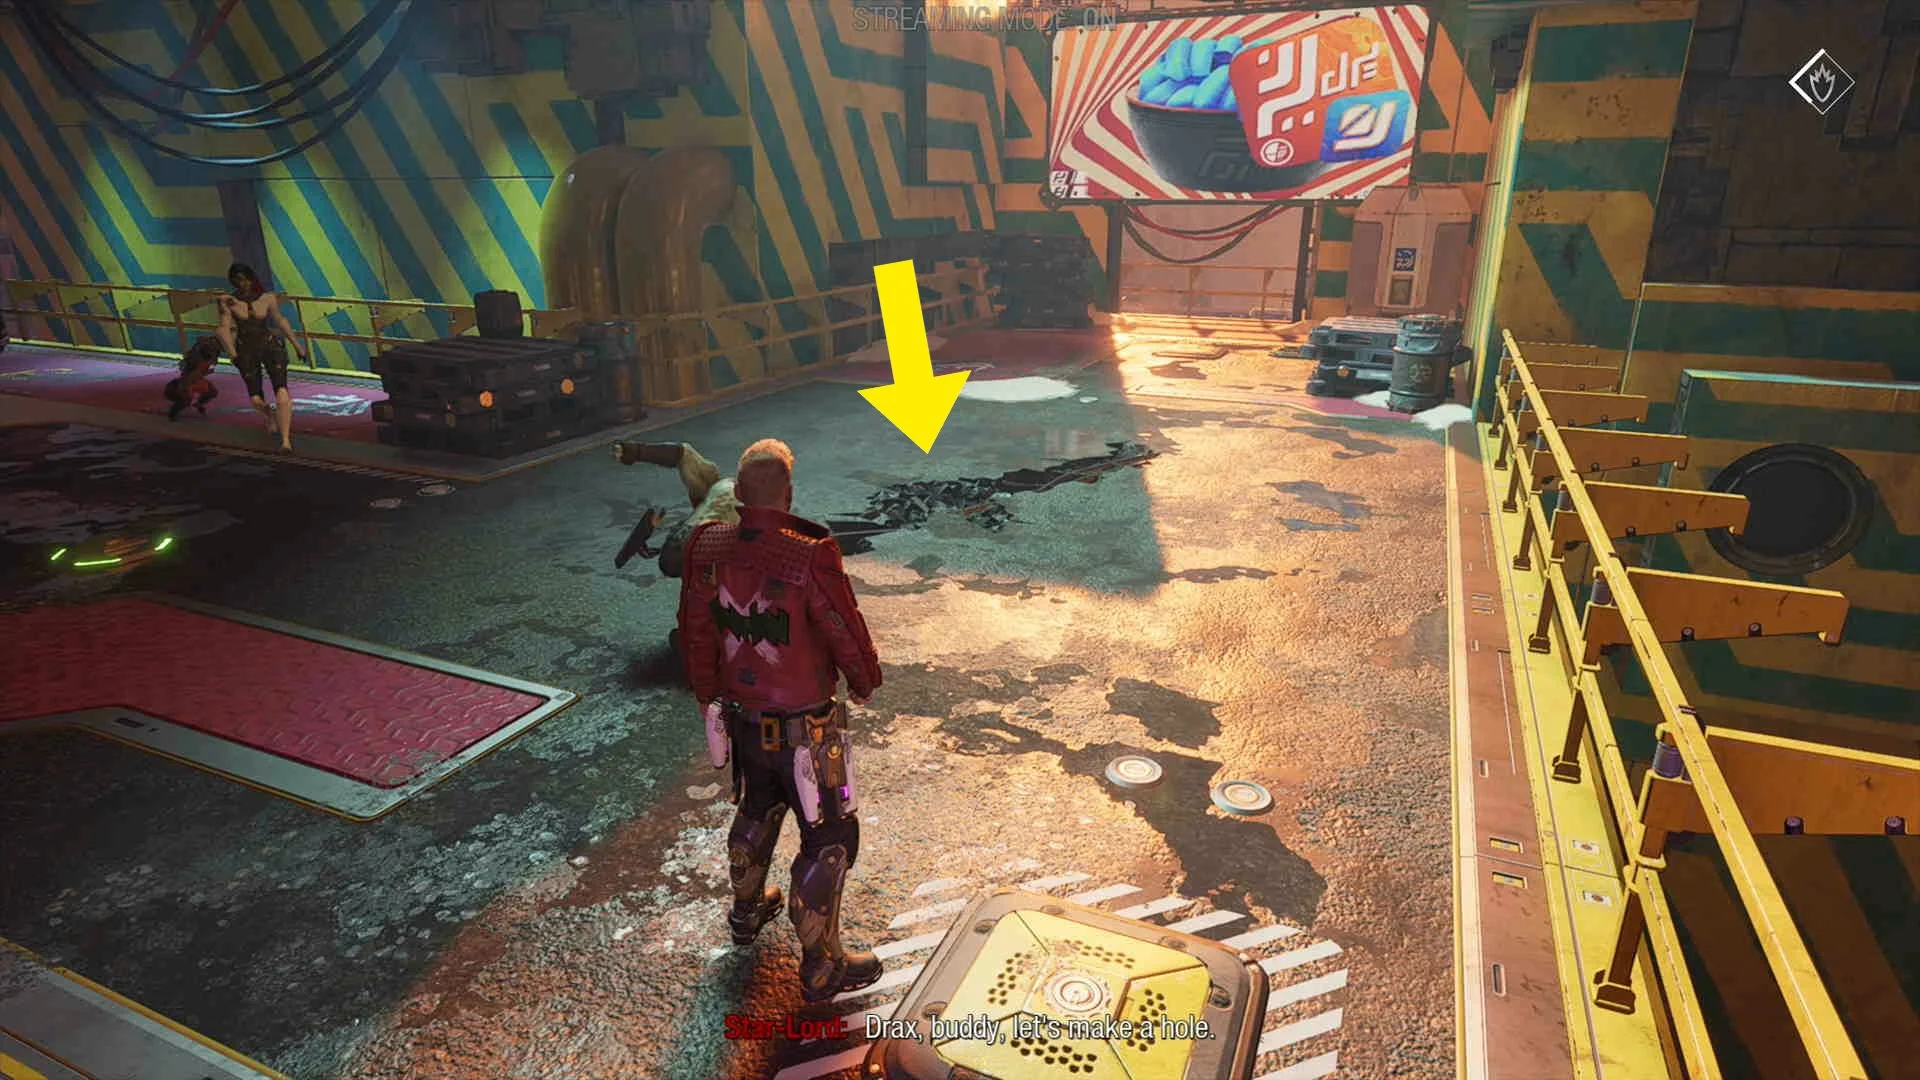
Archive 1. After the negotiation with Lady Hellbender, you will slide down into an area with a drone looking at you, here shoot the metal to your left and jump across, the collectible will be to your right just before going through a gap in between the boxes.

Outfit #1. Soon after going through the gap in the boxes, continue straight instead of taking the main path to the left, jump across some gaps to find the outfit at the end.

Outfit #2. Continue on the main path and eventually you will end up in a sewer area, once you get to a fork in the path, take a left to find the outfit.

Archive #2 & Guardians Collectible #1. The final 2 collectibles can be found in the vault room.
IF SELLING GROOT
Outfit #1. From the entrance of the throne room go around the left side until you see the outfit.


Archive #2. From the entrance of the throne room, go around the right hand side until you see the archive on the small wall.

Outfit #2. After going down the elevator into the tavern area from the throne room, jump over the table to the right and then squeeze in behind the guard to find the outfit at the end.


Guardians Collectible #1. After the tavern area, you will come to a circular room with a hole in the middle, take the door on the left and find the collectible behind some boxes on your right.


Archive #2. From the circular room with the hole in the middle, this time go through the door on the right, here you will find the collectible on some hay.

CHAPTER 4 VIDEO GUIDE
Chapter 5. Due Or Die
Compendium Item #1. You can find this item on the floor in Star-Lord’s room on the ship at the start of the chapter (only if you found it in chapter 3), exhaust all the dialogue to make it count.
Compendium Item #2. Found at the start of the chapter, in Gamora’s room on the ship (only if you found the ring in chapter 4), exhaust all the dialogue for it to count.
Archive #1. Once you get to the waiting room with 4 counters next to the start of the mission take the little door on the left, here you will find the archive on the table.

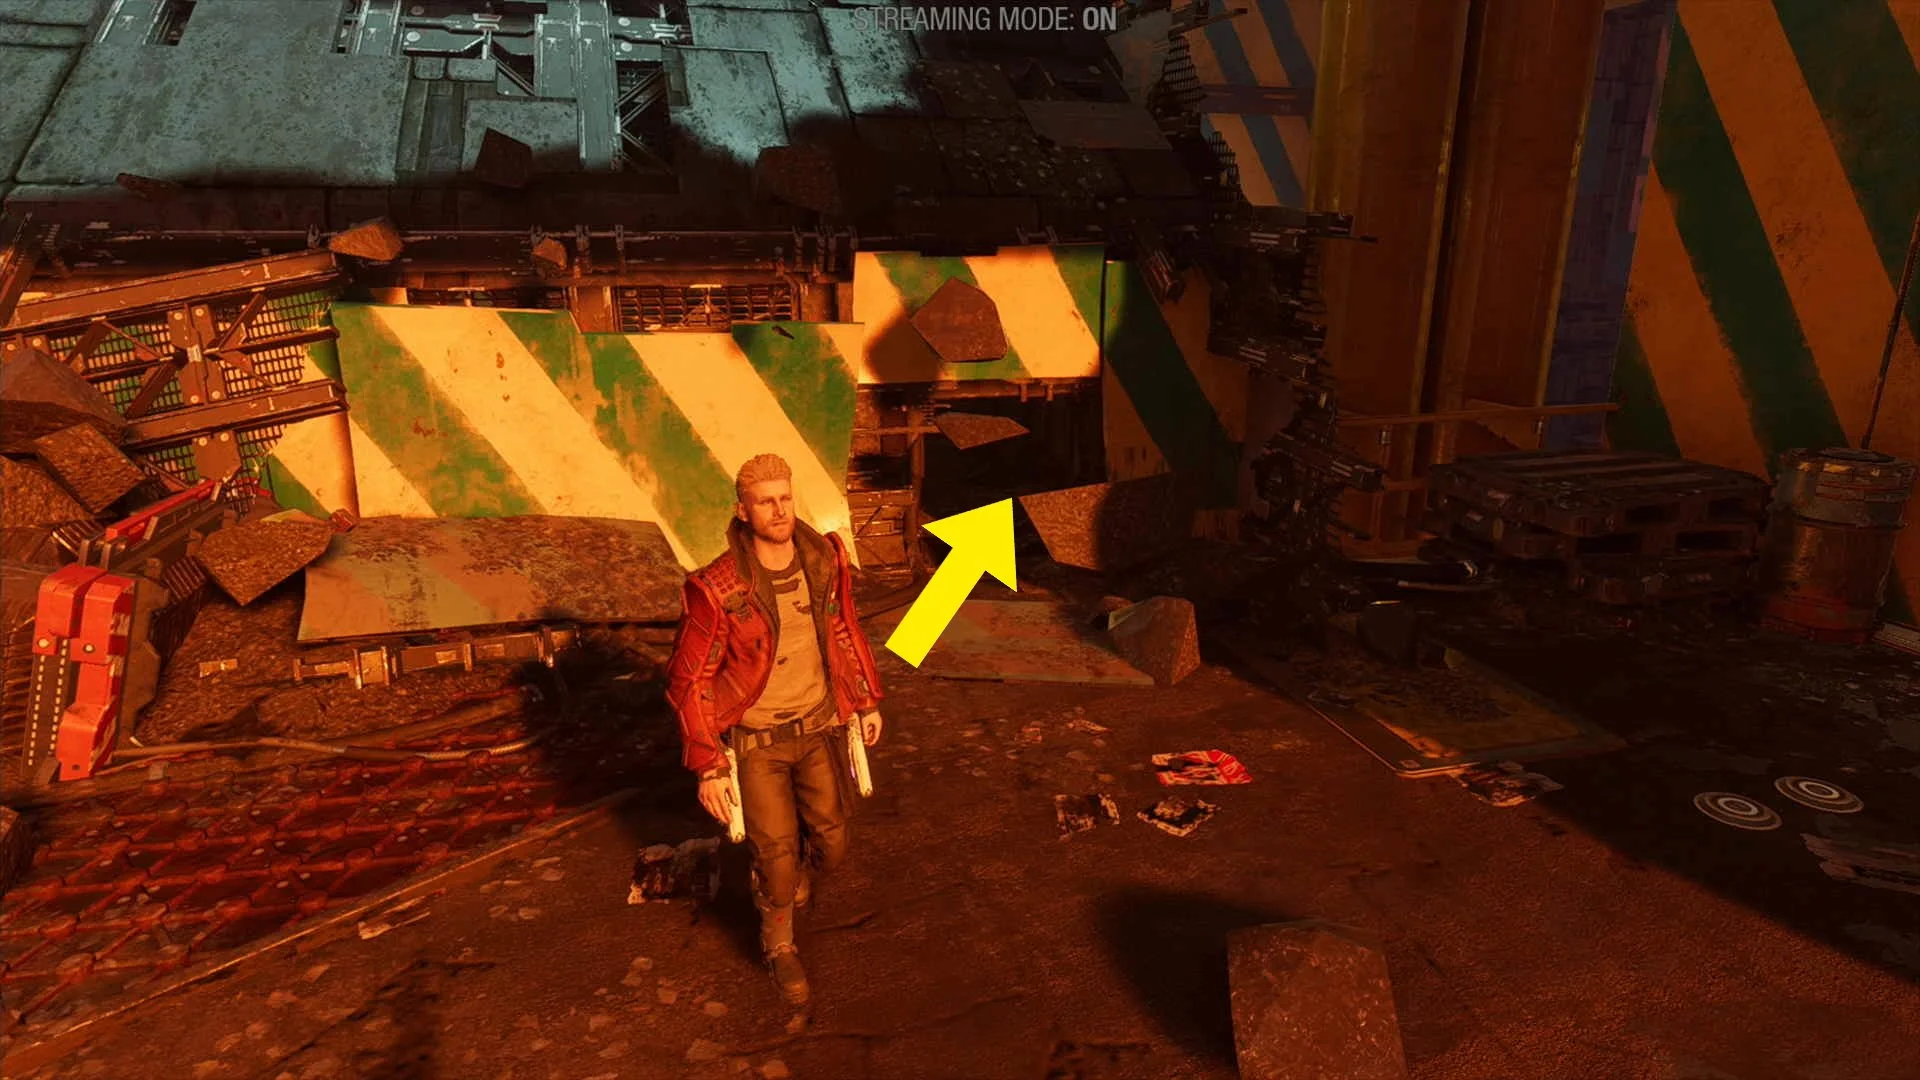
Outfit #1. In the same room as the previous collectible, break open the vent so Rocket can enter it, now head back to the waiting room and reroute the power to the other little door on the left, the collectible will be inside.


Guardian Collectible #1. Now continue on the main path for a little bit until you get to a control room, here you will find the collectible on the floor to the left.
Archive #2. Very shortly after leaving the control room you will come to an area with a red light, the collectible will be on the ground to the right next to some boxes.
Archive #3. On the desk in the round blue room (part of the main story path).
Outfit #2. After fighting off a few hoards of enemies in some halls, you will come to a room with yellow lighting (same room you will have to escape through the ceiling), here look for the collectible behind a forklift.

CHAPTER 5 VIDEO GUIDE
Chapter 6. Between A Rock And A Hard Place
Archive #1. In the bar at the start, where you talk to Lipless.
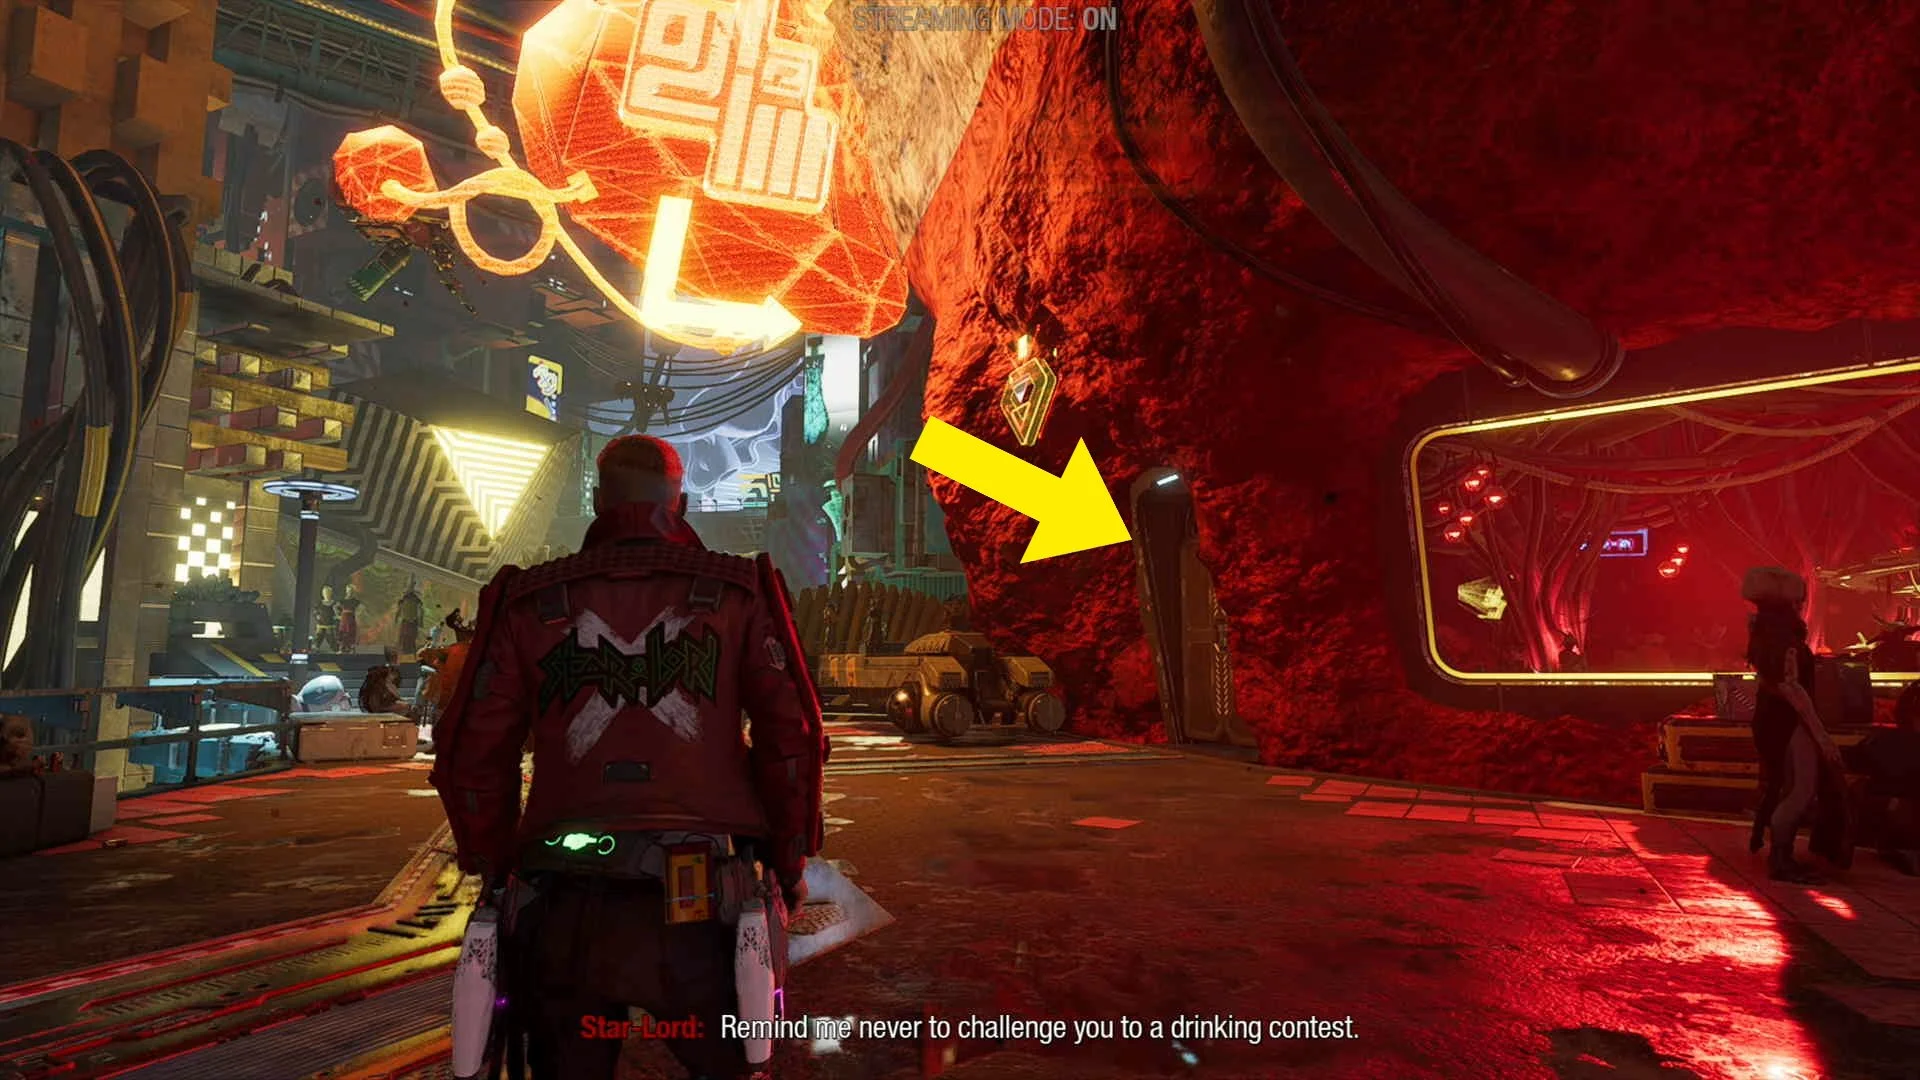

Archive #2. Exit the bar through the back door, now go down the set of stairs to your right, then another set of stairs next to a red NPC, the collectible will be down these stairs.
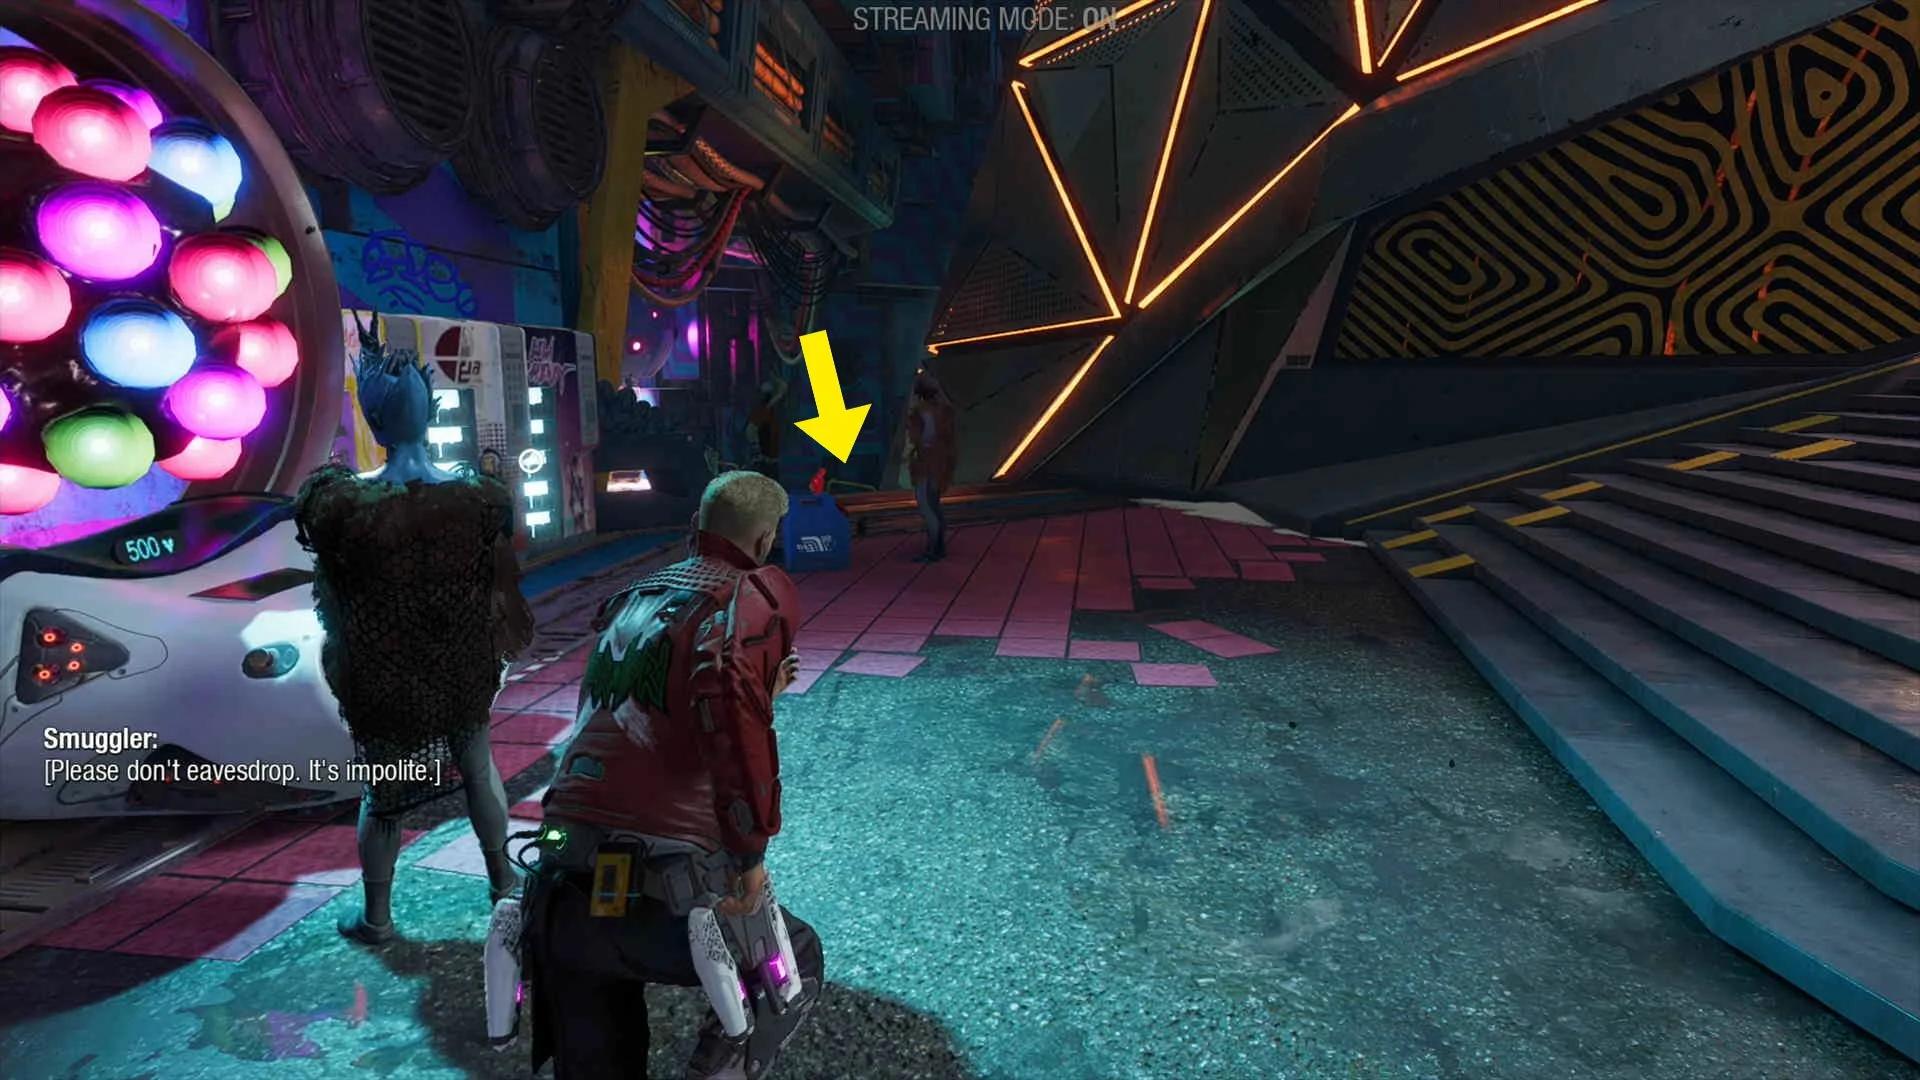


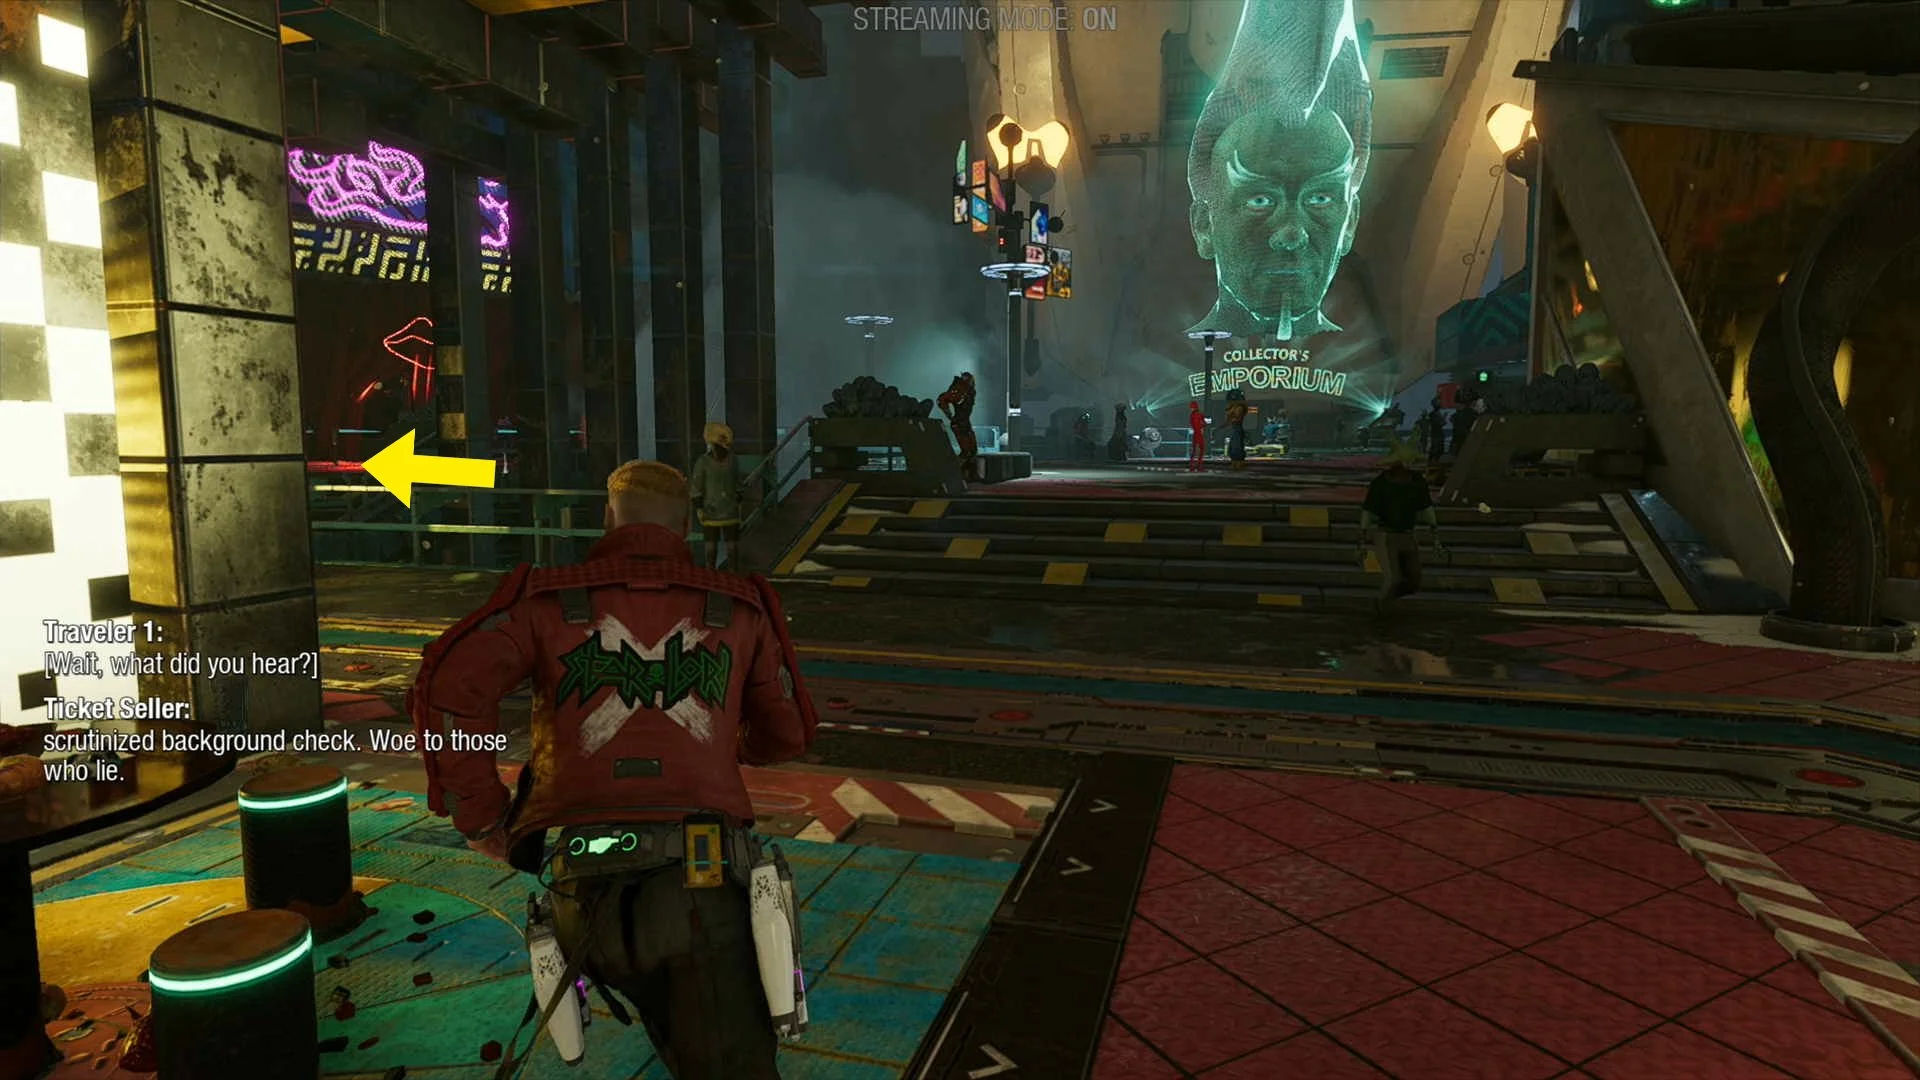
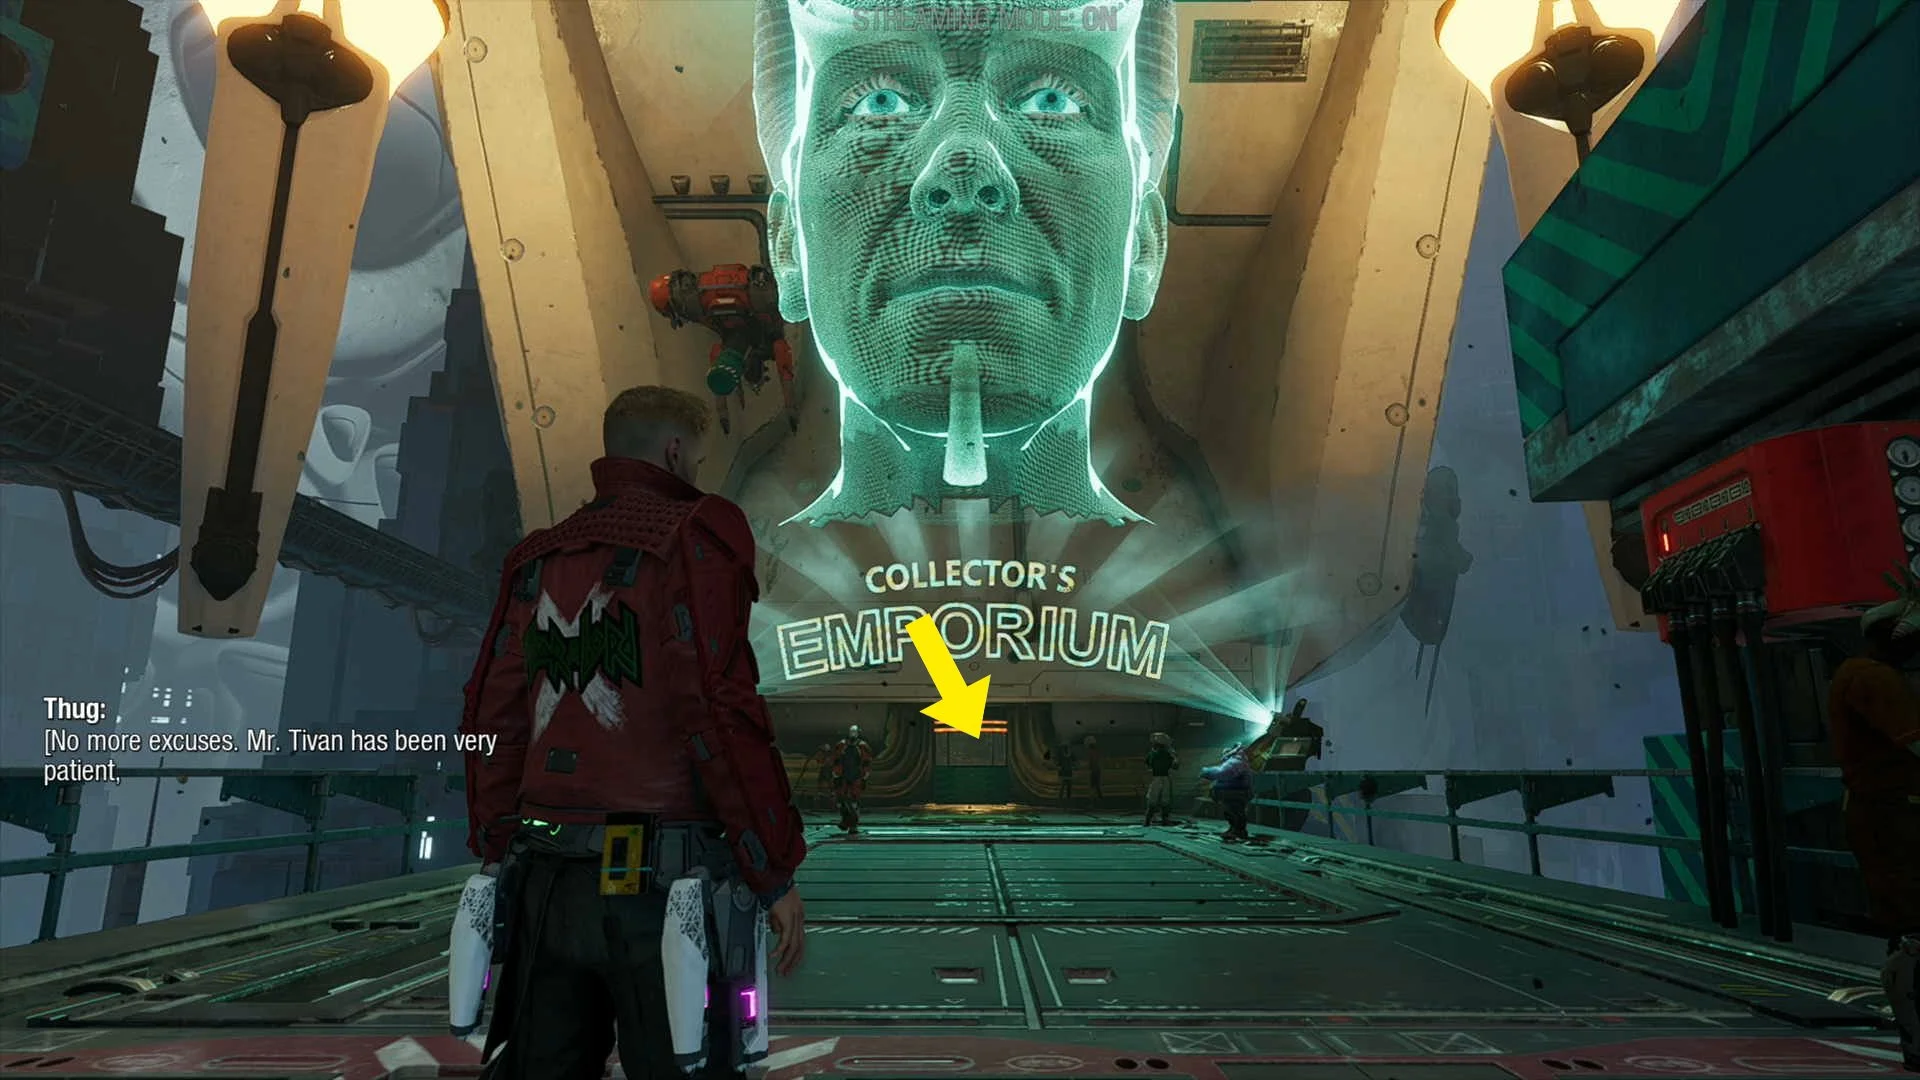
Compendium Item #1. Sold at the lottery ticket stand for 1000 Units, you can find it just to the right of the plaza in front of the massive holographic head.
Compendium Item #2. Bought from the junk dealer, he can be found by taking a left just before the plaza with the holographic head.
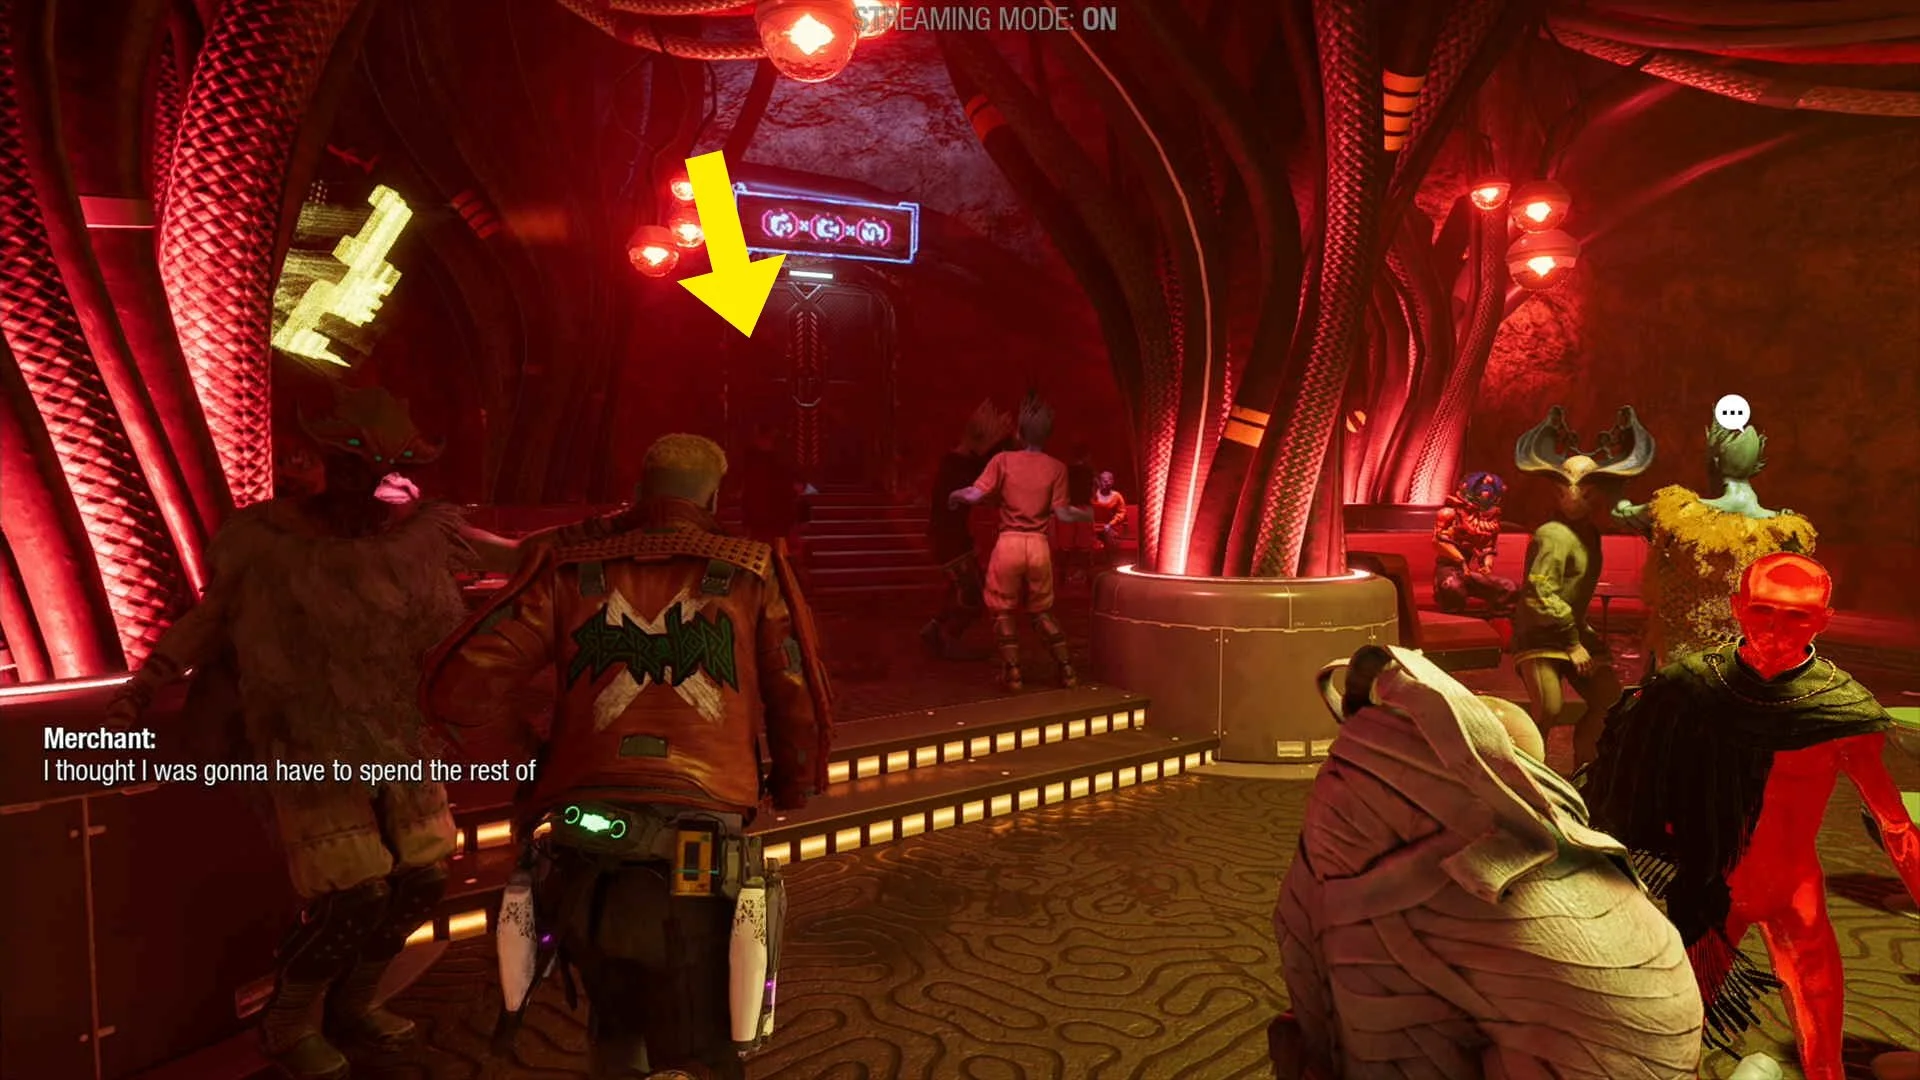
Guardian Collectible #1. In the building under the massive holographic head, inside take a right and buy the doll for 2000 units at the counter.


Compendium Item #3. Bought at the front desk in the same building as the previous collectible (this collectible can also be obtained from lipless in the bar if you choose the right dialogue, saving you 5000 Units).


Compendium Item #4-6. Leave the bar from the back door, then go up the stairs to the right, here you will find a vending machine, the machine will give you 1 out of 3 possible dolls randomly, you can only use it once per playthrough so you will not be able to get them all (don’t worry only 65% of compendium items are needed for the trophy)

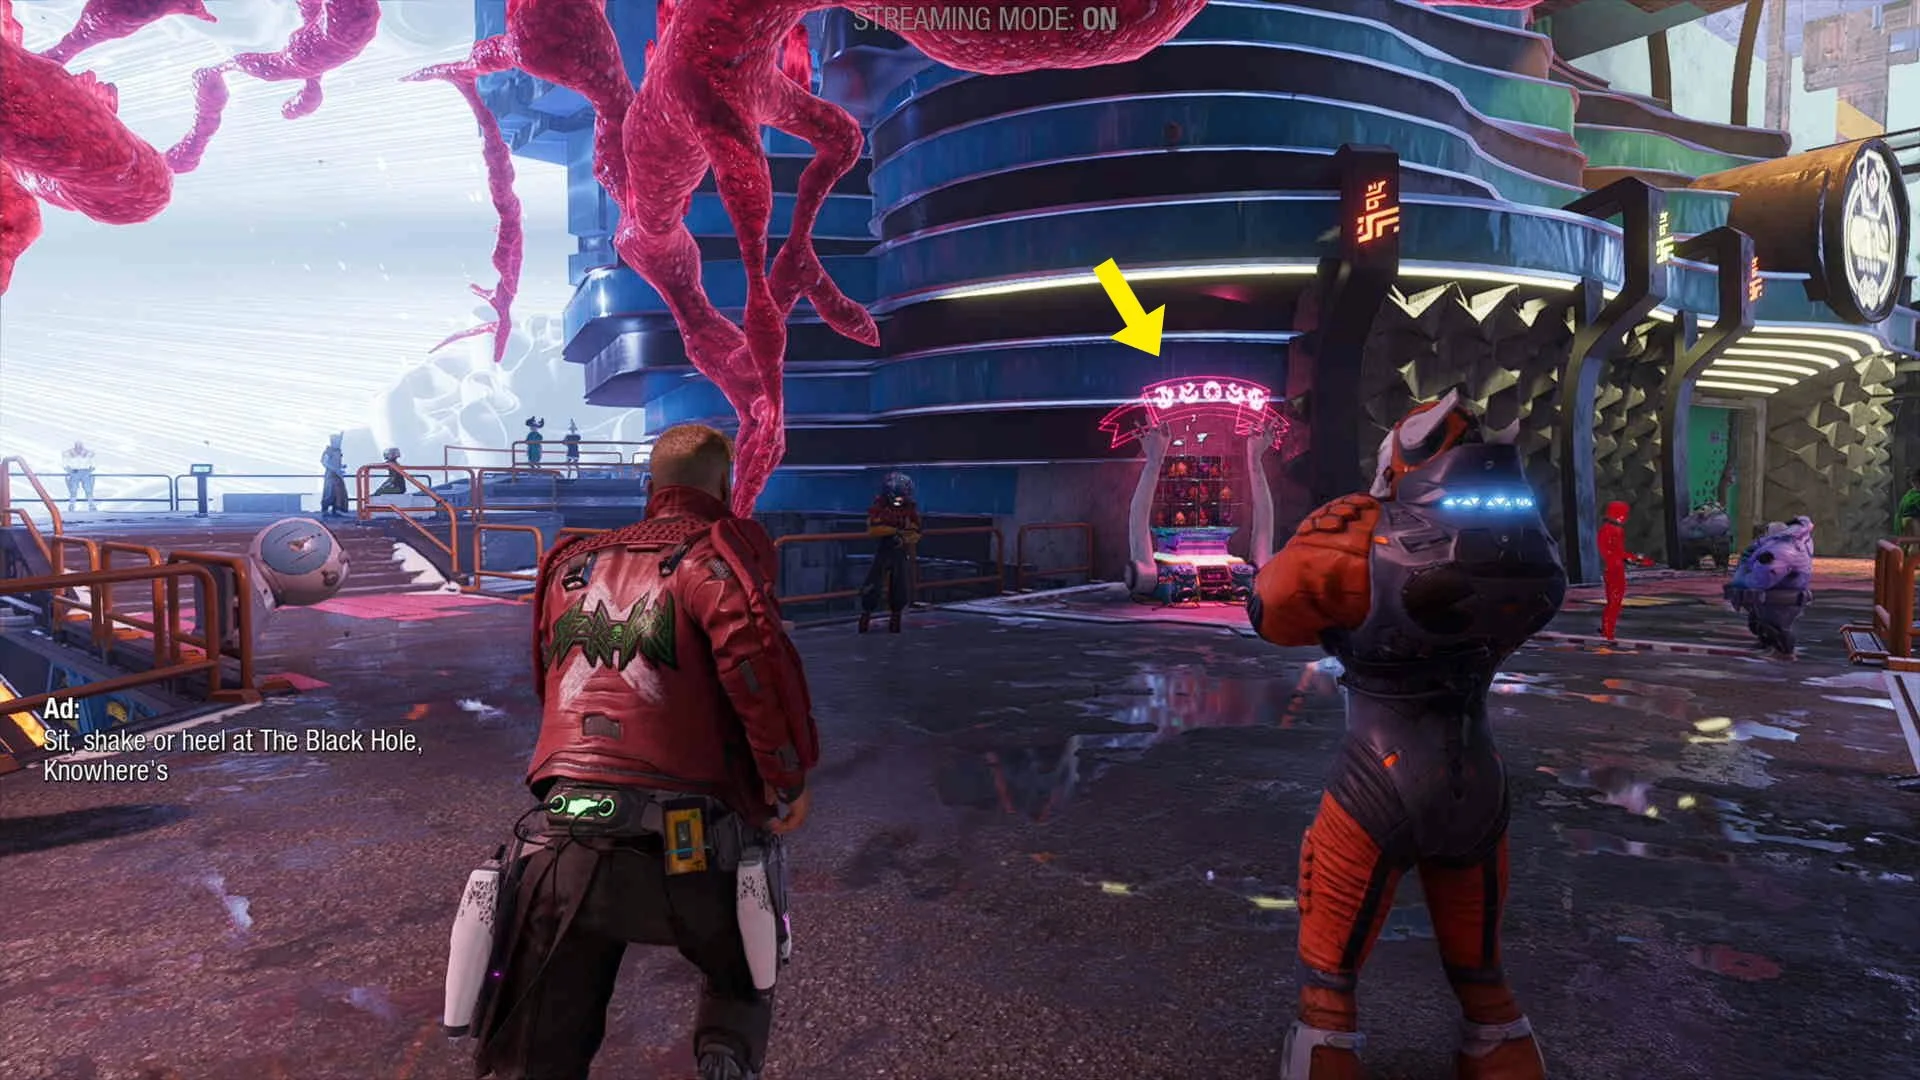
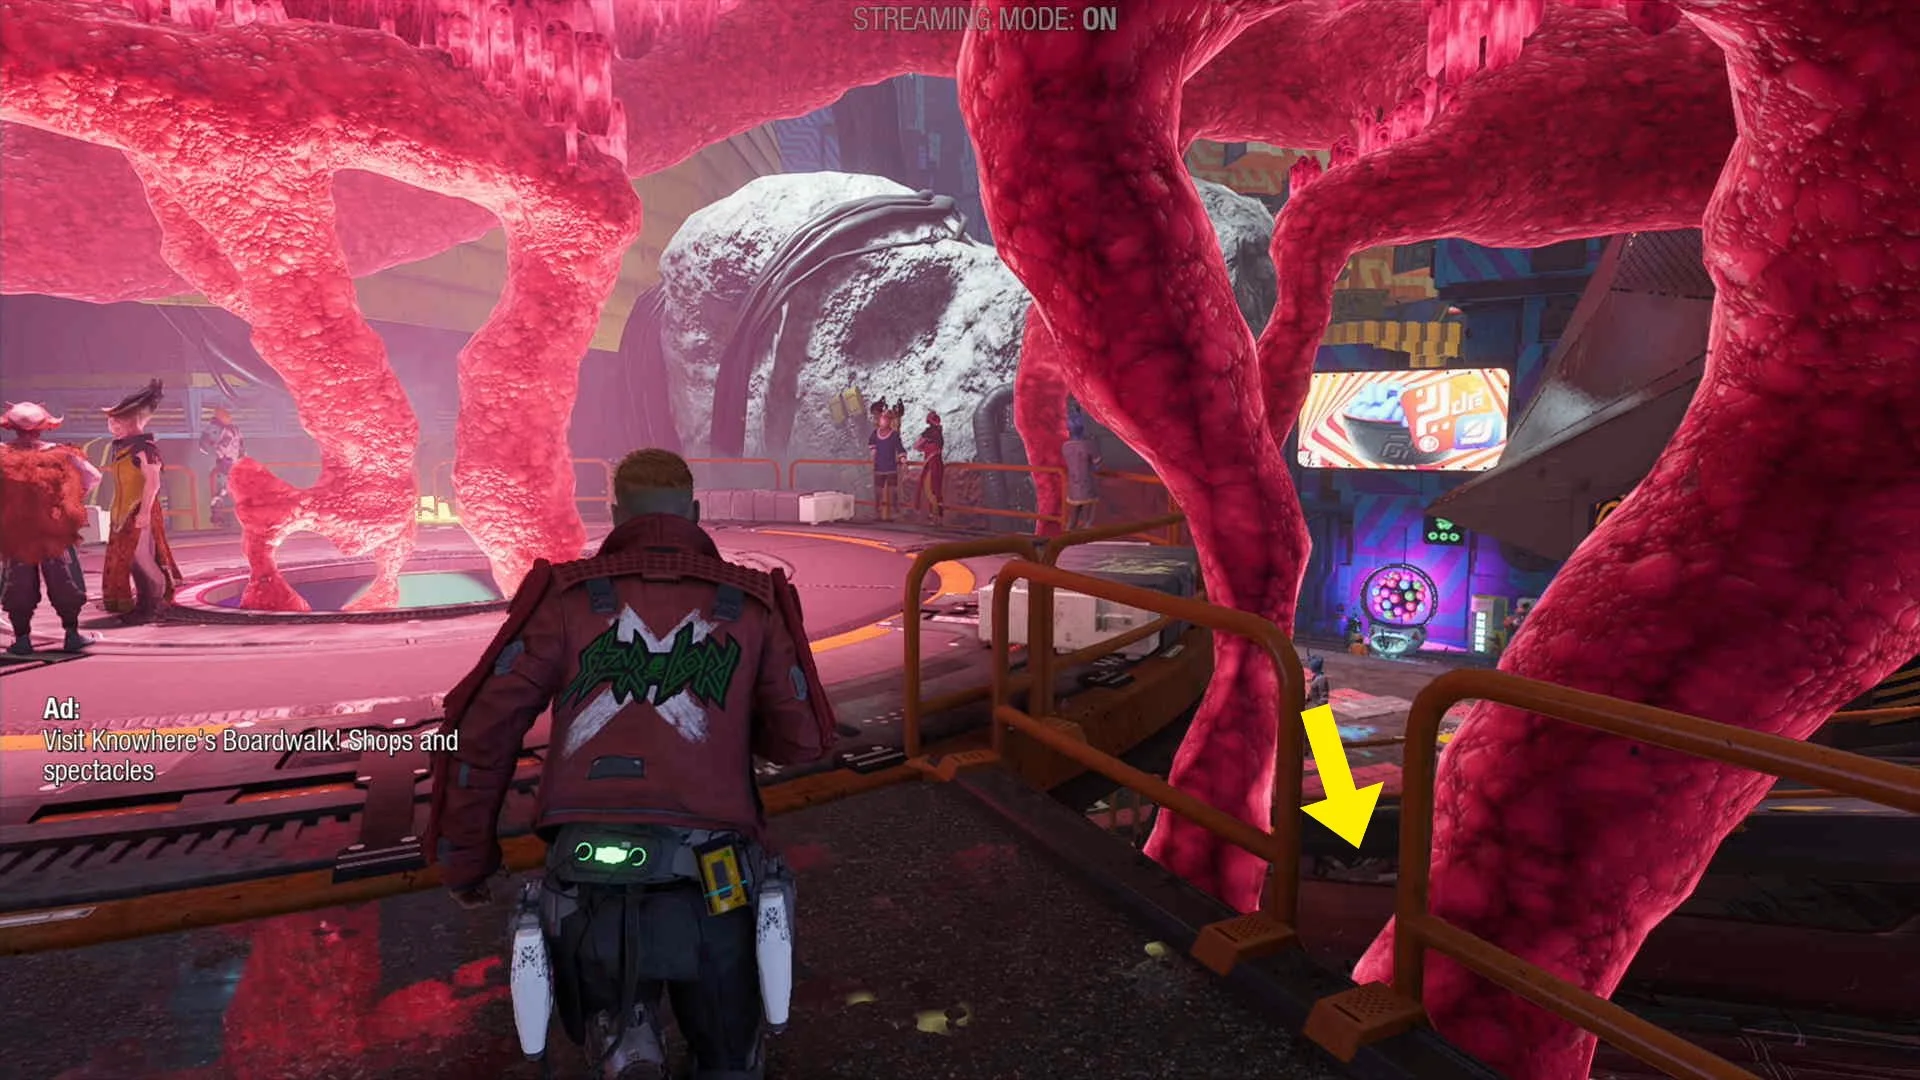
Archive #3. From the vending machine (where you can obtain the previous collectibles) turn around 180º and head up to the circular area with the red goo, the collectible will be near the hole in the center.


Archive #4. From the vending machine go left onto the balcony area where Drax is, here go to the right to find the collectible on the ground.


Outfit #1. From the circular area with the red goo (same location as archive #3), jump down to the red pipes below, the outfit is at the end.

CHAPTER 6 VIDEO GUIDE
Chapter 7. Canine Confusion
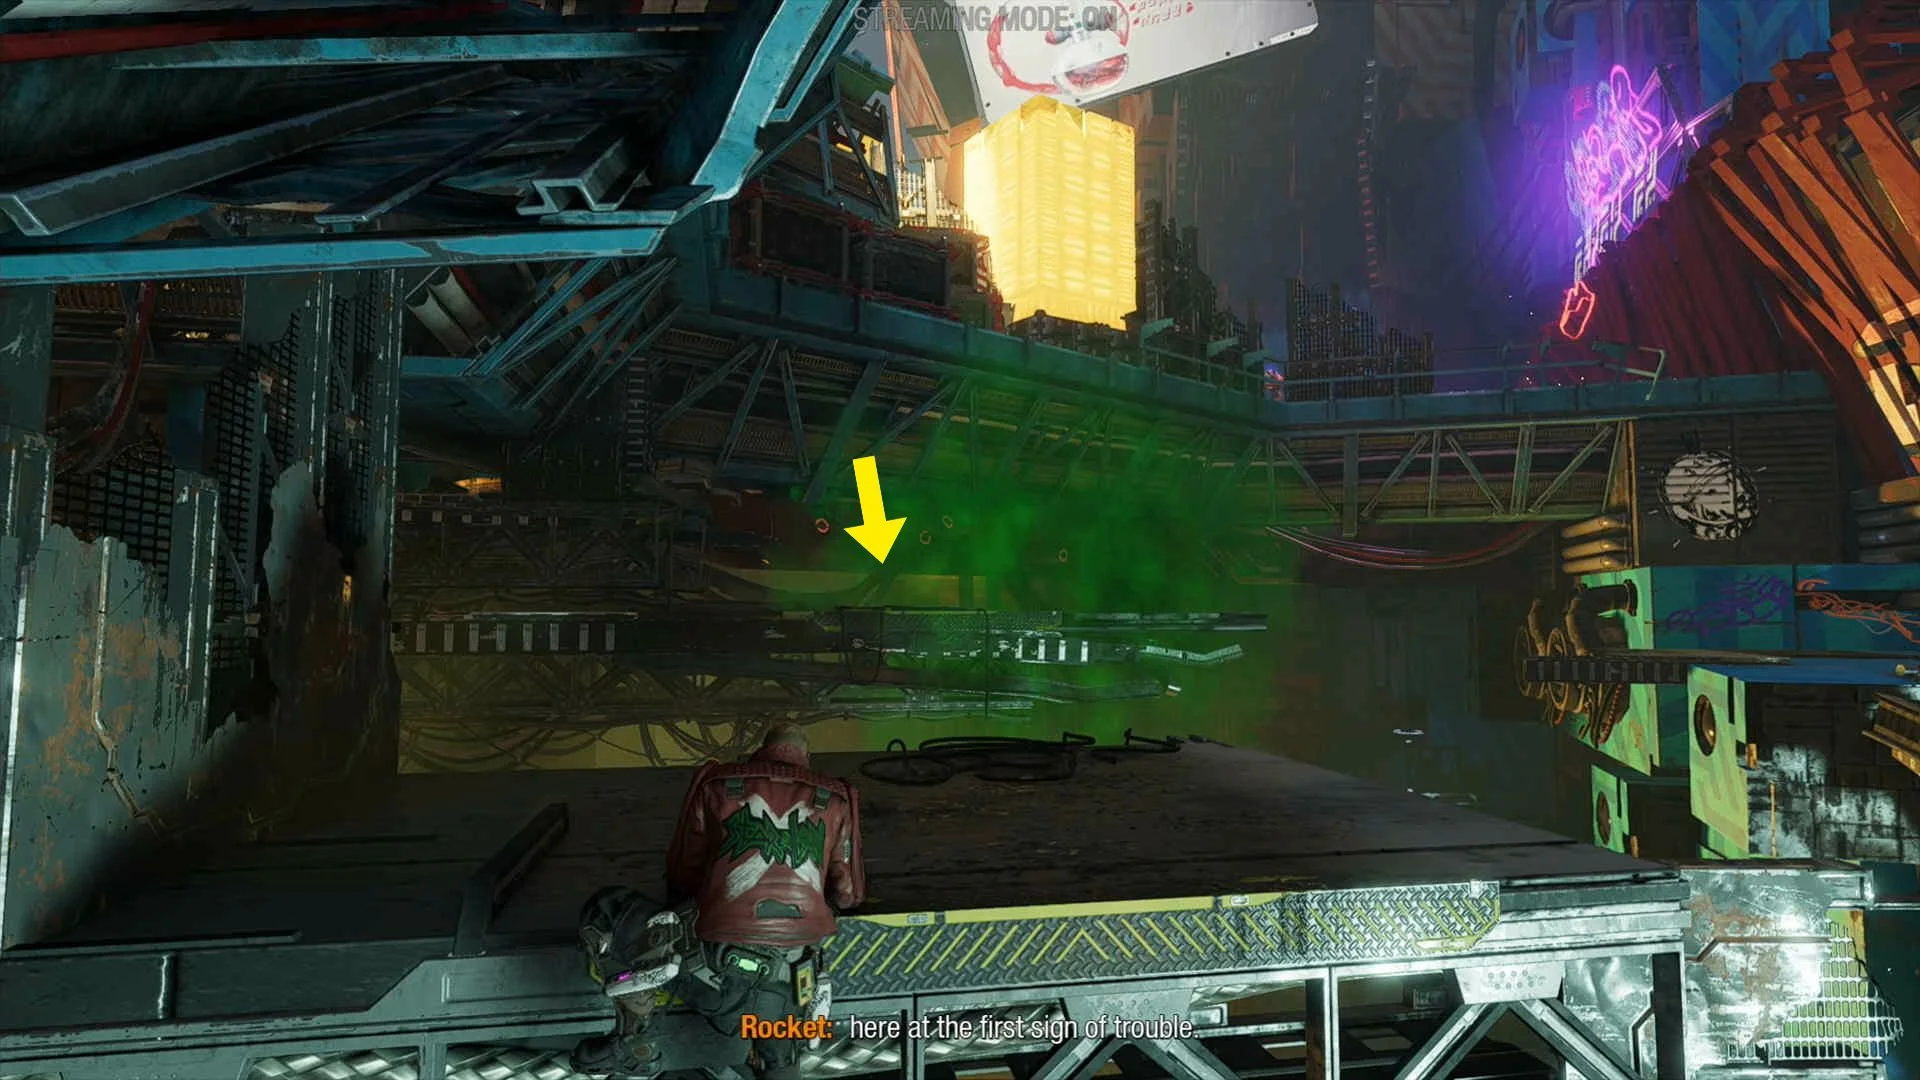
Archive #1. After opening the first door with the electric ammo, you will be in a hall with red lighting, the collectible will be on the ground in plain sight.
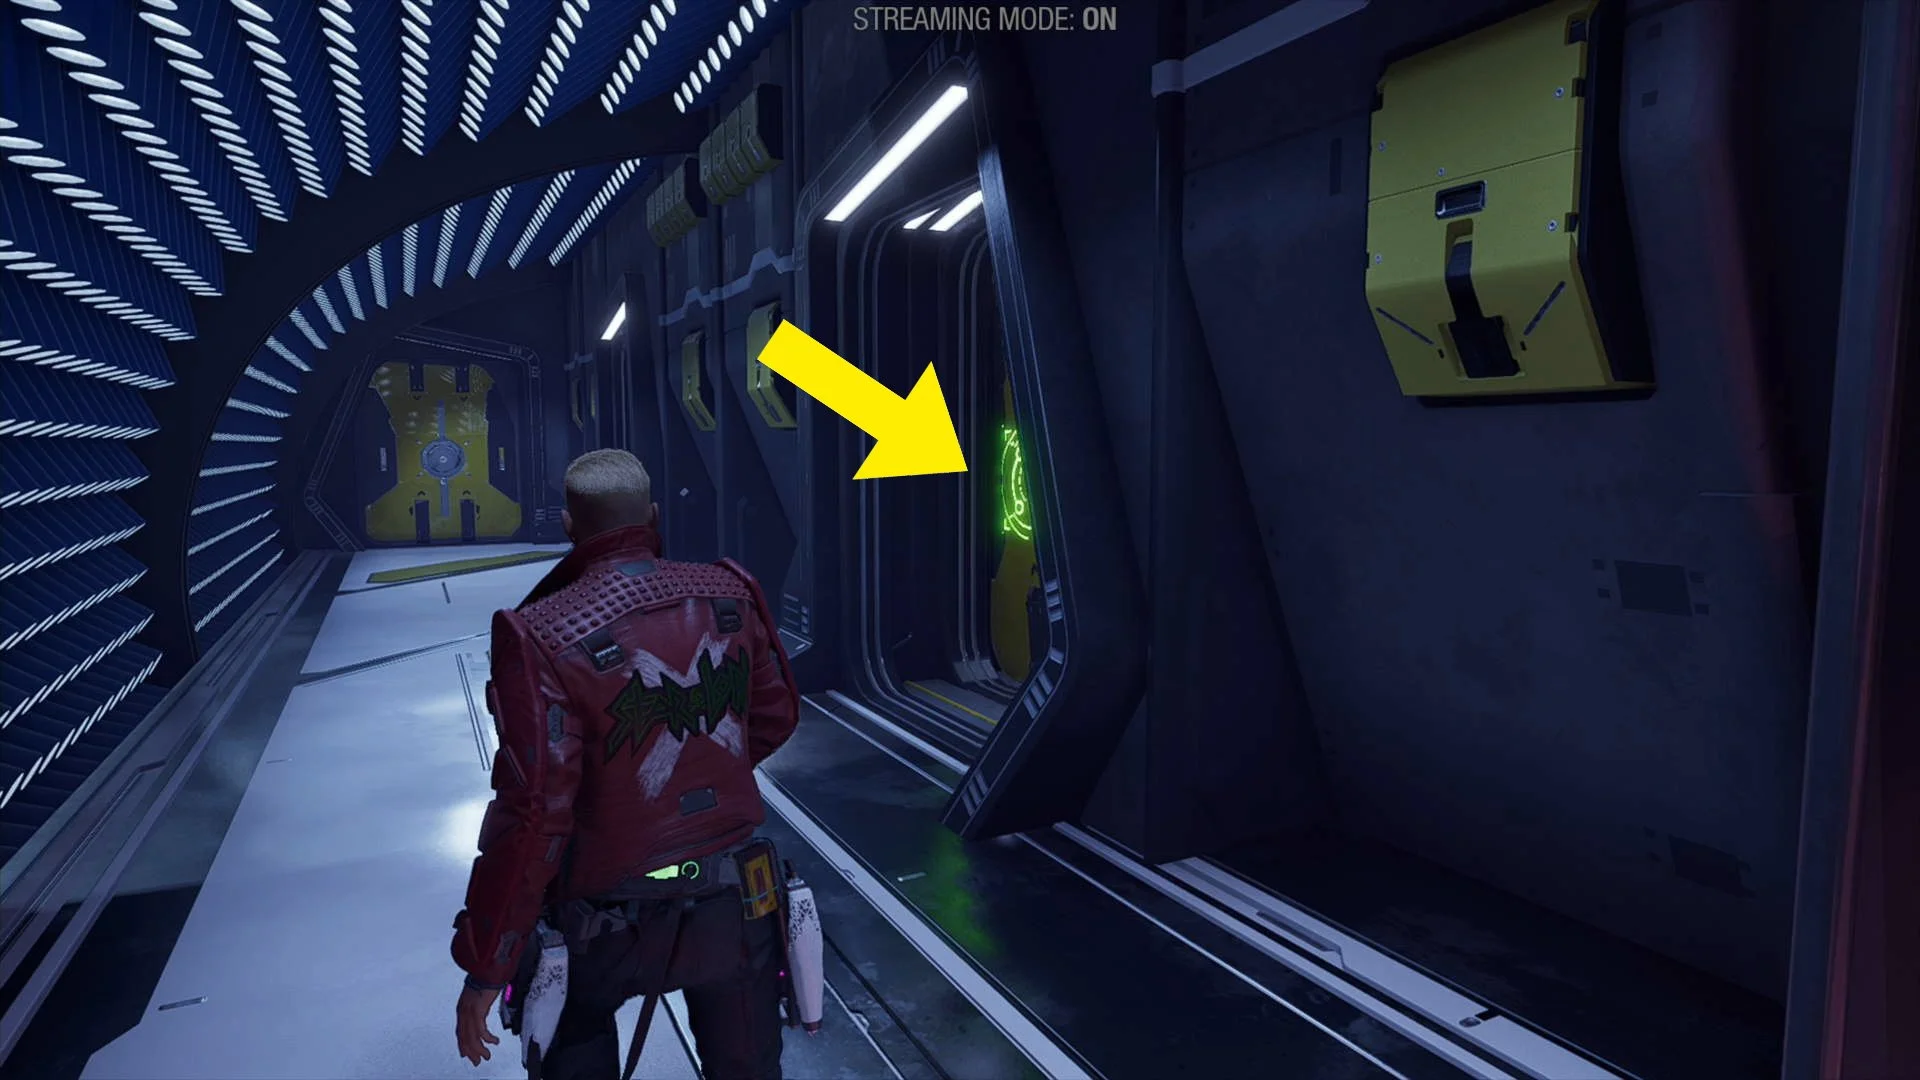
Archive #2. Soon after the previous collectible you will see a yellow door to your right, go through the door (will only open if you have Nikki’s personal key from chapter 2), now stick to the right and go to the end.


Guardian Collectible #1. From the last collectible, turn around 180º and shoot the grey goo above you, thne jump up and go around to the right until you see the collectible at the end.


Outfit #1. In the big circular room that goes up after defeating a wave of enemies, Rocket will be in the control room on the panel, from here go into the room to the left of the big circle room, here use Groot to elevate the platform while you are on it, now go through the vent, in the next room reroute the power to the small door below you, the collectible will be inside.


Outfit #2. After using Groot to make a bridge you will come to some stairs that go down, at the bottom you will see some water covered with electricity, here reroute the power so Gamora can cut through the pipes blocking the little room with the collectible in it.

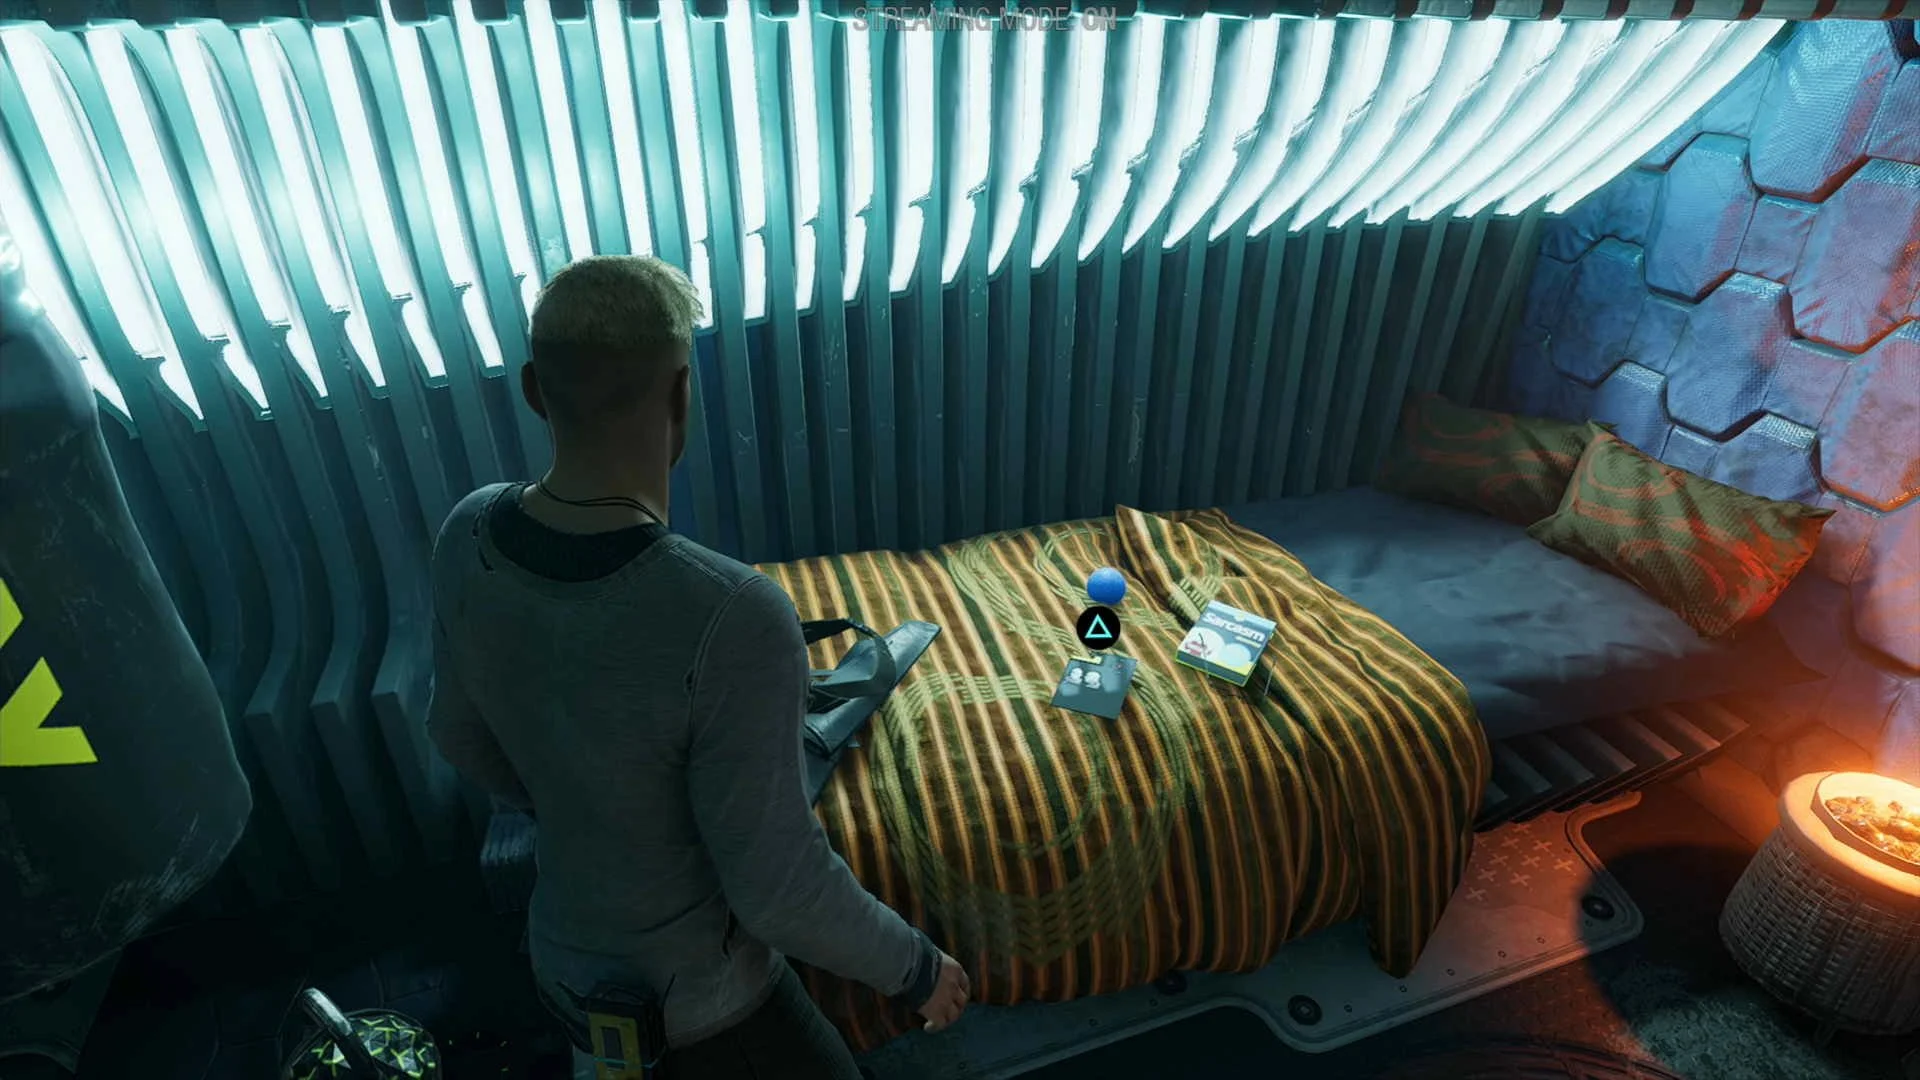
Compendium Item #1 & Archive #3. These collectibles are in plain sight in Nikki’s Room (you will go here during the main story path), the compendium item will be obtained during the cutscene and the archive will be on the bed.


Archive #4. On a barrel to your right as soon as you exit Nikki’s hideout.
Guardian Collectible #2. In Ko-Rel’s office next to the big window.
Archive #5. In the first room in the hall of bedrooms to the right of Ko-Rel’s office.

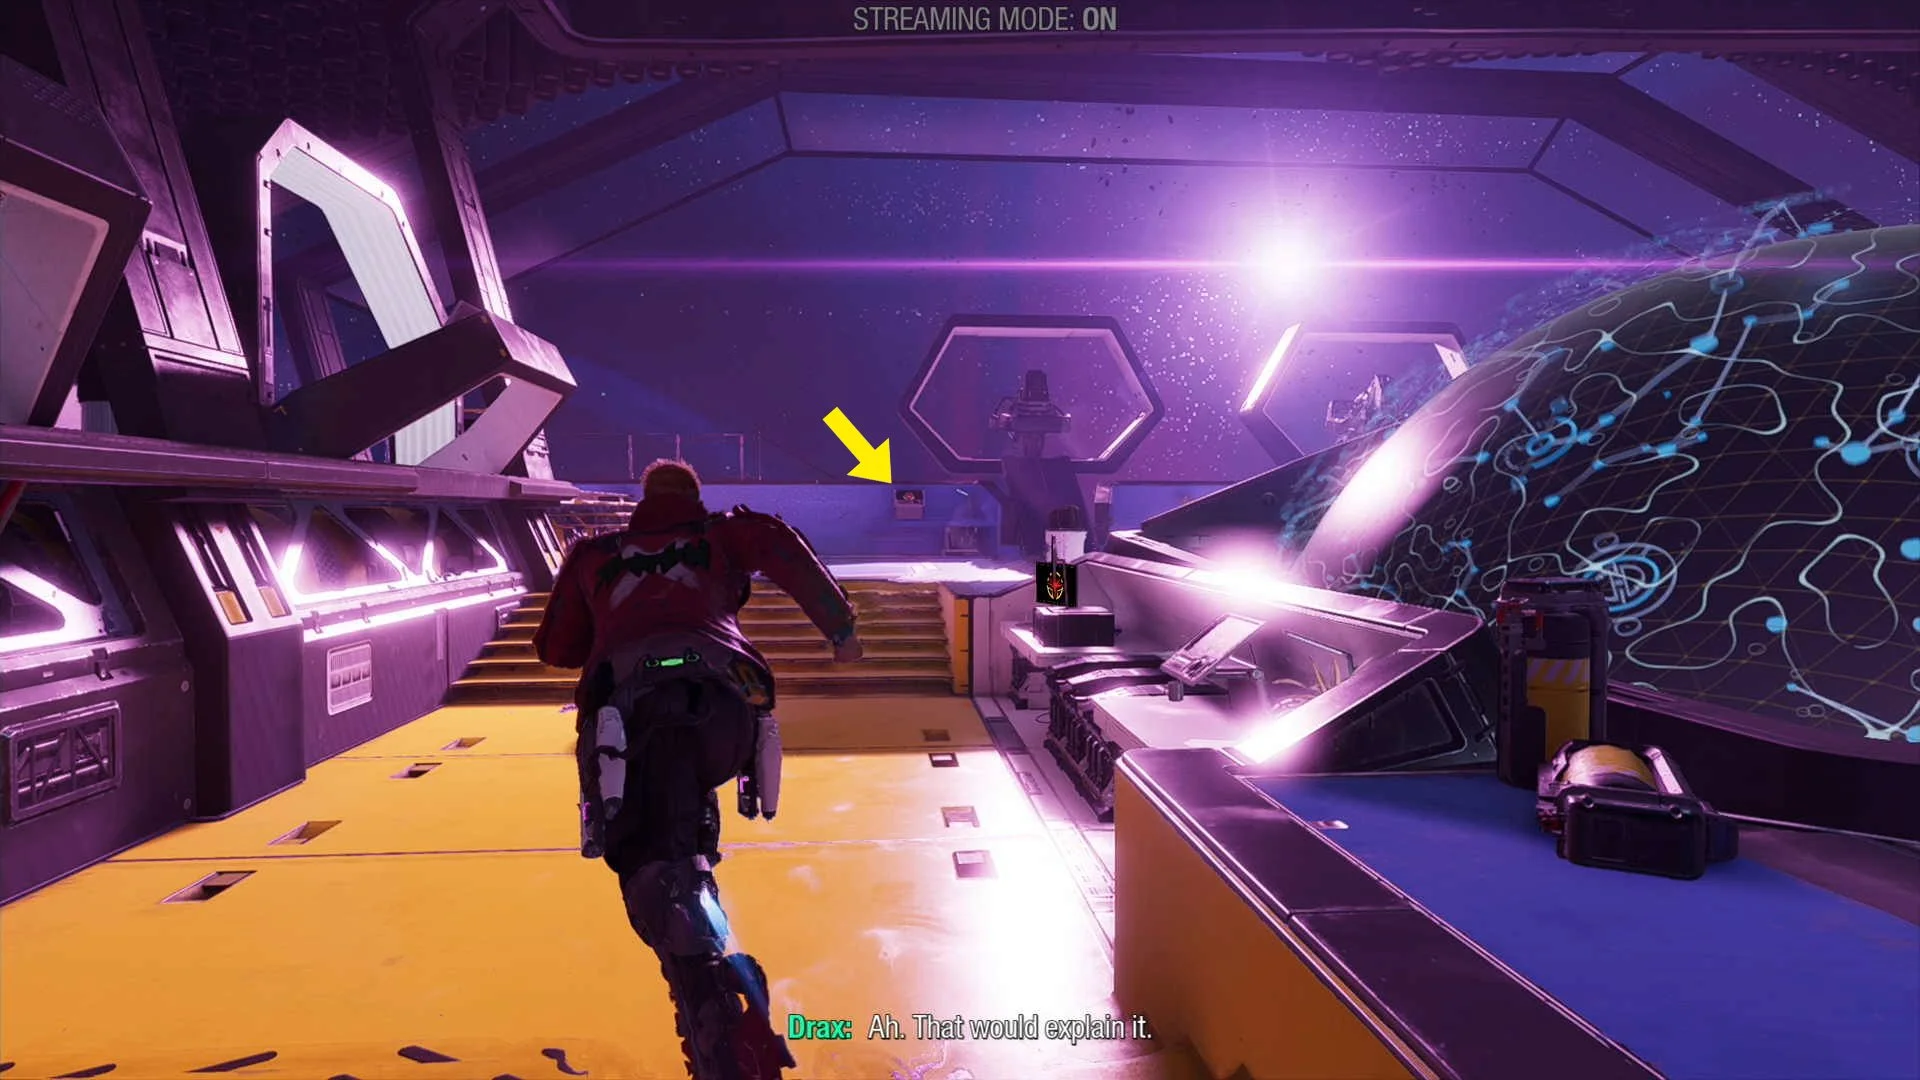
Archive #6. Found in the final room of the chapter (the one with the massive orb in the middle).
Archive #7. On the right side of the same room as the previous collectible.
CHAPTER 7 VIDEO GUIDE
Chapter 8. The Matriarch
Outfit #1. After the area where you go through the red liquid on the ground, as soon as you come out the other side of the hole you crouch through, look right and get Drax to carry the block, place it in front of the hole you just came out of, jump up to find the collectible.

Archive #1. You will eventually come to a room with a cutscene where rocket is trying to hack a computer, the collectible is in this very room.

Guardian Collectible #1. Very soon after the previous collectible you will be in an area with a workbench at the end, just before you get to the workbench climb up to the right to find the collectible.


Archive #2. Soon after the workbench you will come to a door that needs a battery to open, you can find it close by, to the right of the door, next to a corpse of a robot, the collectible is also next to this robot.


Outfit #2. Eventually you will come to a massive golden area where you will ride platforms and defeat enemies, after you ride the 3rd platform you will be in a circular room, the collectible will be in this room on the opposite side from the platform.


CHAPTER 8 VIDEO GUIDE
Chapter 9. Desperate Times
Compendium Item #1. At the start of the mission, in your ship, can be found downstairs if you found the collectible in chapter 5, make sure you exhaust all the dialogue for it to count.
Compendium Item #2. At the start of the mission, in your ship, can be found in Gamora’s room if you found the collectible in chapter 6, make sure you exhaust all the dialogue for it to count.
Compendium Item #3. At the start of the mission, in your ship, can be found in Drax’s room if you found the collectible in chapter 7, make sure you exhaust all the dialogue for it to count.
Compendium Item #4. At the start of the mission, in your ship, can be found in Star-Lord’s room if you found the collectible in chapter 7, make sure you exhaust all the dialogue for it to count.
Compendium Item #5. At the start of the mission, in your ship, can be found in Rocket’s room if you found the collectible in chapter 8, make sure you exhaust all the dialogue for it to count.
CHAPTER 9 VIDEO GUIDE
Chapter 10. Test Of Faith
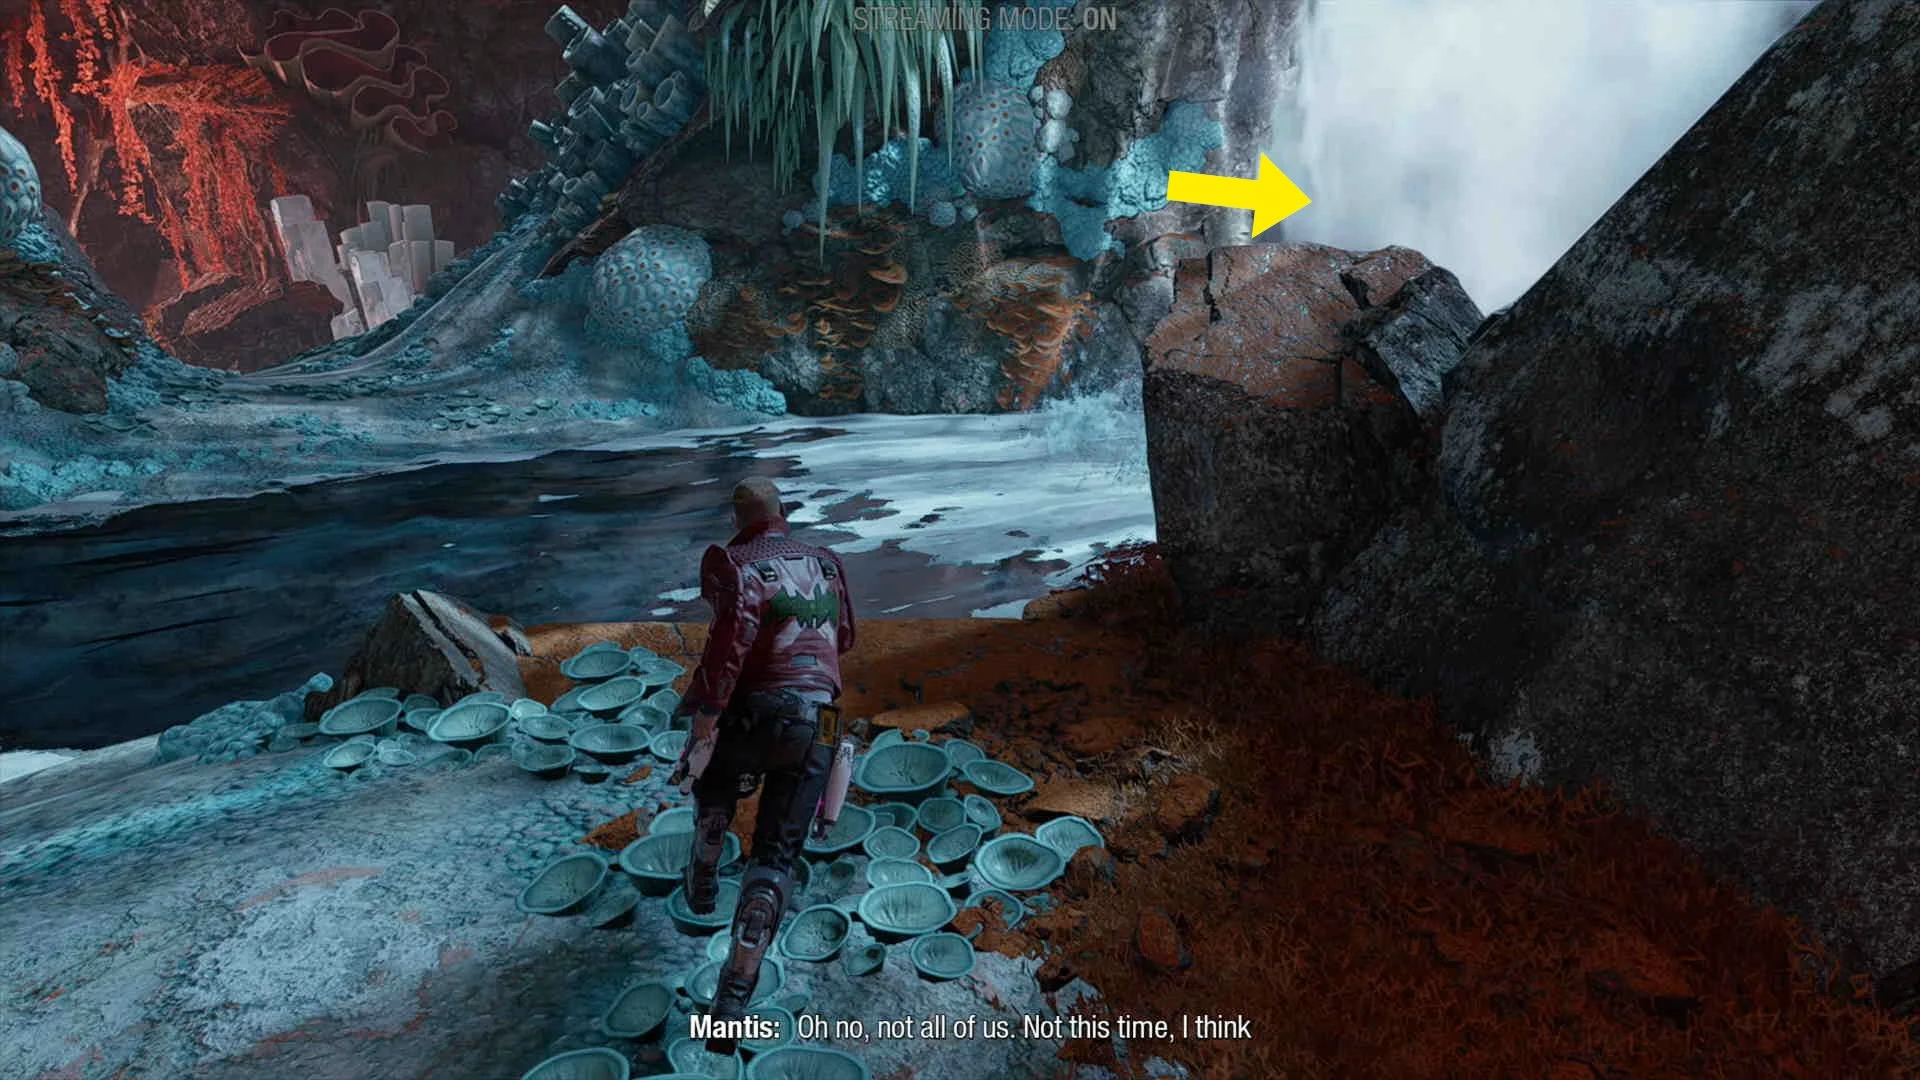
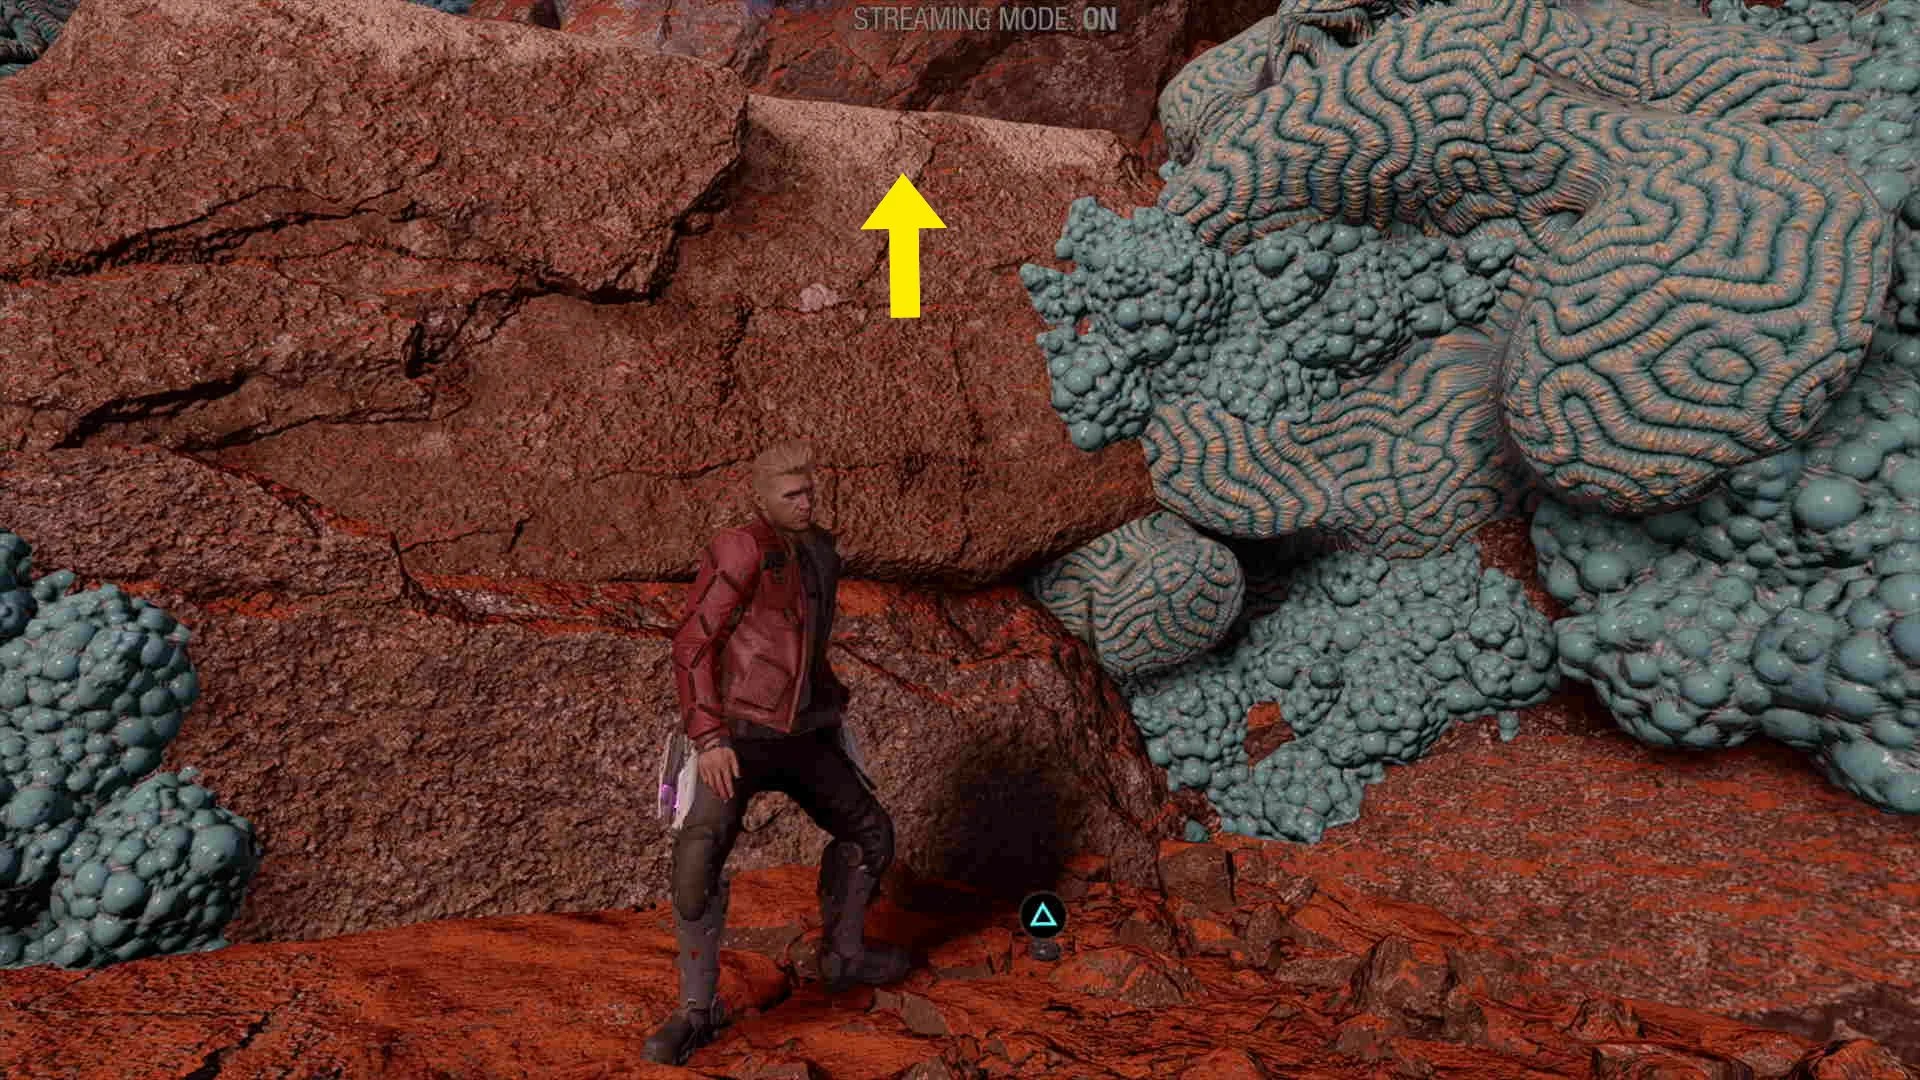
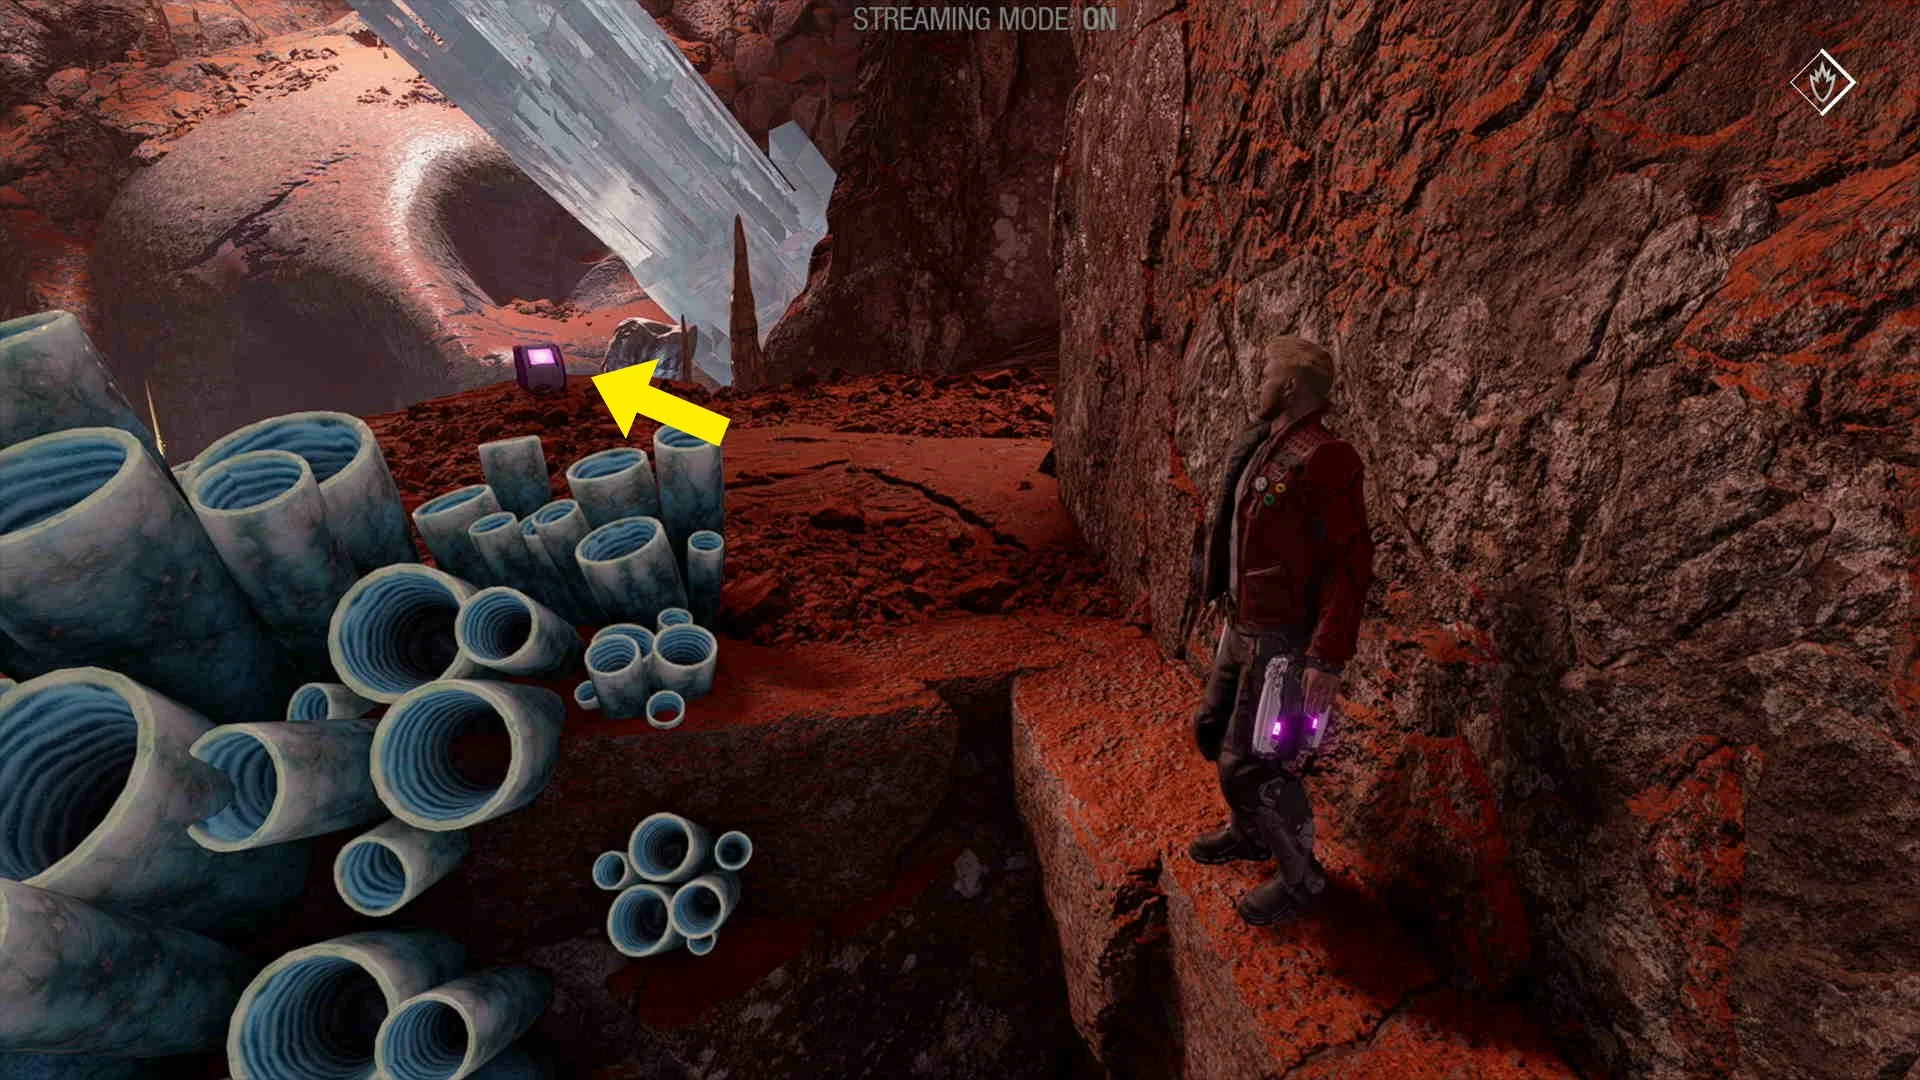
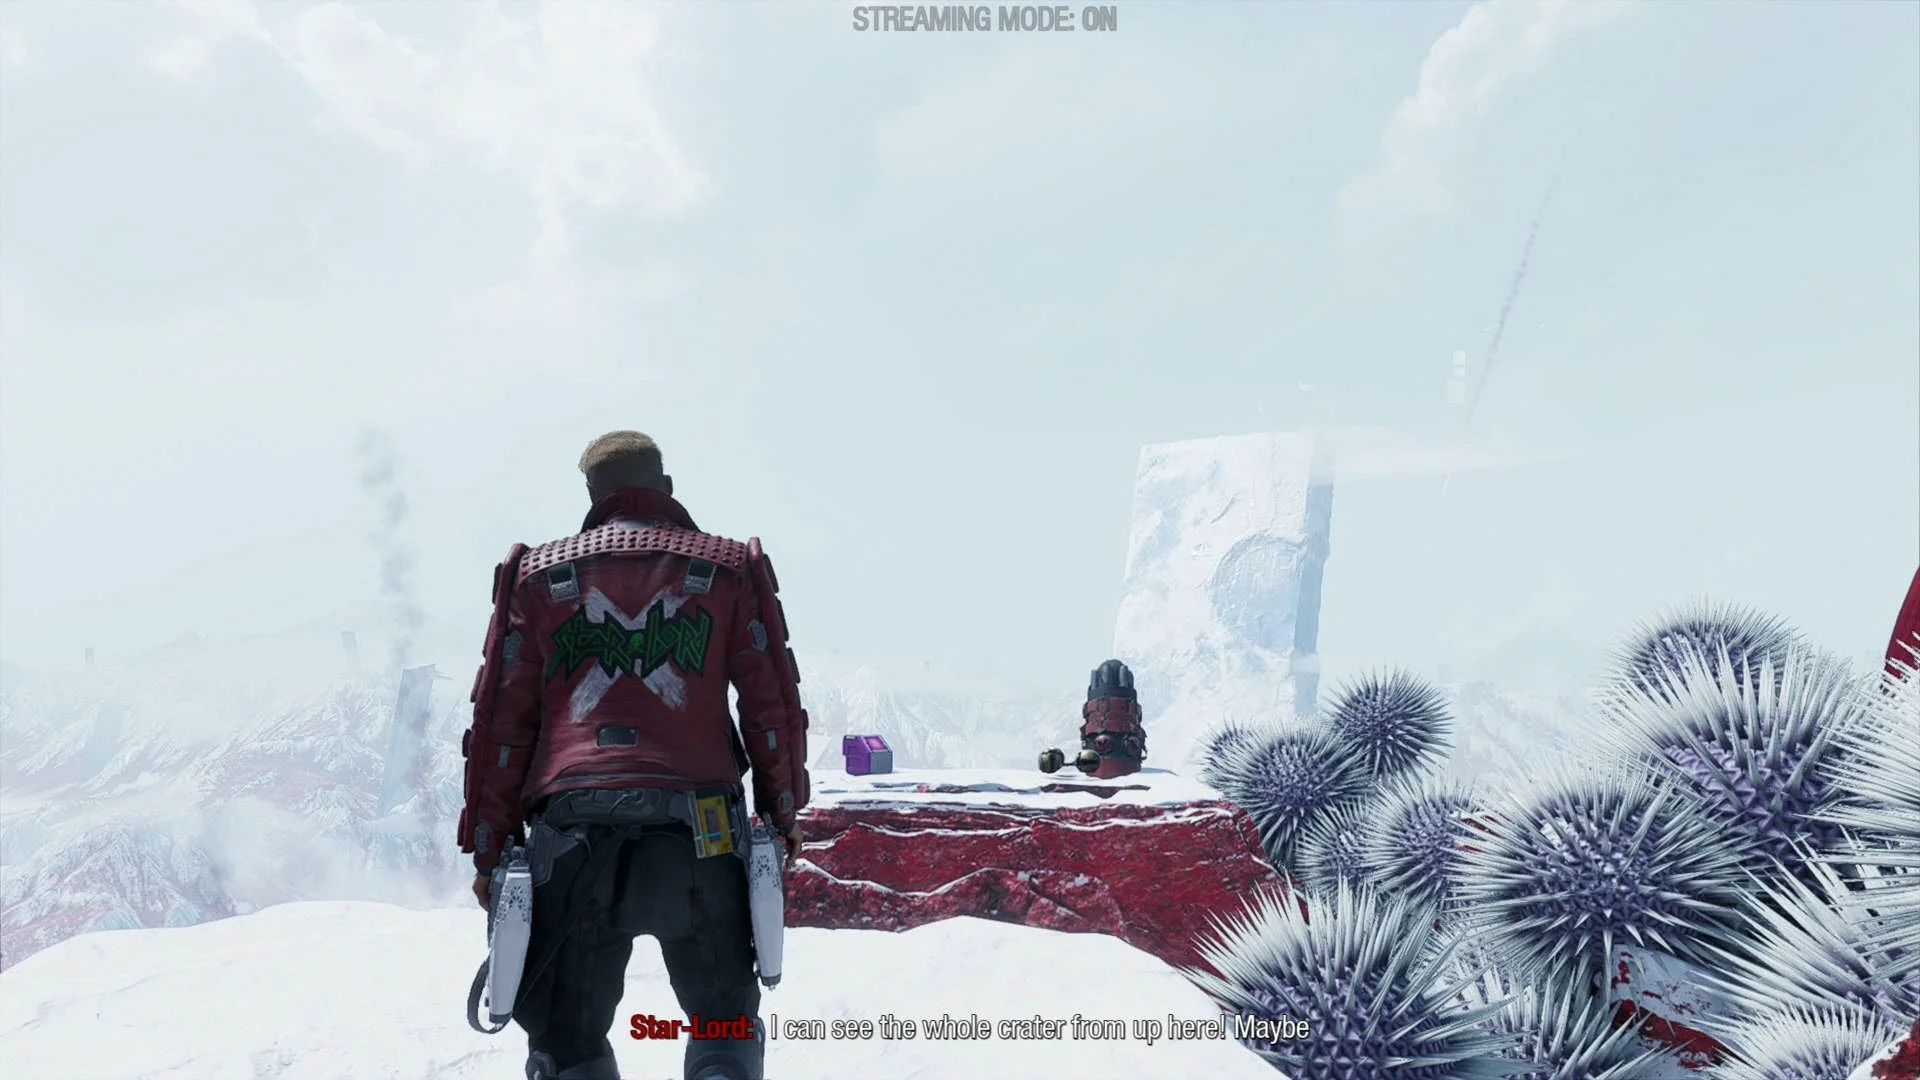
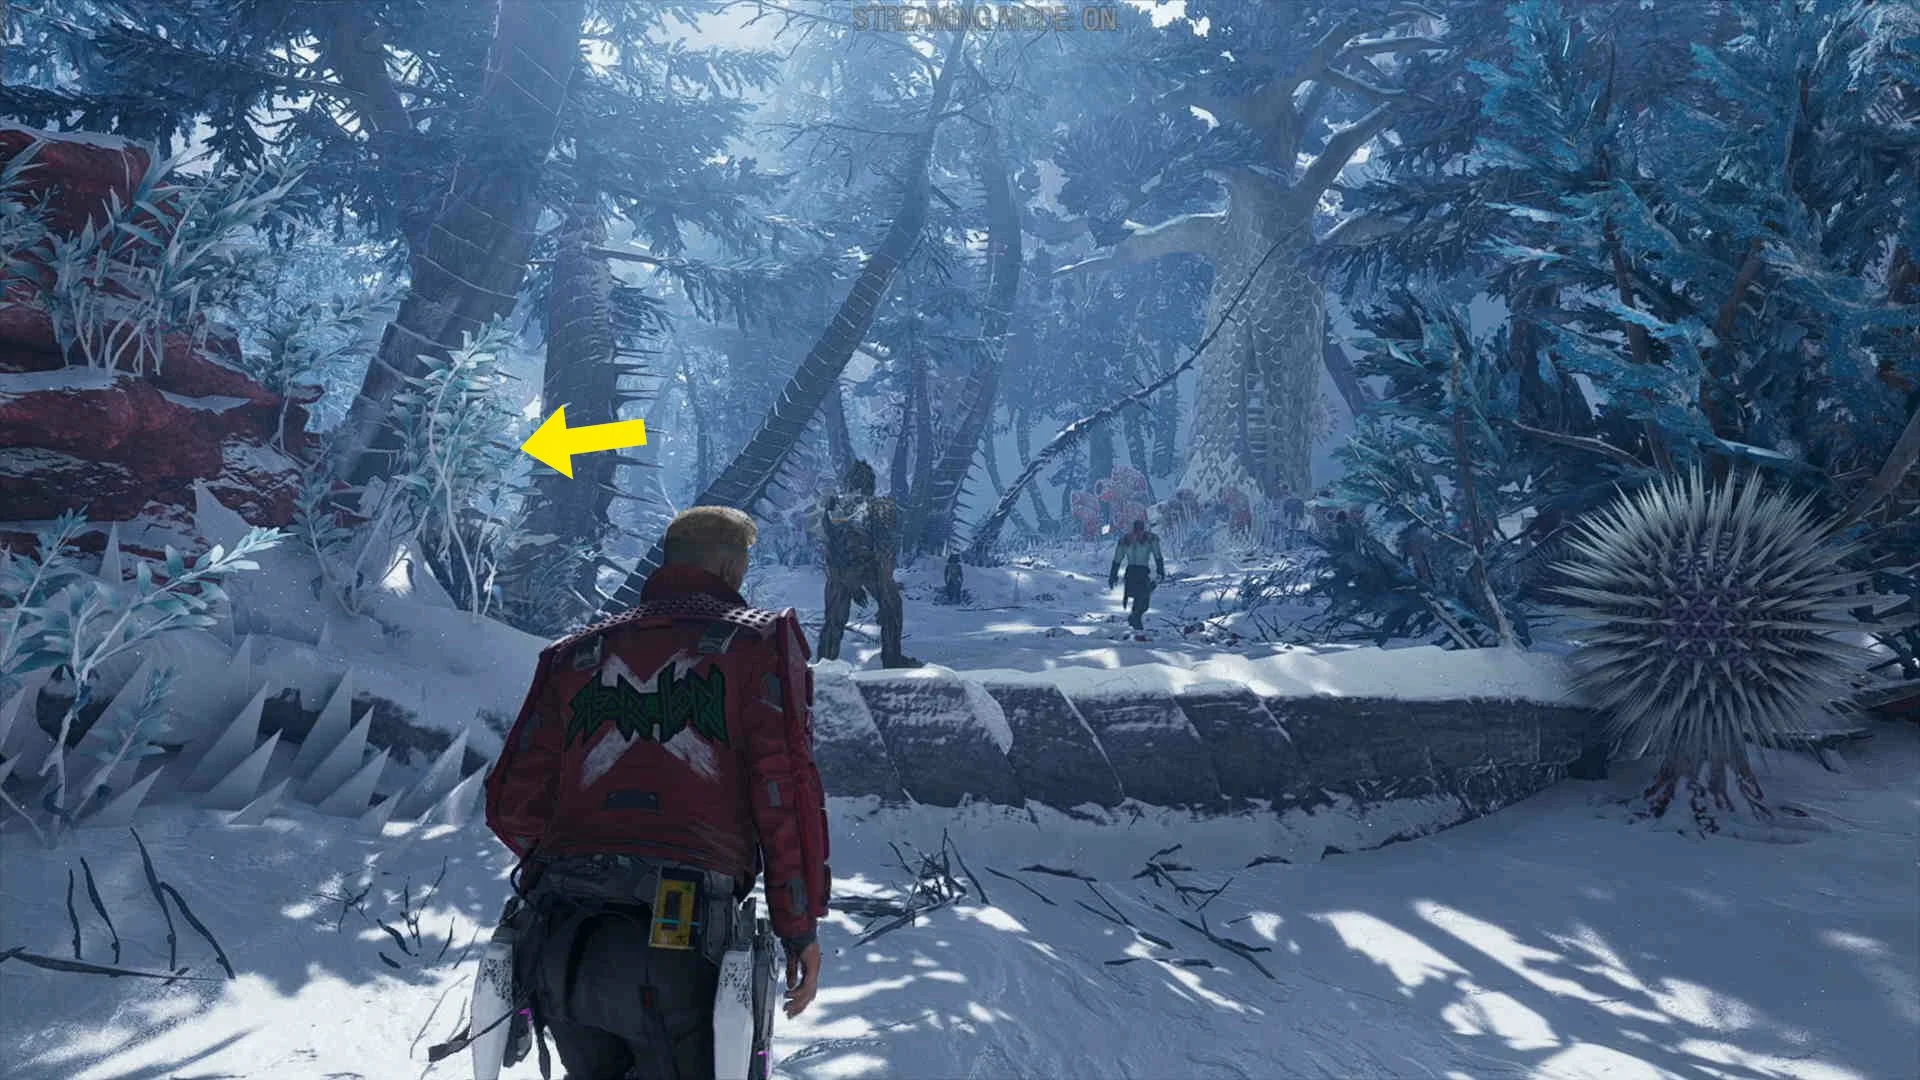
Outfit #1. In the first cave you enter, after going across a massive crystal, the collectible will be behind the waterfall on your right.


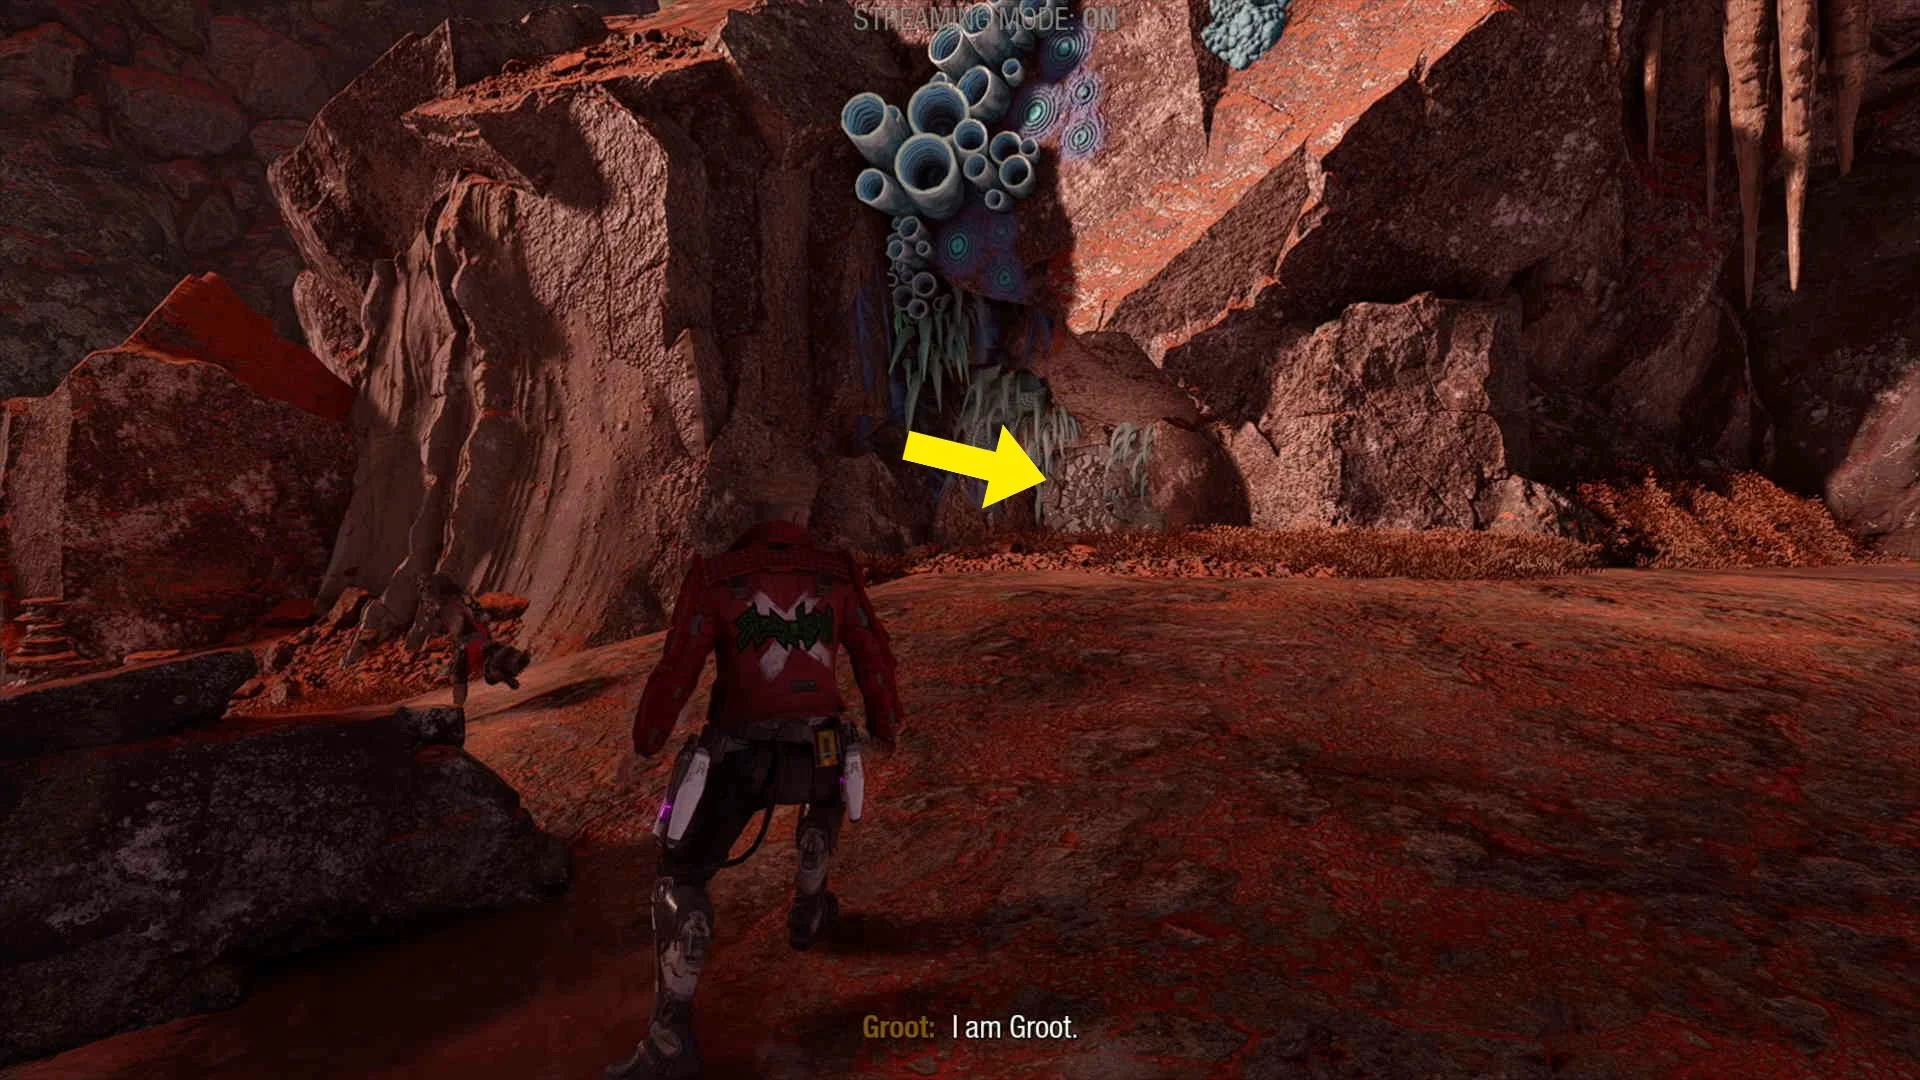
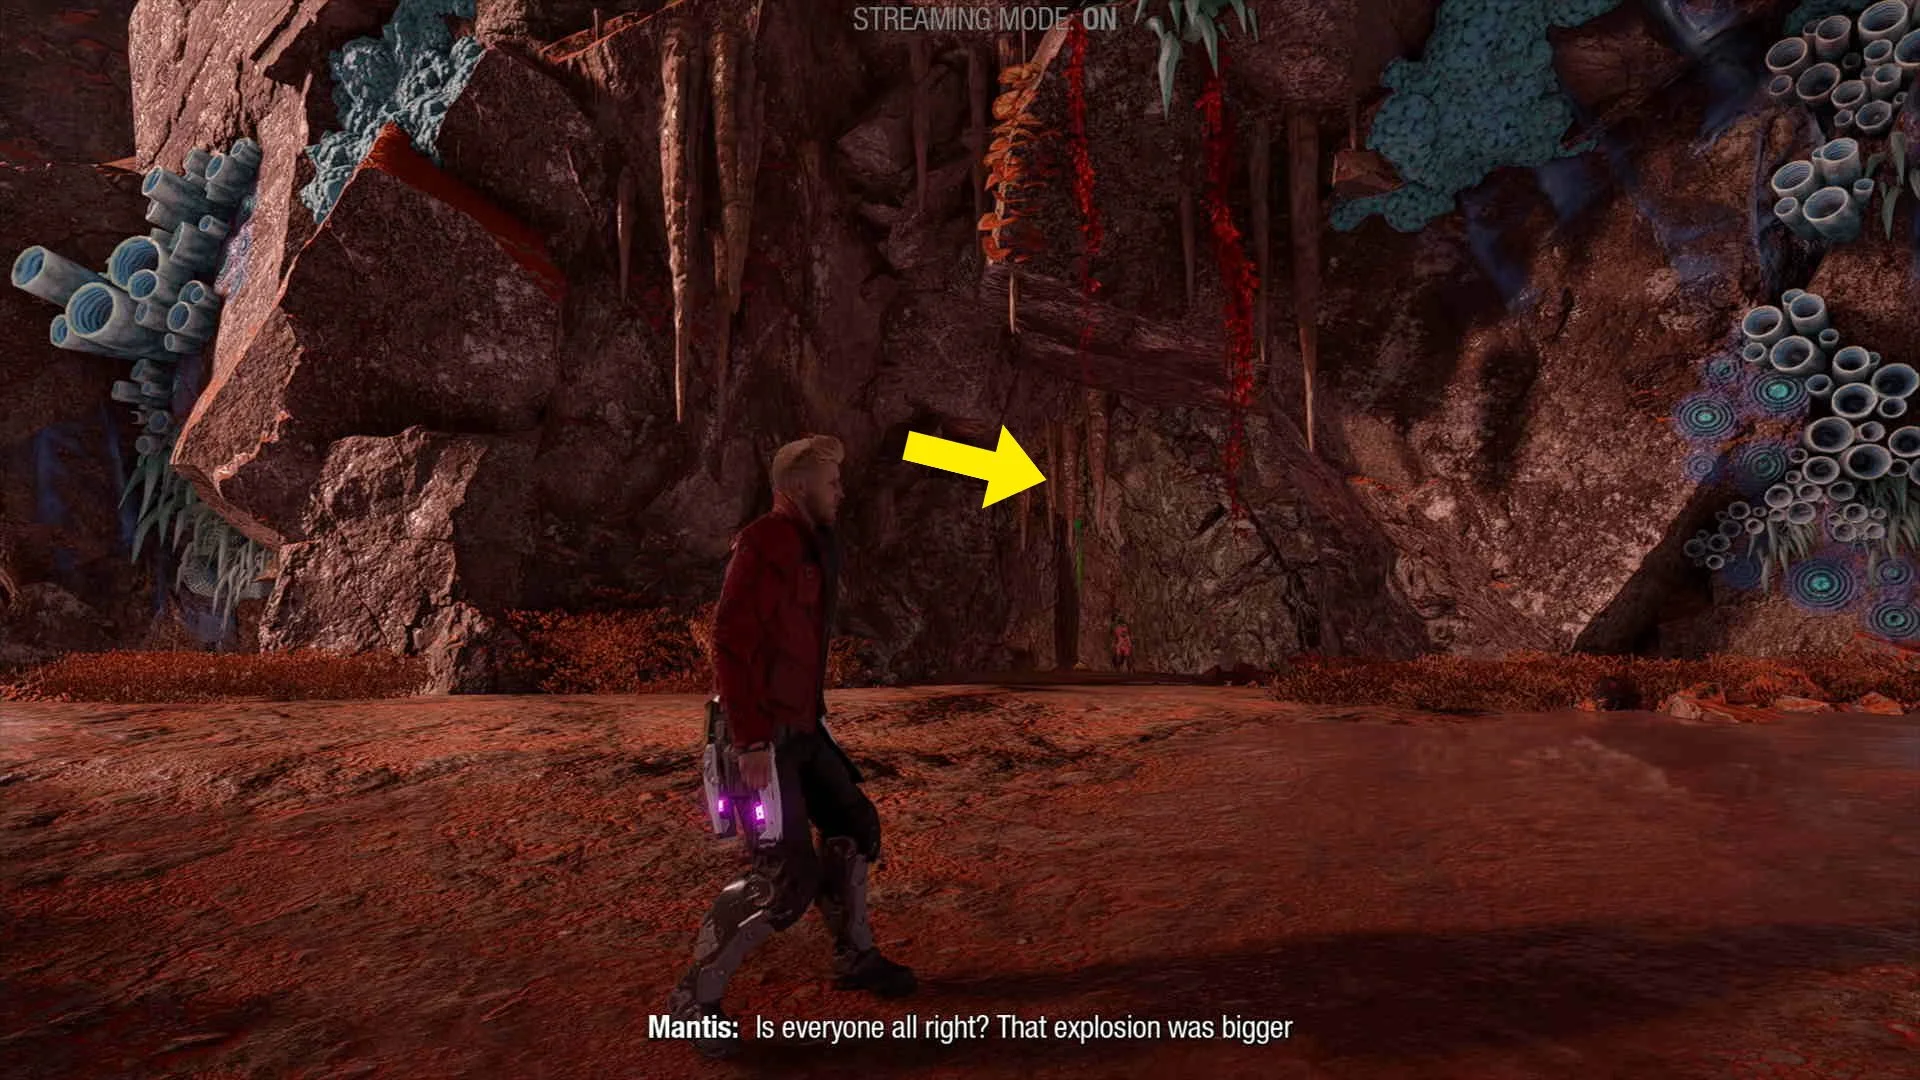
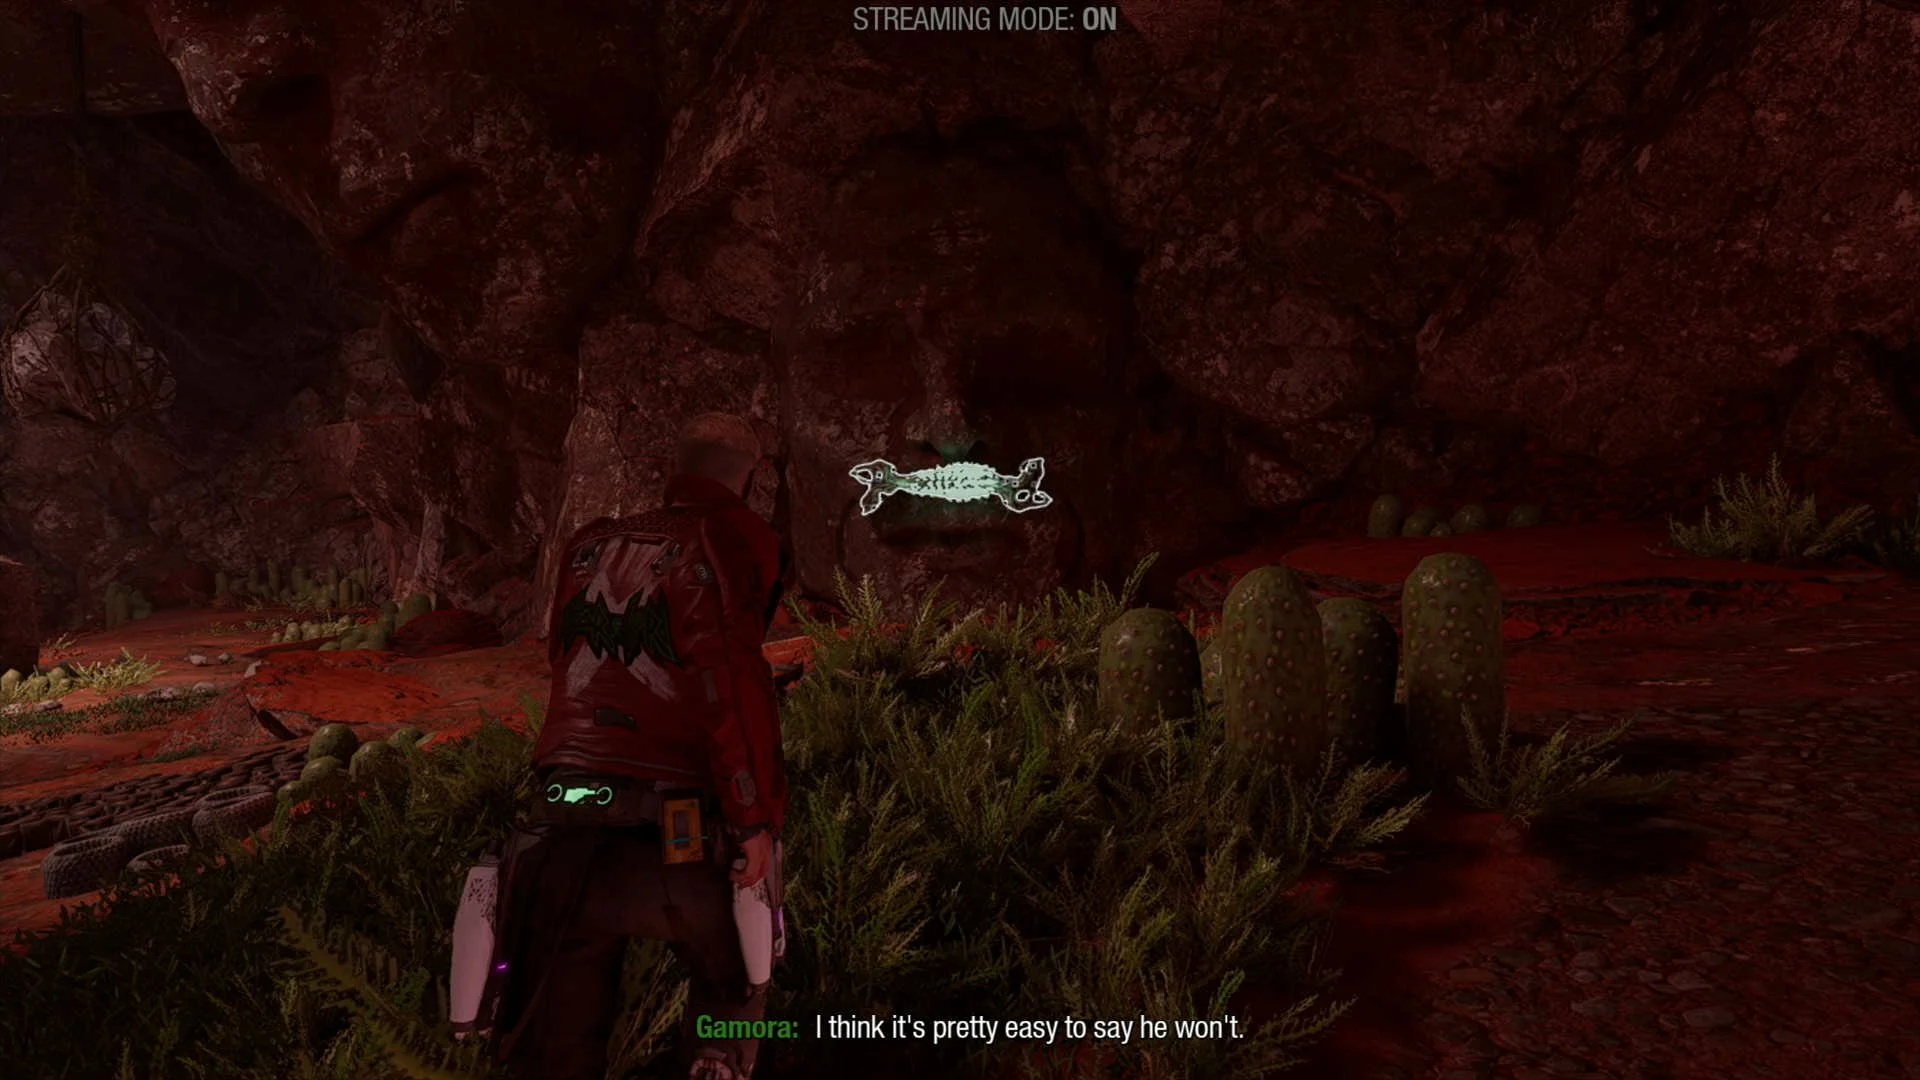
Archive #1. Just after fighting the “dog” type enemy, in the cave go through the gap to your left, continue on this path until you see the collectible on the ground.


Guardian Collectible #1. On the ledge above the previous collectible.

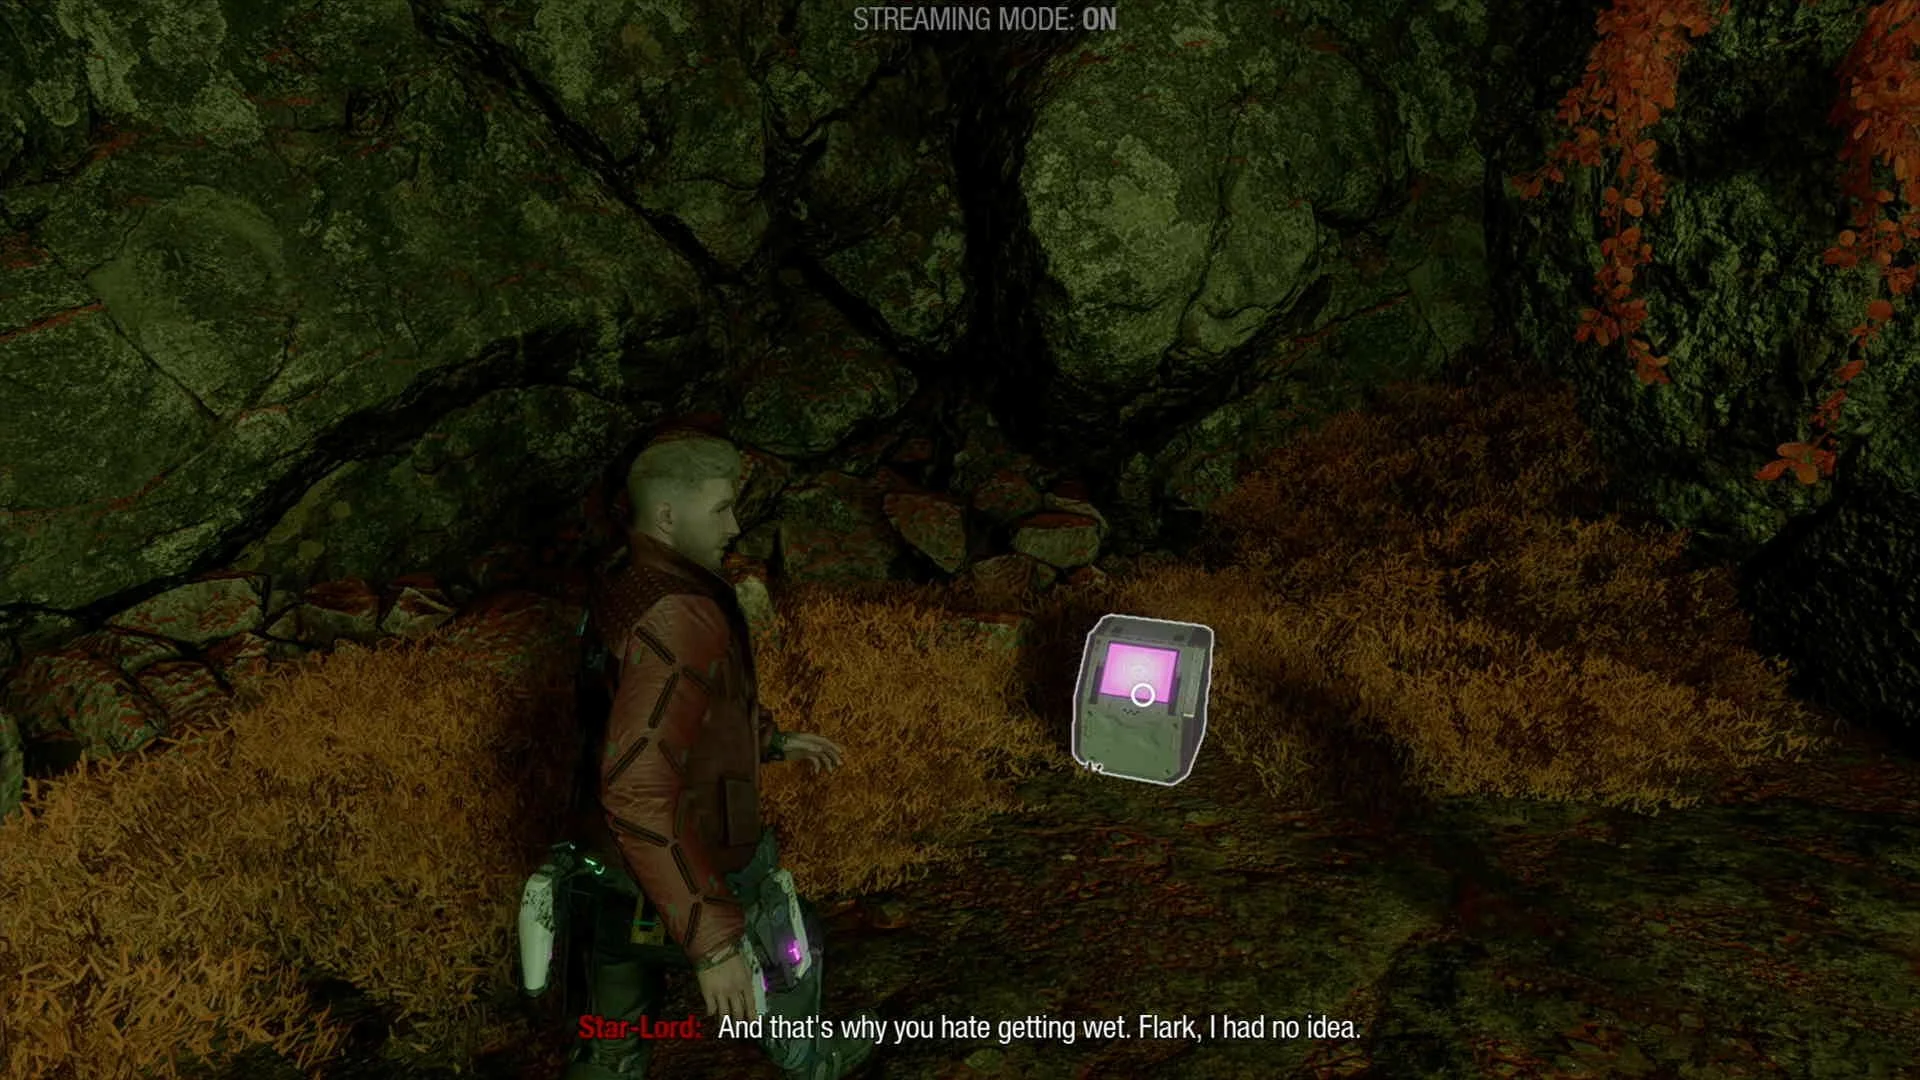
Outfit #2. In the area where you fight the first load of Ogrode enemies look for a little entrance that Rocket can use on the right hand side wall, this will destroy the stone head and allow you to go through, inside use ice bullets to stop the poison, then use Groot to raise the platform, jump up another ledge and go to the end to find the collectible.

Guardian Collectible #2. In the second area where you fight some Ogrode enemies, pull the stone head away from the wall with your new wind ammo, the collectible will be at the end of the path inside.


Archive #2. Very soon after the previous collectible, stay on the main path and you should see this archive on the ground before going through a gap to the left.
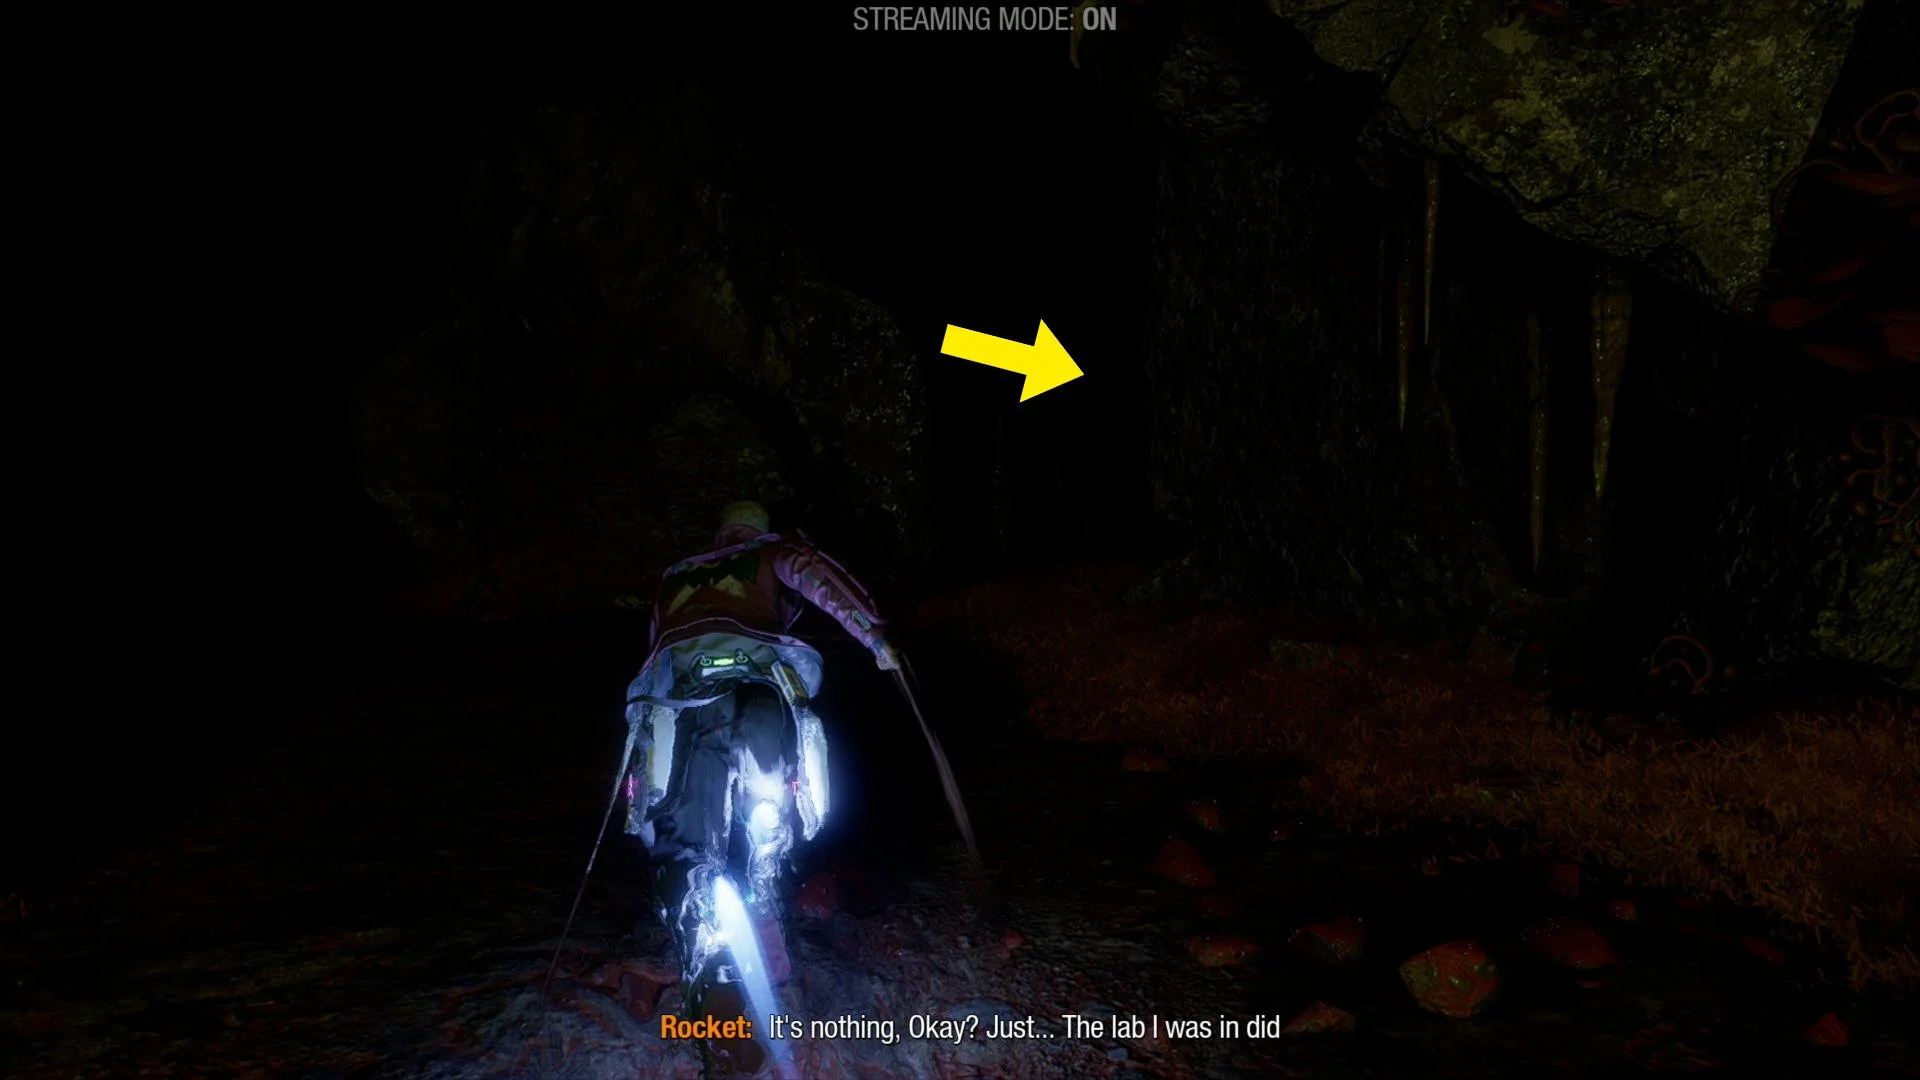
Outfit #3. In the dark cave that Groot helps you through with his light, stick to the right hand side until you see a gap with purple light the other side, that is where the collectible is.


CHAPTER 10 VIDEO GUIDE
Chapter 11
NO COLLECTIBLES
Chapter 12. Knowhere To Run
Compendium Item #1. At the start of the chapter in the ship, in Drax’s room, only if obtained in chapter 10.
Compendium Item #2. Found at the start of the mission on the ship, in Gamora’s room, will only spawn if you found it in chapter 10.
Outfit #1. Found in the area with the first enemies, move the yellow block with Drax and climb up to find the collectible.


Archive #1. Very soon after the previous collectible on the main path to your left, next to some boxes.


Archive #2. When you first get to the destroyed market area, you can find this collectible on the ground in the round stand.
Outfit #2. Just before using the gap in the wall to leave the market area, look right and destroy the wall with wind ammo.
Archive #3. After Gamora helps you jump over a wall, look at the gate that you have to destroy with wind ammo to help the rest of your team through, now look left, the collectible will be there.


Archive #4. After moving the red piece of metal out of the way, in the next area continue straight through the middle until you see some yellow vending machines, the collectible will be on the ground next to them.


Guardian Collectible #1. To the left of the vending machines use the slide to go down, here turn around and use the ice ammo to get rid of the posion, the collectible will be on the platform where the poison was.
Outfit #3. Continue through the level until you get to a part where the team is waiting for you at what look like a dead end, before going that way, look left and use the wind ammo to break the wall, then use Groot to cross, then use electric ammo to open the door and finally you will have to use Rocket to clear the electricity to get the collectible.


Outfit #4. On the main path you will have to get Drax to break a hole in the cracked floor, as soon as you slide down turn around 180º and go through the gap to find the collectible.
Outfit #5. In the big round sandy area, break the barrier with wind ammo, then get Drax to move the block to the left to climb up to the upper level, now go right and get Gamora to help you up to the higher right platform where you can find the collectible.


Archive #5. Very soon after the previous collectible go to the right as soon as you can, next to the workbench use Groot to move the platform up to the higher level where the archive is.


Archive #6. After getting the previous collectible go back to the main path where you will go down some stairs, they will break behind you, before you enter the gap in the wall pick up the collectible to your left.
CHAPTER 12 VIDEO GUIDE
Chapter 13. Against All Odds
Compendium Item #1. At the start of the chapter on the ship, in Rocket’s Room if you found the collectible in chapter 12 (exhaust all dialogue to make it count).
Outfit #1. In the area where you fight the first group of enemies, before breaking the icicles get Gamora to help you climb the wall to the right, the outfit will be at the top.

Outfit #2. After you shimmy across a ledge to enter a cave (story path), as soon as you enter the cave go to the right to find the collectible.

Guardian Collectible #1. After fighting a few enemies, Groot will make a bridge on his own, just after crossing climb the wall to the right with Gamora’s help, the collectible will be at the top.
Outfit #3. In the cave just after obtaining the fire ammo, just before the exit shoot the icicle on the ceiling with fire ammo, then use Groot to move the ledge up to the platform above, the collectible will be there.


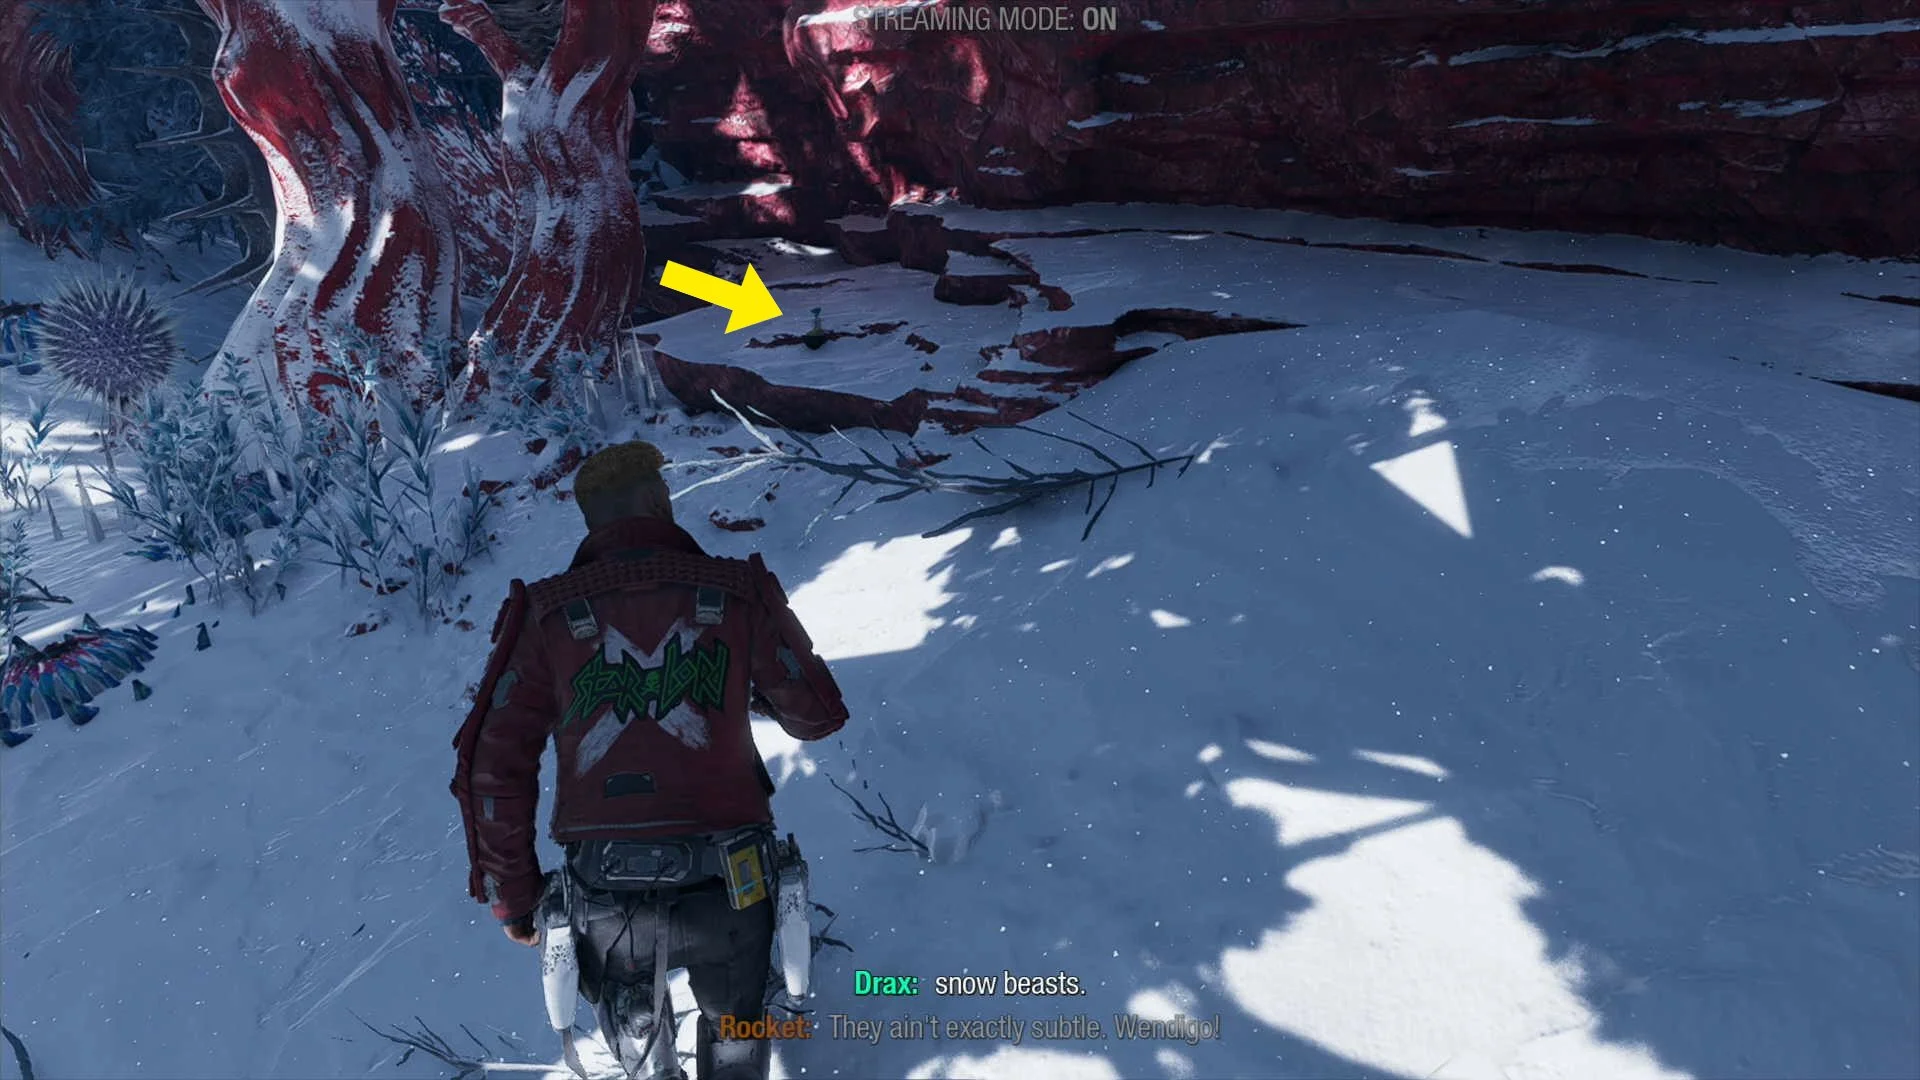
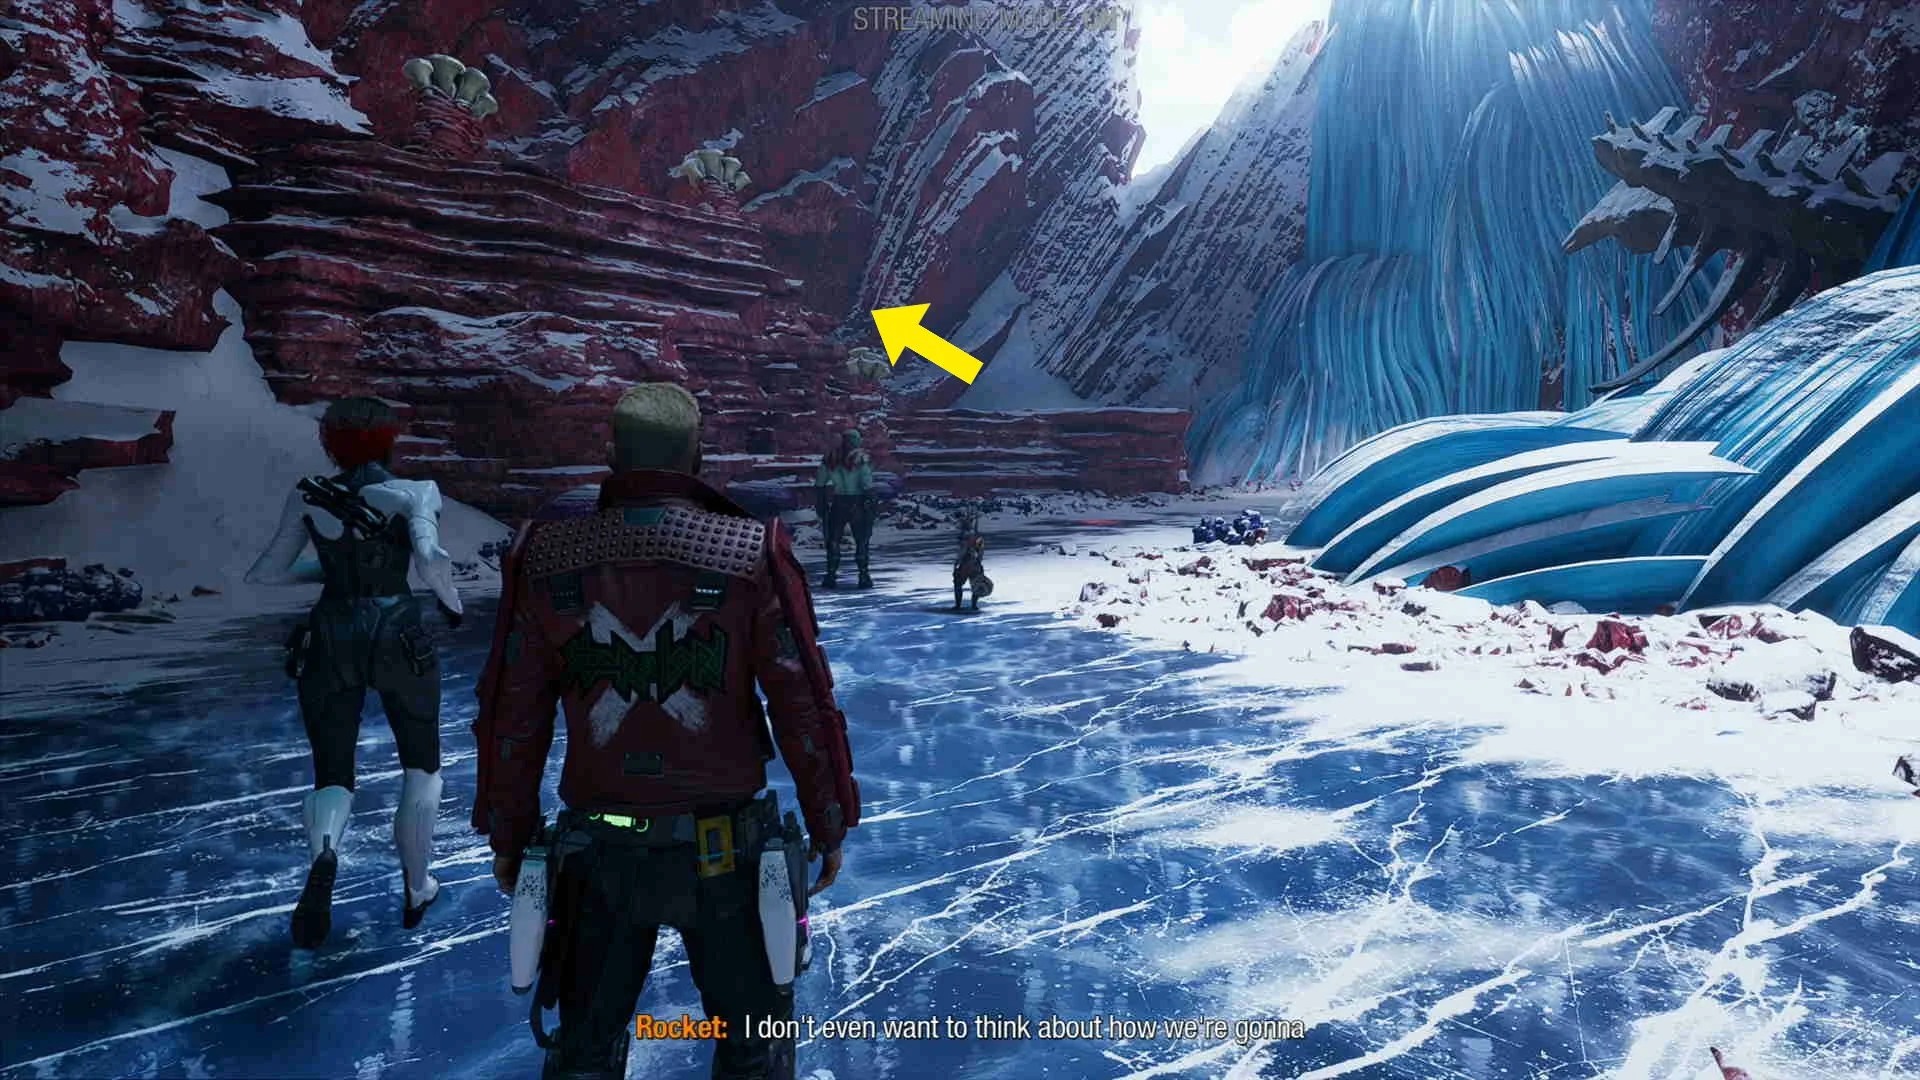
Guardian Collectible #2. As soon as you enter the forest just after seeing the first Wendigo, take a right and stick to the right side wall until you see the collectible on the ground.
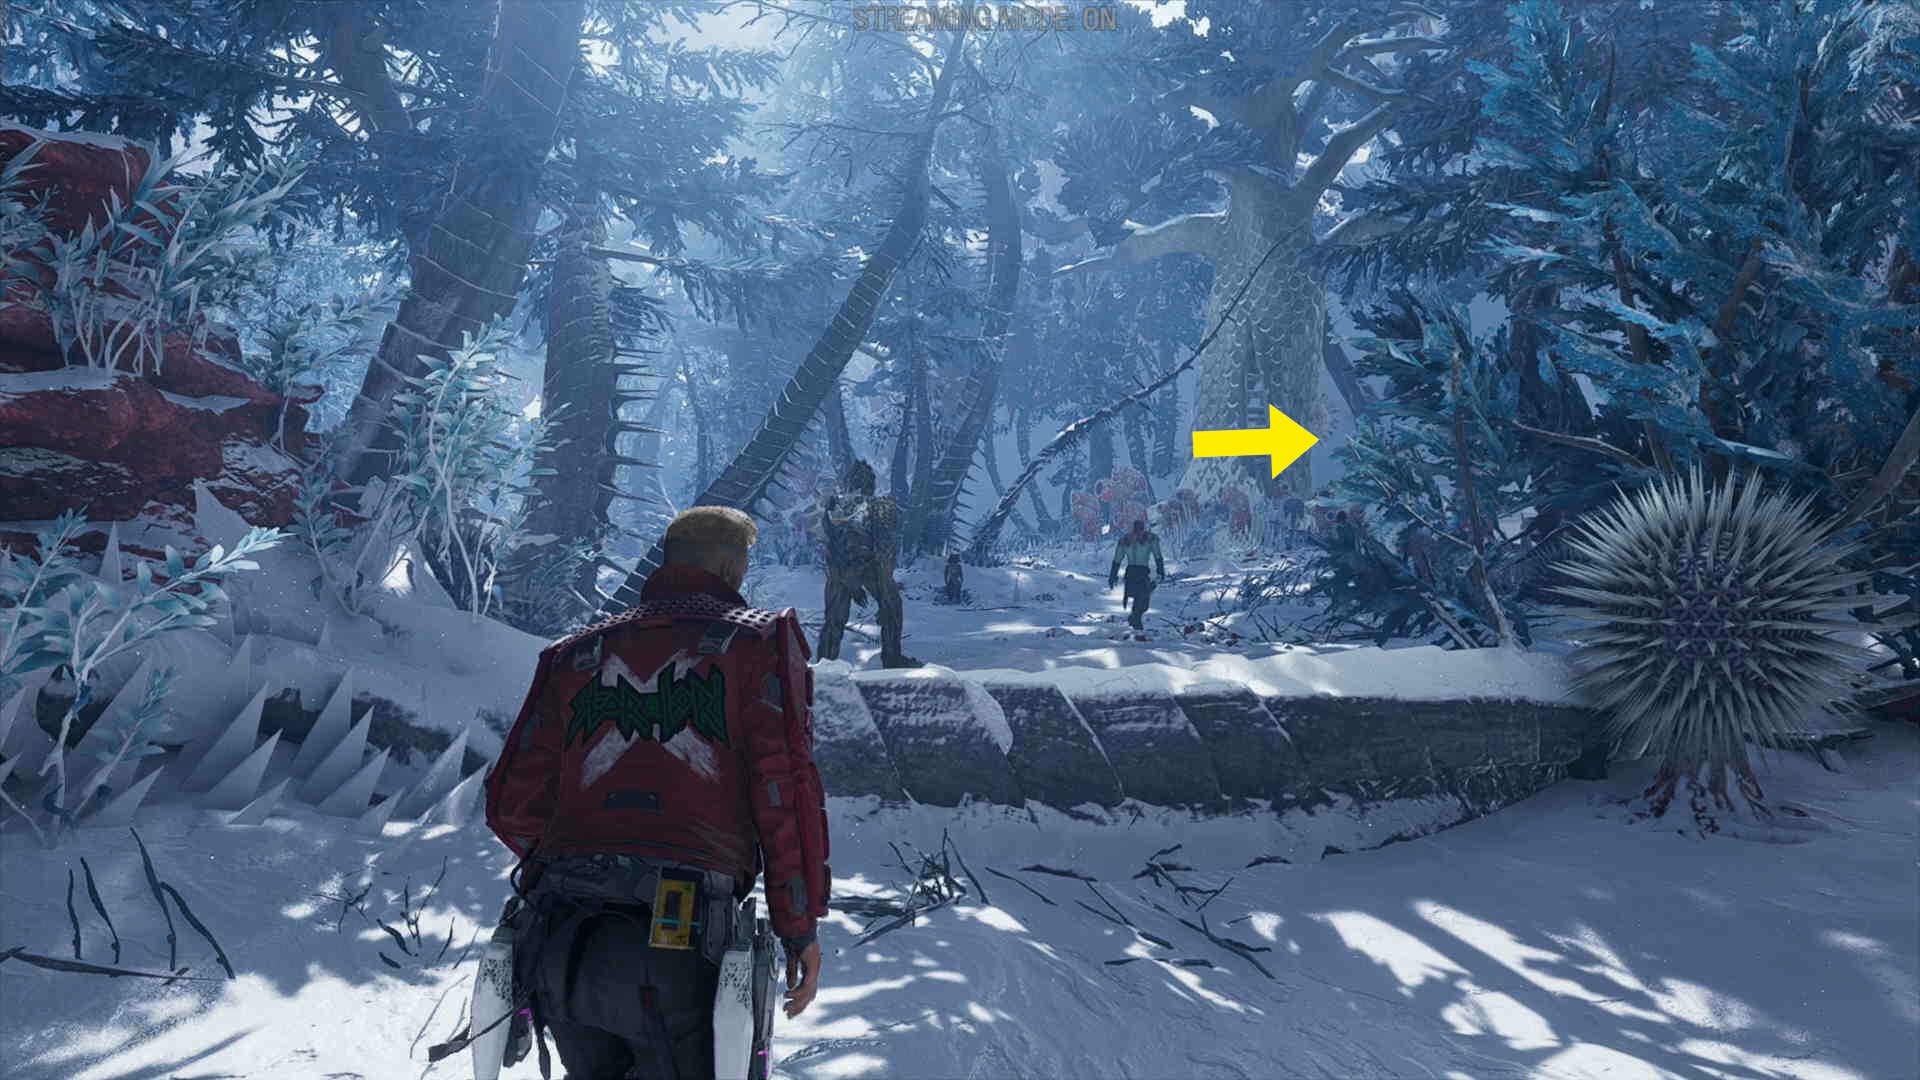
Archive #1. In the same forest as the previous collectible, this time go to the left as you enter, the collectible will be on a platform with 3 plants.

Outfit #4. In the same forest as the previous 2 collectibles, this time go straight up the middle, the collectible will be at the end.


Archive #2. After defeating the alpha wendigo, on the main path on the platform above (very hard to miss).
Archive #3. In the burning village just after talking to the survivor, on the ground in the middle of the main path (also very hard to miss).
Outfit #5. After sliding down the massive ice slope, jump up the platforms to your left with the plants on them, the collectible is at the top.

CHAPTER 13 VIDEO GUIDE
Chapter 14. Into The Fire
Compendium Item #1. At the start of the chapter in your ship, found in Drax’s room if you found it in chapter 13, will only count if you exhaust all dialogue.
Compendium Item #2. At the start of the chapter in your ship, found downstairs if you found it in chapter 13, will only count if you exhaust all dialogue.
Outfit #1. On the high platform in the big room where the fan is pushing you back, you can get up there by climbing up the yellow box to the left.

Outfit #2. Once you go outside on the second area with artificial gravity, there will be an airstrike, after this Groot will make a bridge on his own, straight after that take a right and use fire ammo on the ice wall, the collectible will be very soon after.


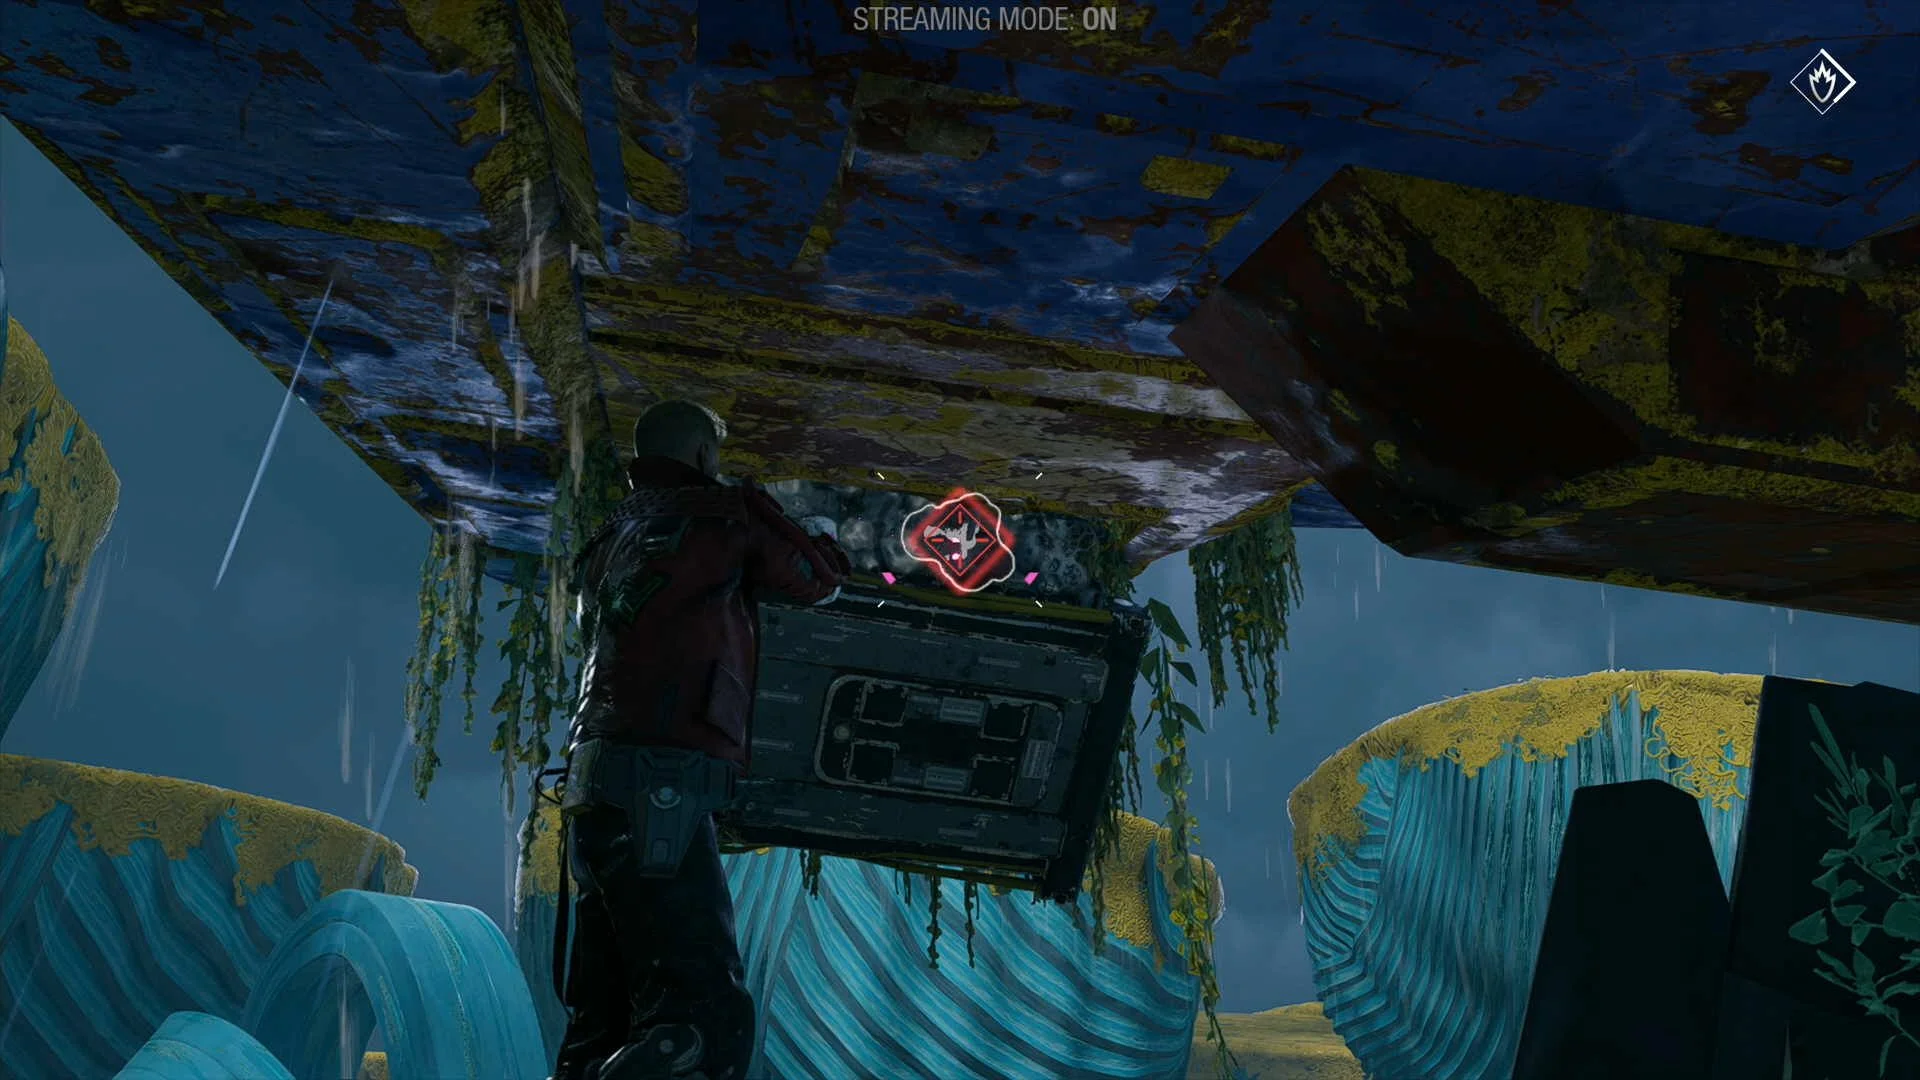
Outfit #1 & Archive #1. In the mines, where the second spouts of water are, after jumping across the first water spout DO NOT continue, instead continue across the next load of water spouts into a gap in the wall, the 2 collectibles will be here.

CHAPTER 14 VIDEO GUIDE
If you found this guide helpful and would like to support our work, you can do so by pressing the Ko-fi button below