Kao The Kangaroo 100% Walkthrough (Collectible Guide)
In this 100% Walkthrough of Kao The Kangaroo we will show you where to find every KAO Letter, Chest, Rune, Scroll, Crystal, Eternal Well & Heart Piece in every level! After following this guide you should have every collectible related trophy in the game.
🎮 Find more Kao the Kangaroo guides here.
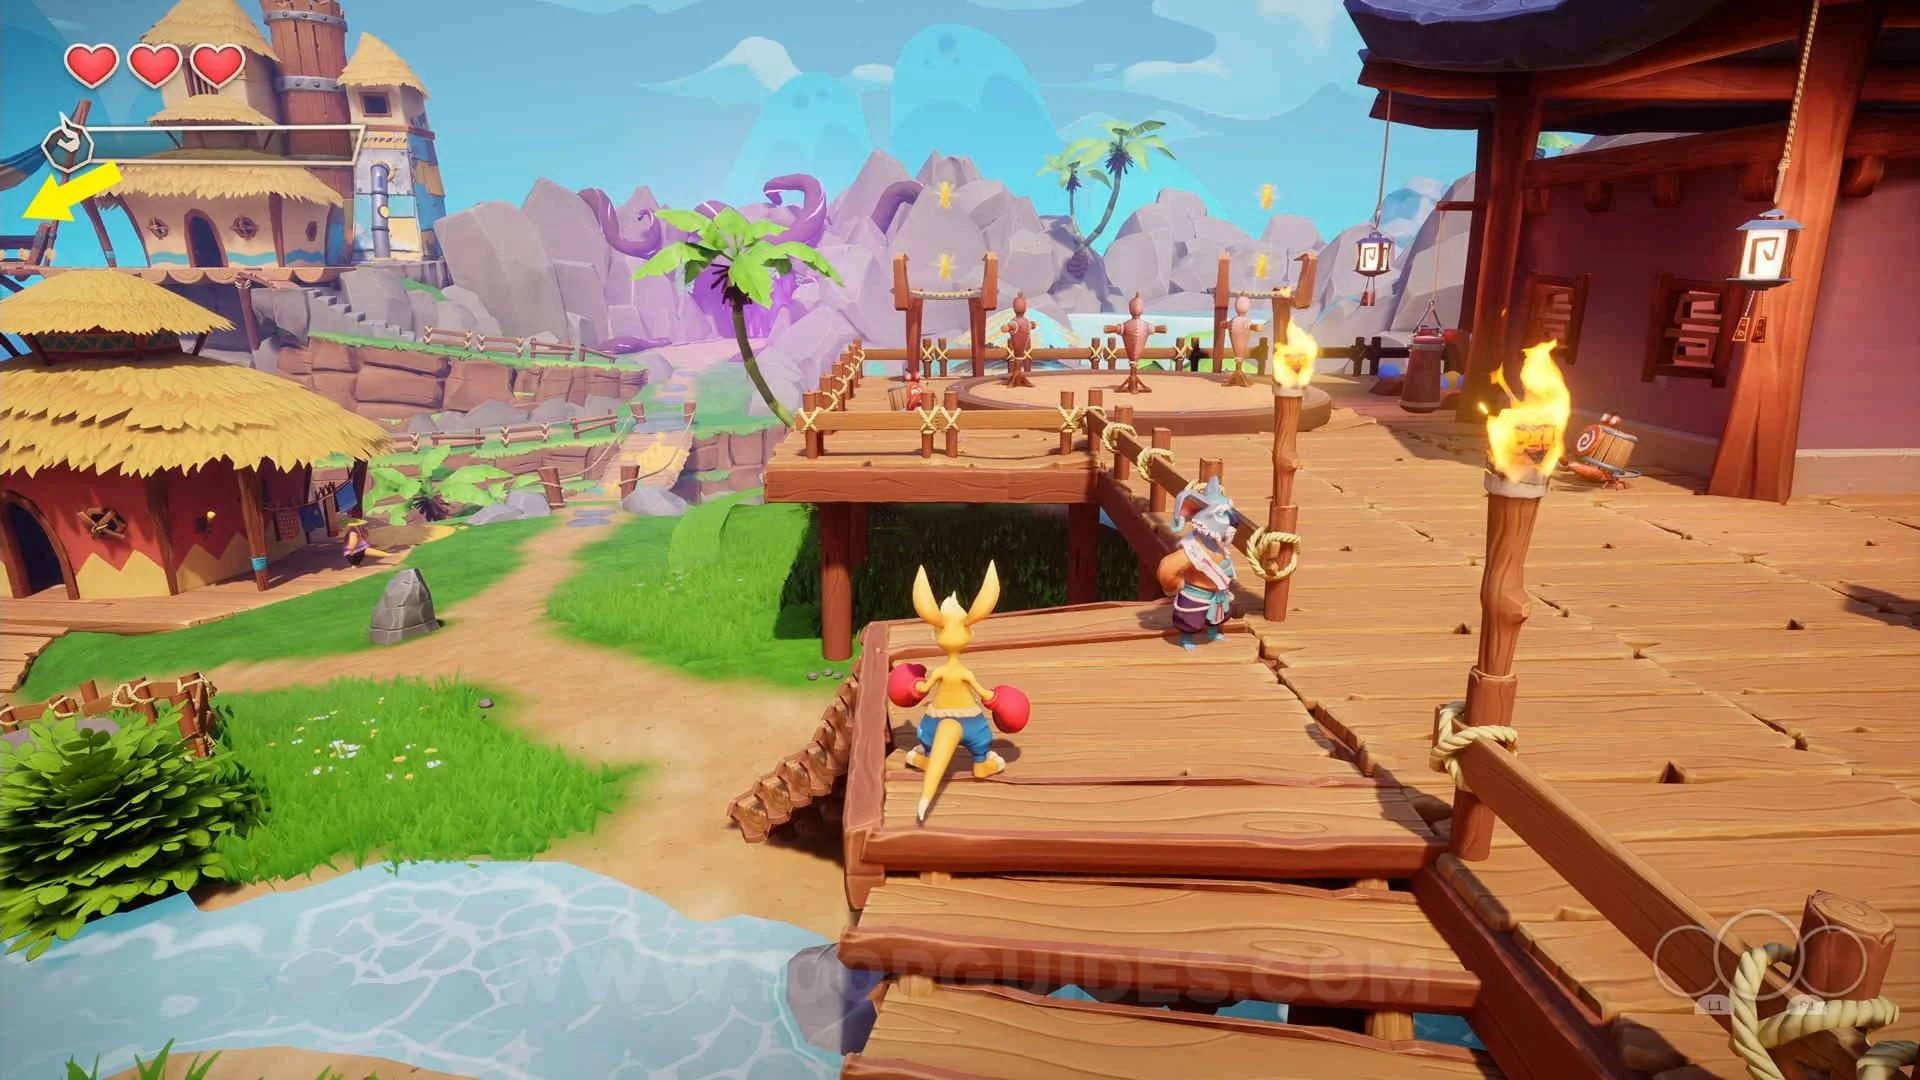
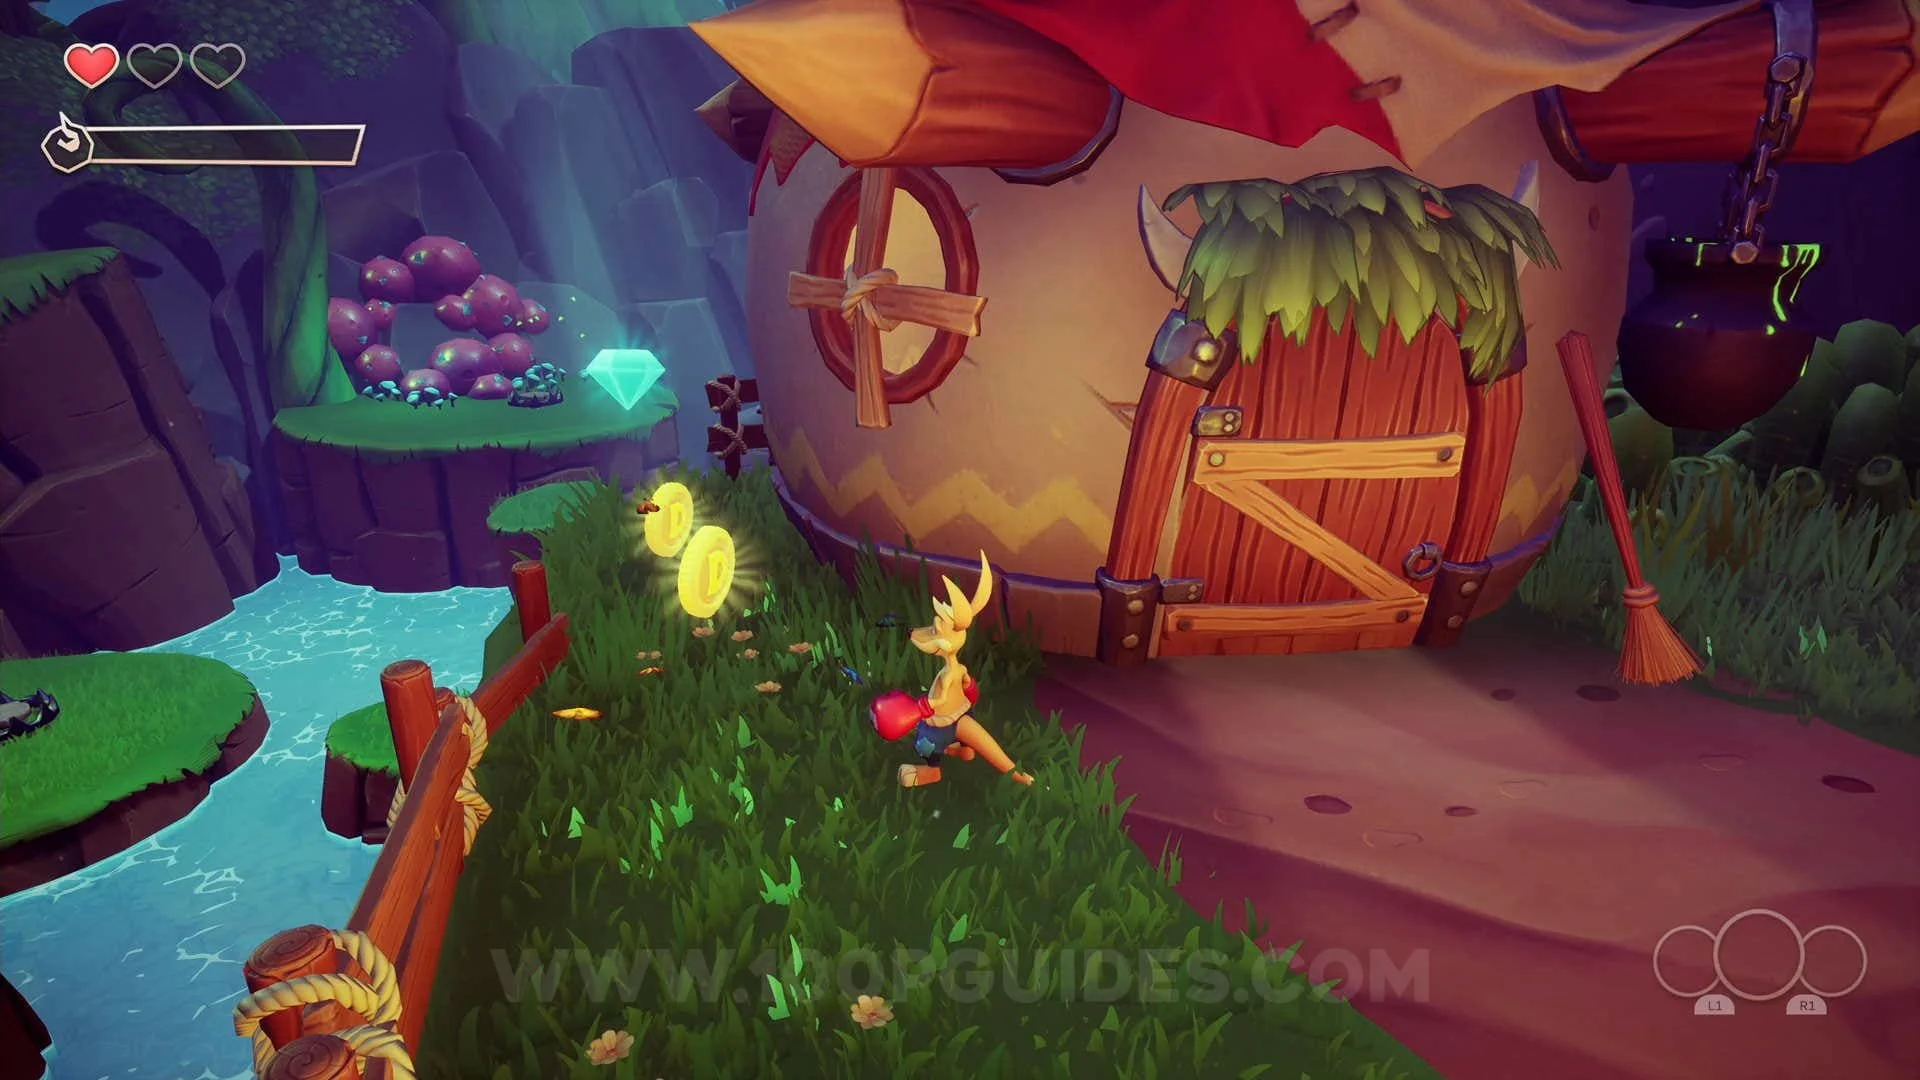
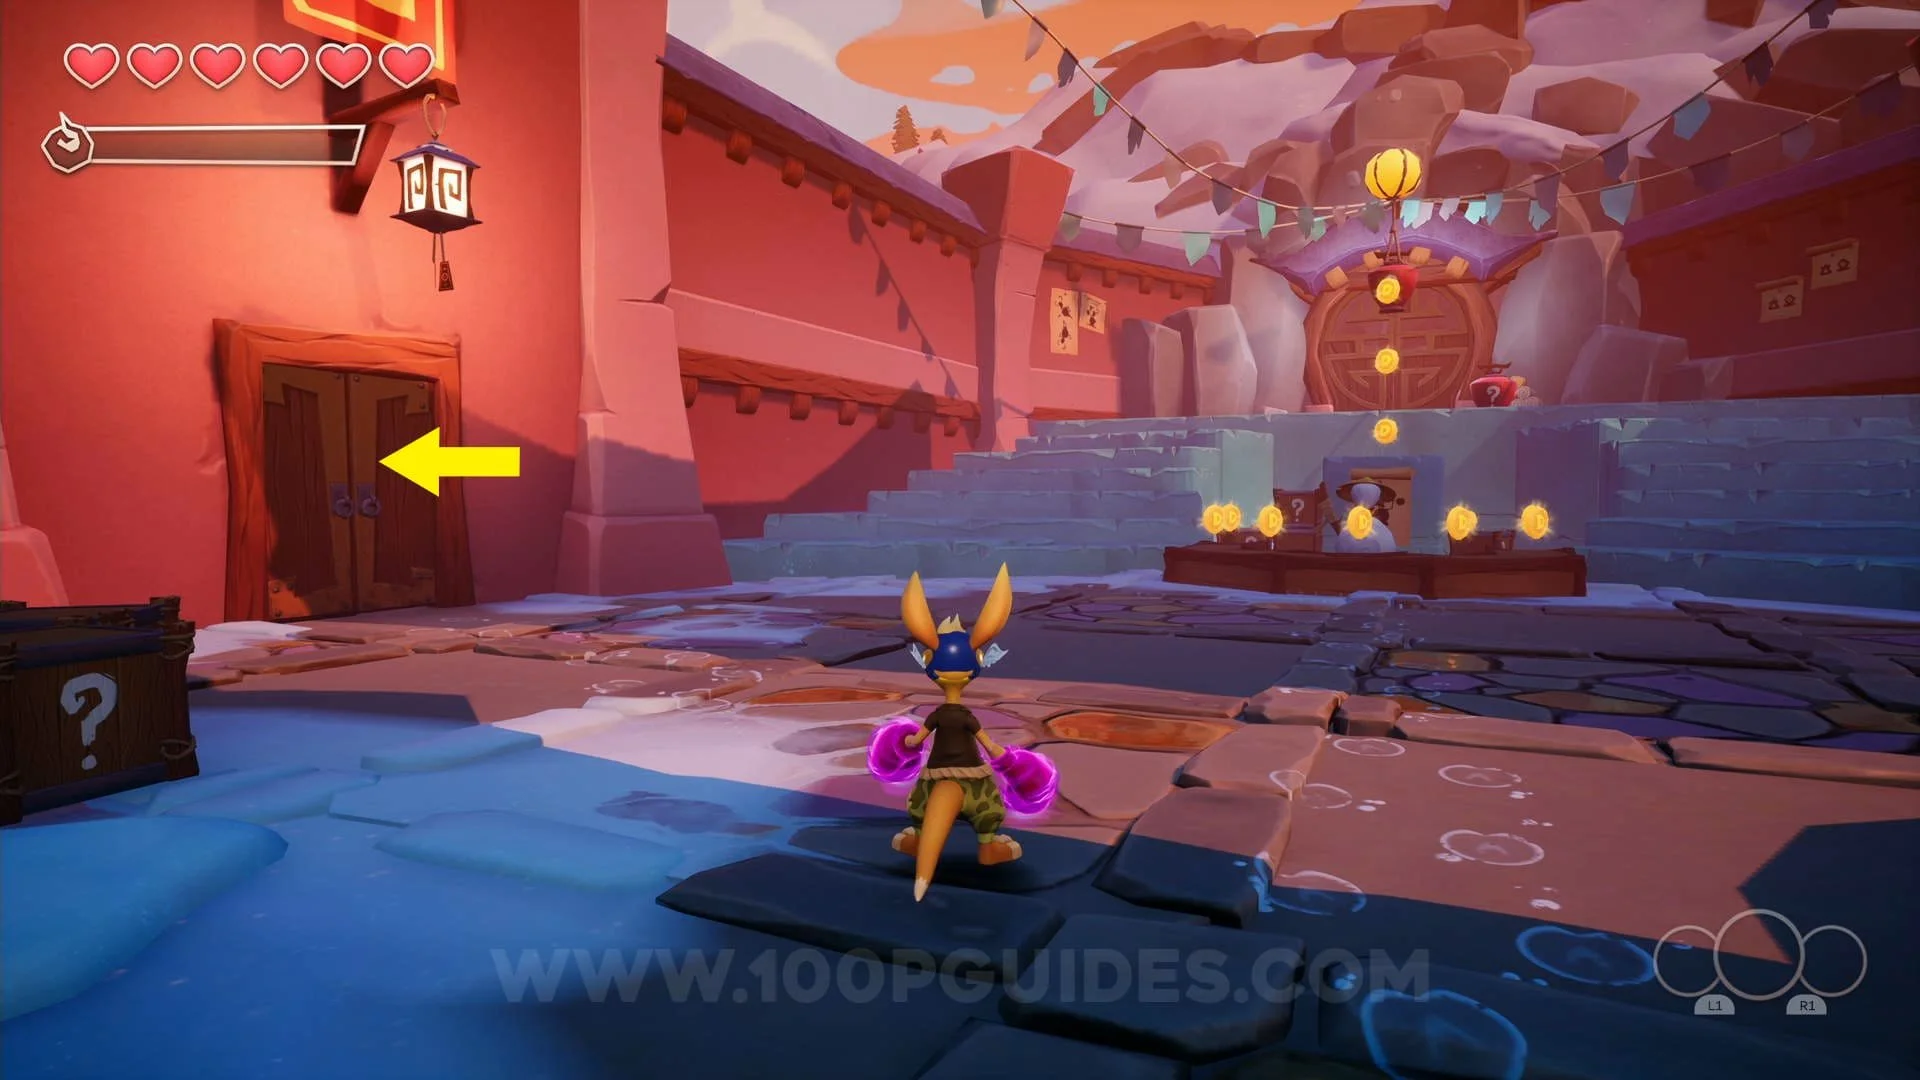
Walt’s Dojo Collectibles
Chest #1: Take the path to the right of the "Secrets" tutorial.
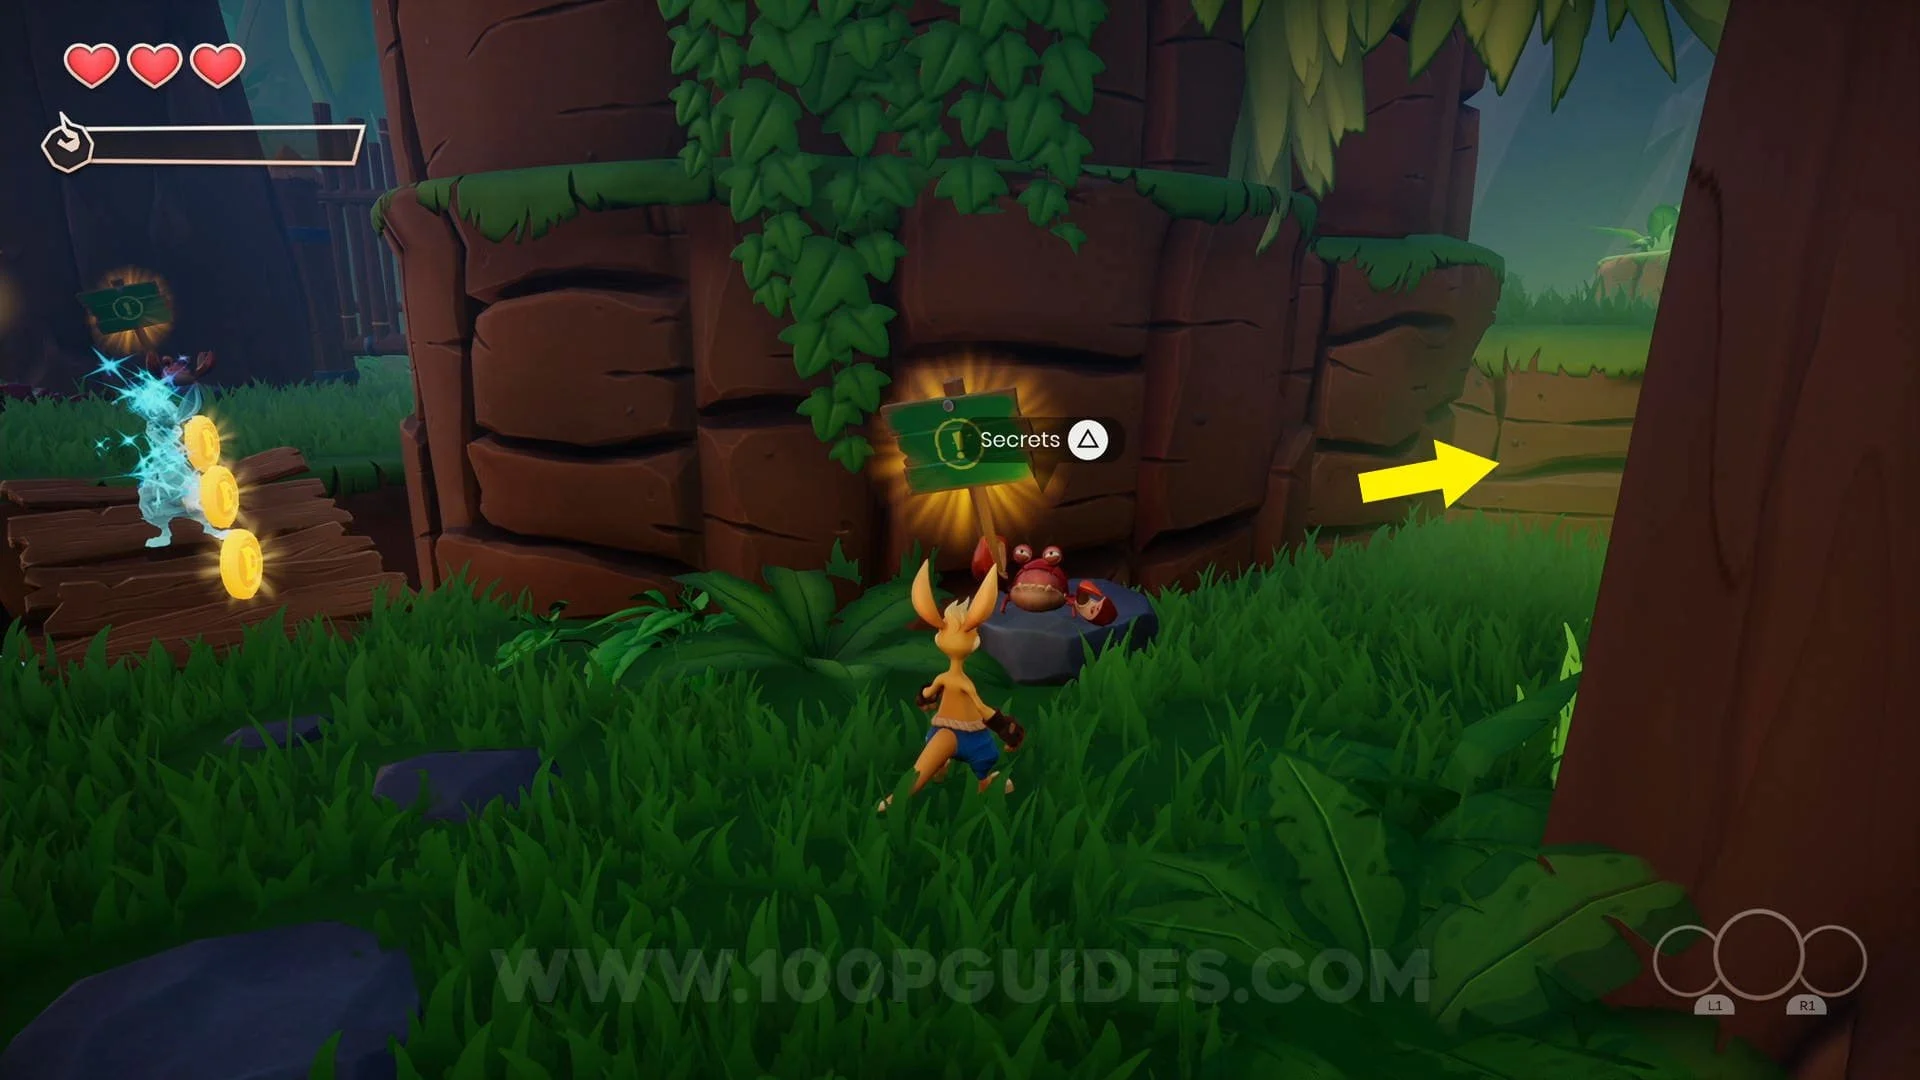

KAO Letter (K): Just like the chest, take the path to the right of the "Secrets" tutorial to find the letter soon after the chest.


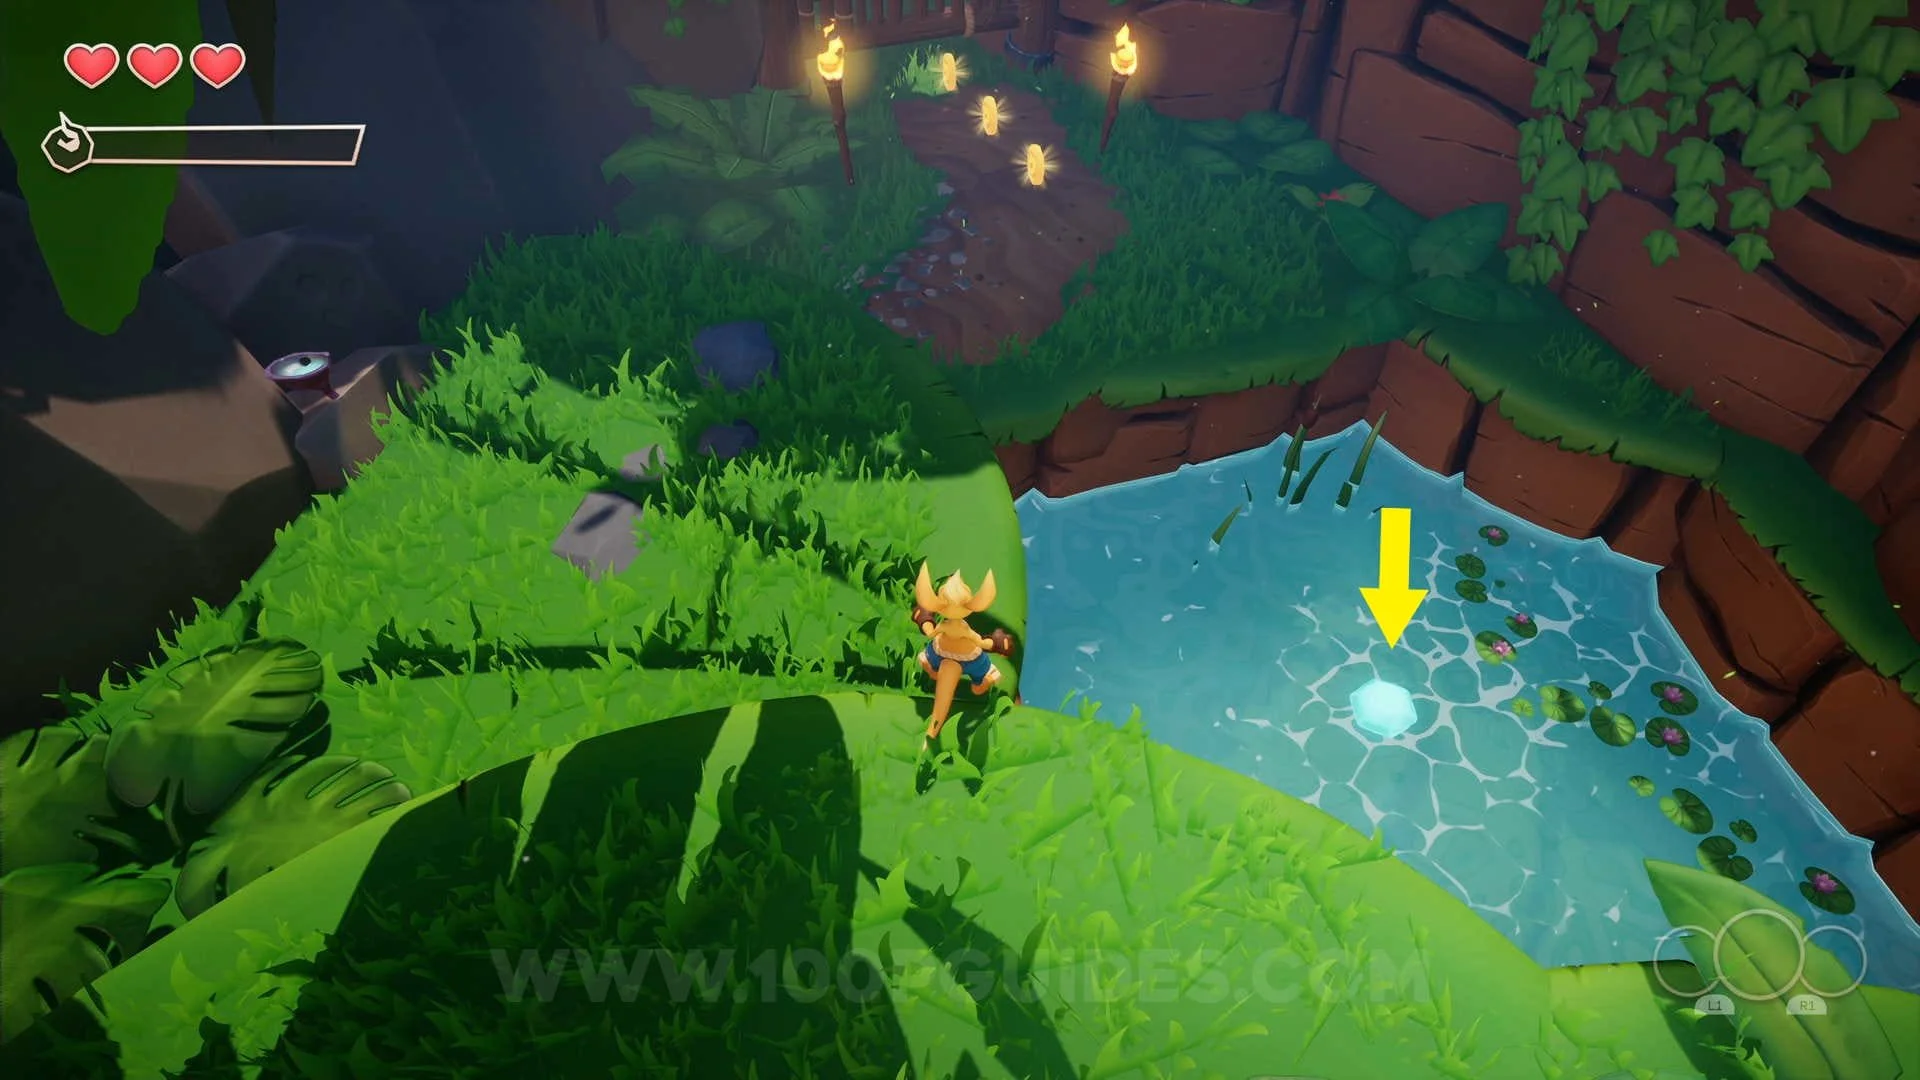
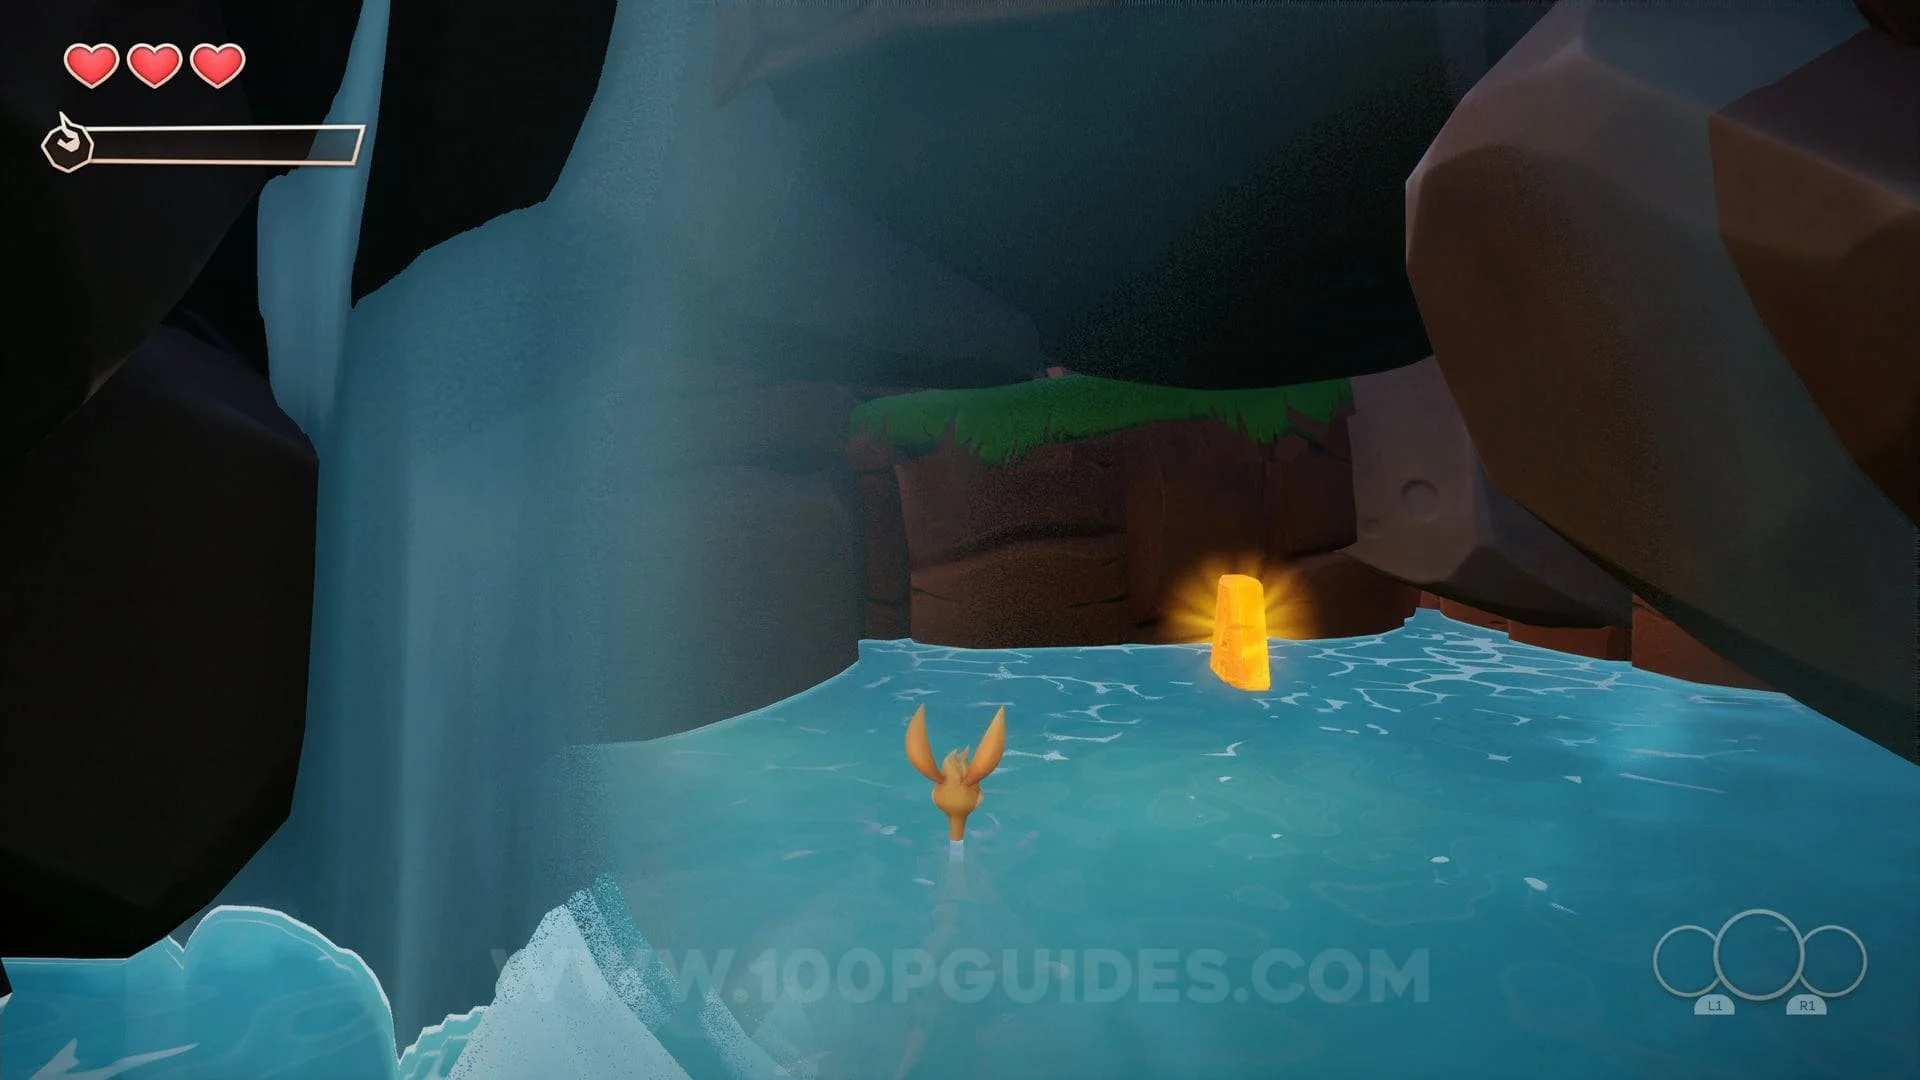
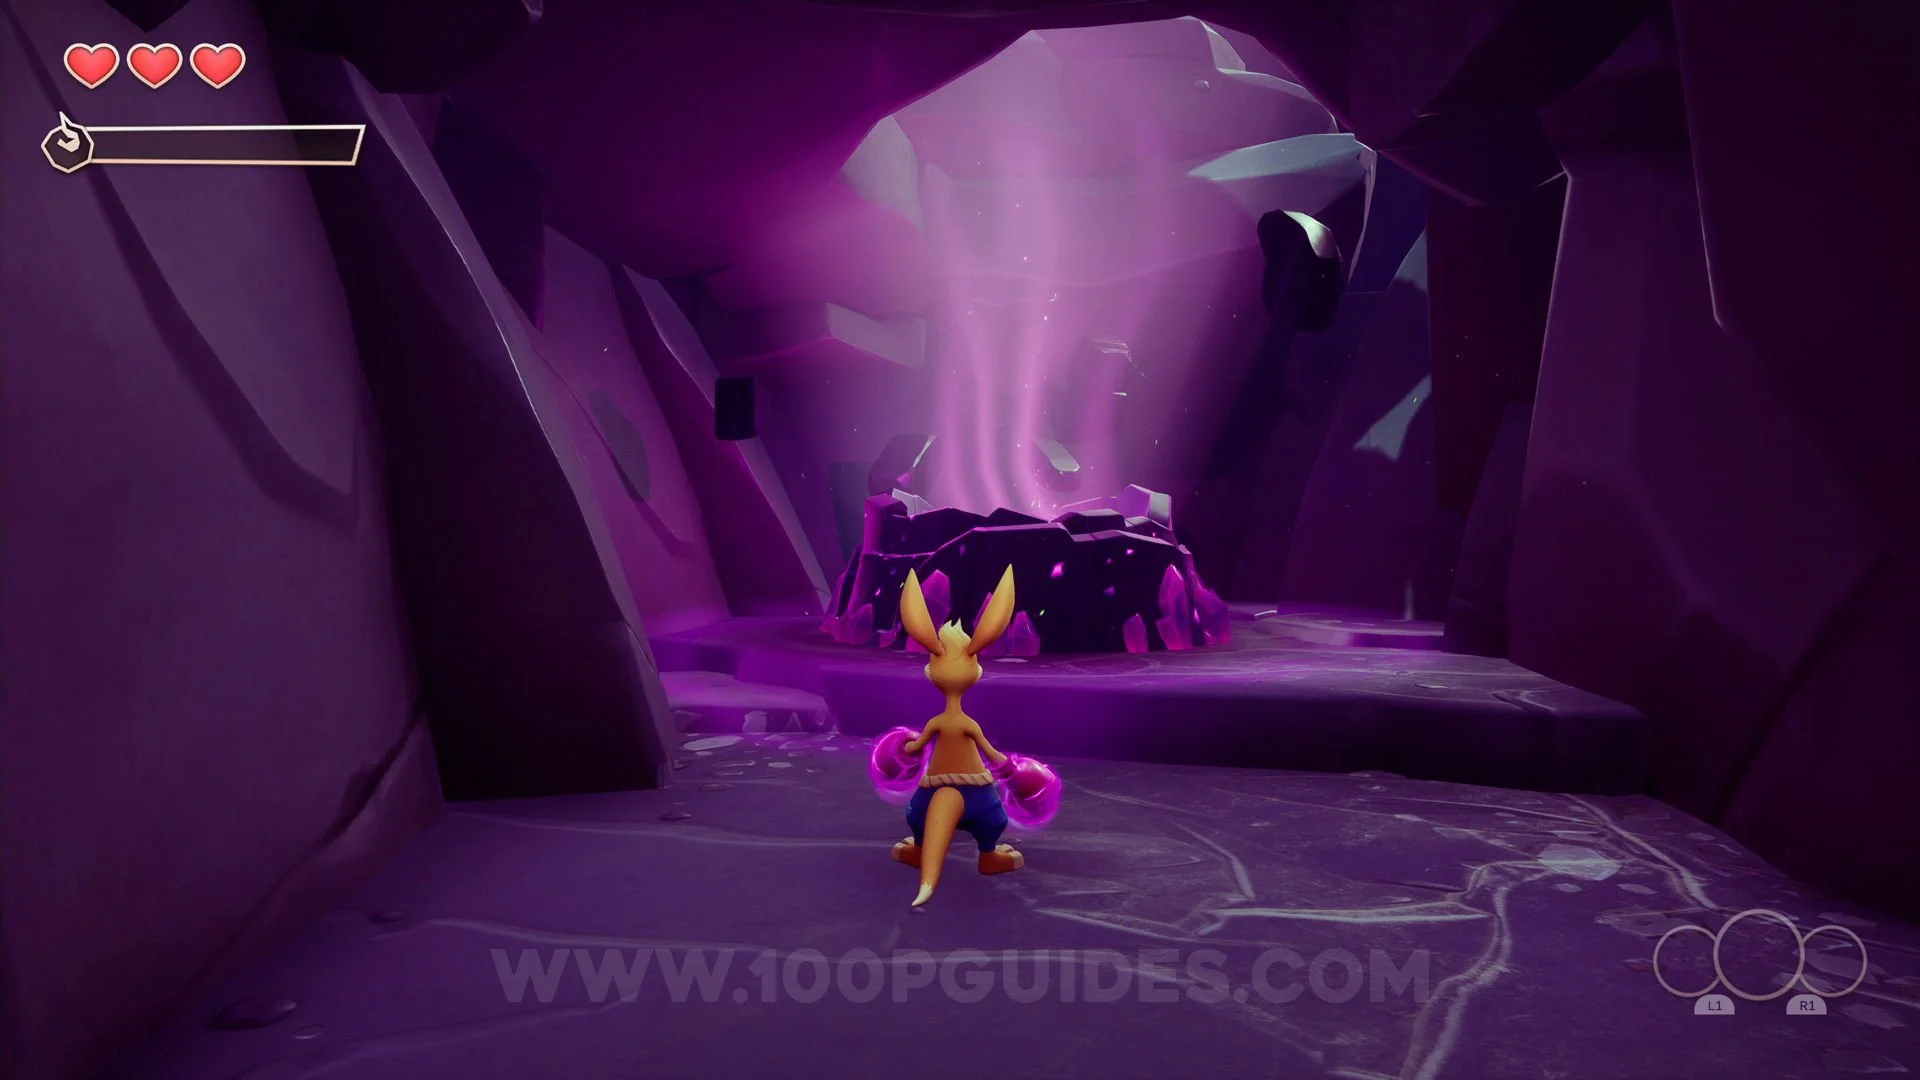
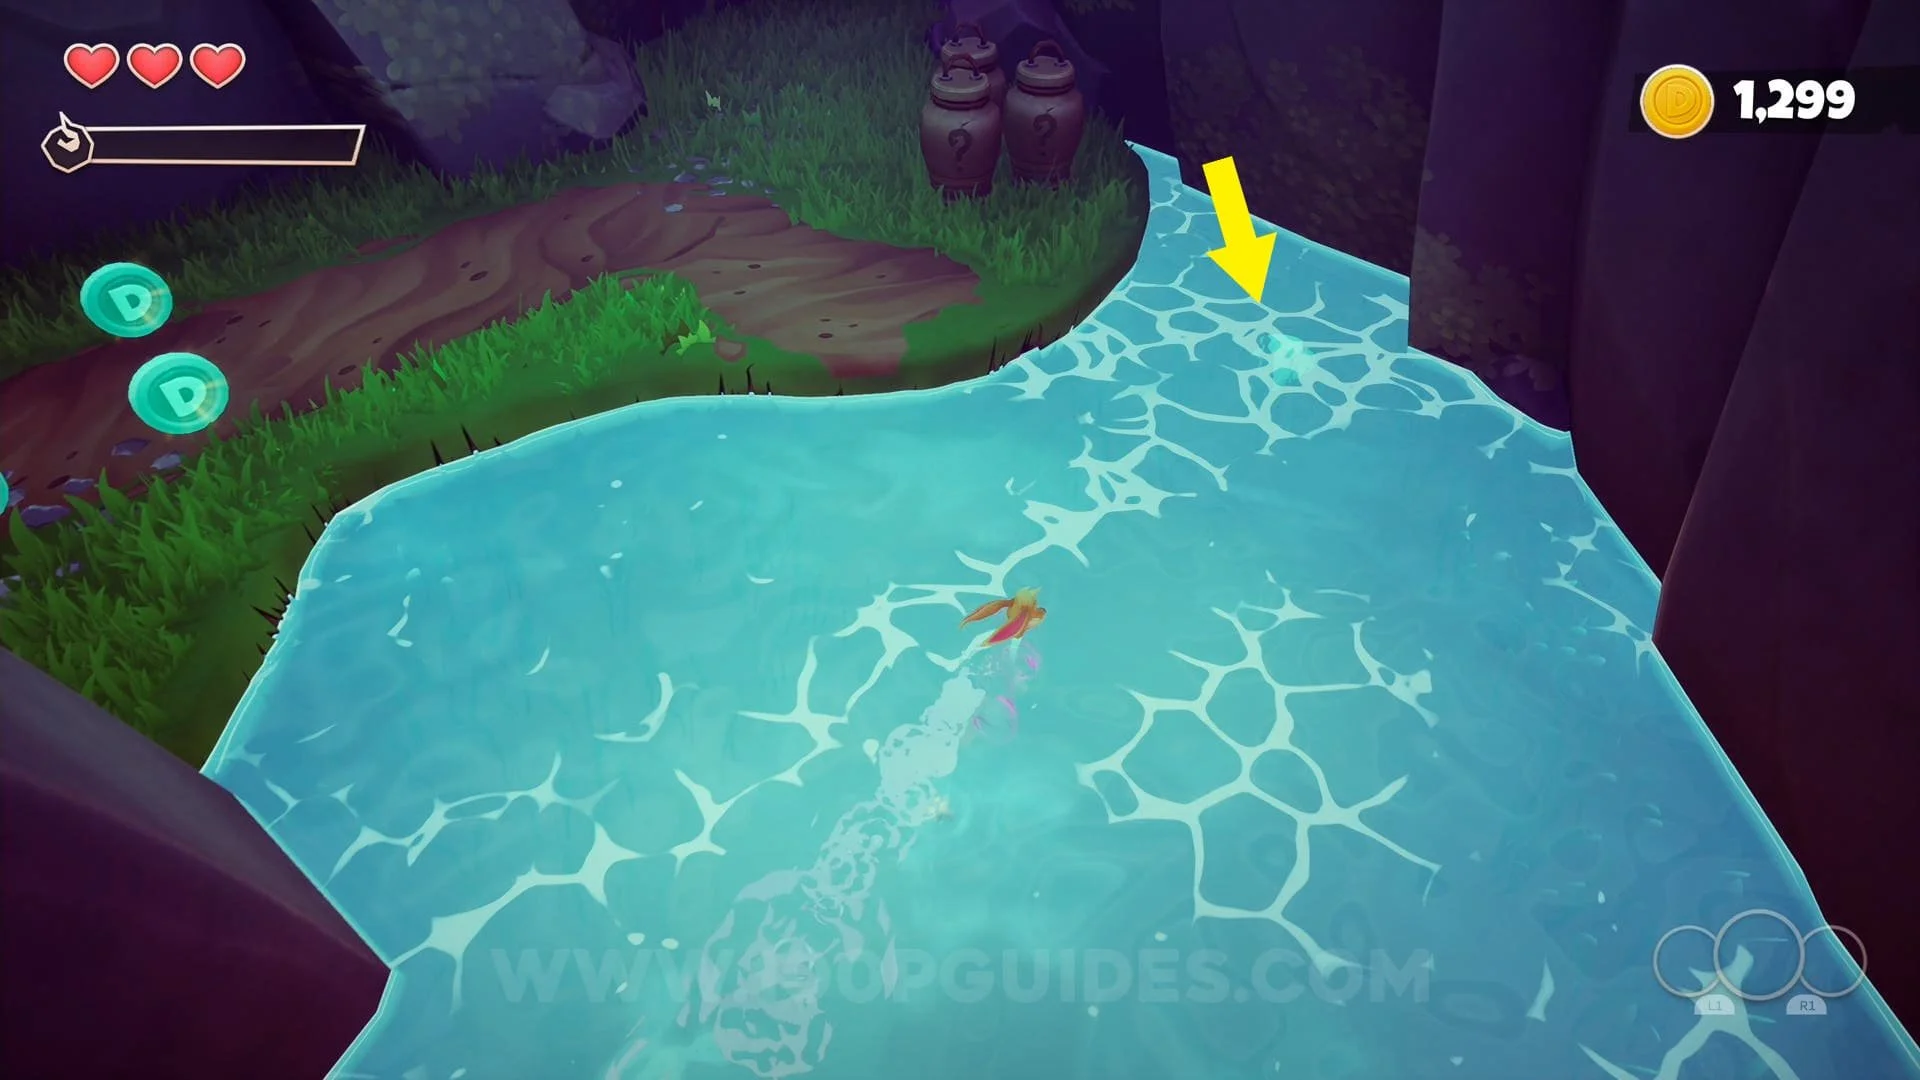
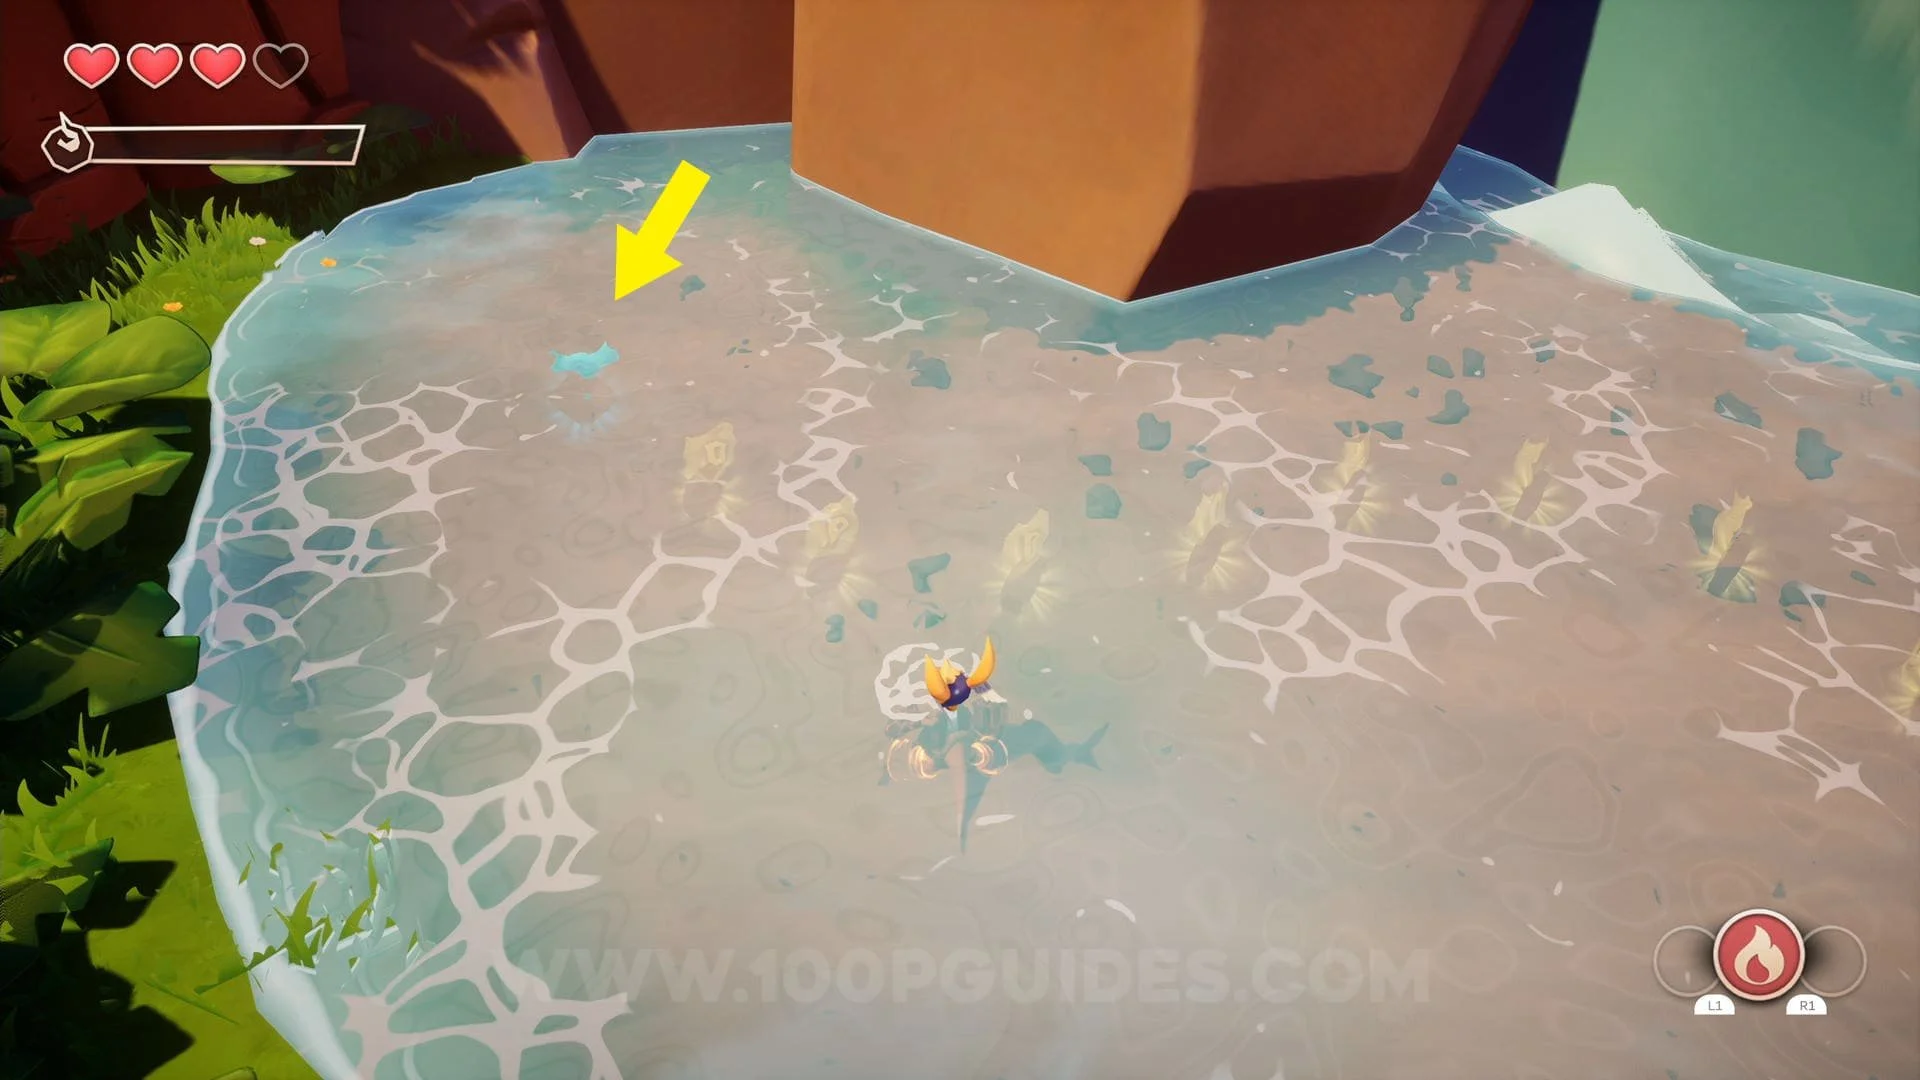
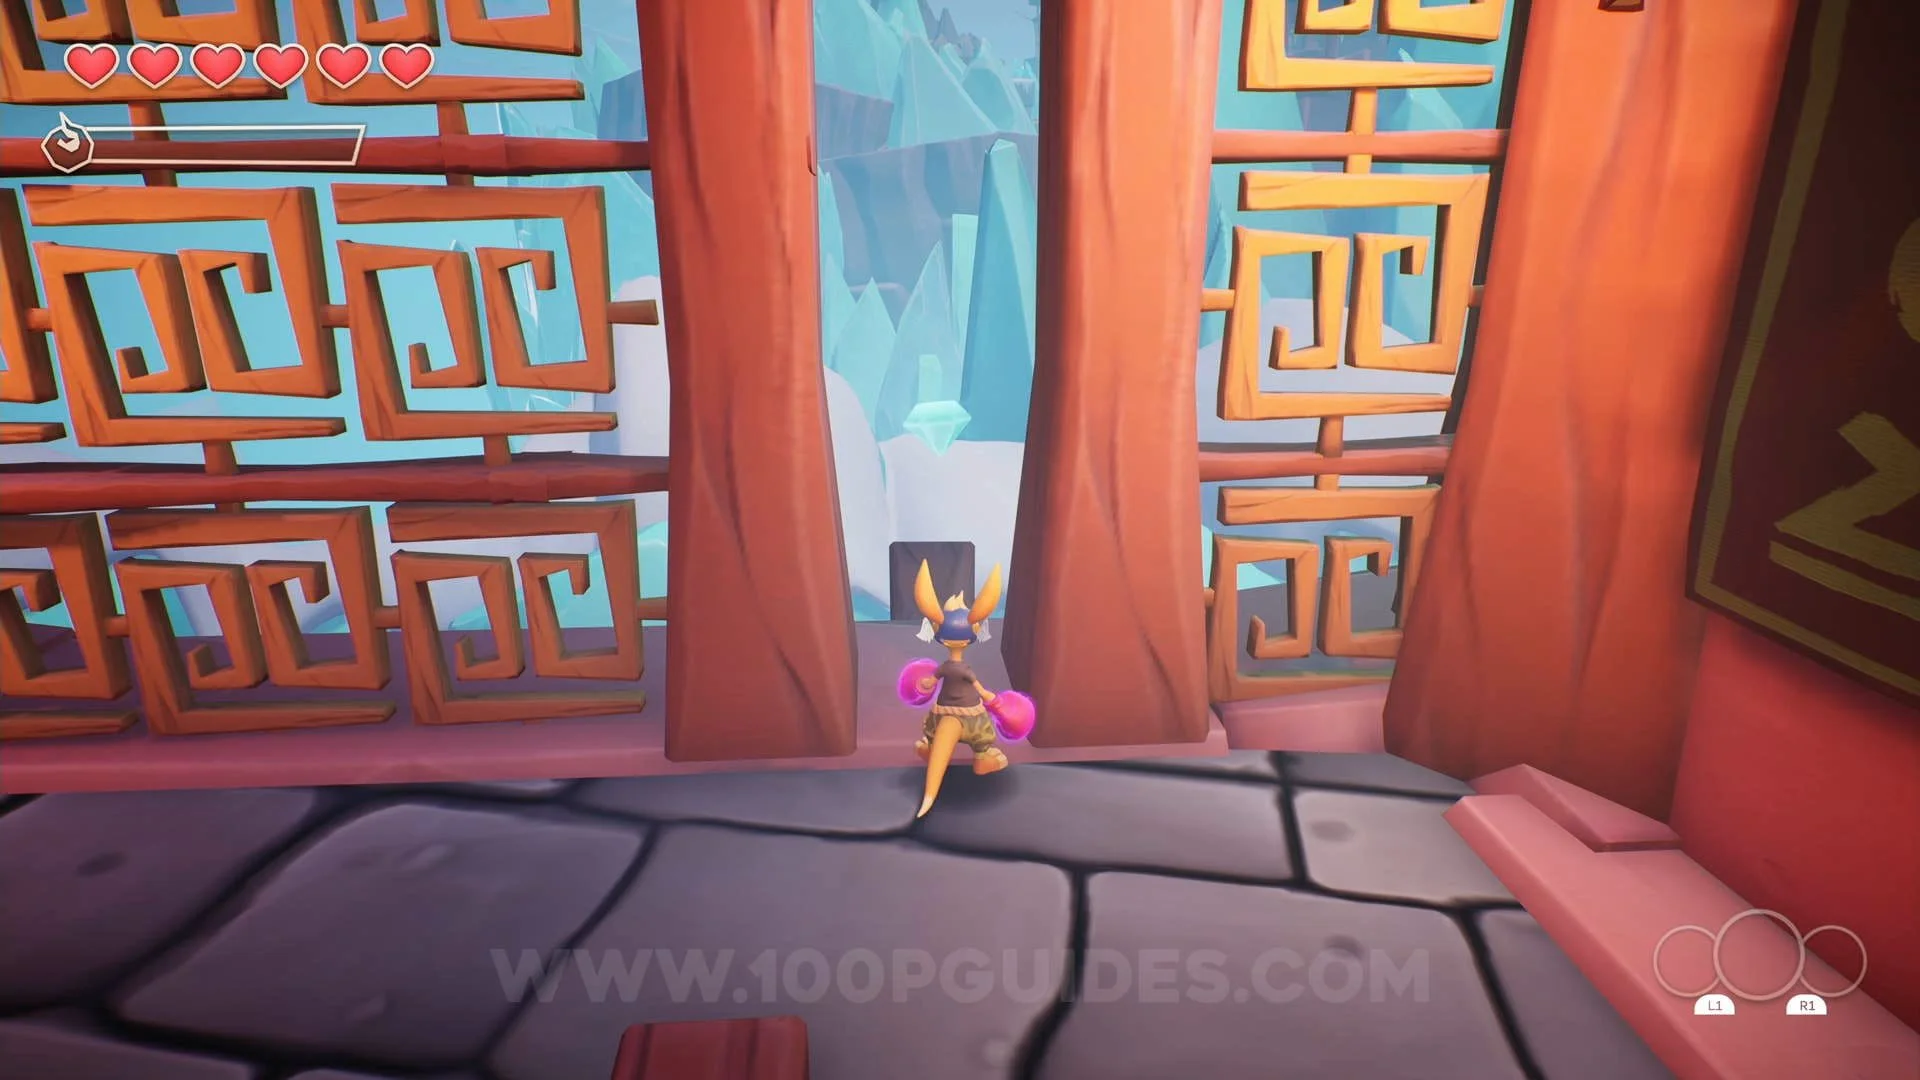
Crystal #1: In the water just after the first wooden gate you roll under.

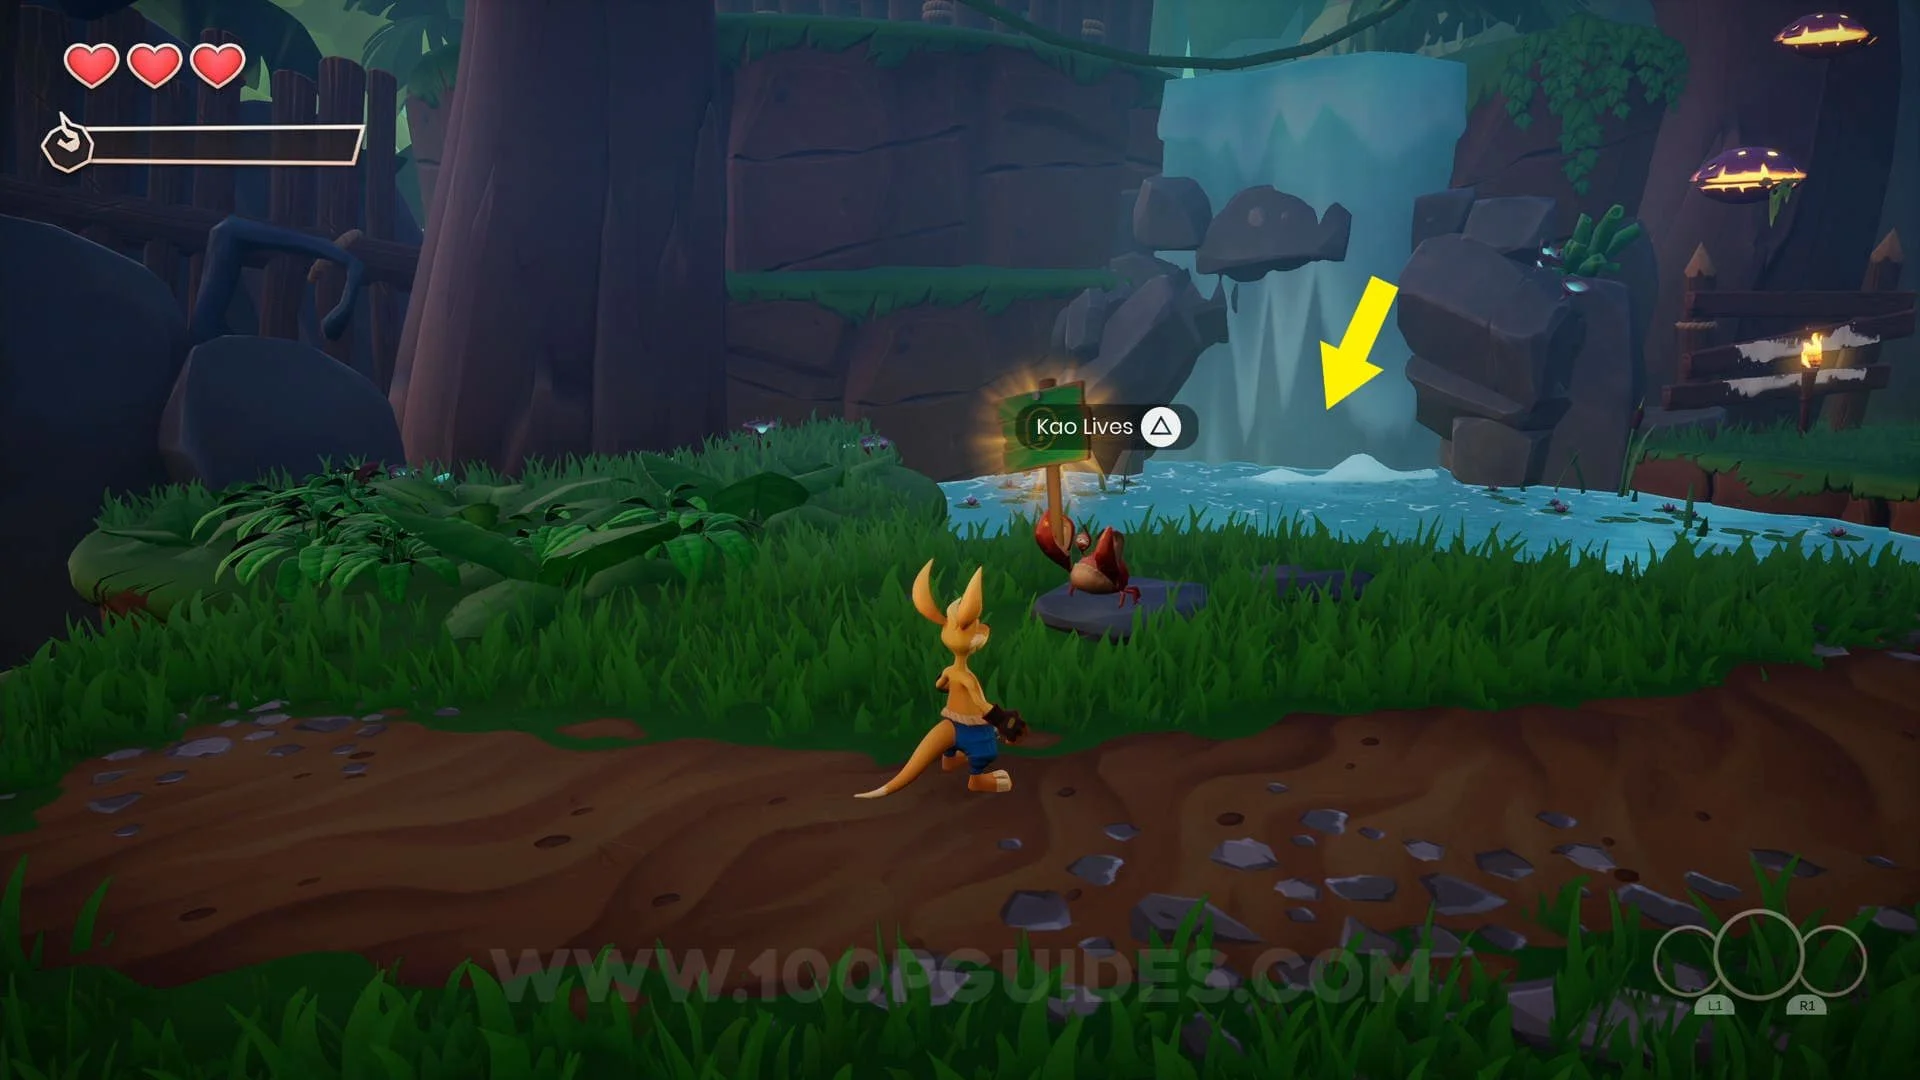
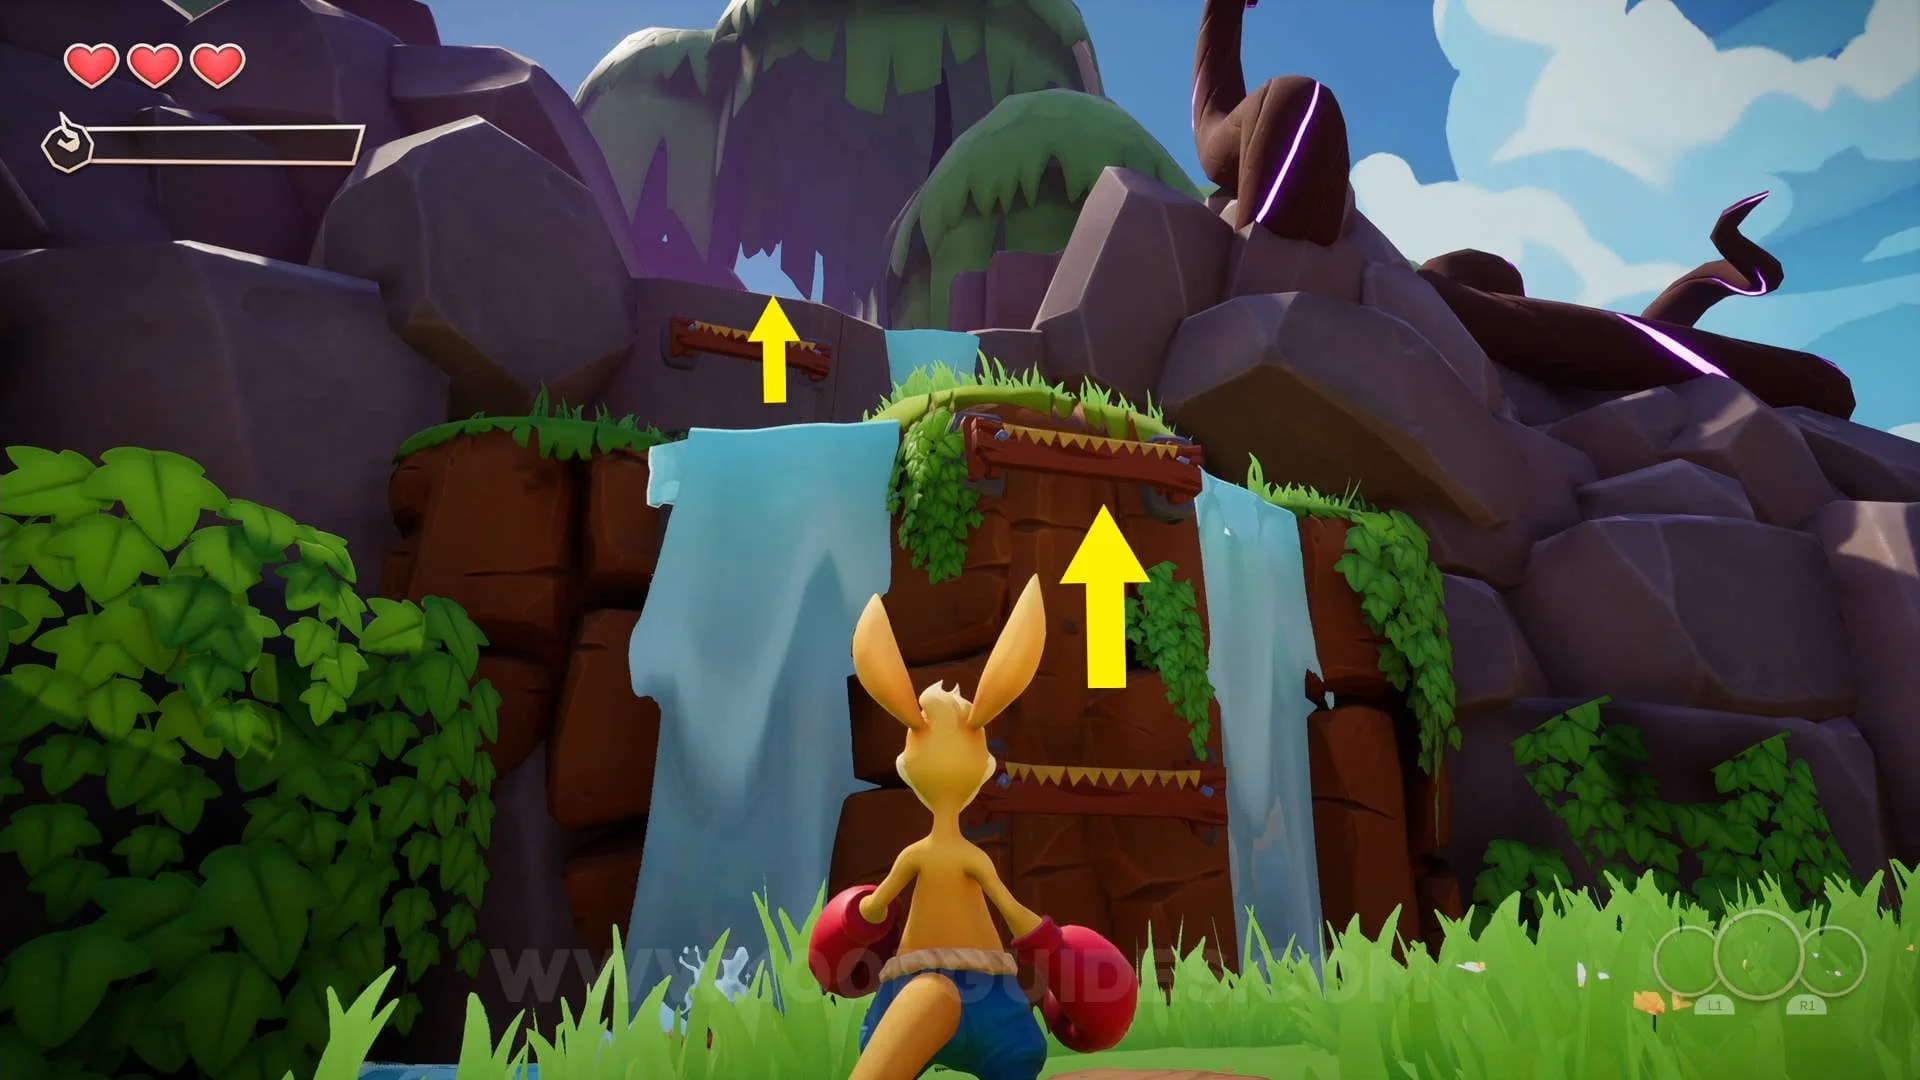
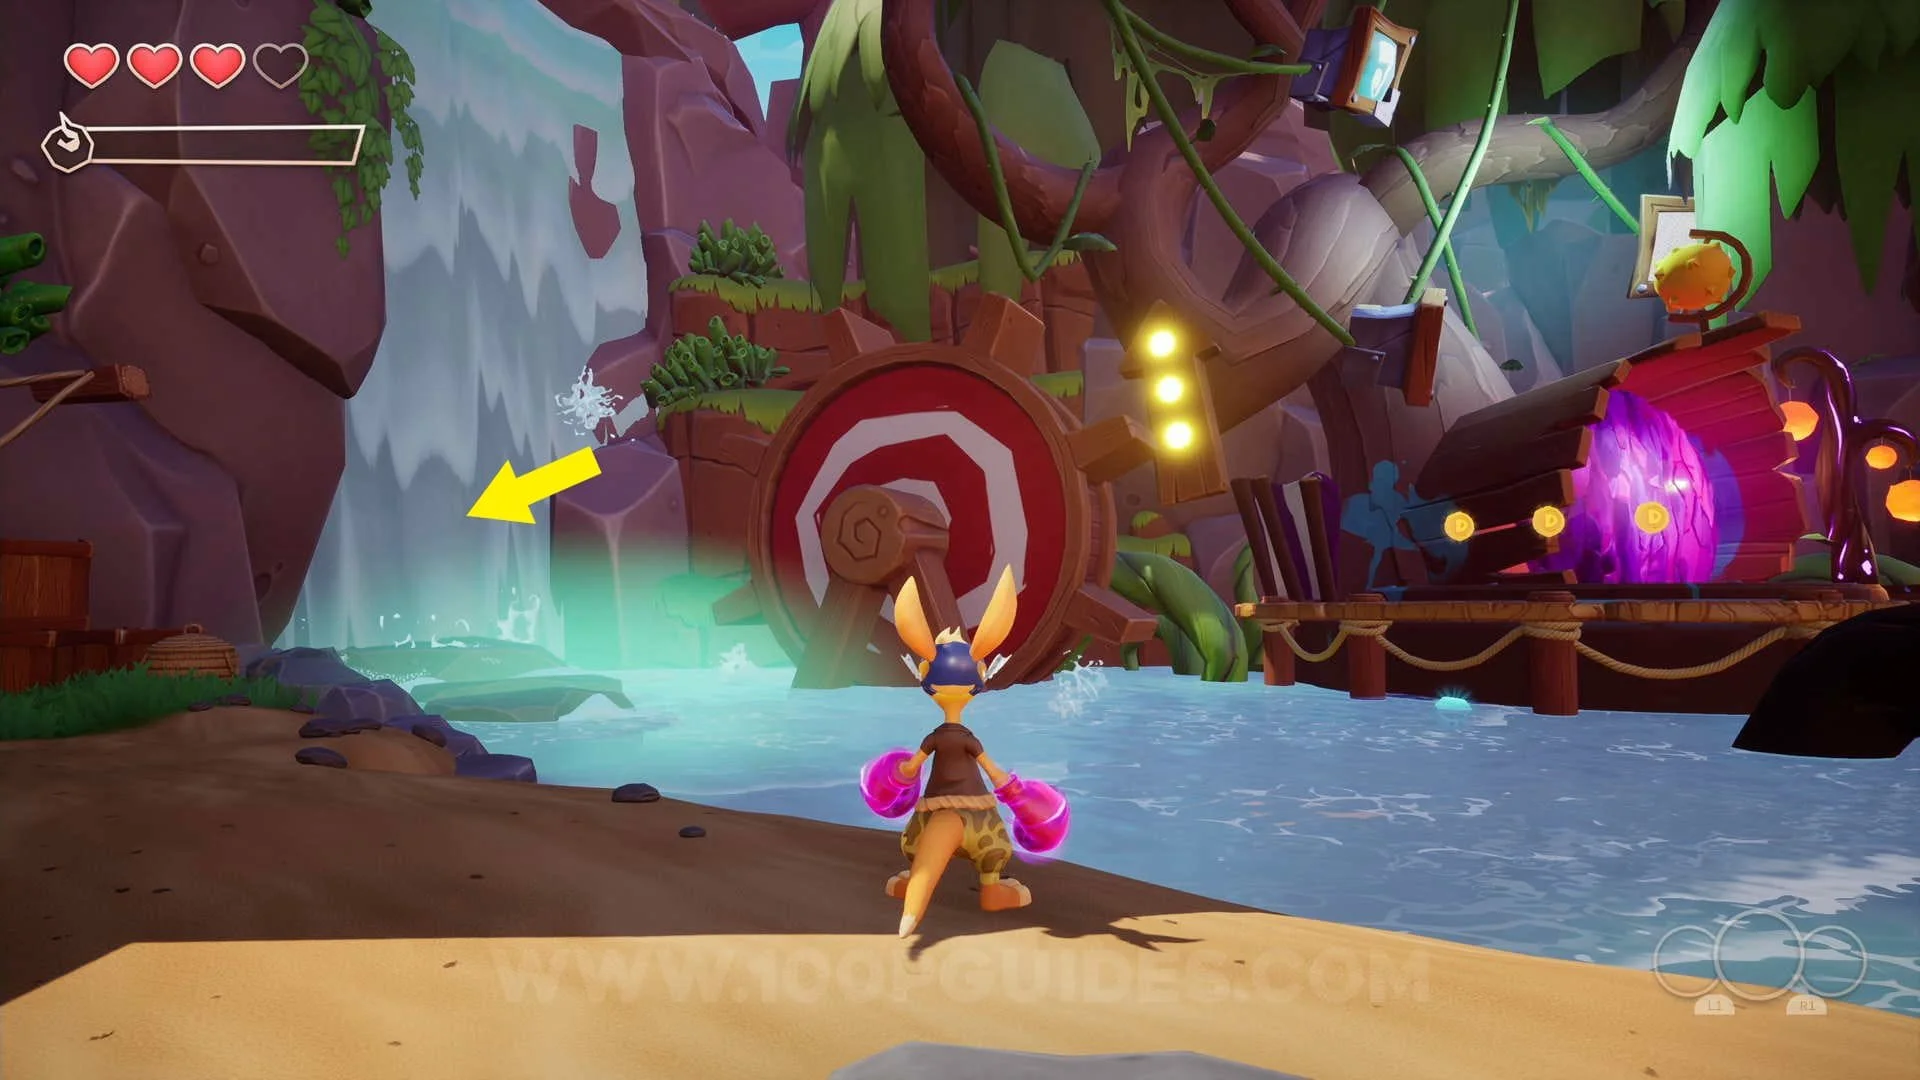
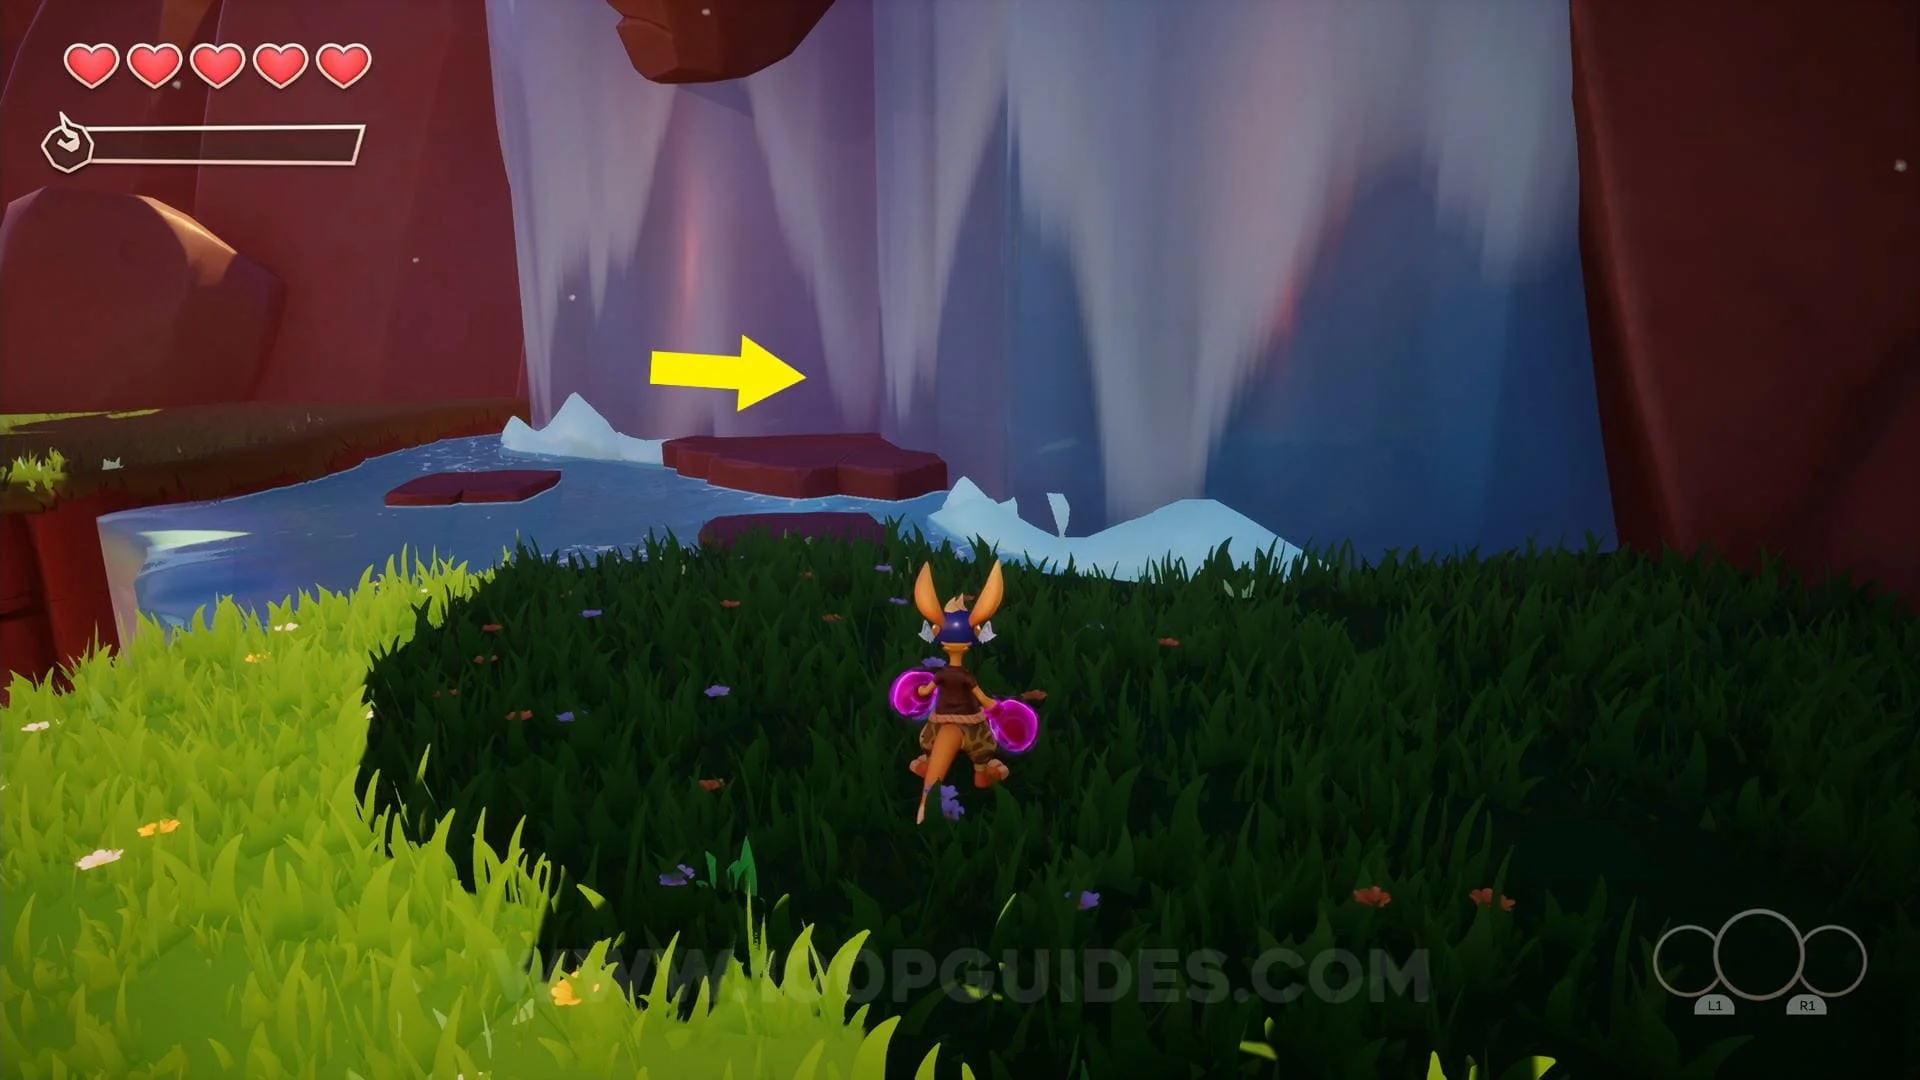
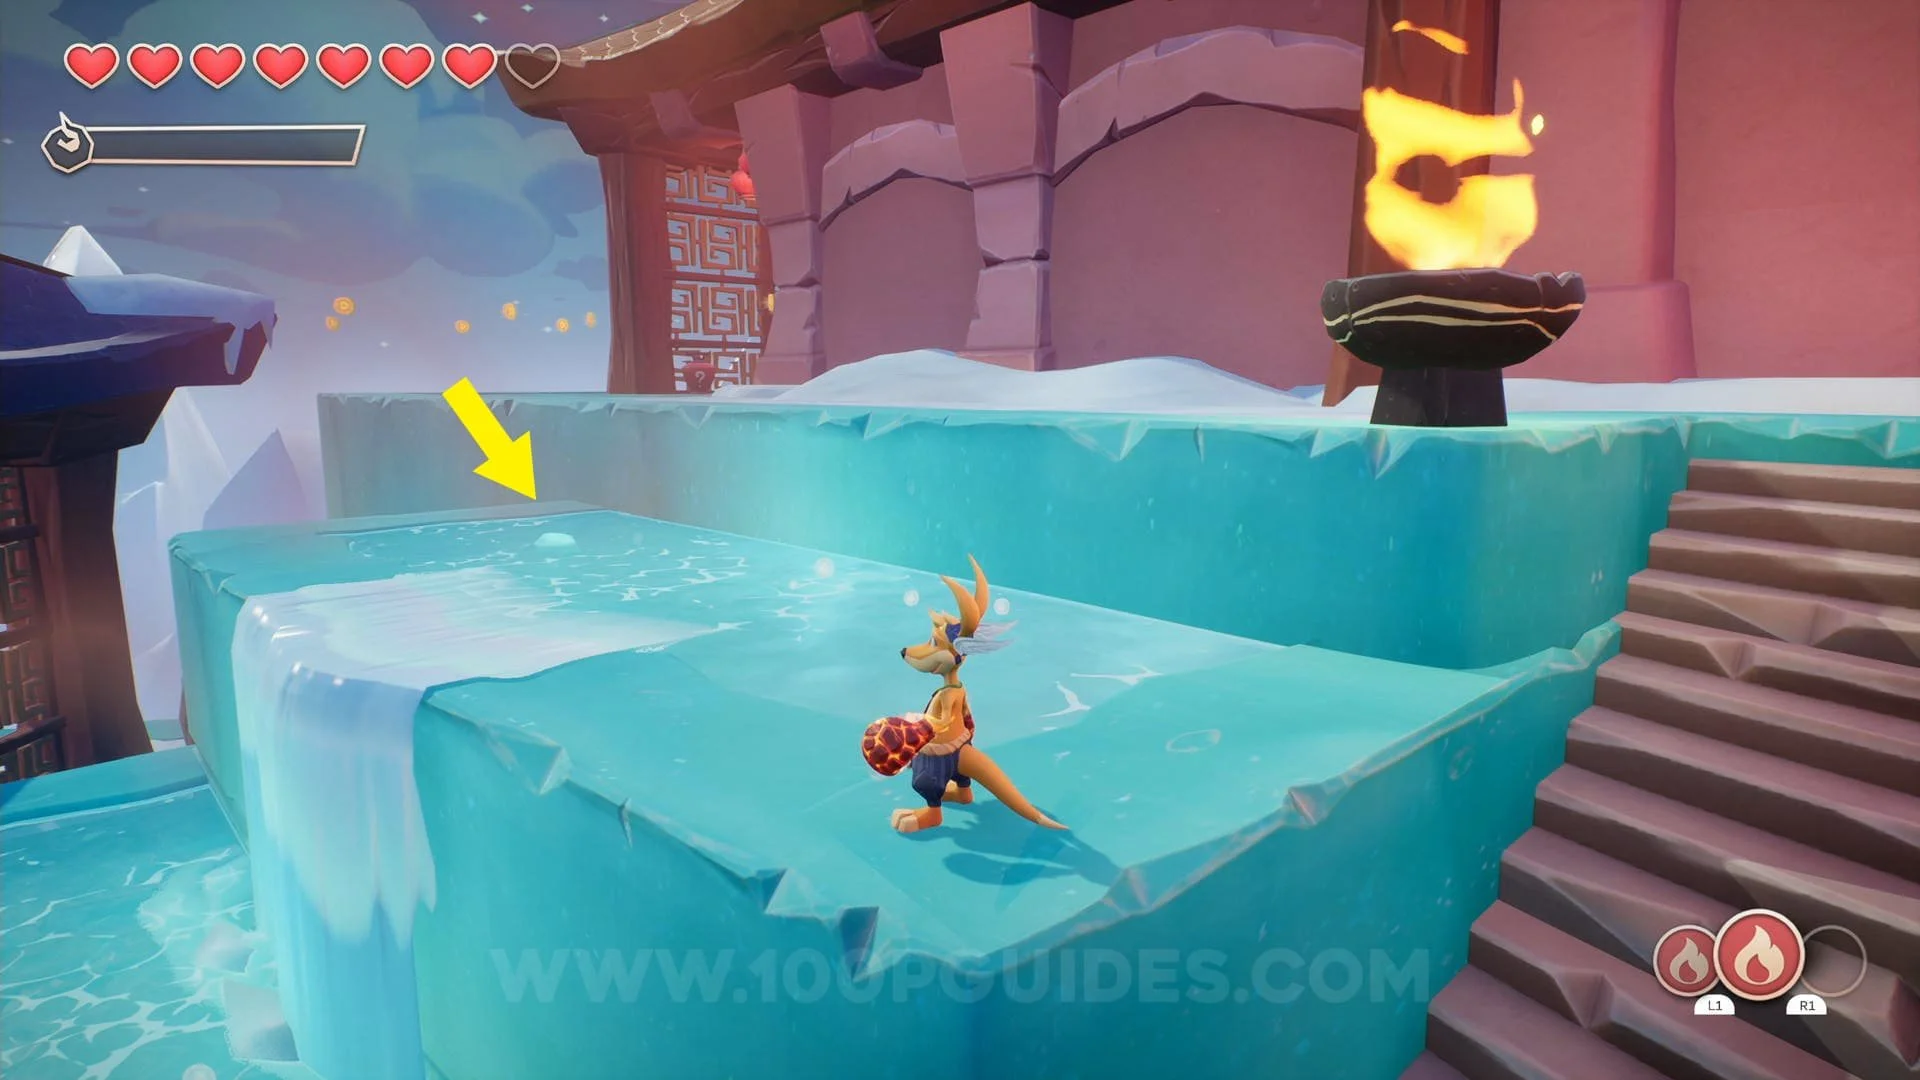
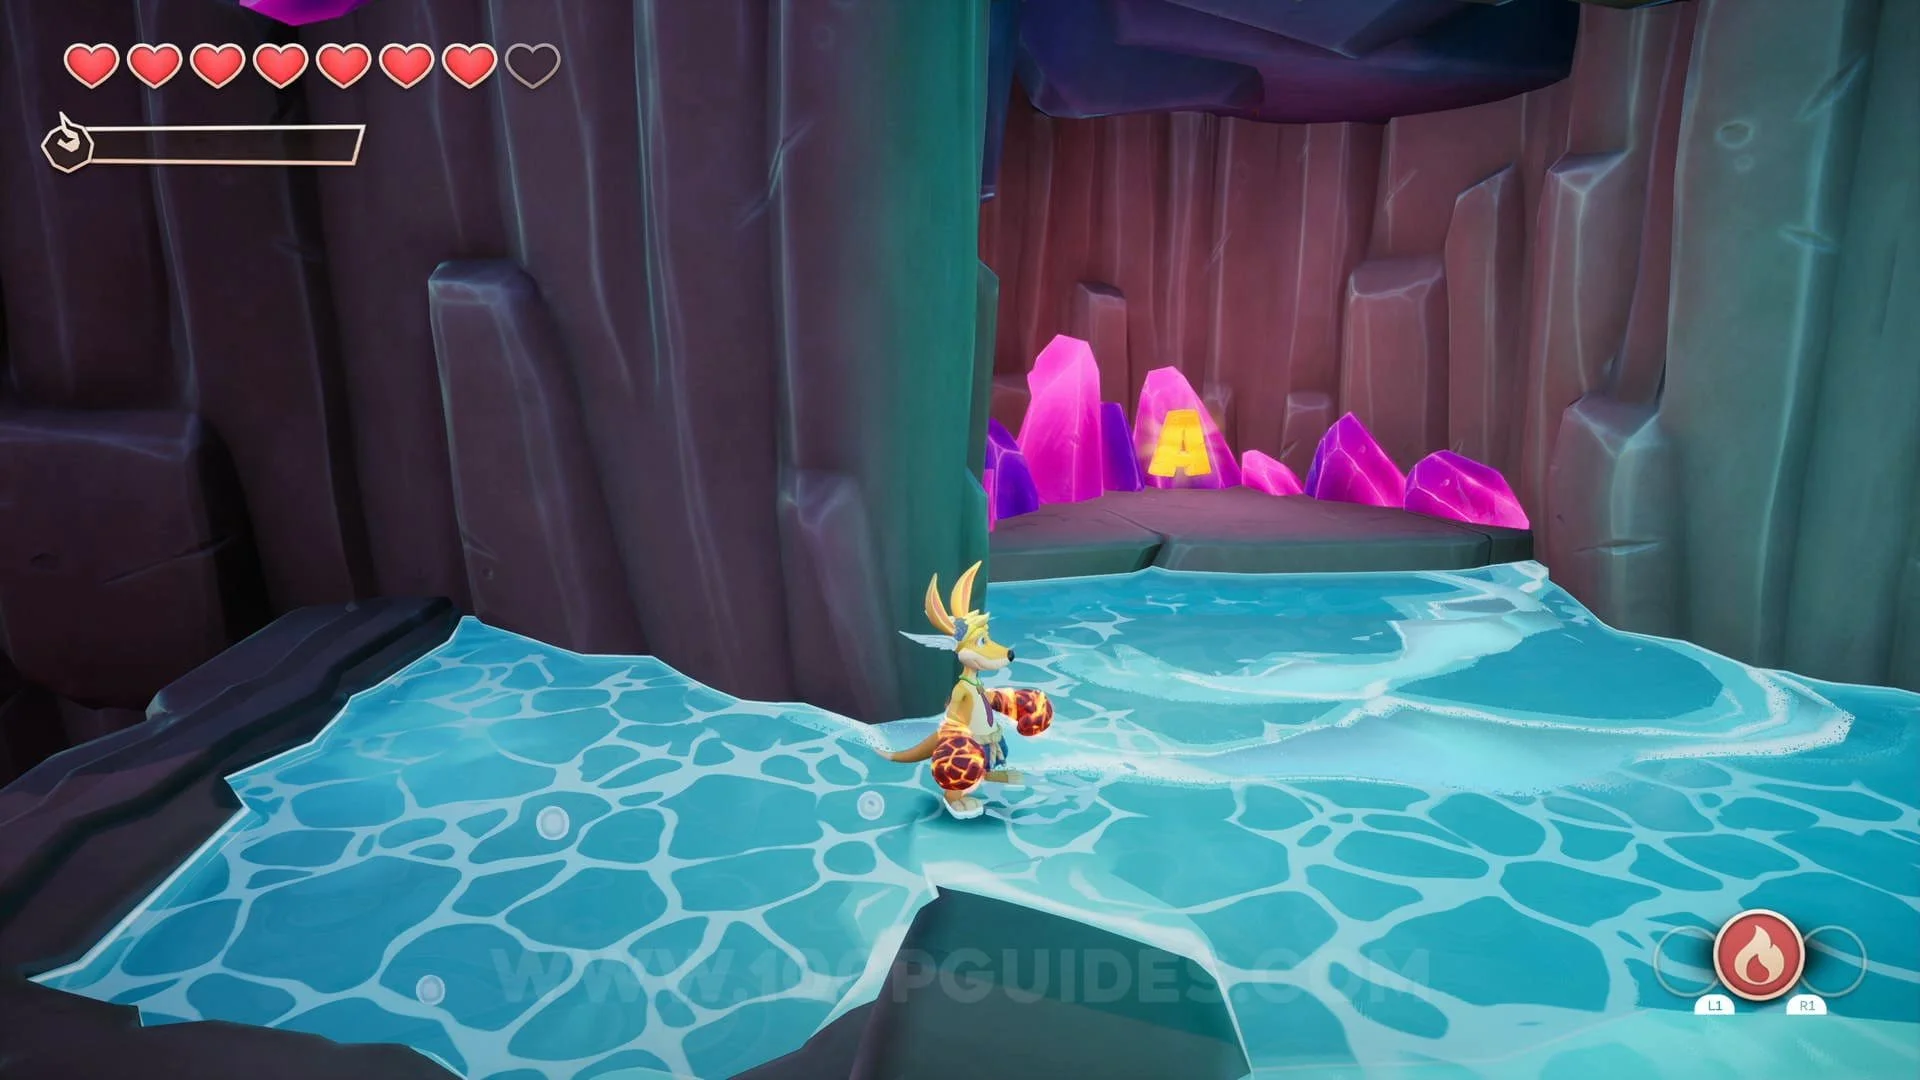
KAO Letter (A): Behind the waterfall next to the "Kao Lives" tutorial.
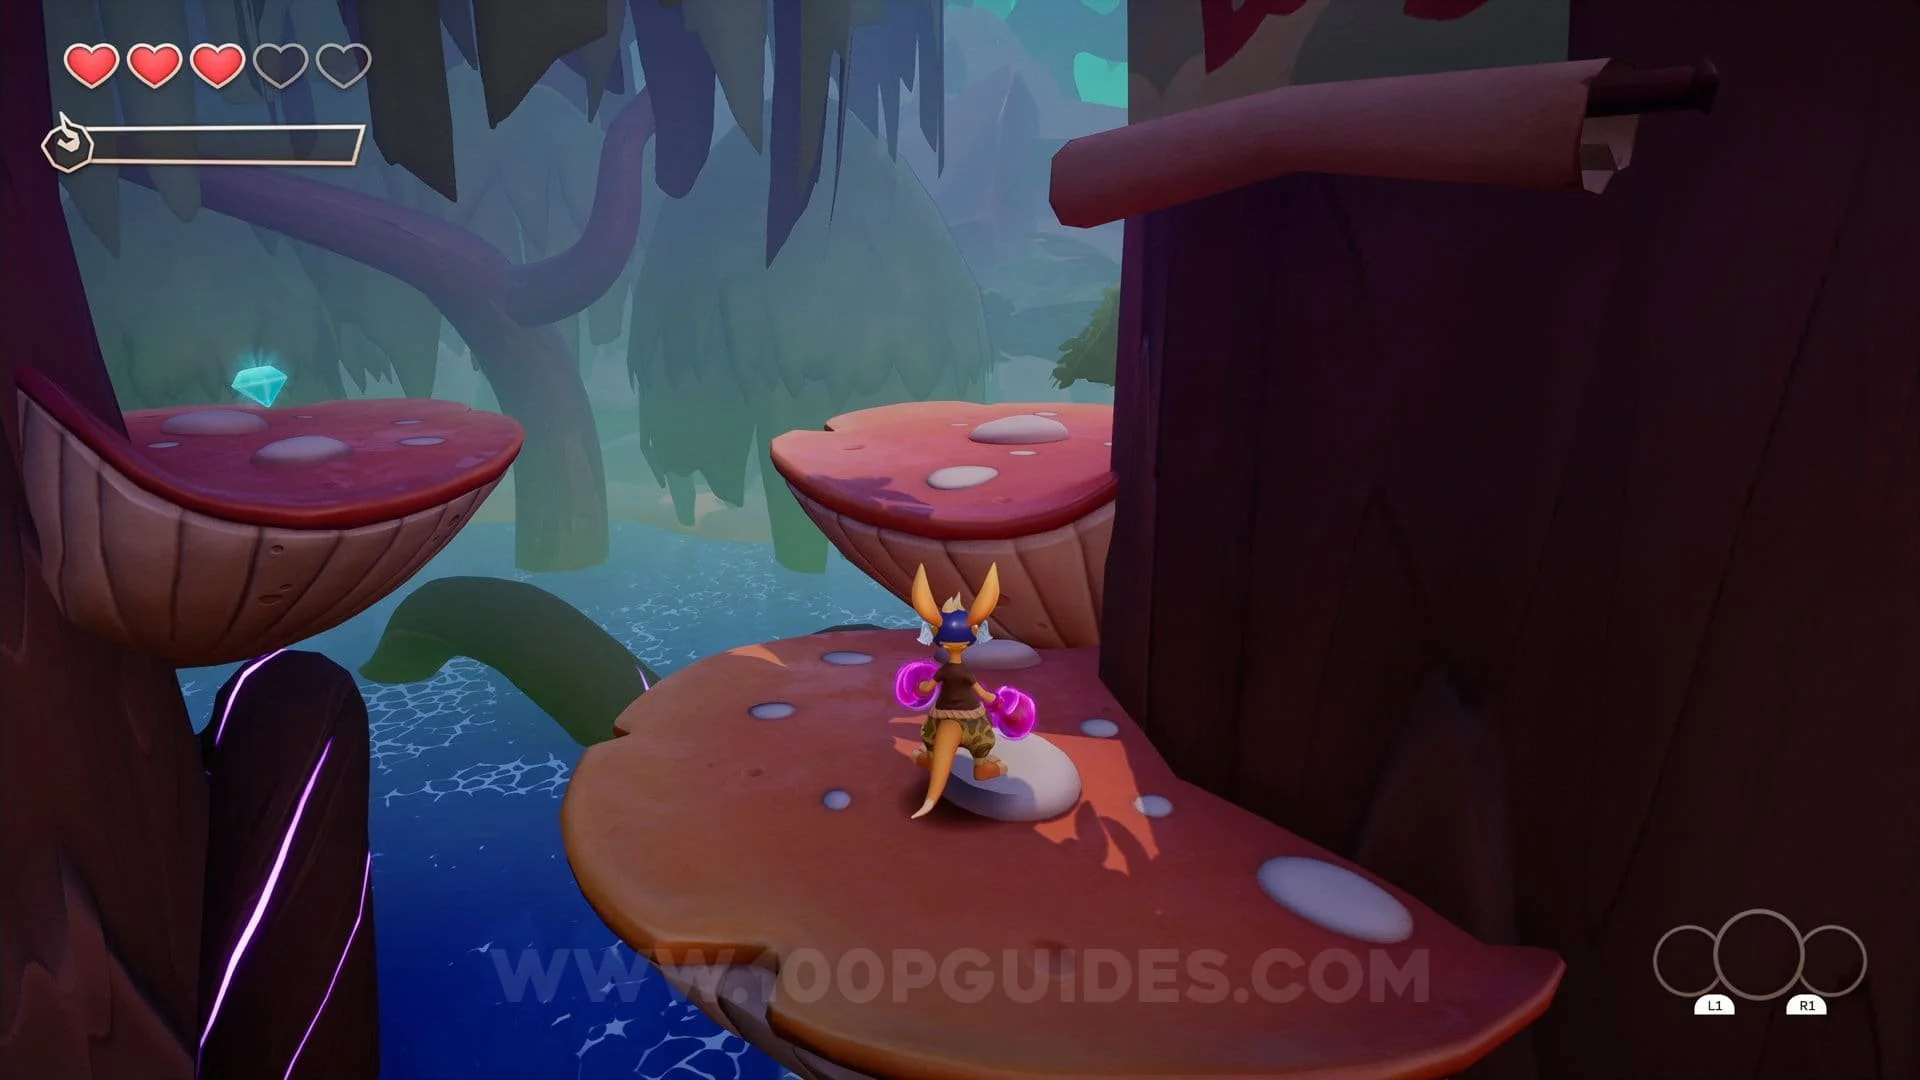
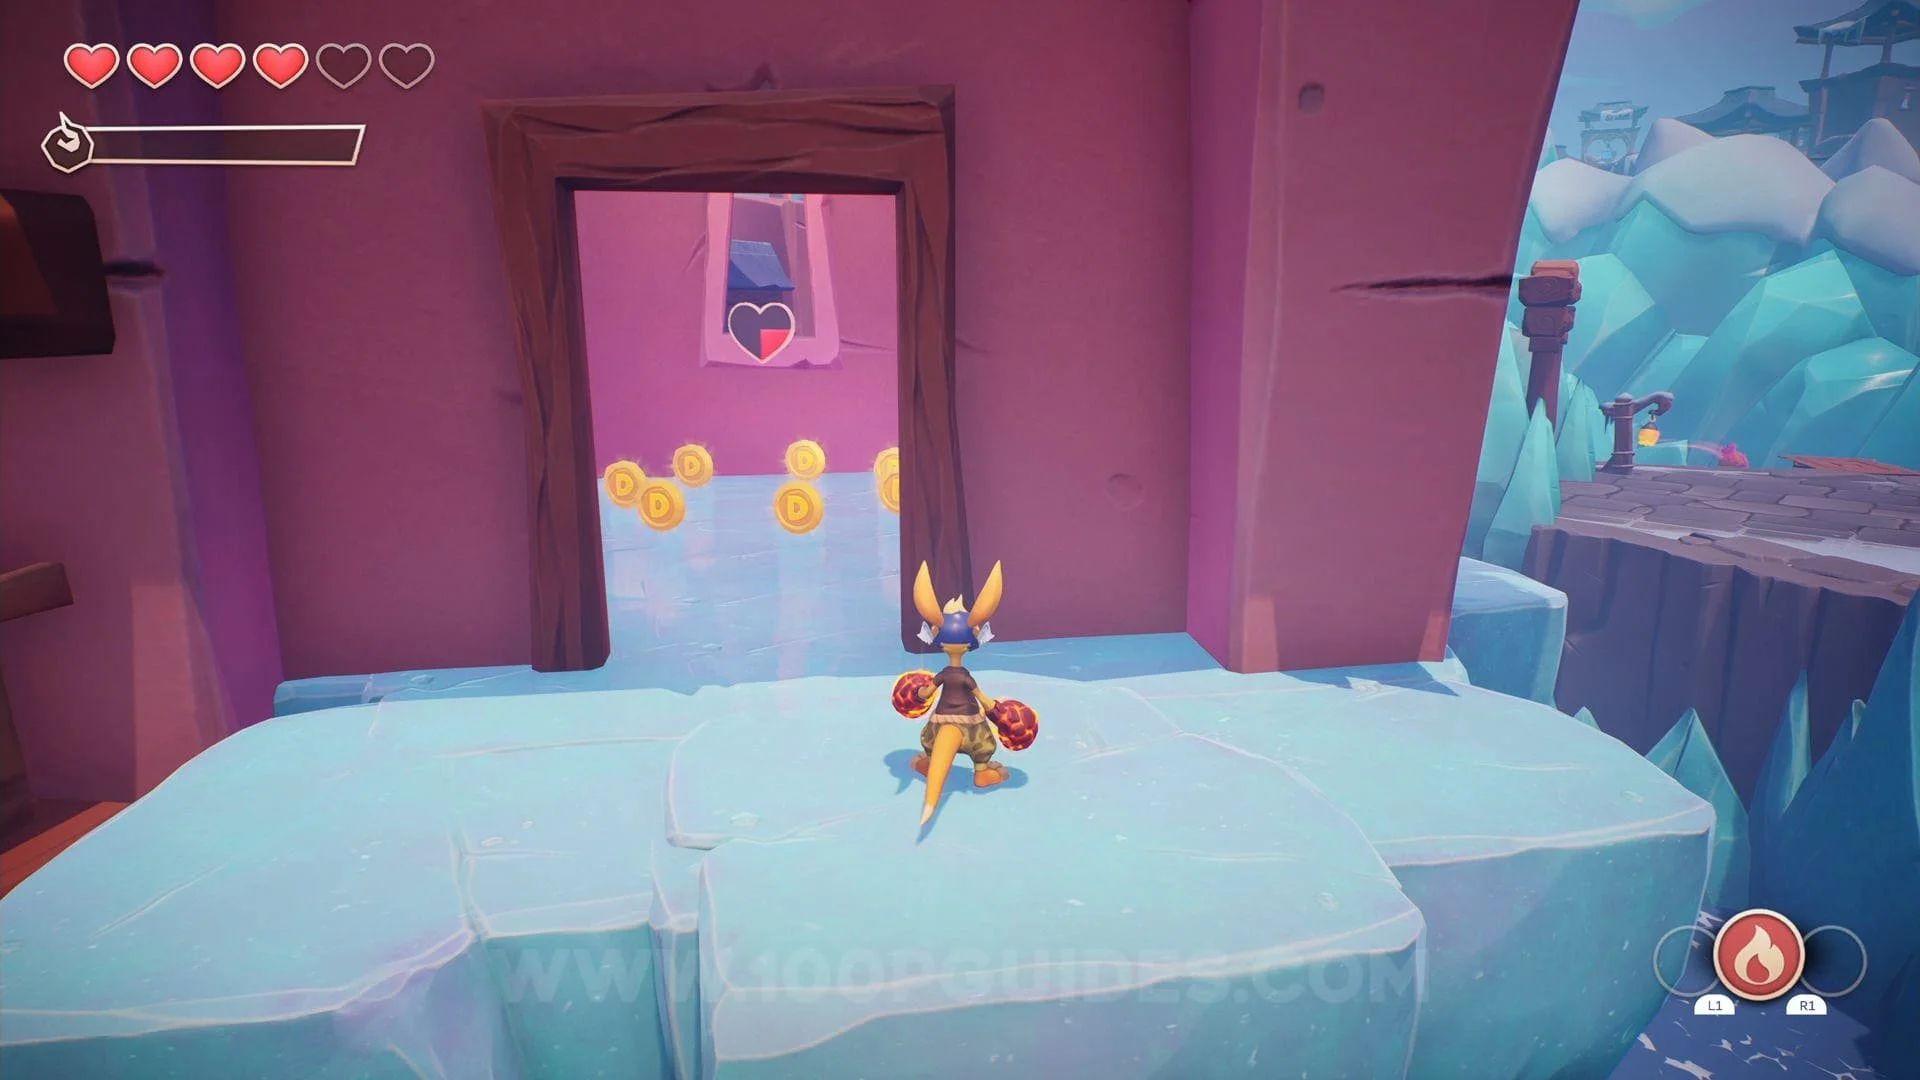
Scroll #1: Once you get to the open water area, roll under the wooden plank to the right to
find the scroll on a small island with a tutorial.


Crystal #2: Just after the "Tail Attack" tutorial, take a left at the wooden gates and do some platforming
to the blue houses, the crystal will be inbetween the houses.


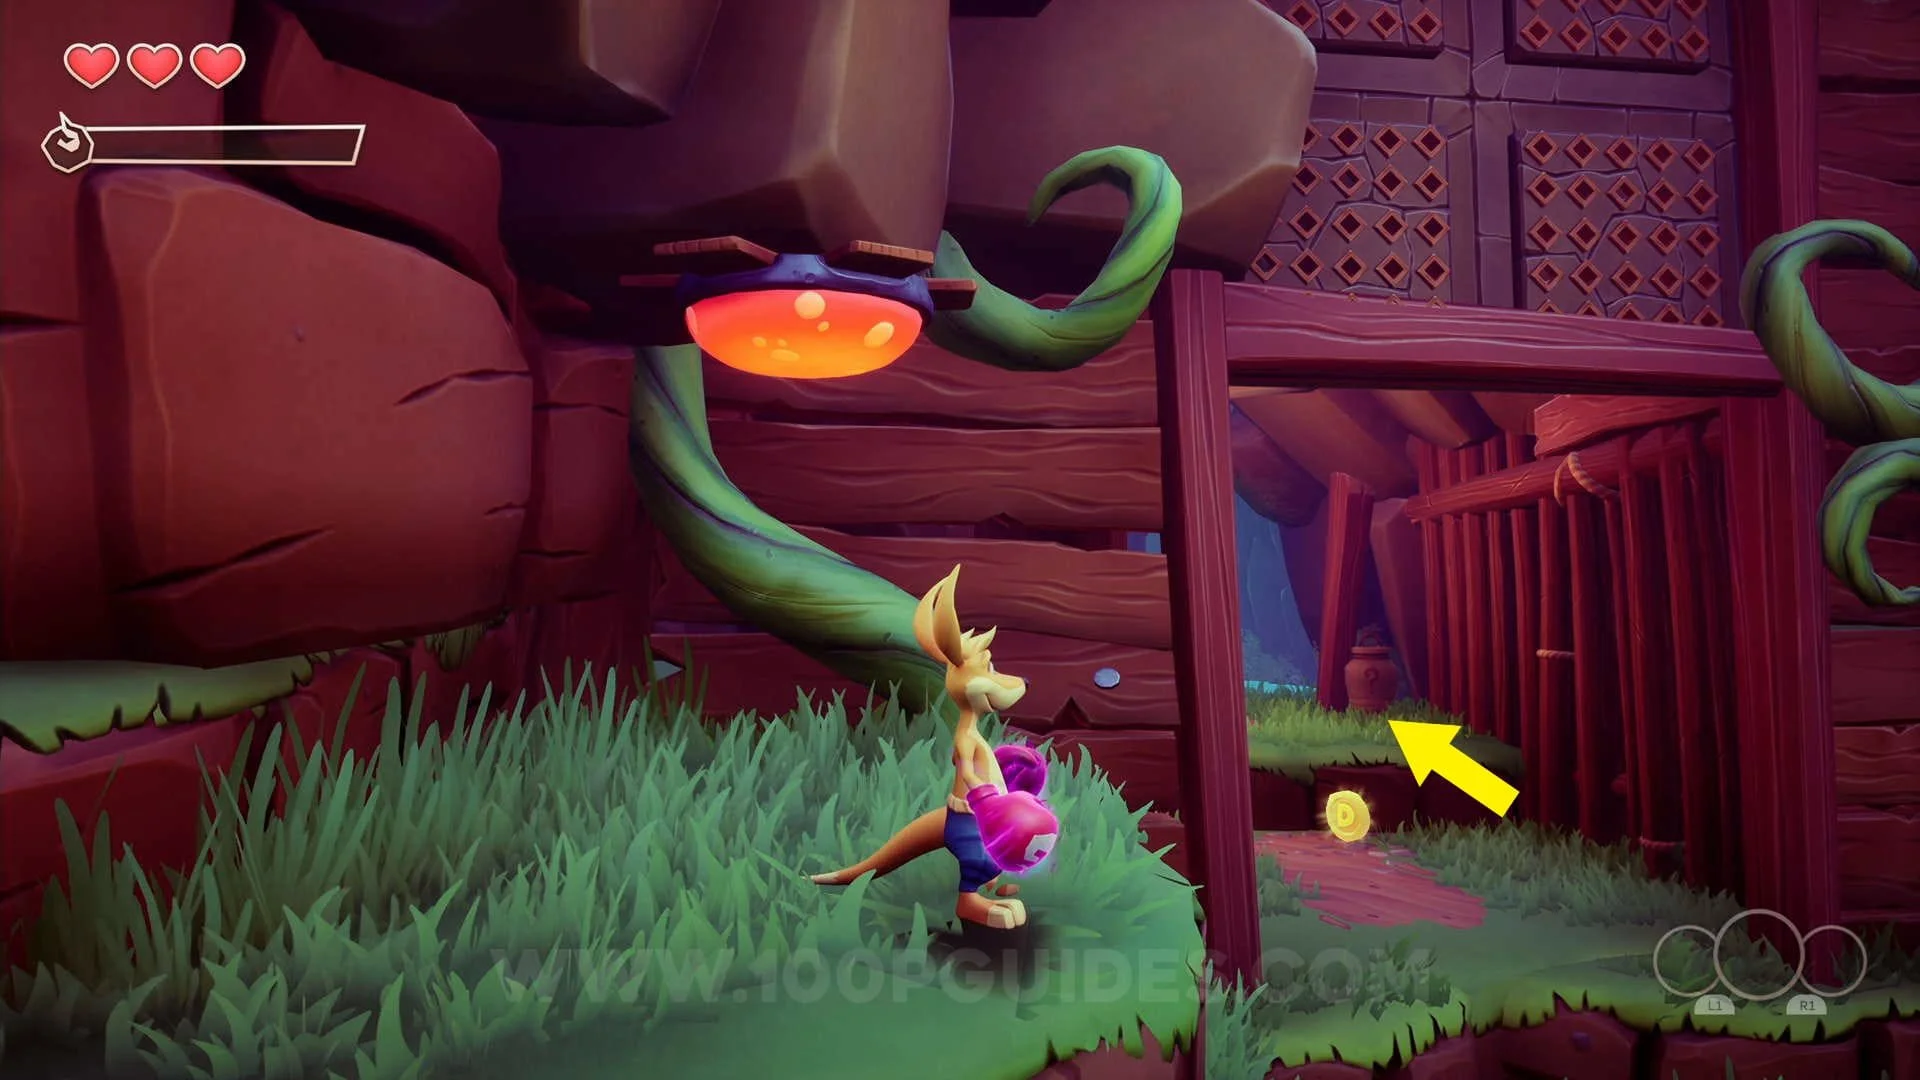
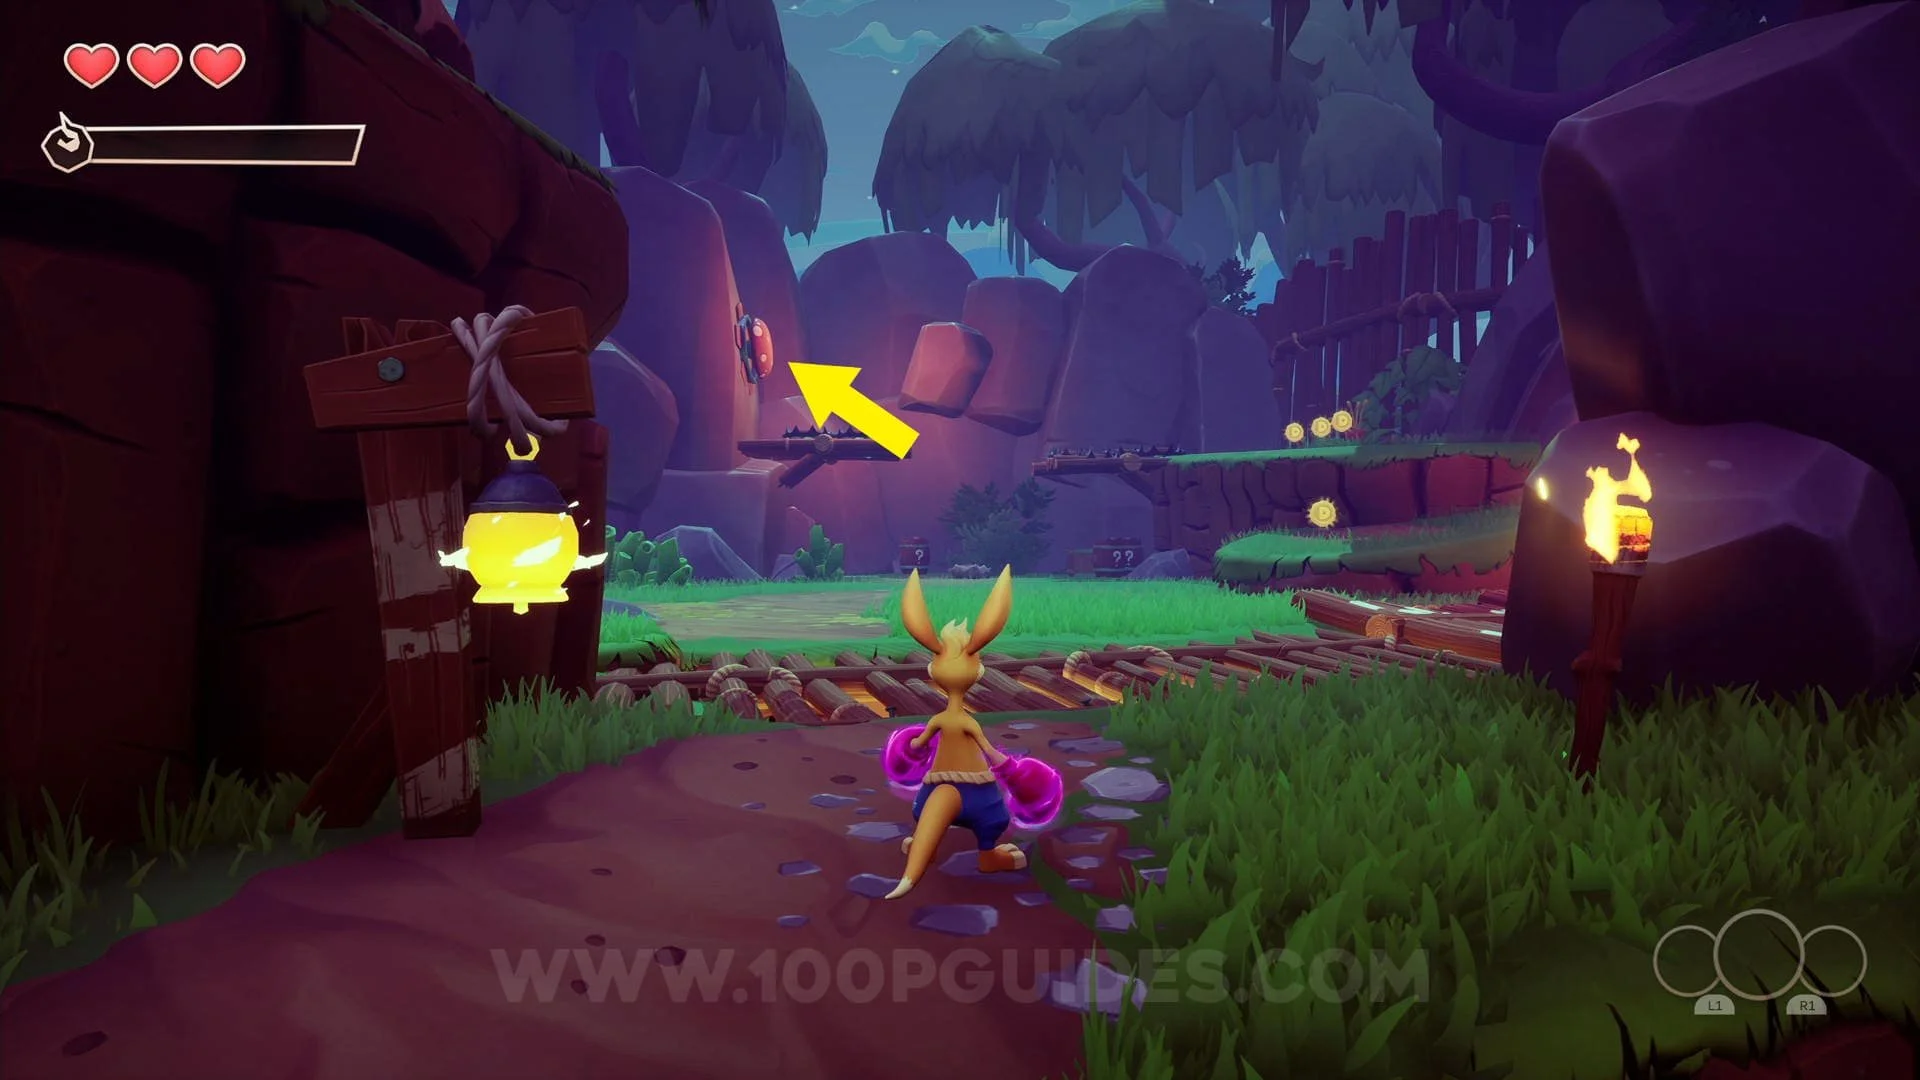
KAO Letter (O): In the area with the previous crystal, punch the door of the red house to break it,
the collectible will be inside.
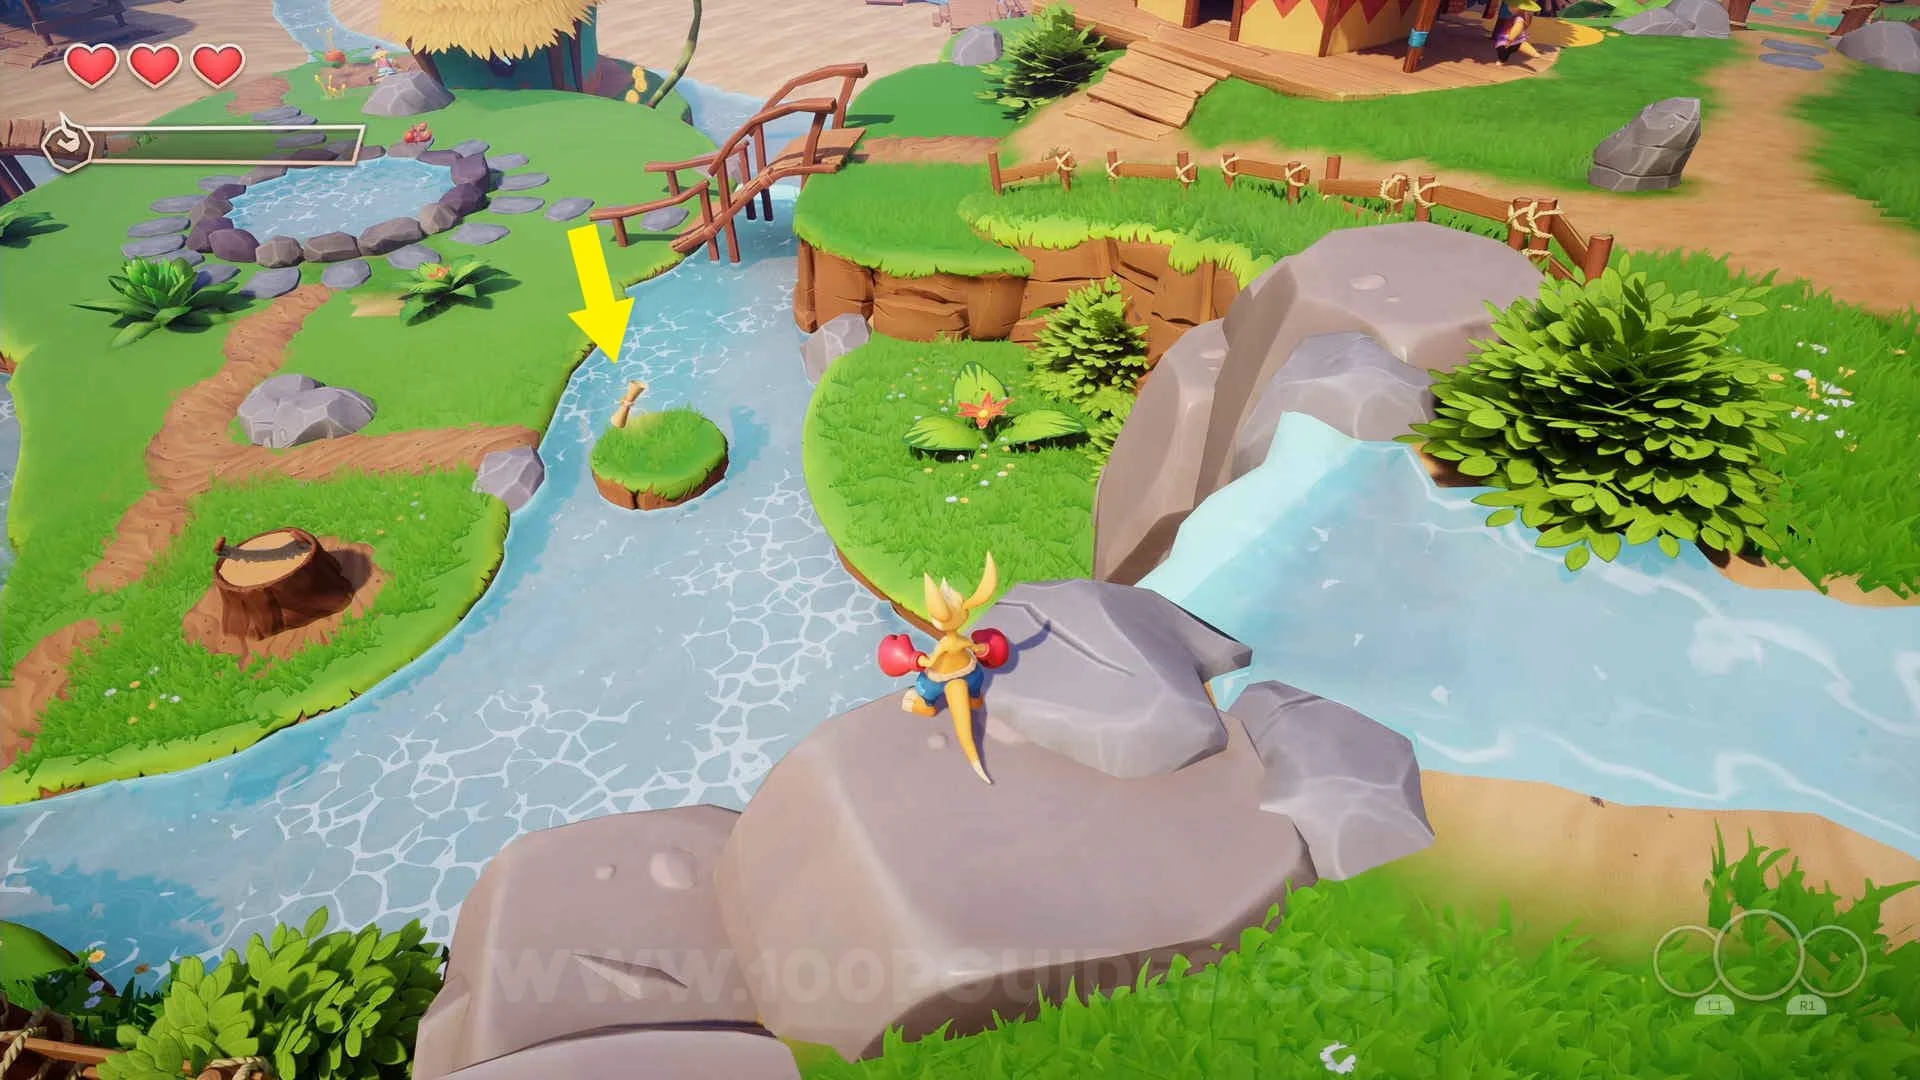
Chest #2: To your left just after using the dodge roll for the first time.


Crystal #3: Just after using the dodge roll for the first time, take a left in to the water and follow the water
until you see the crystal on a small island.

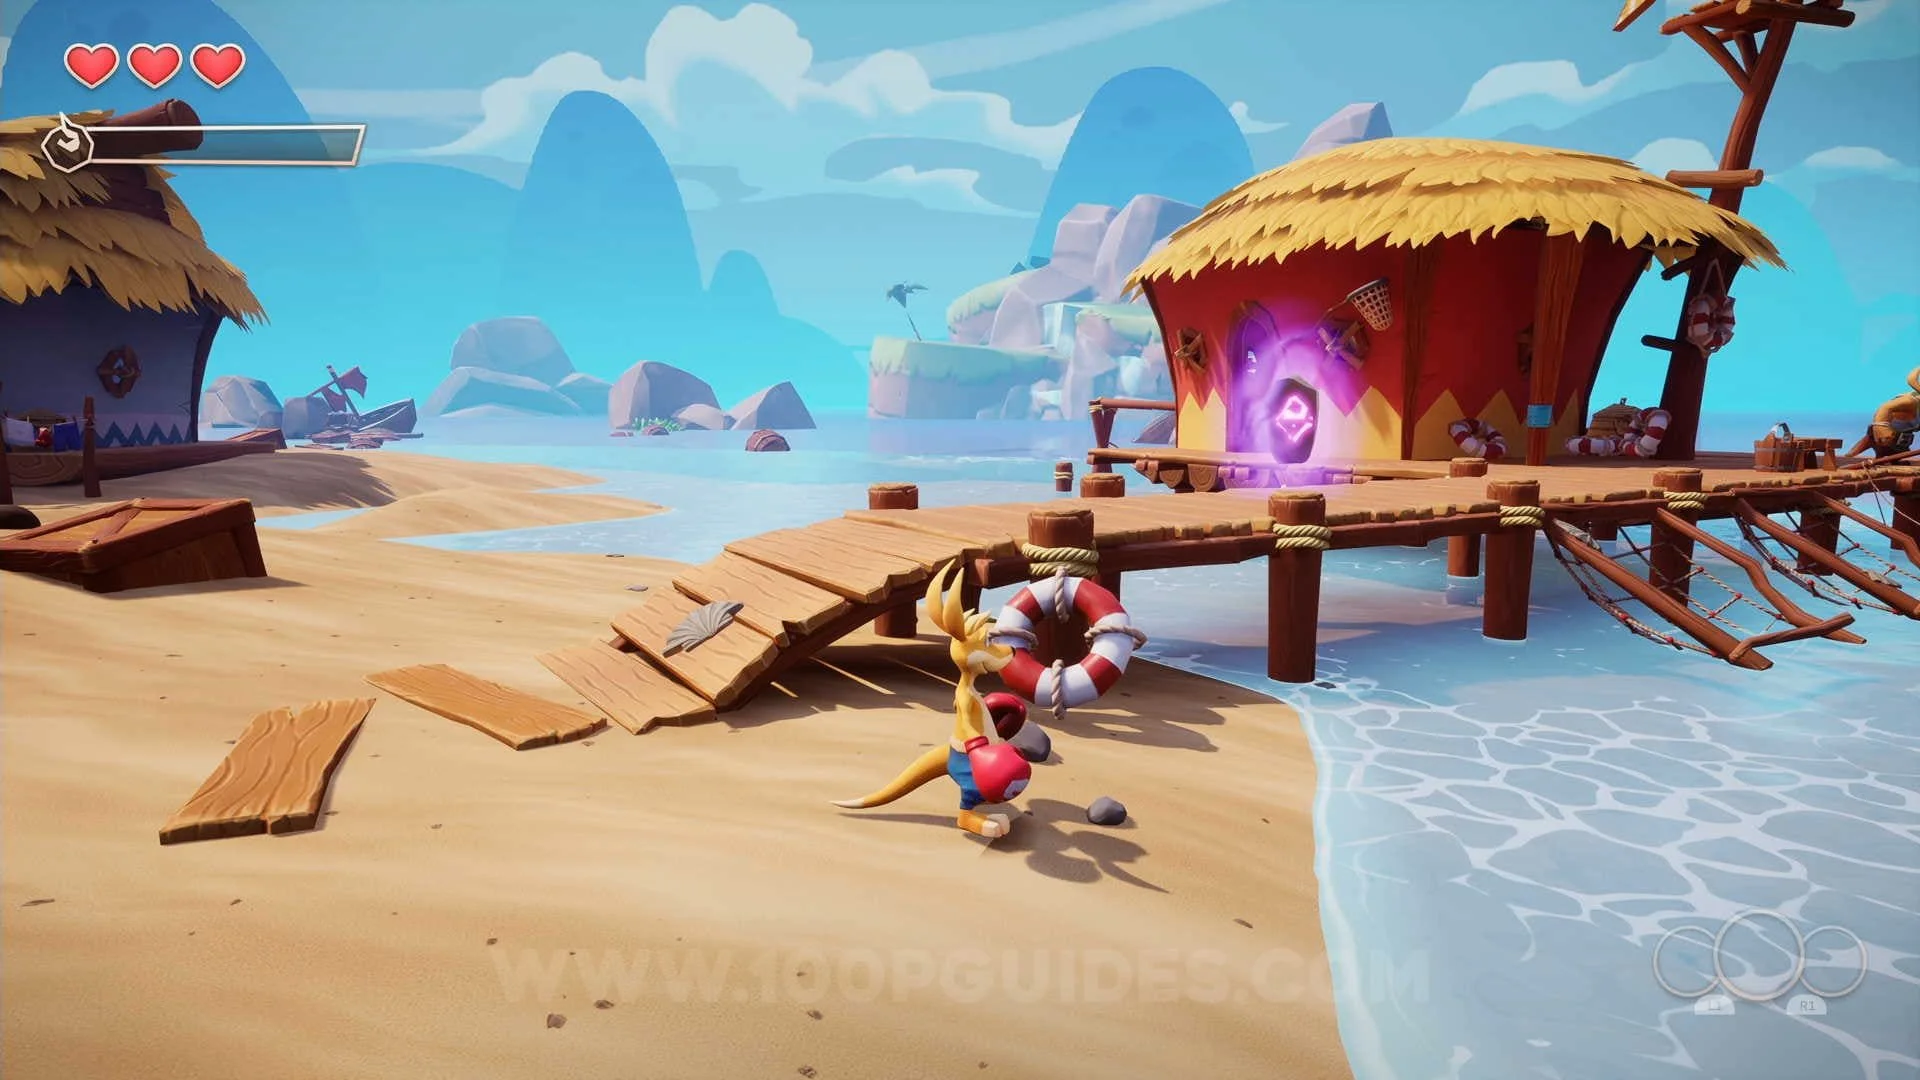
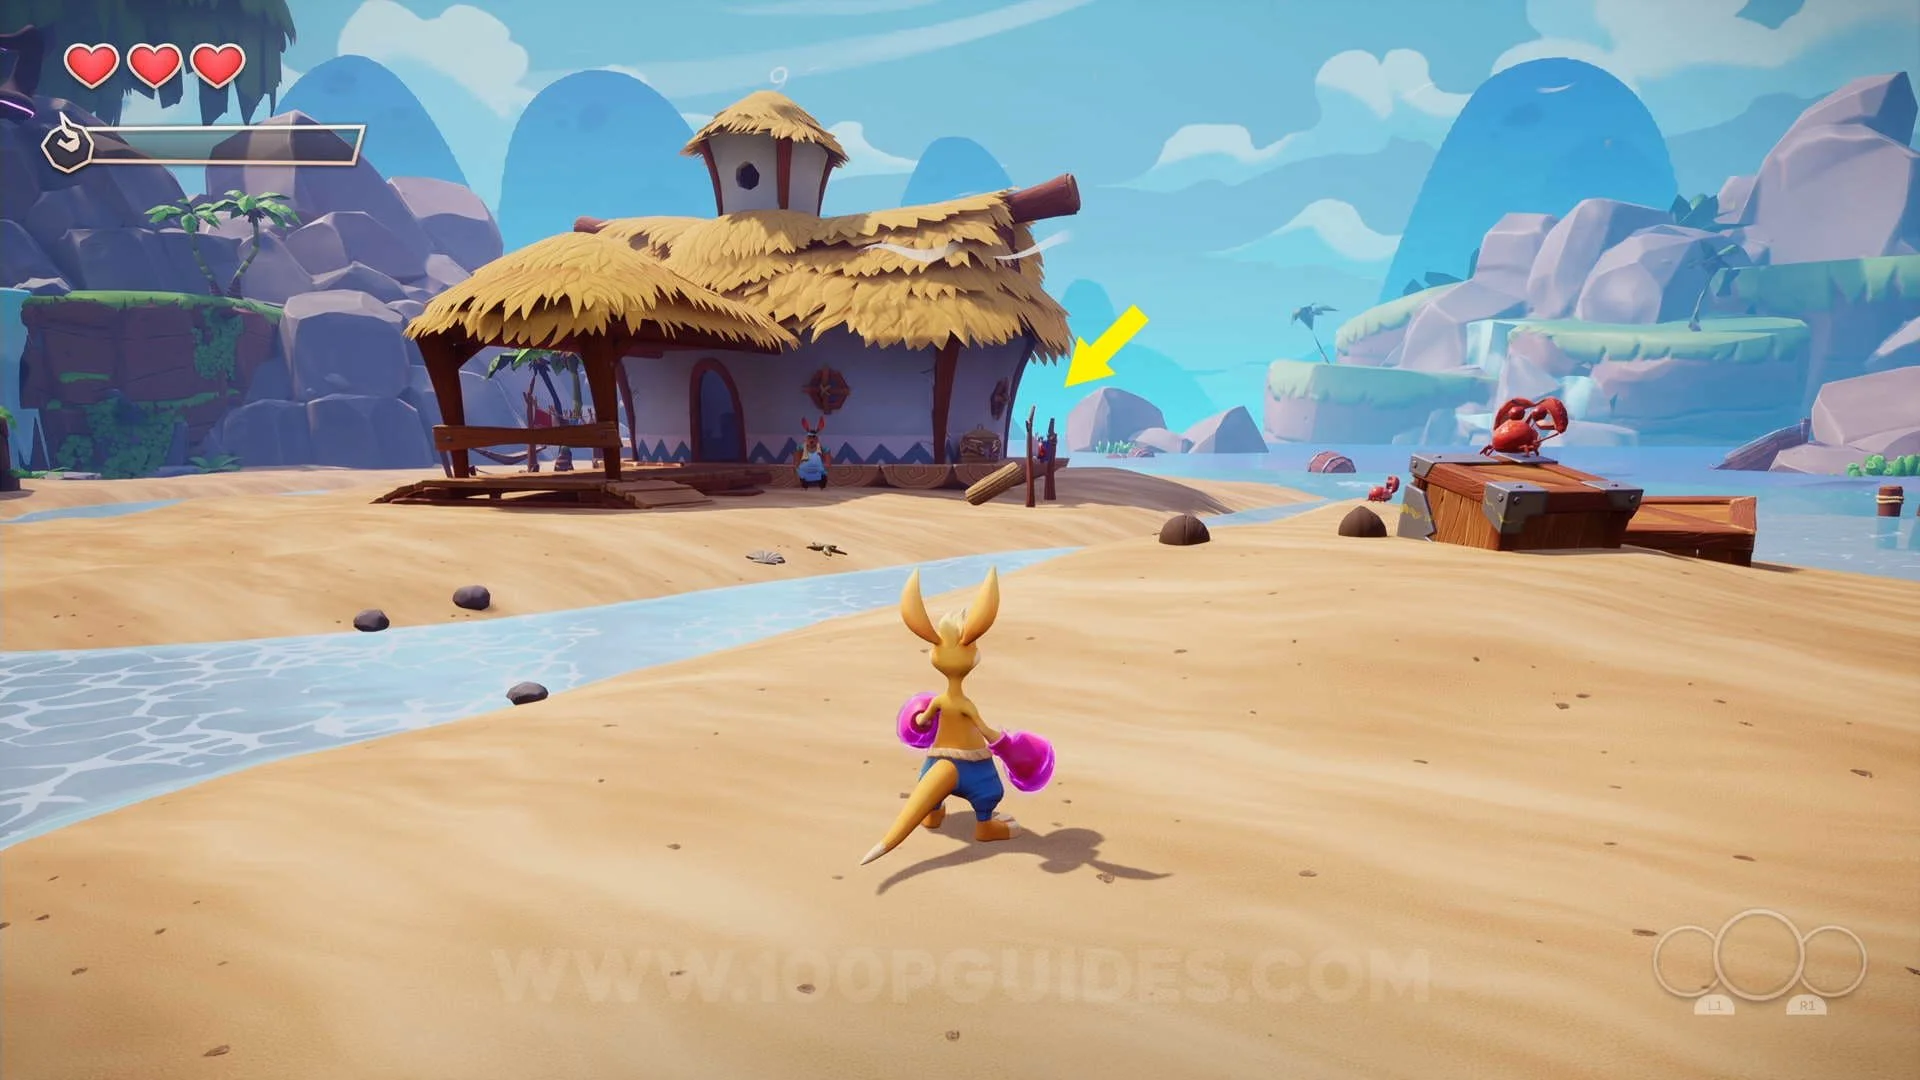
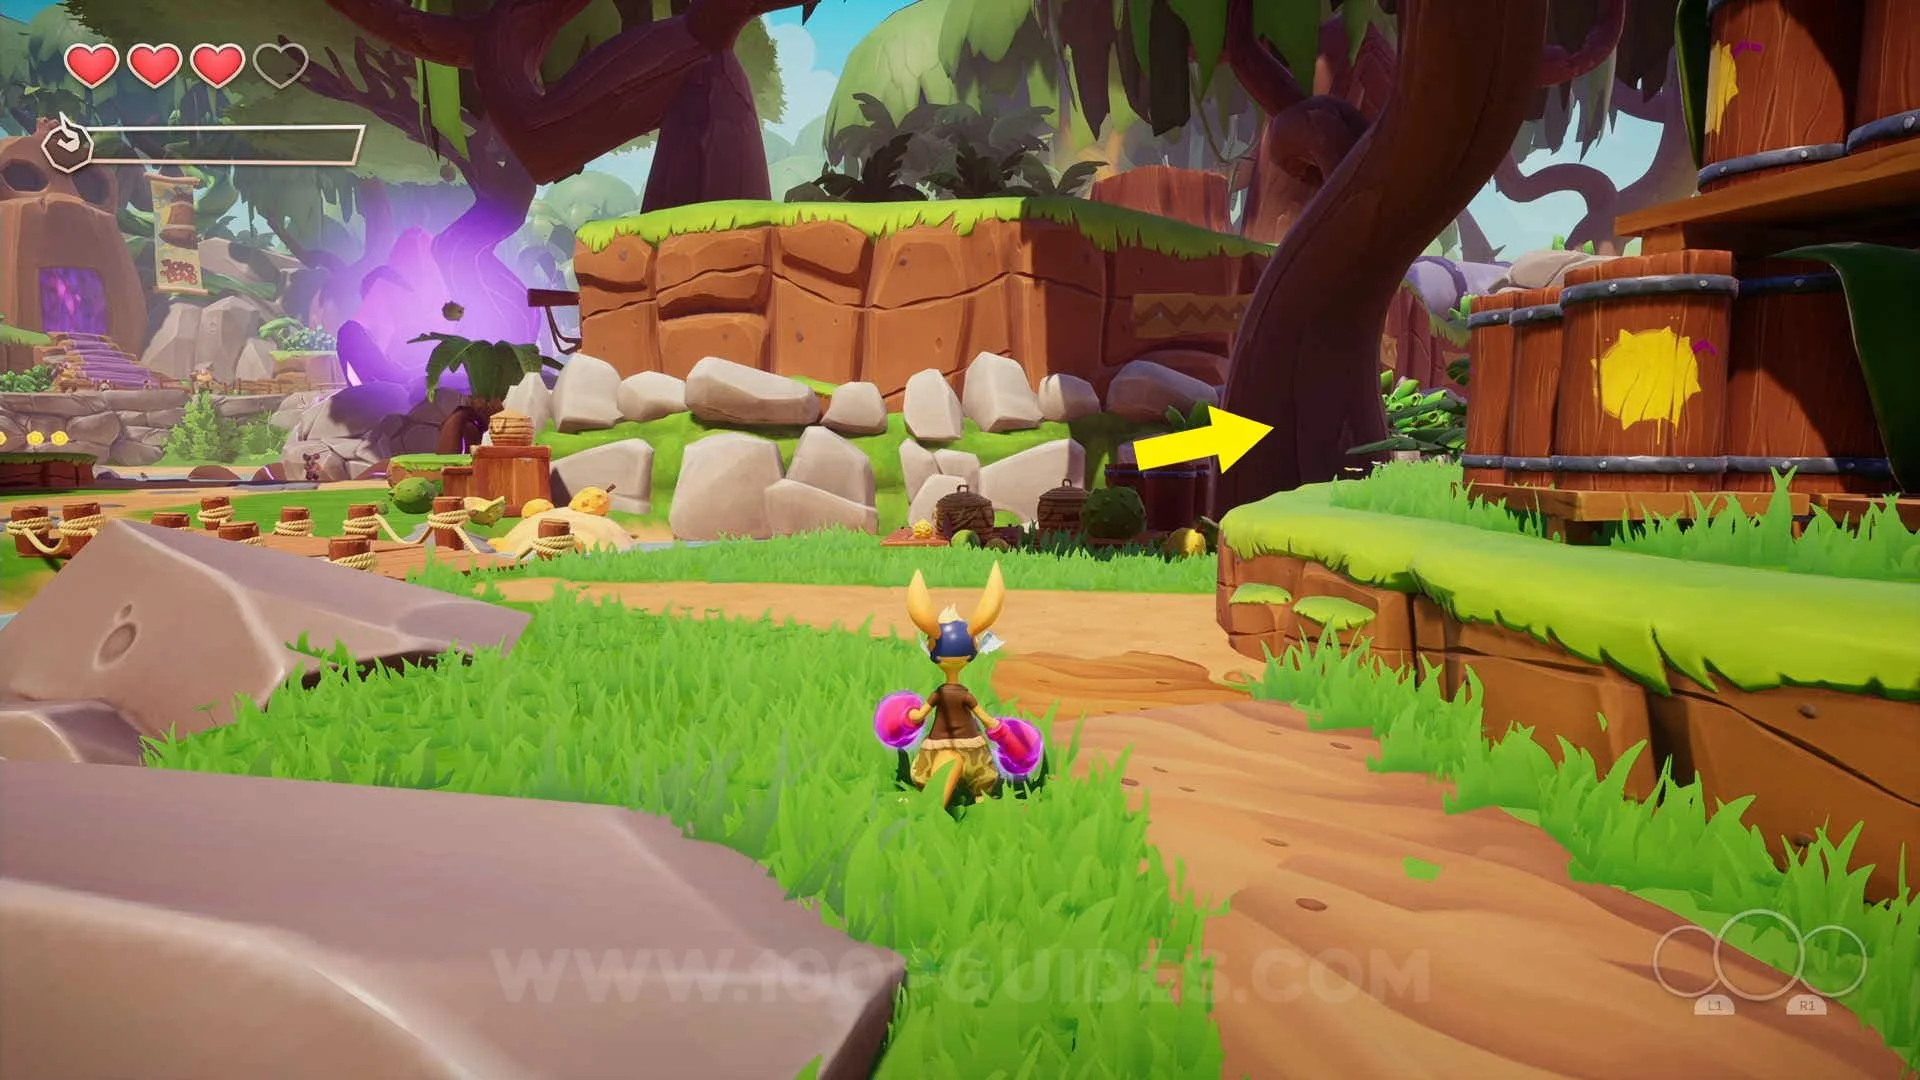
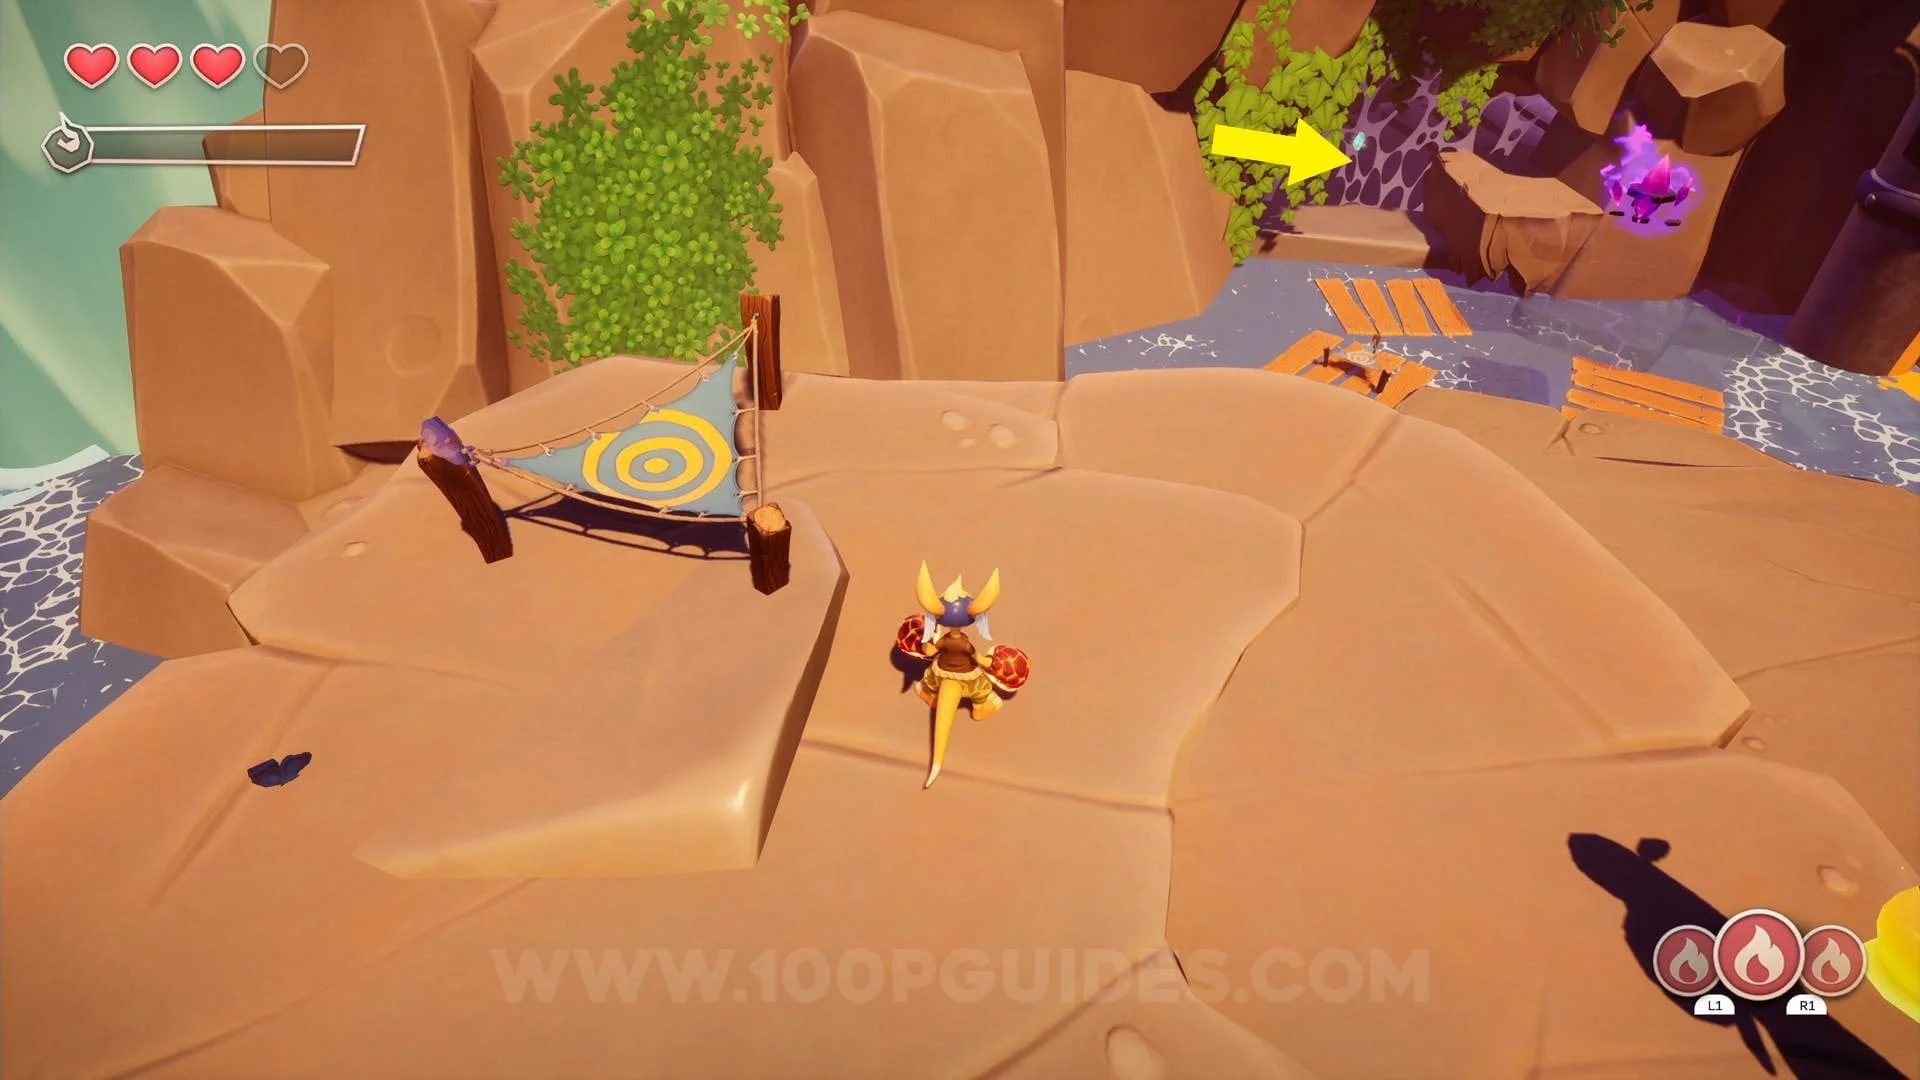
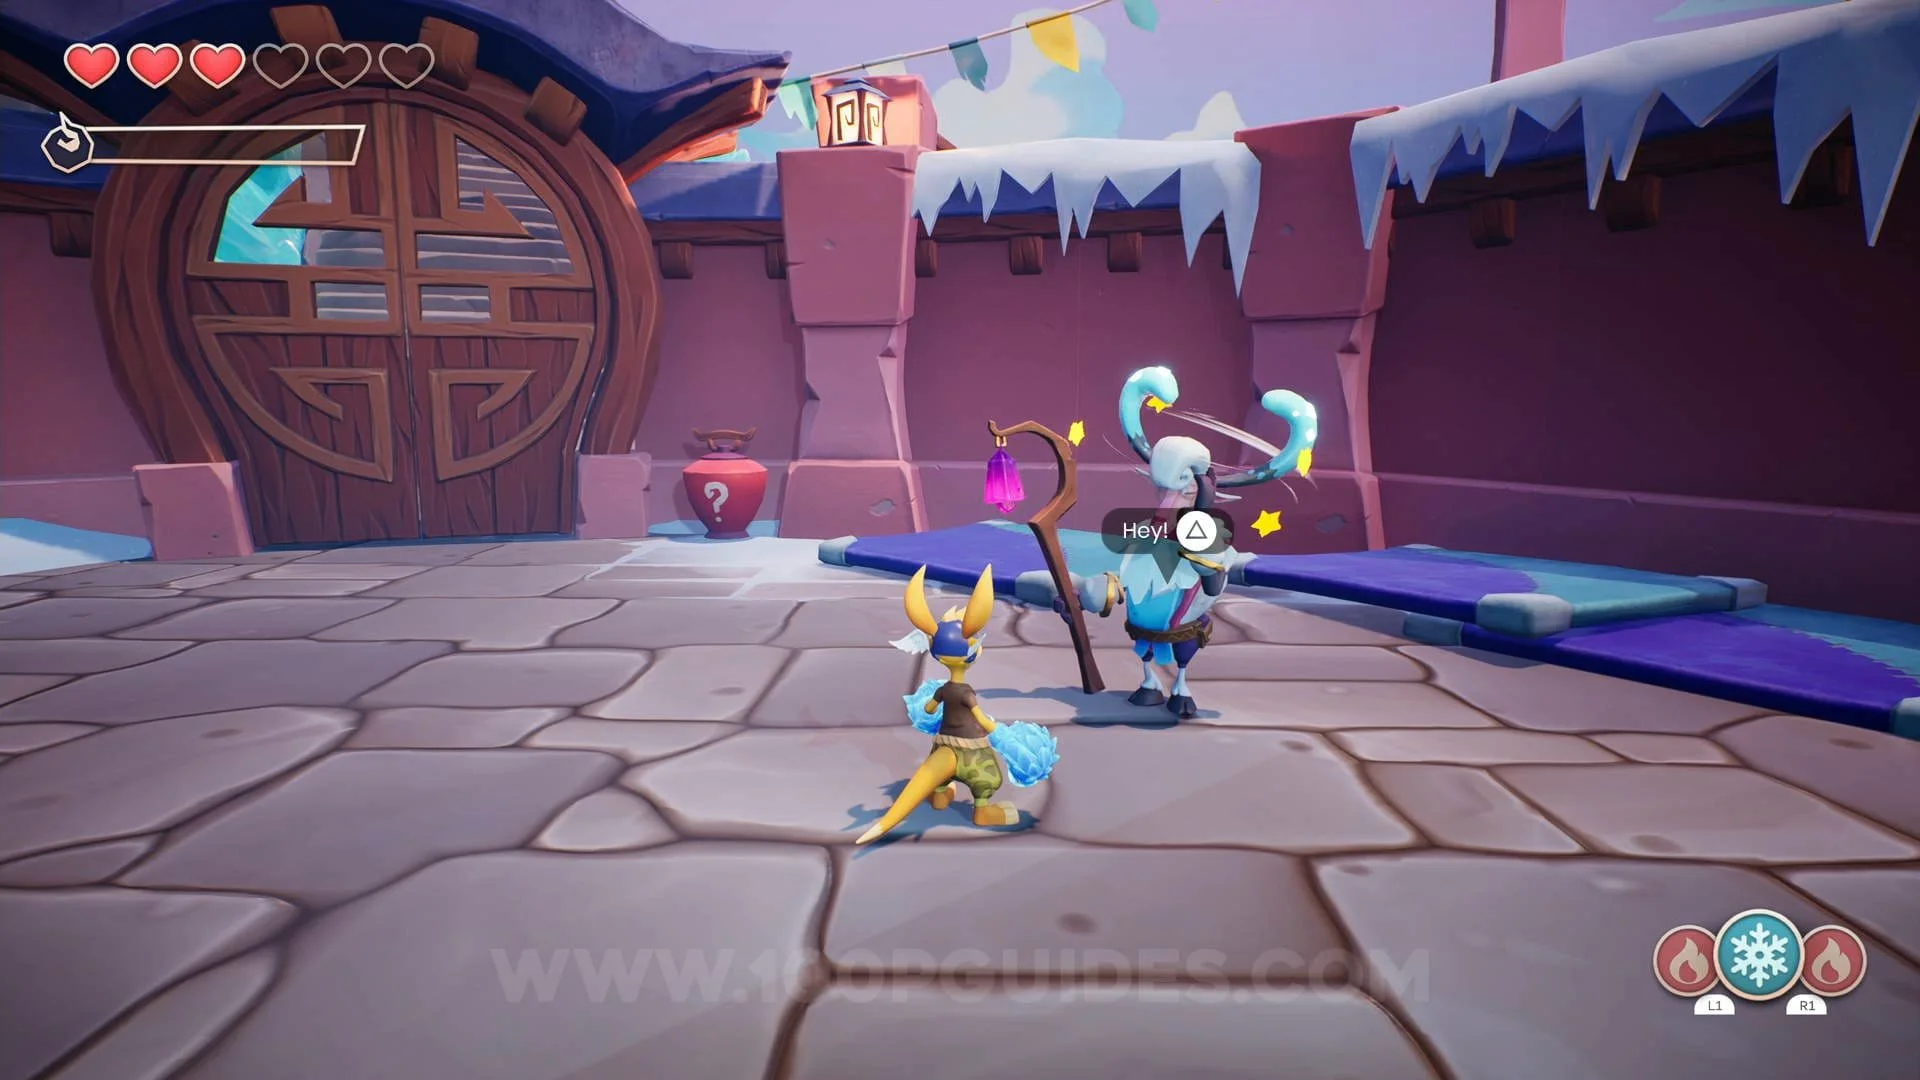
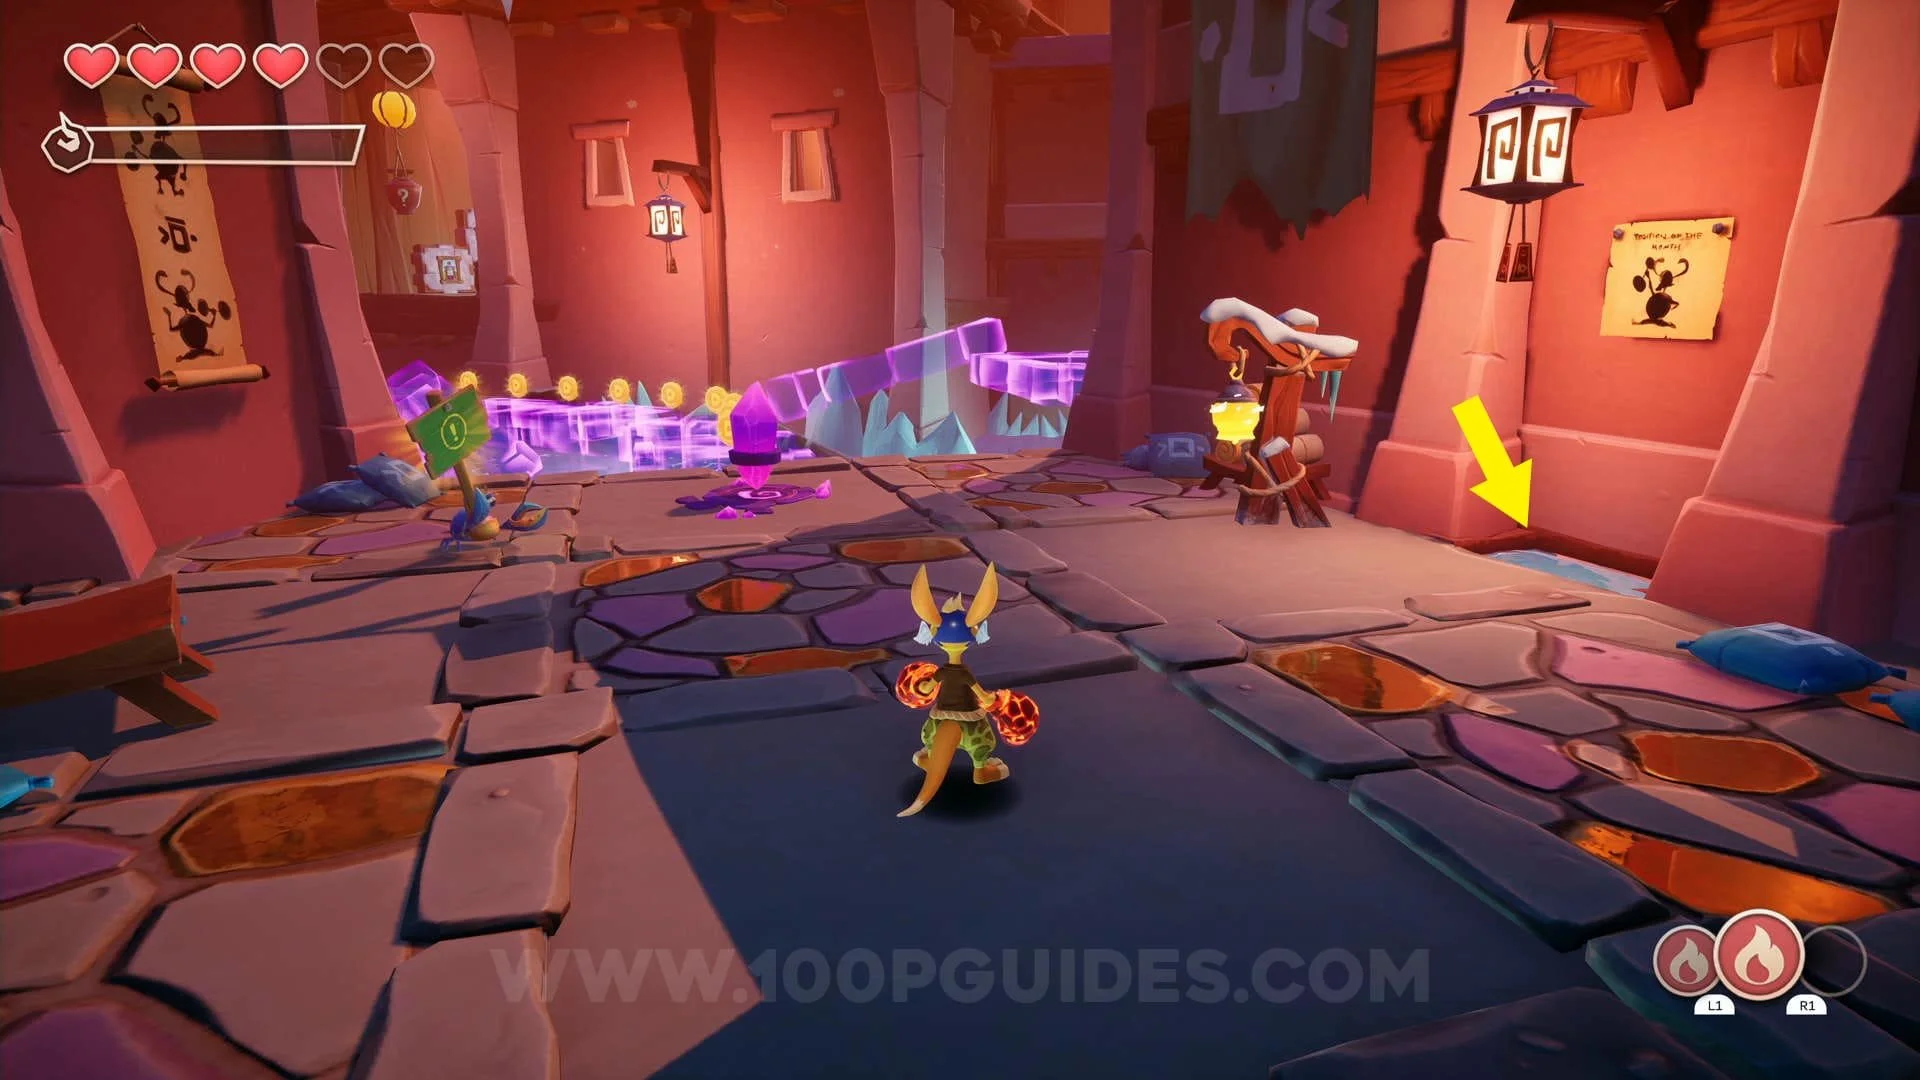
Hopalloo Island Collectibles
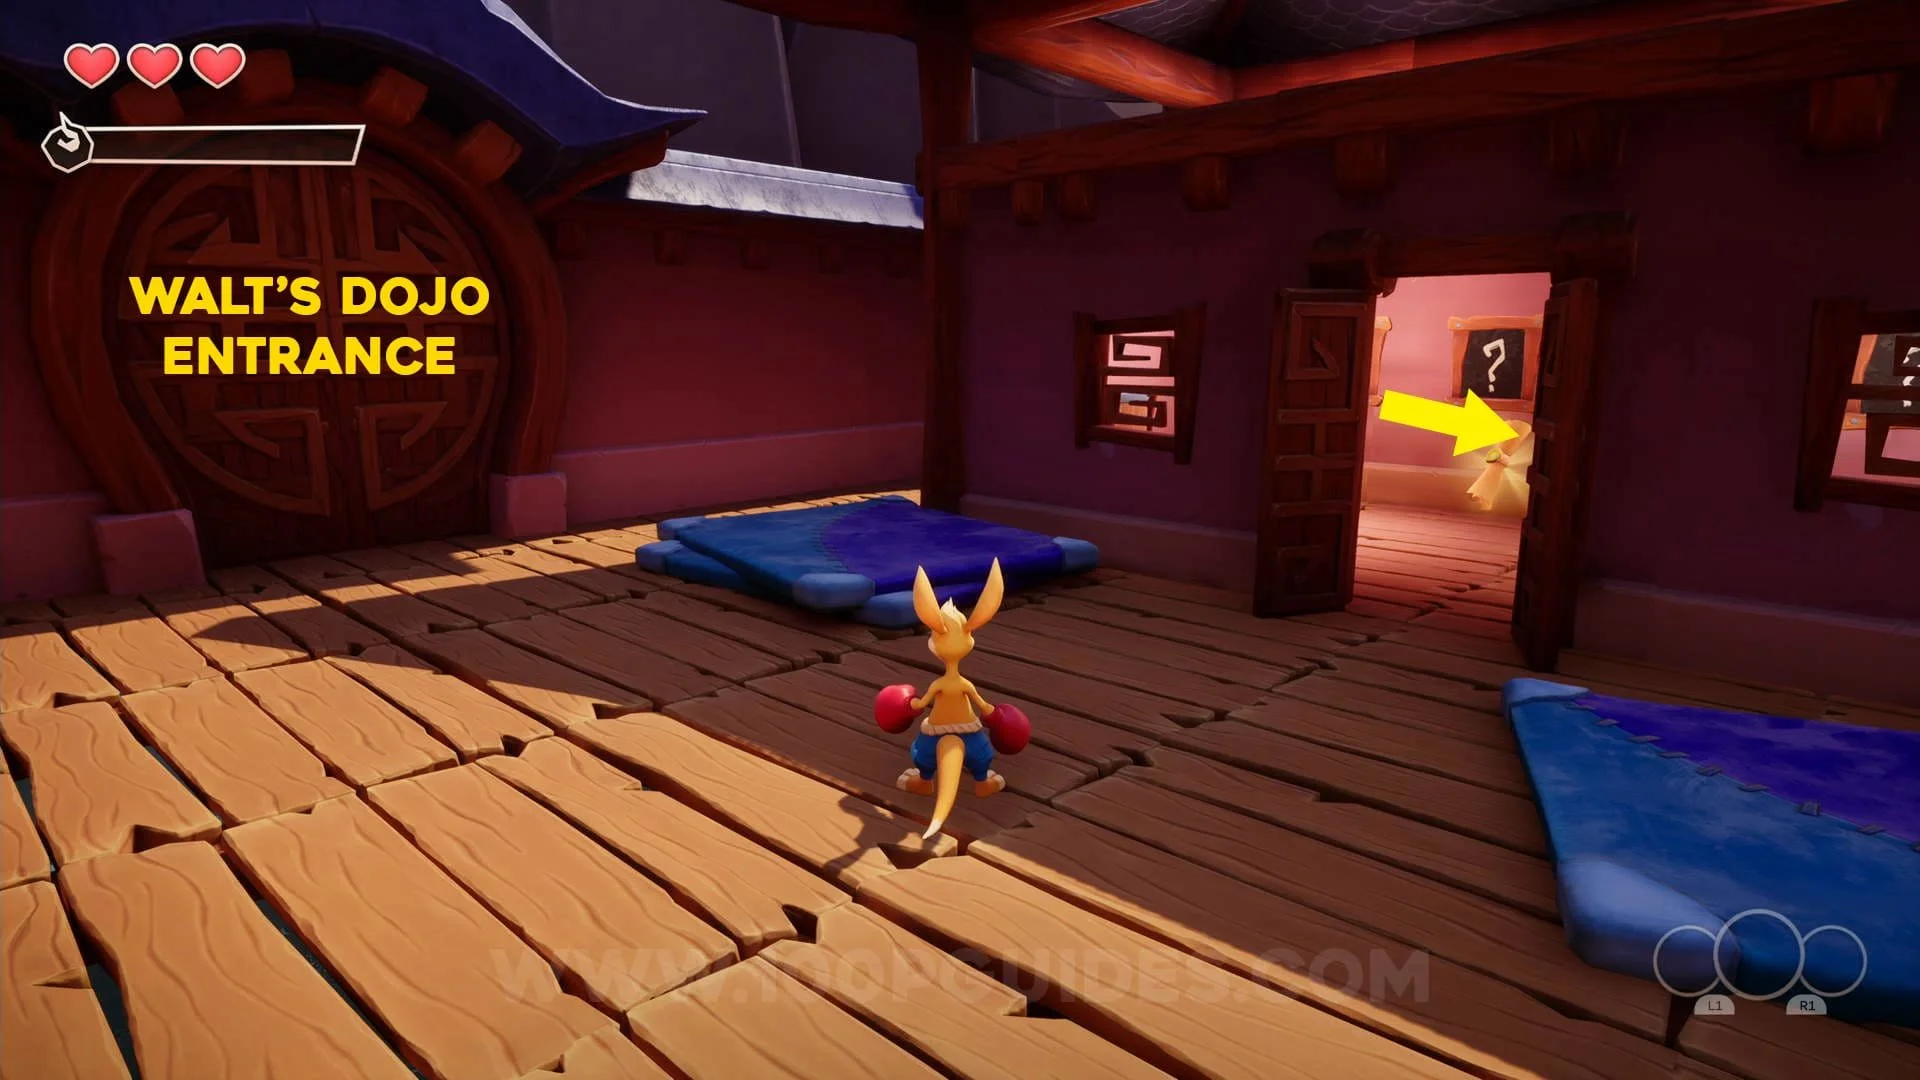
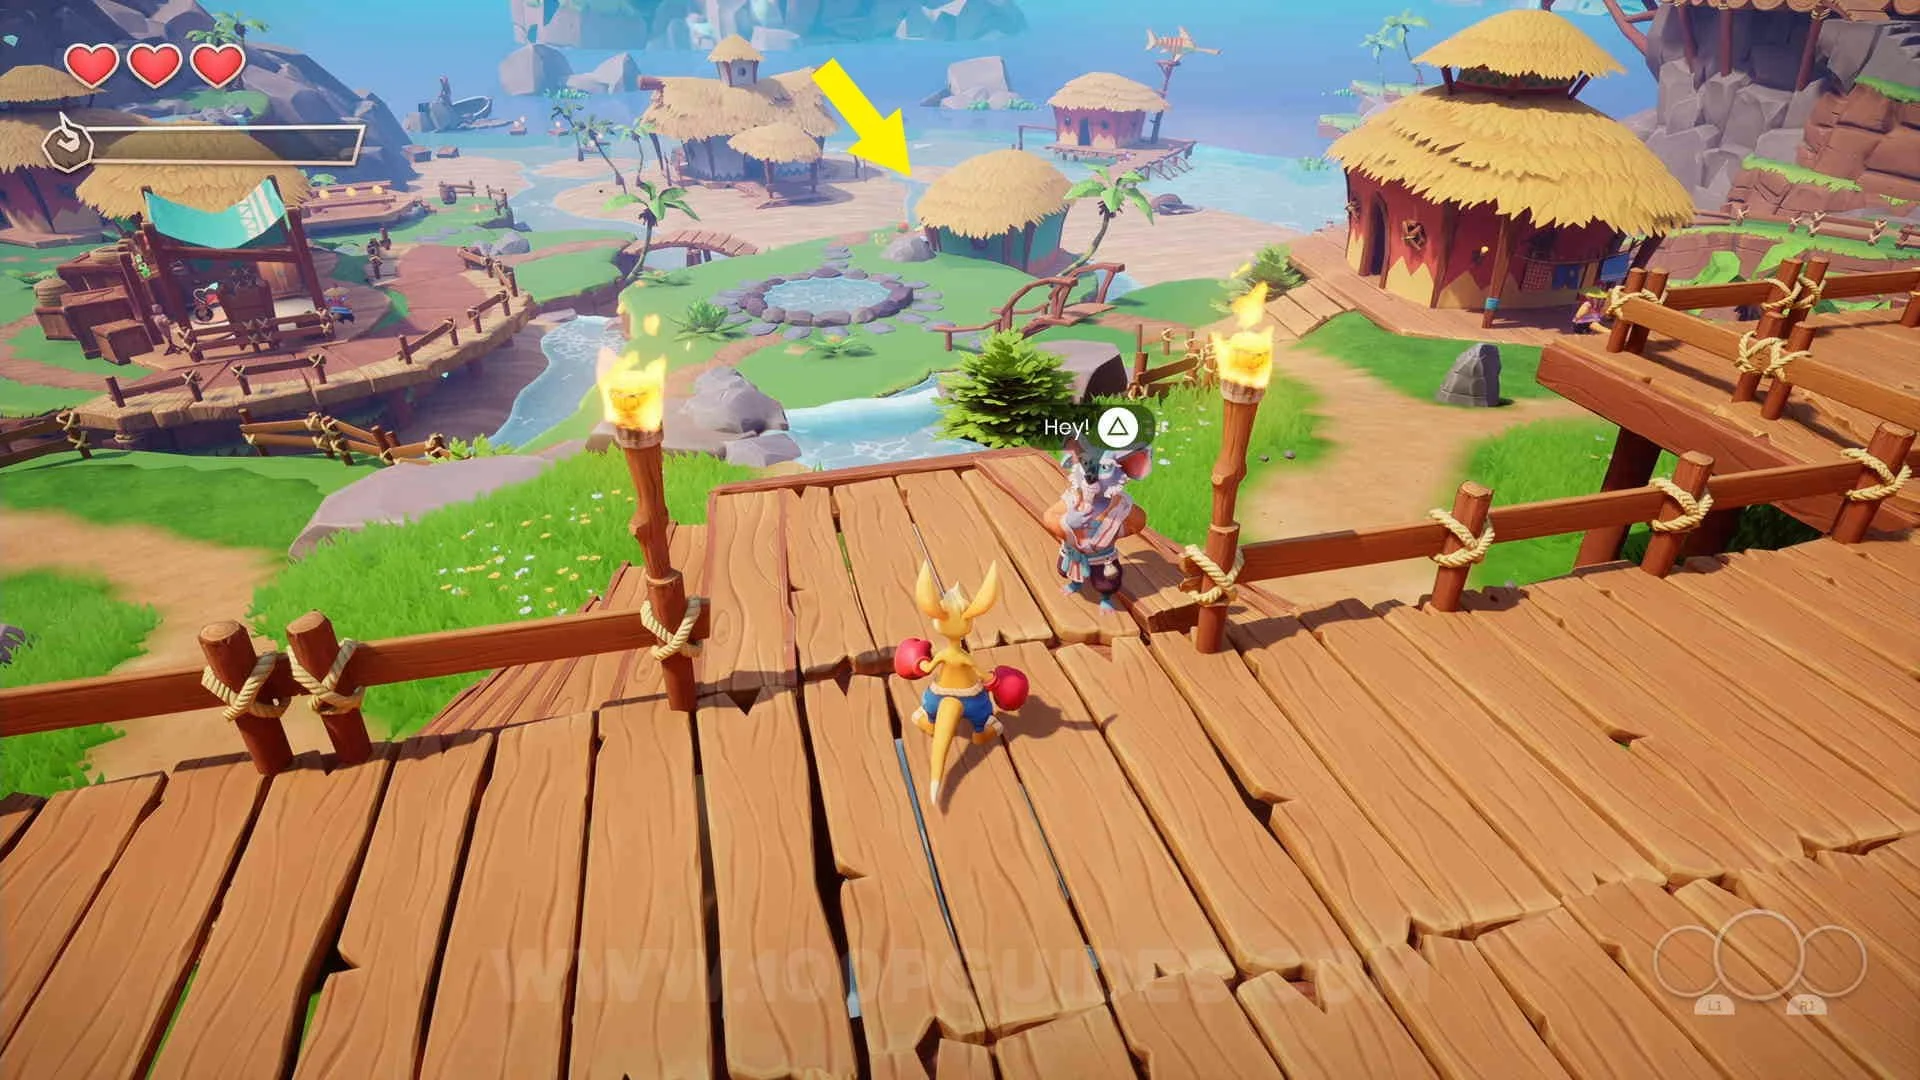
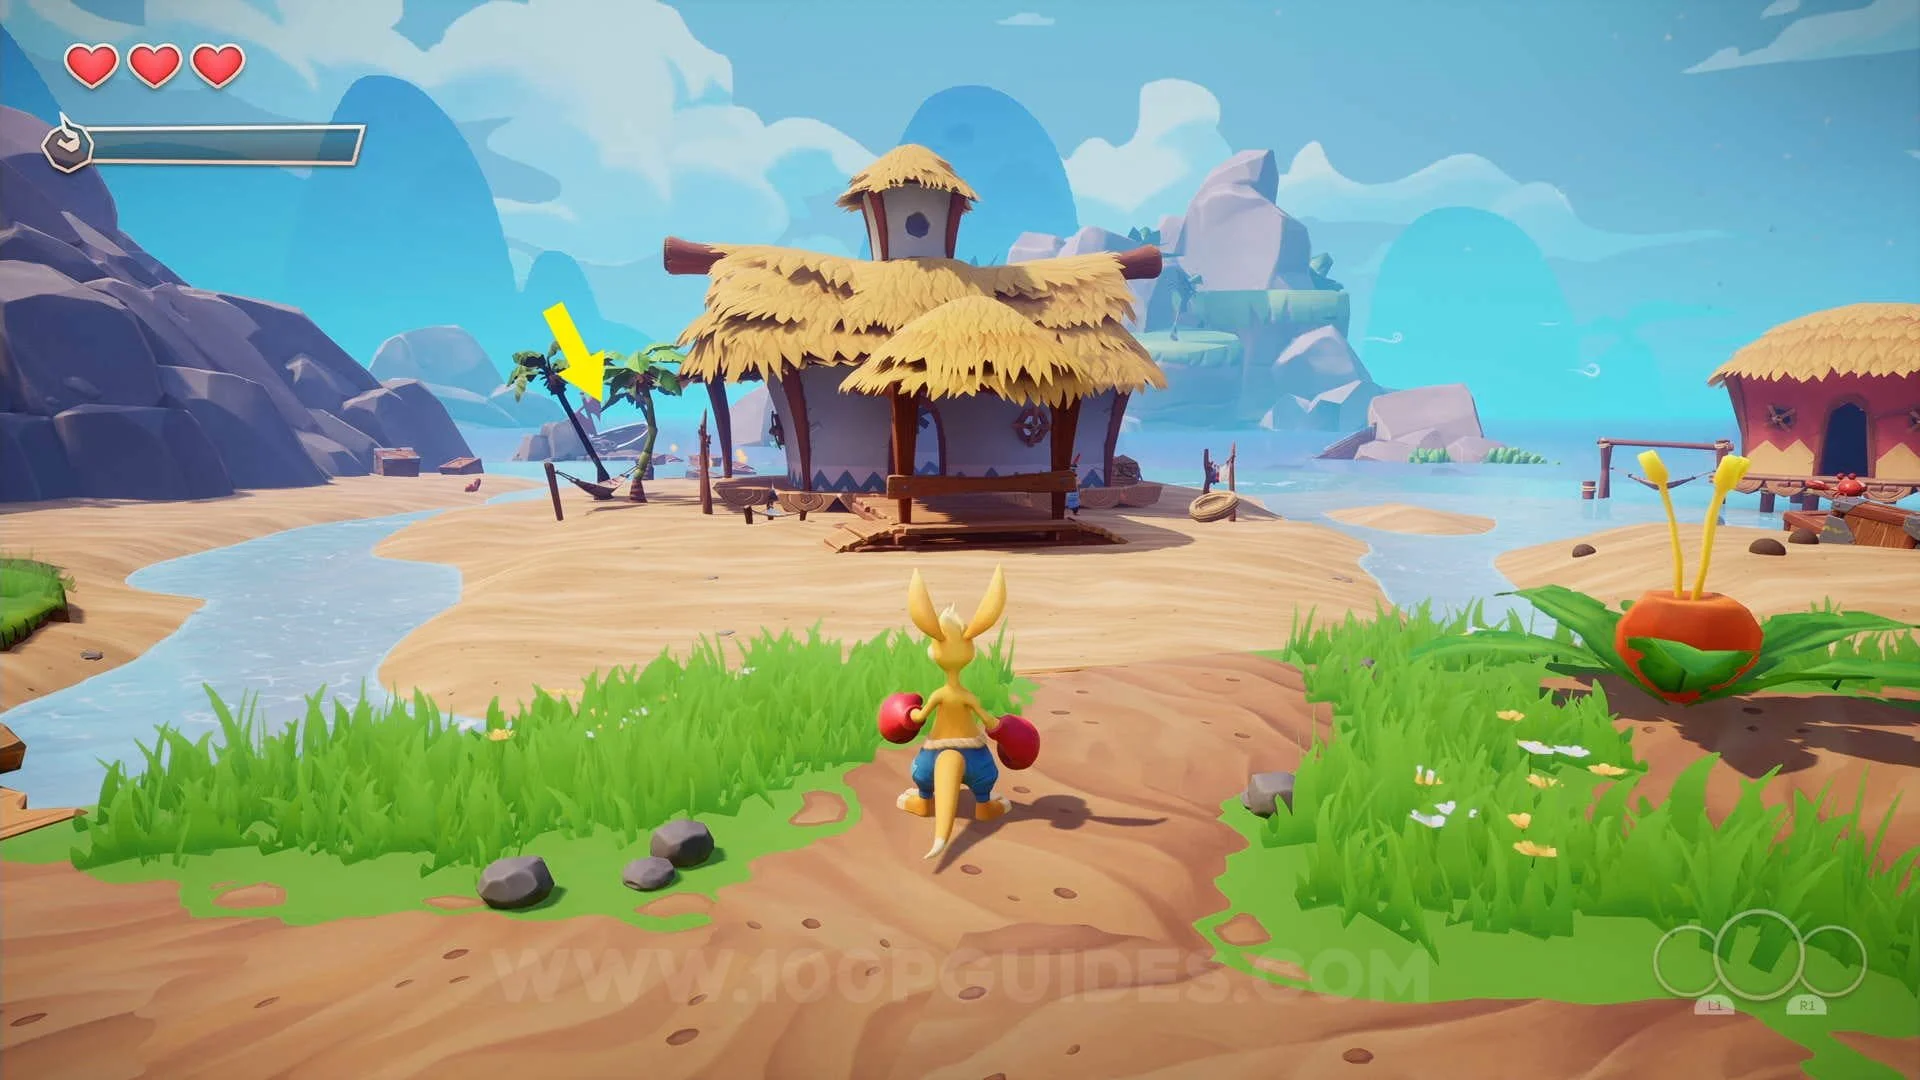
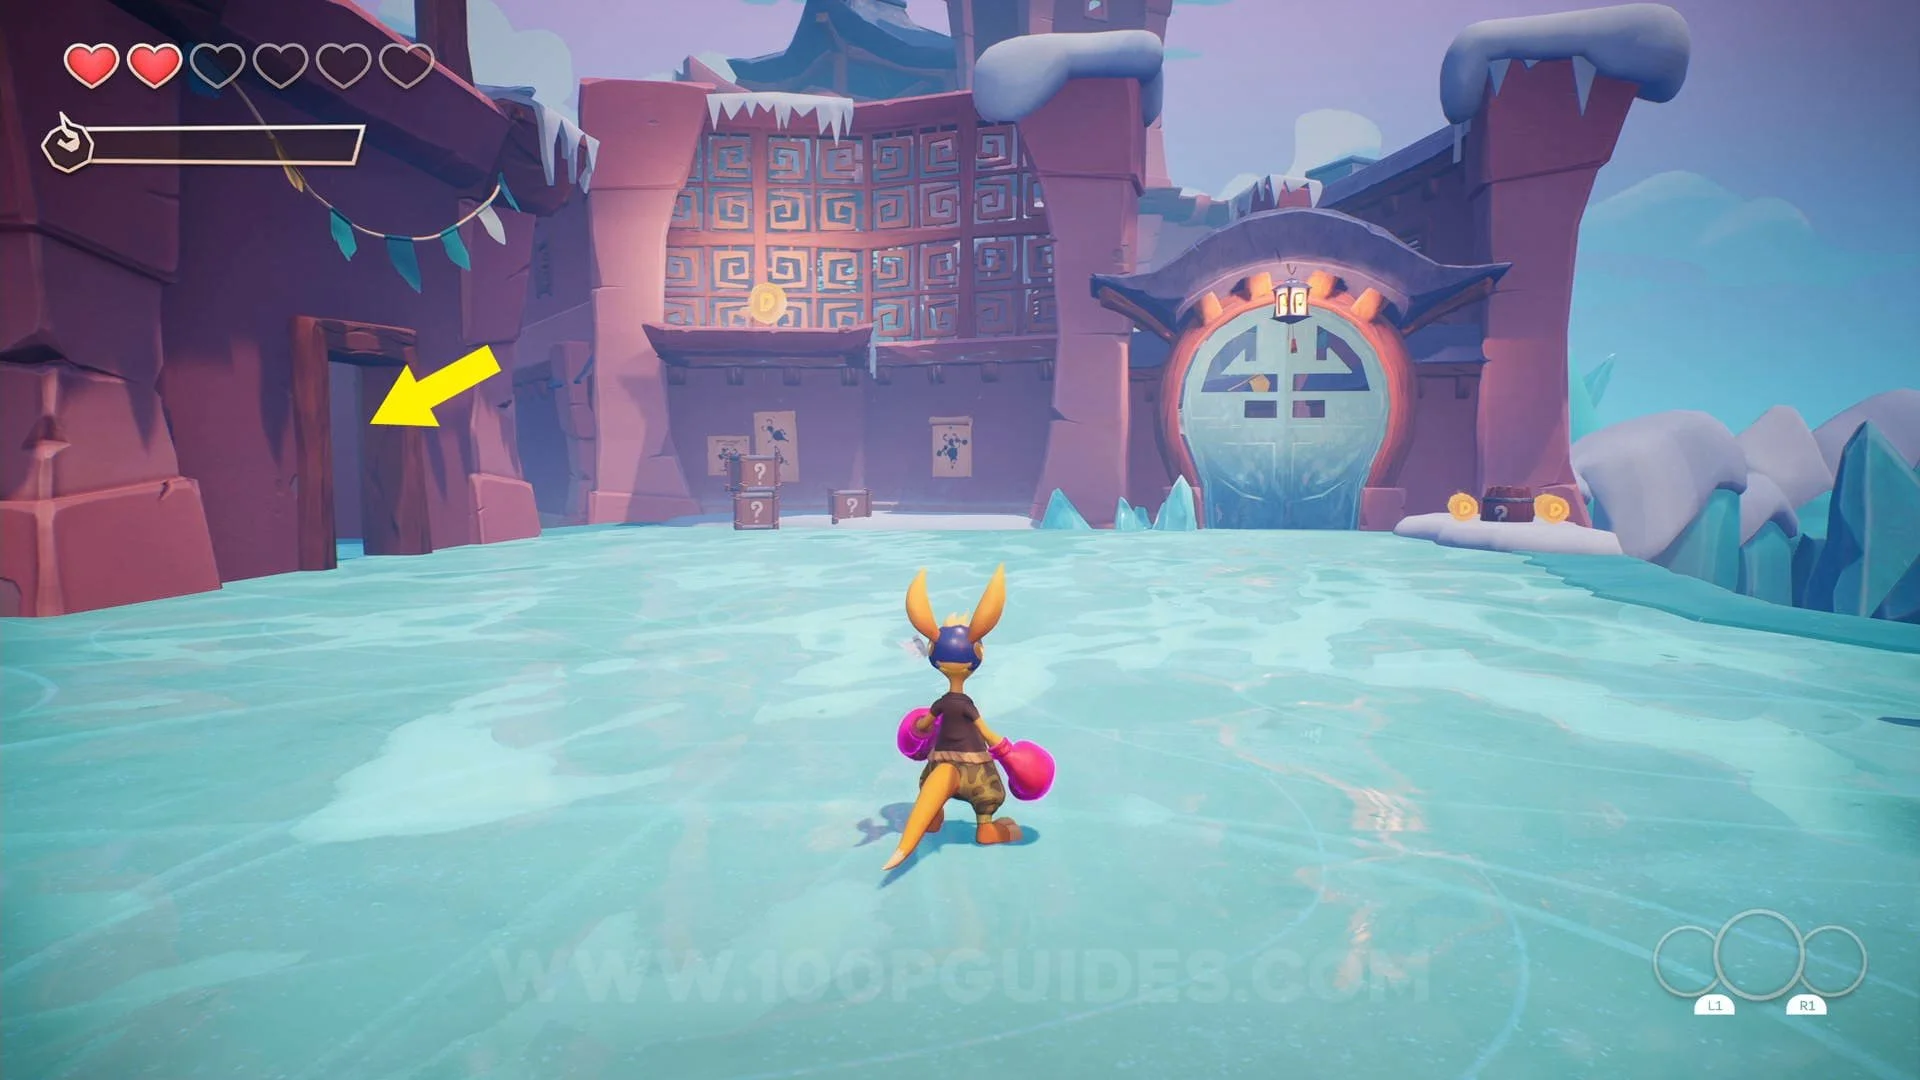
Scroll #1: Face the entrance to the Walt's Dojo level entrance and enter the house on your
right to find the collectible.
Crystal #1: In the same house as Scroll #1.

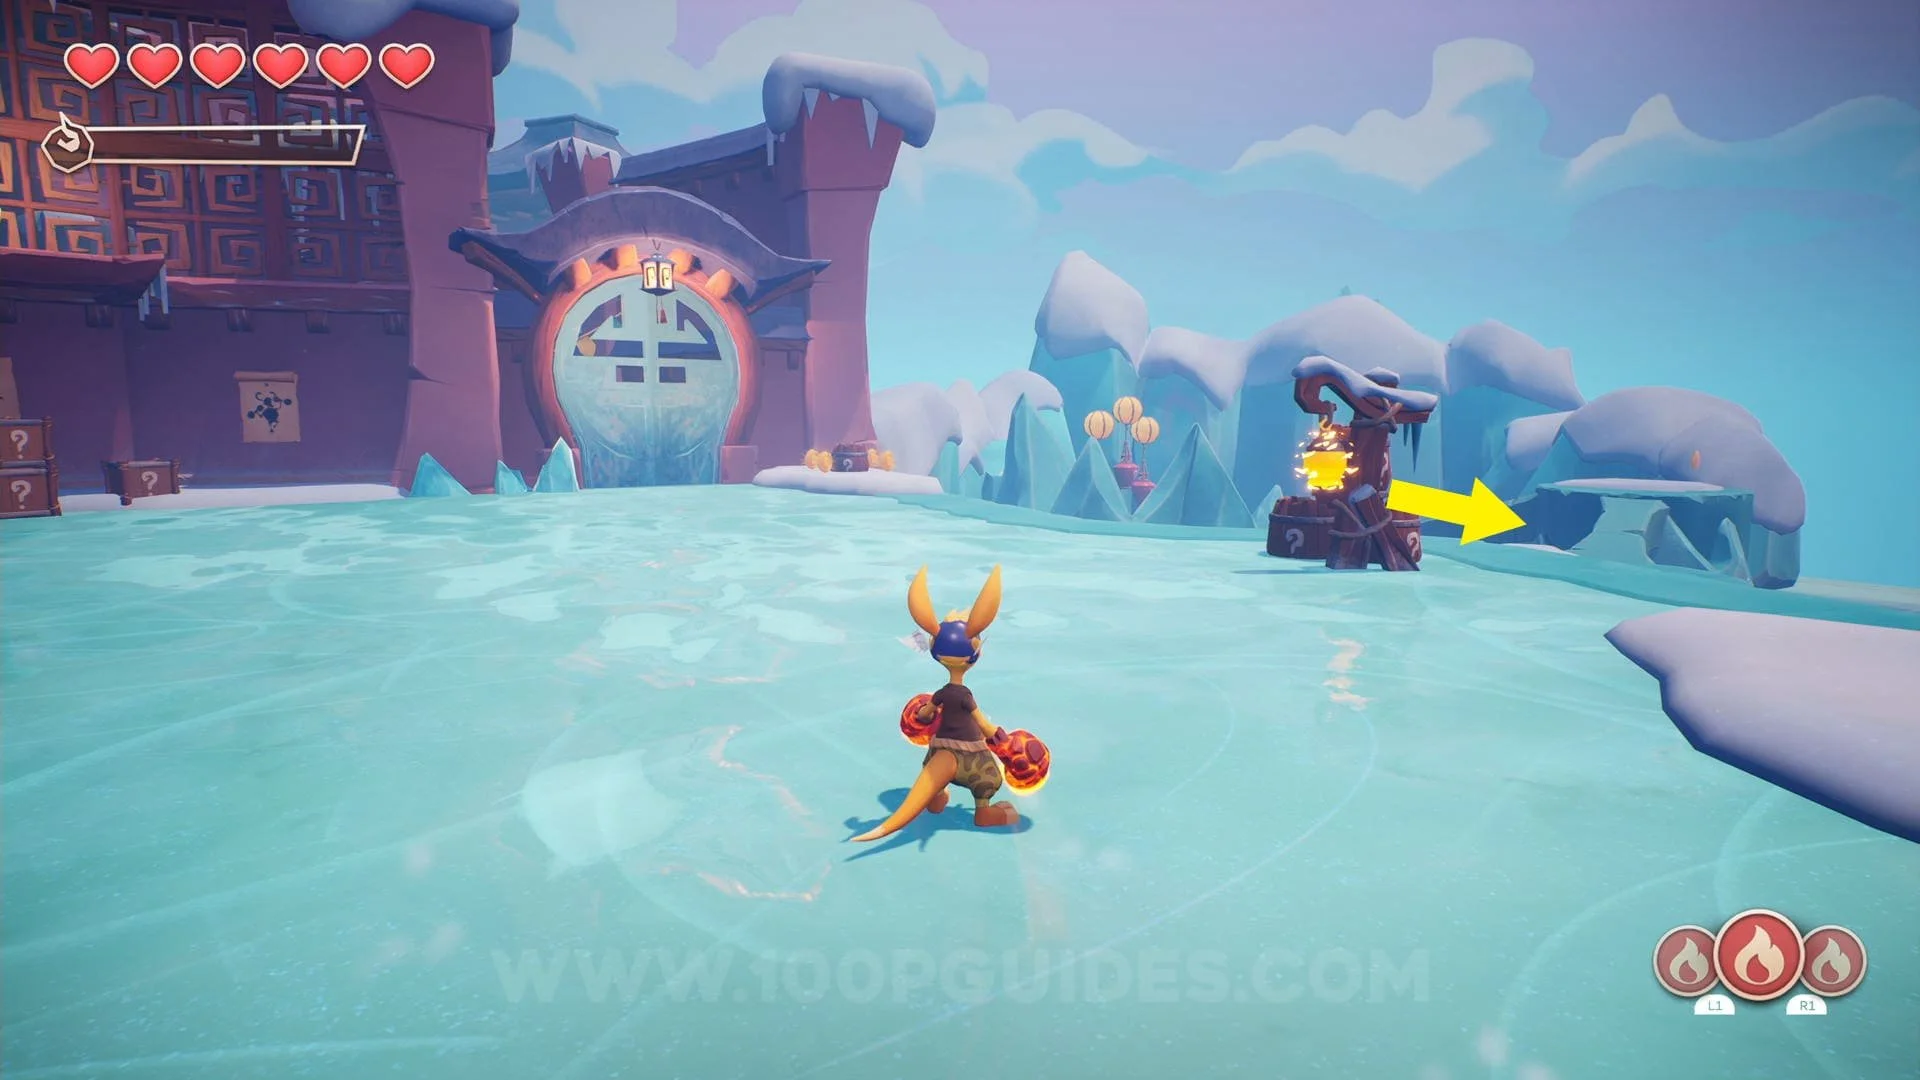
Scroll #2: To the right of Walt.
Rune #1: In the water just below Walt.
Crystal #2: Next to the waterfall under the platform walt is standing on.
Rune #2 & Chest #1: From Walt, go left and jump in to the water below, here you will see a rune behind
a spider web, you will have to pick up the fire power-up found here (will only spawn if you have finished
"The Lava Caves" level. With the fire power-up you will be able to burn the spider web and pick up the
rune as well as open the chest.


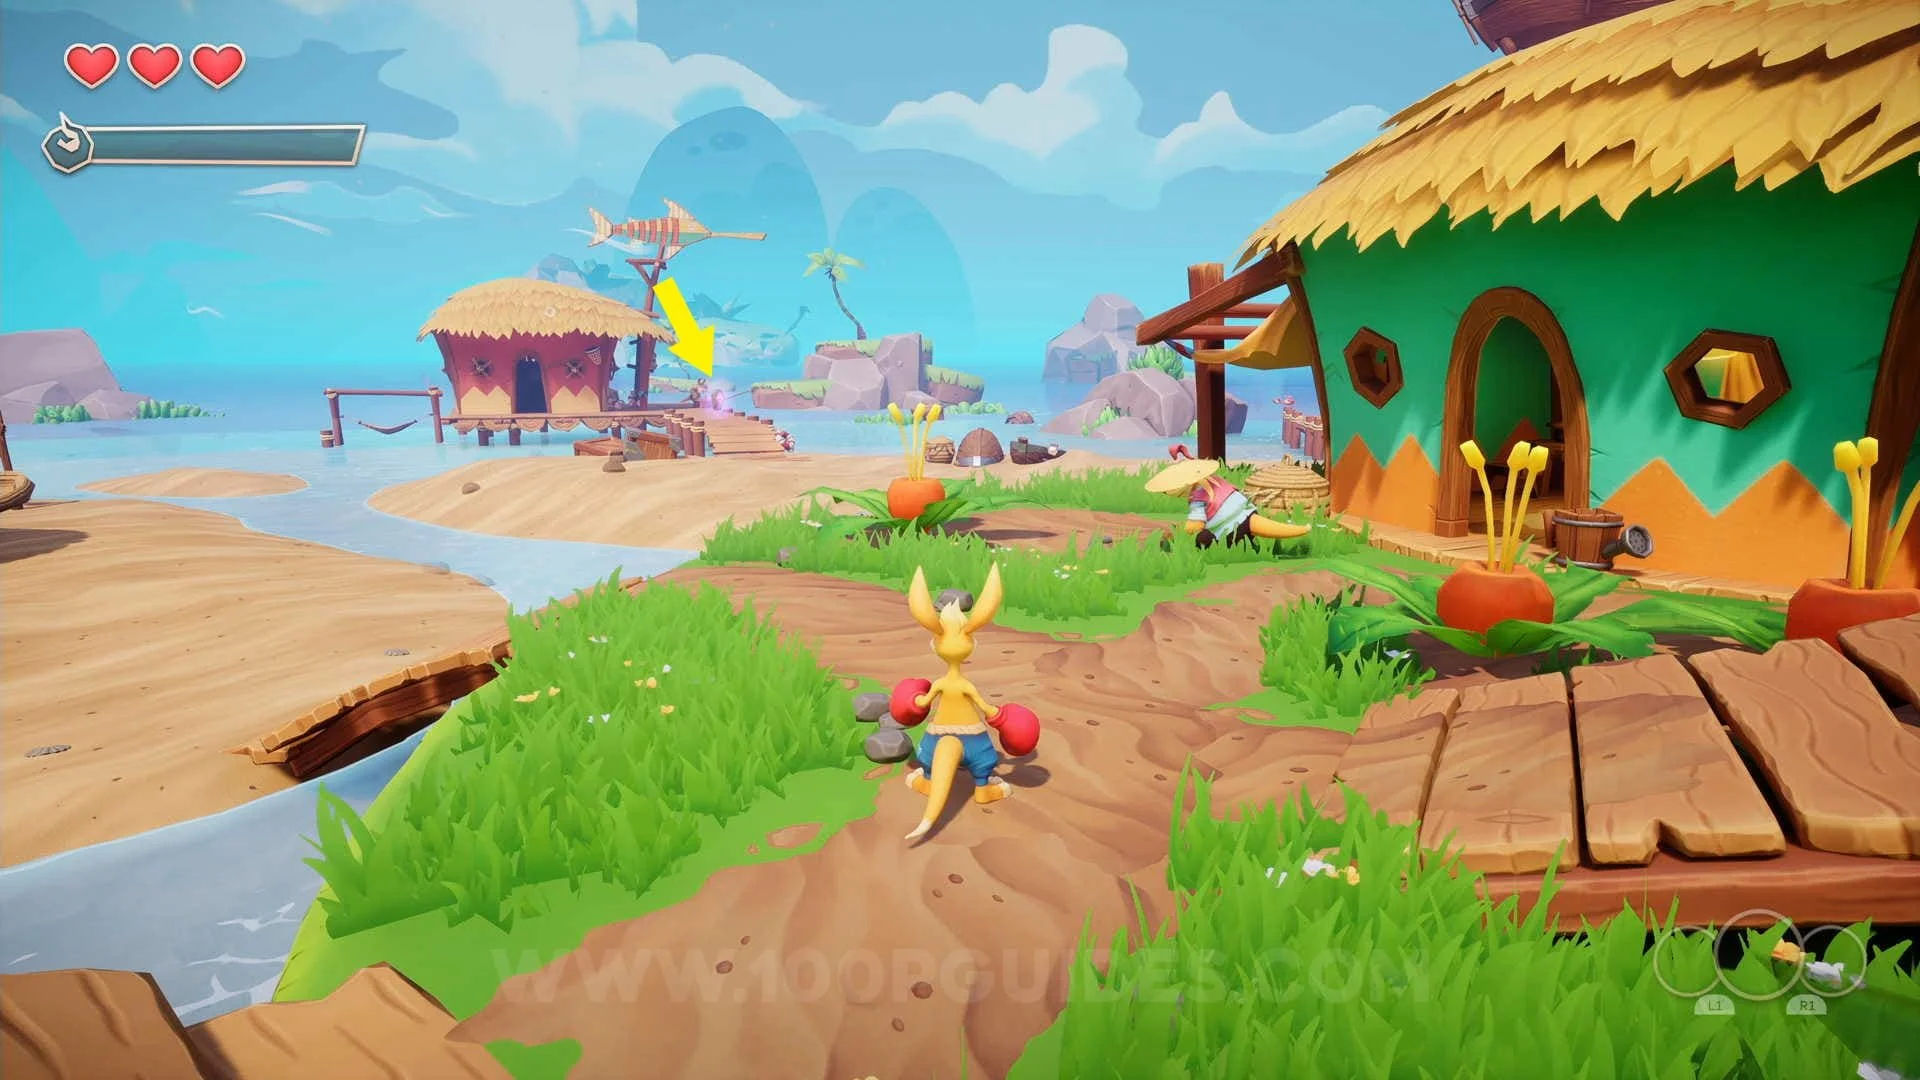
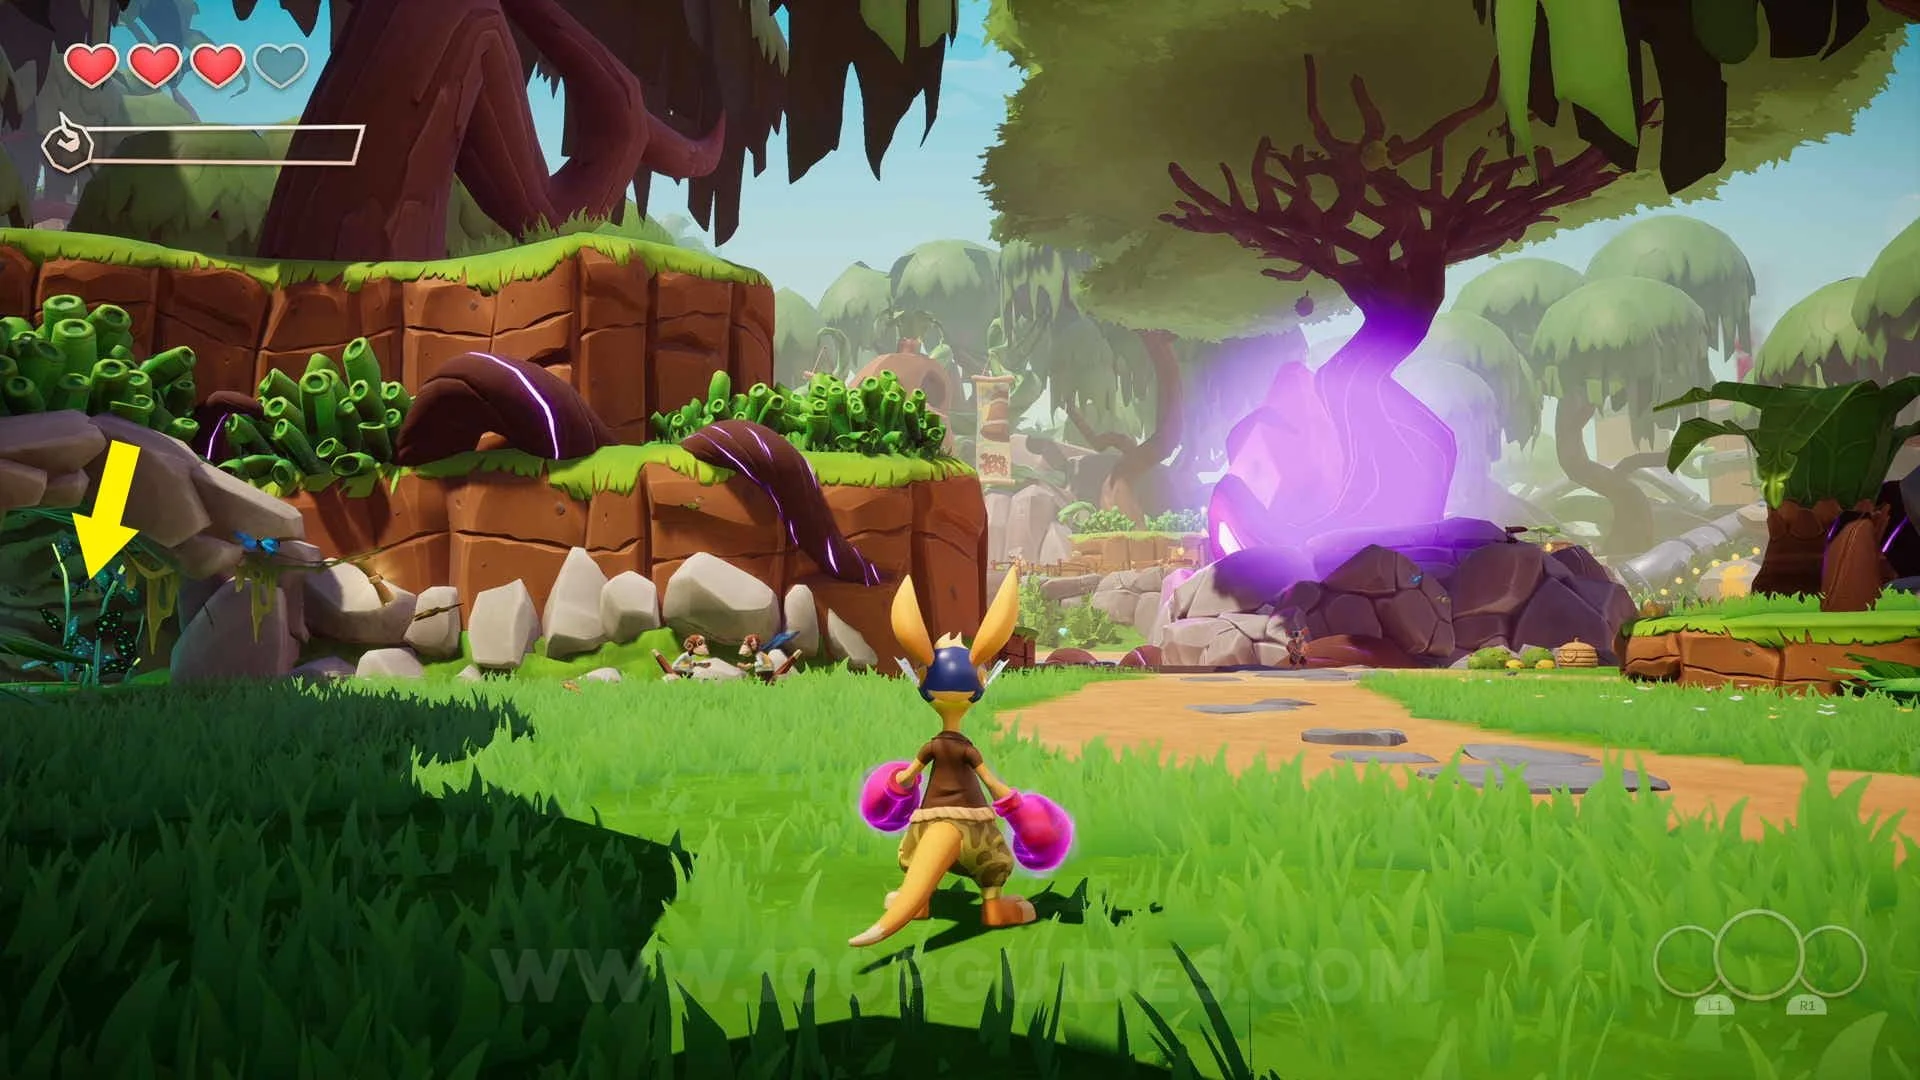
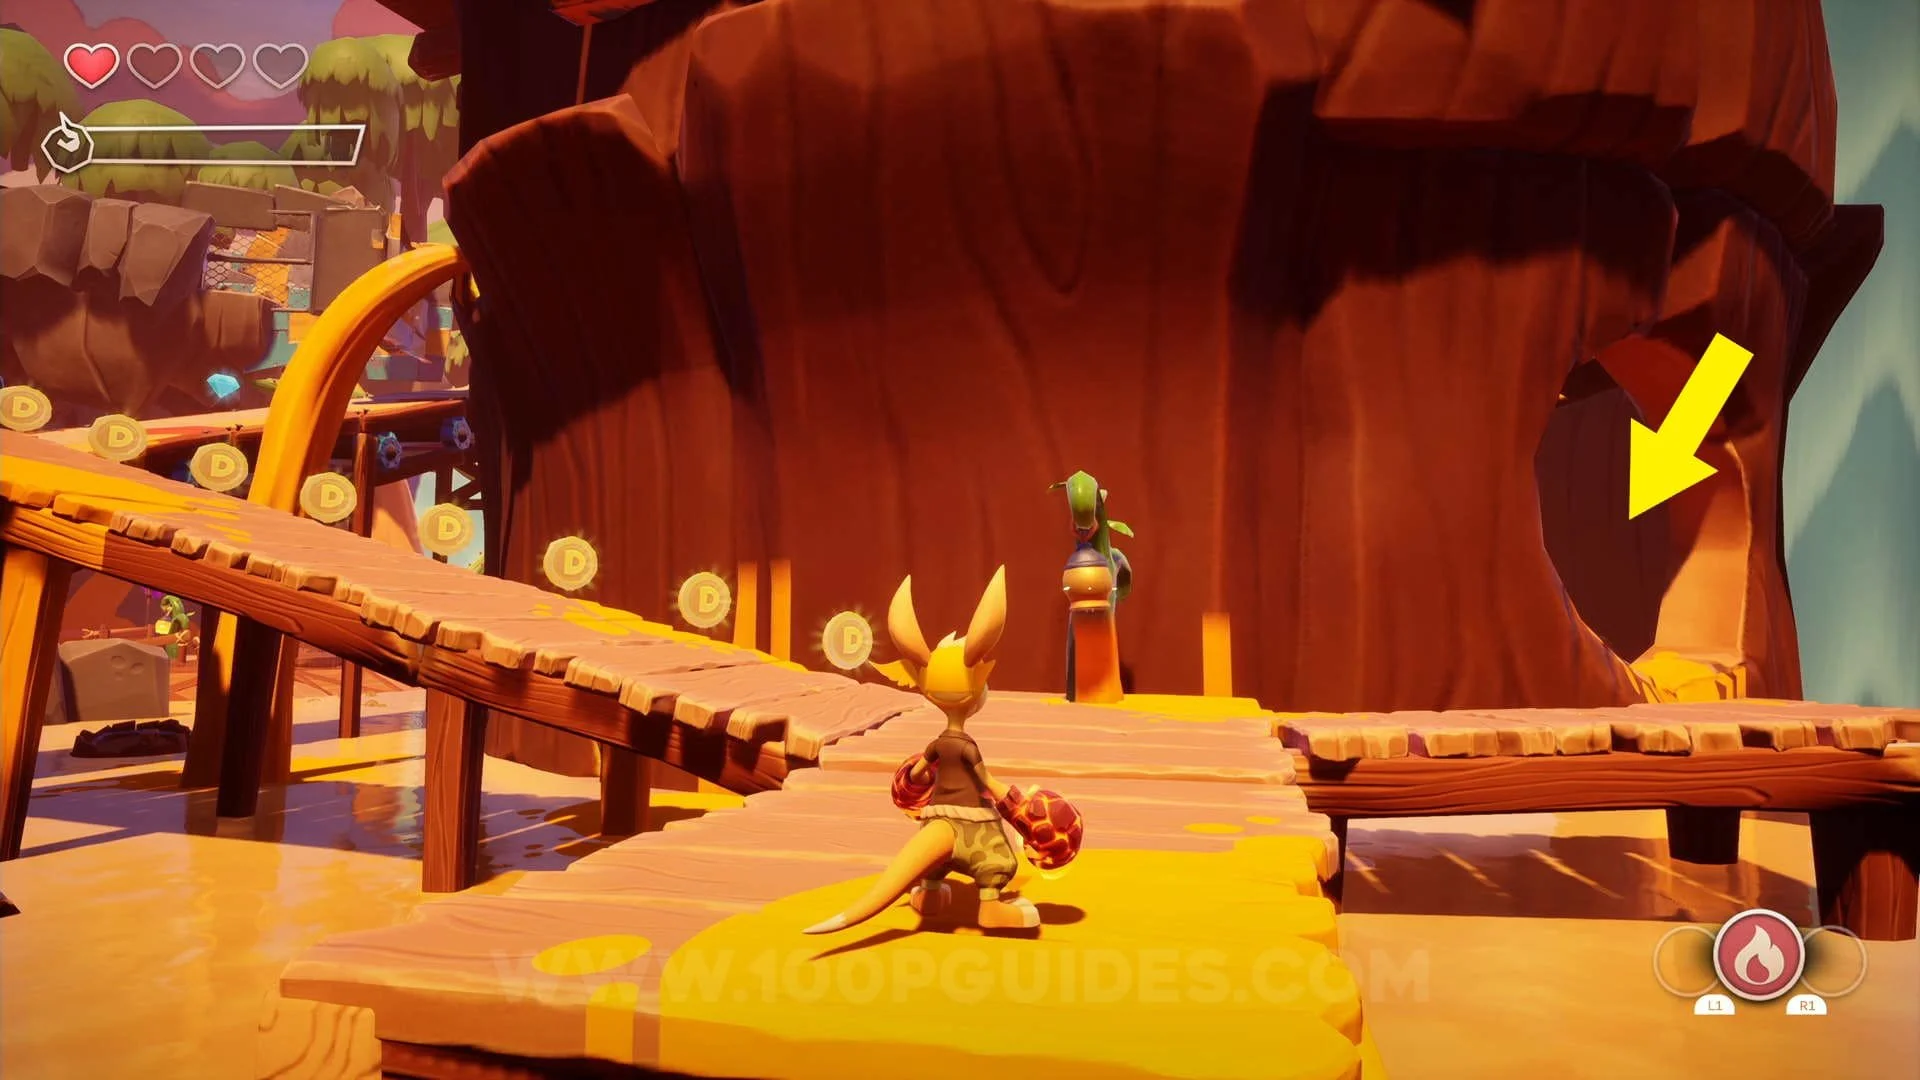
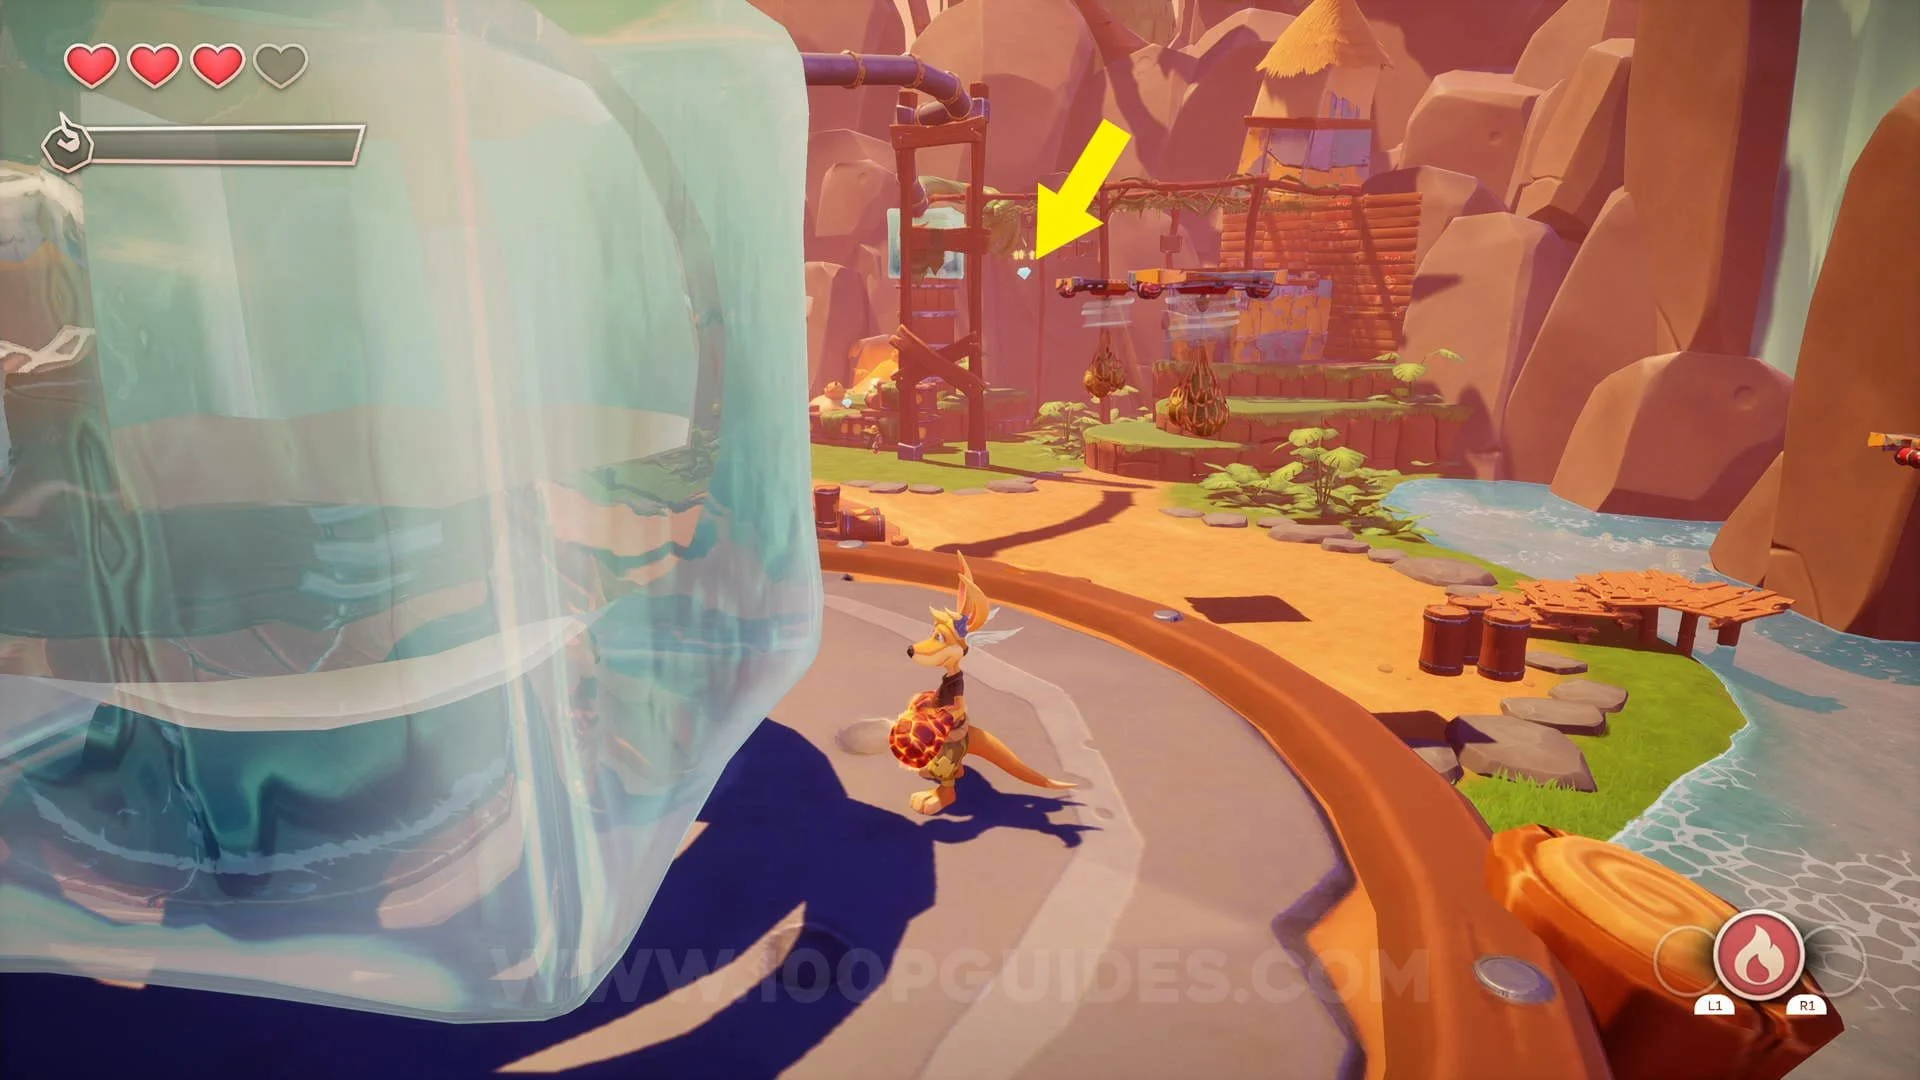
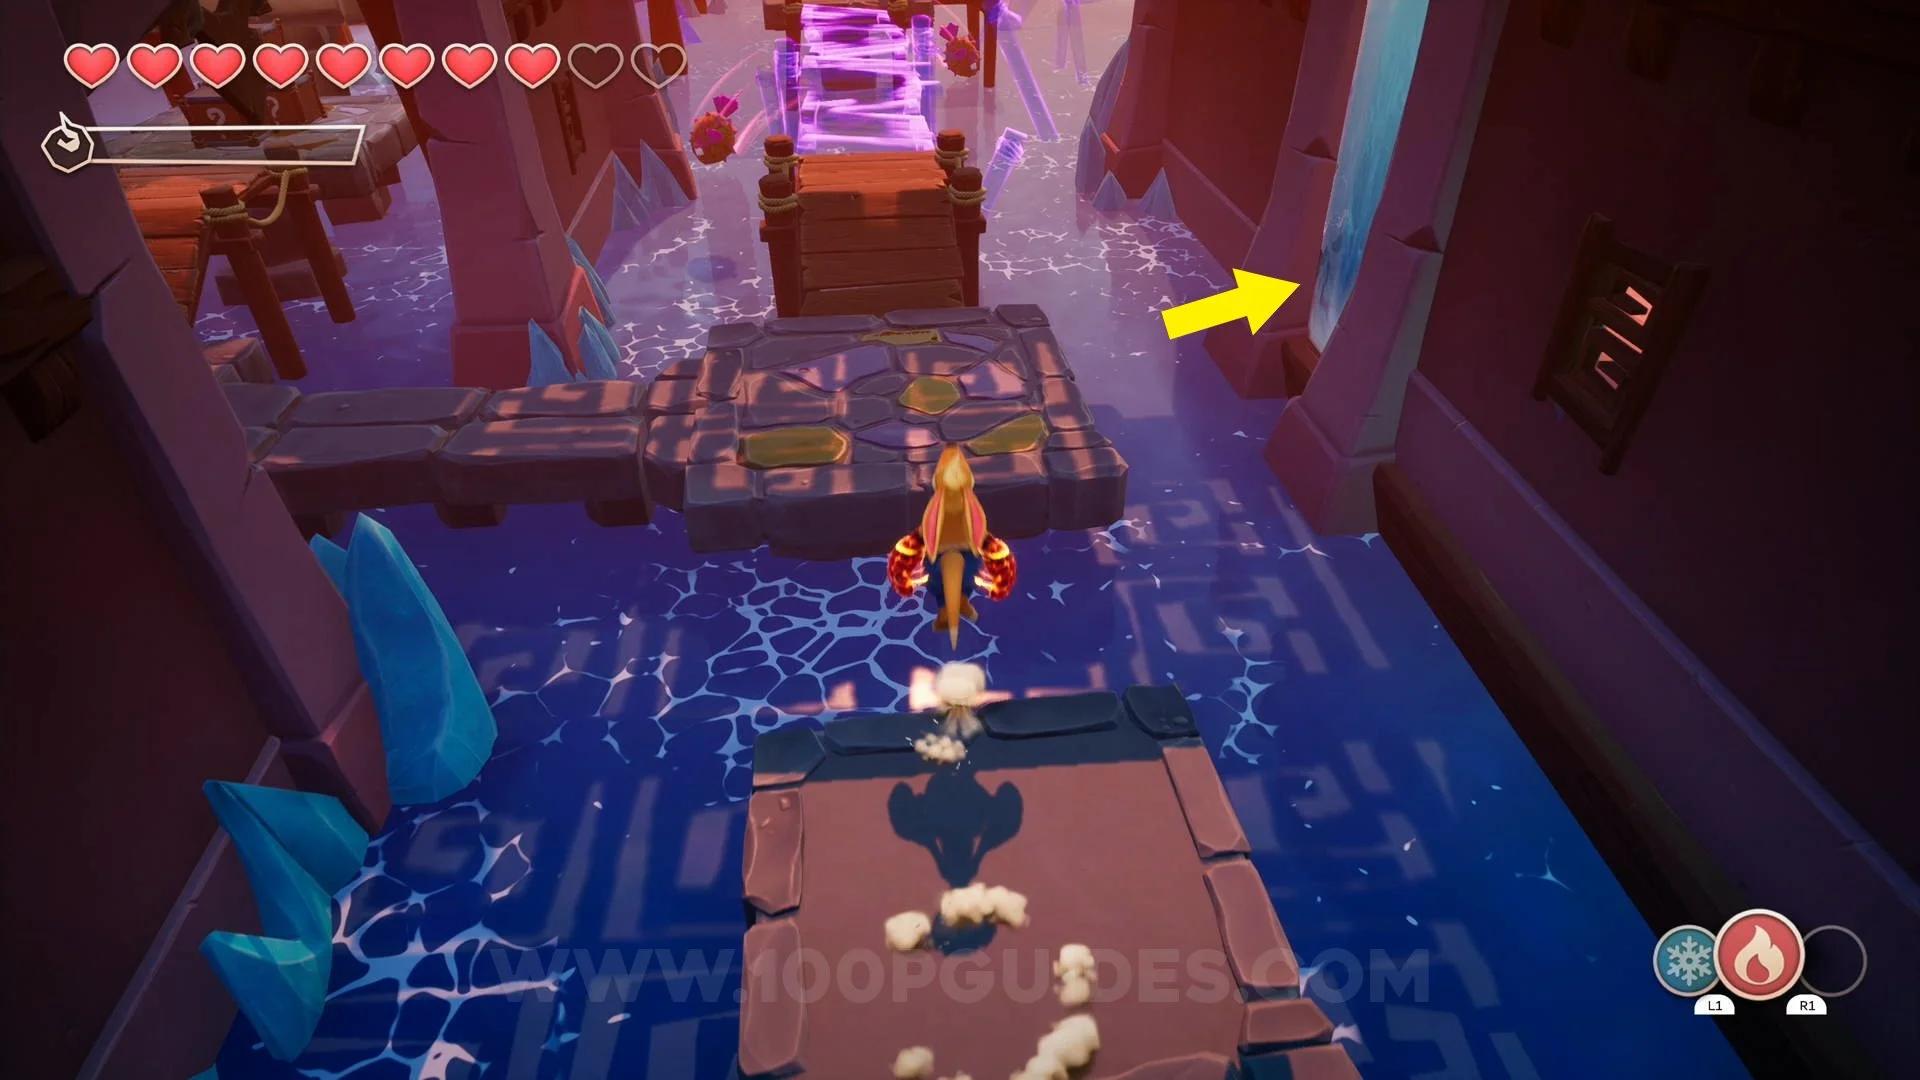
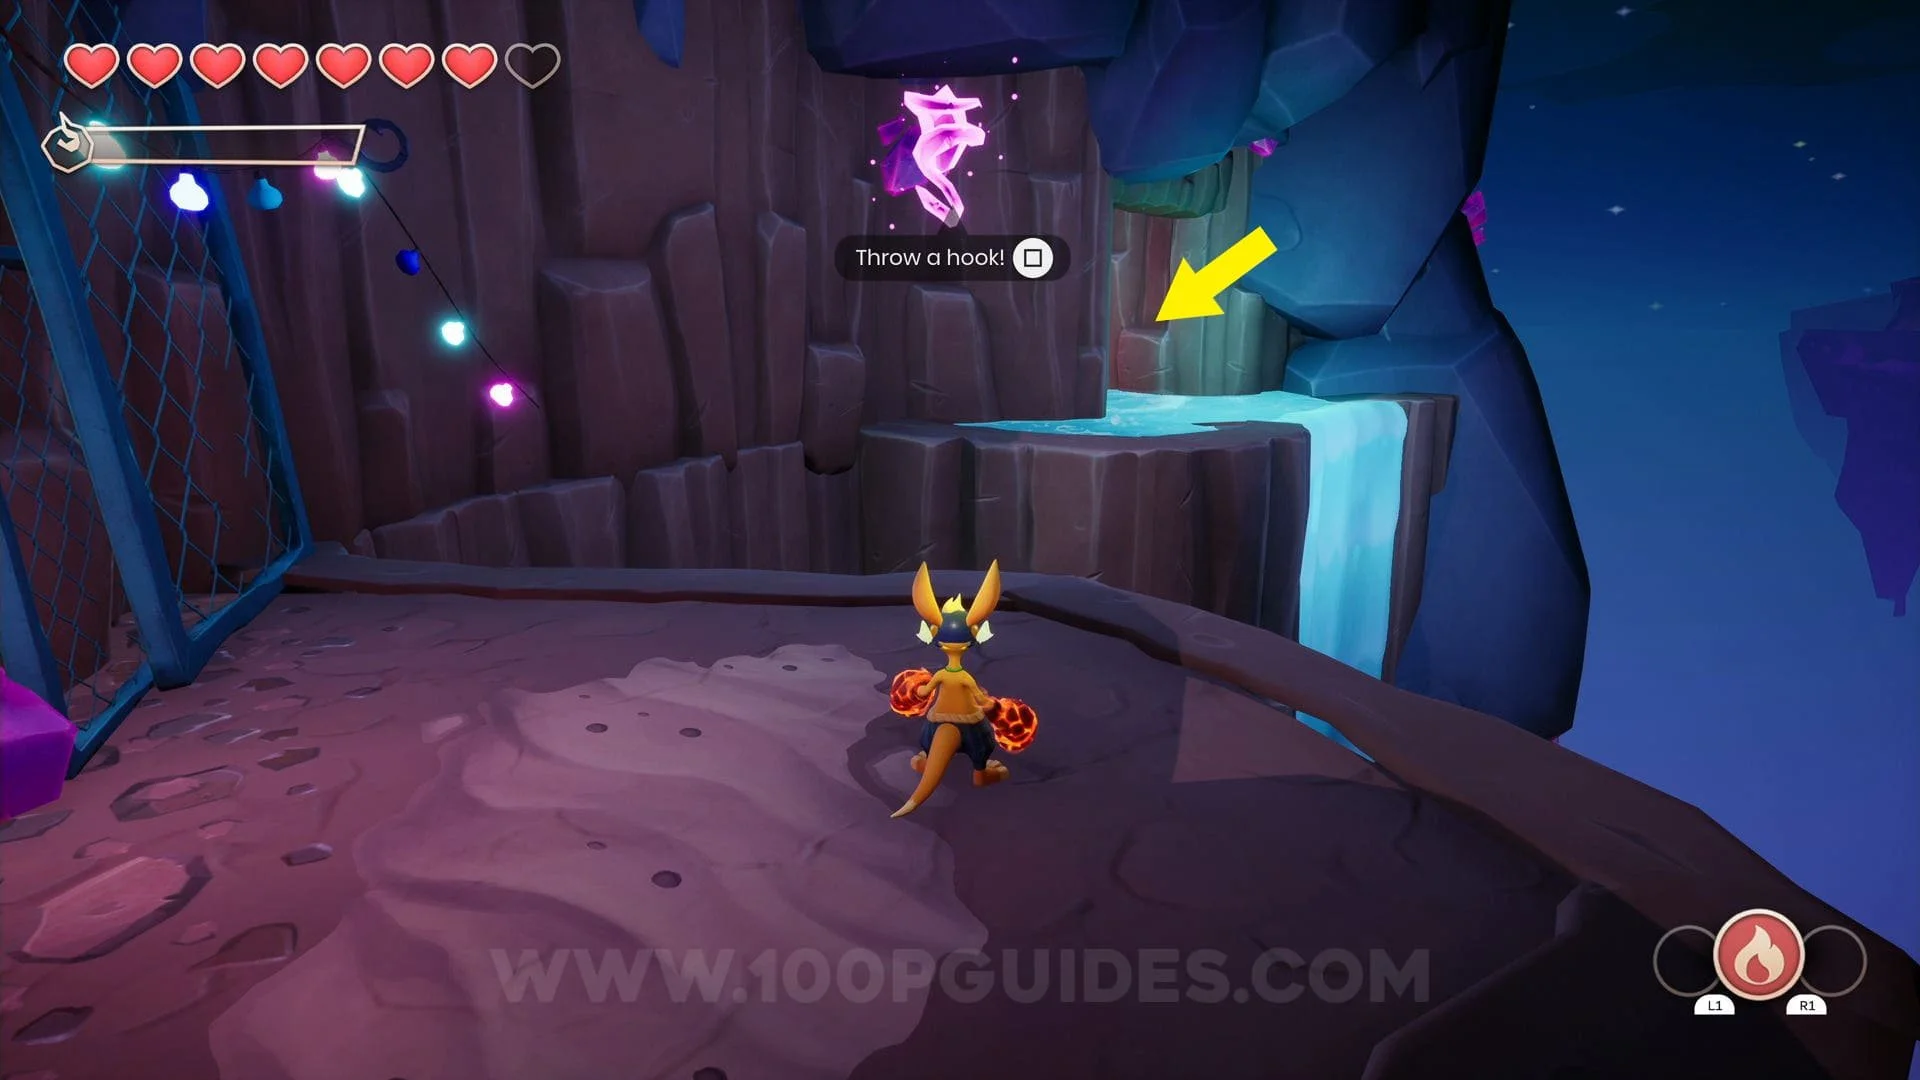
Rune #3: In front of The Dark Forest level entrance. Found across the bridge to the left of the area.
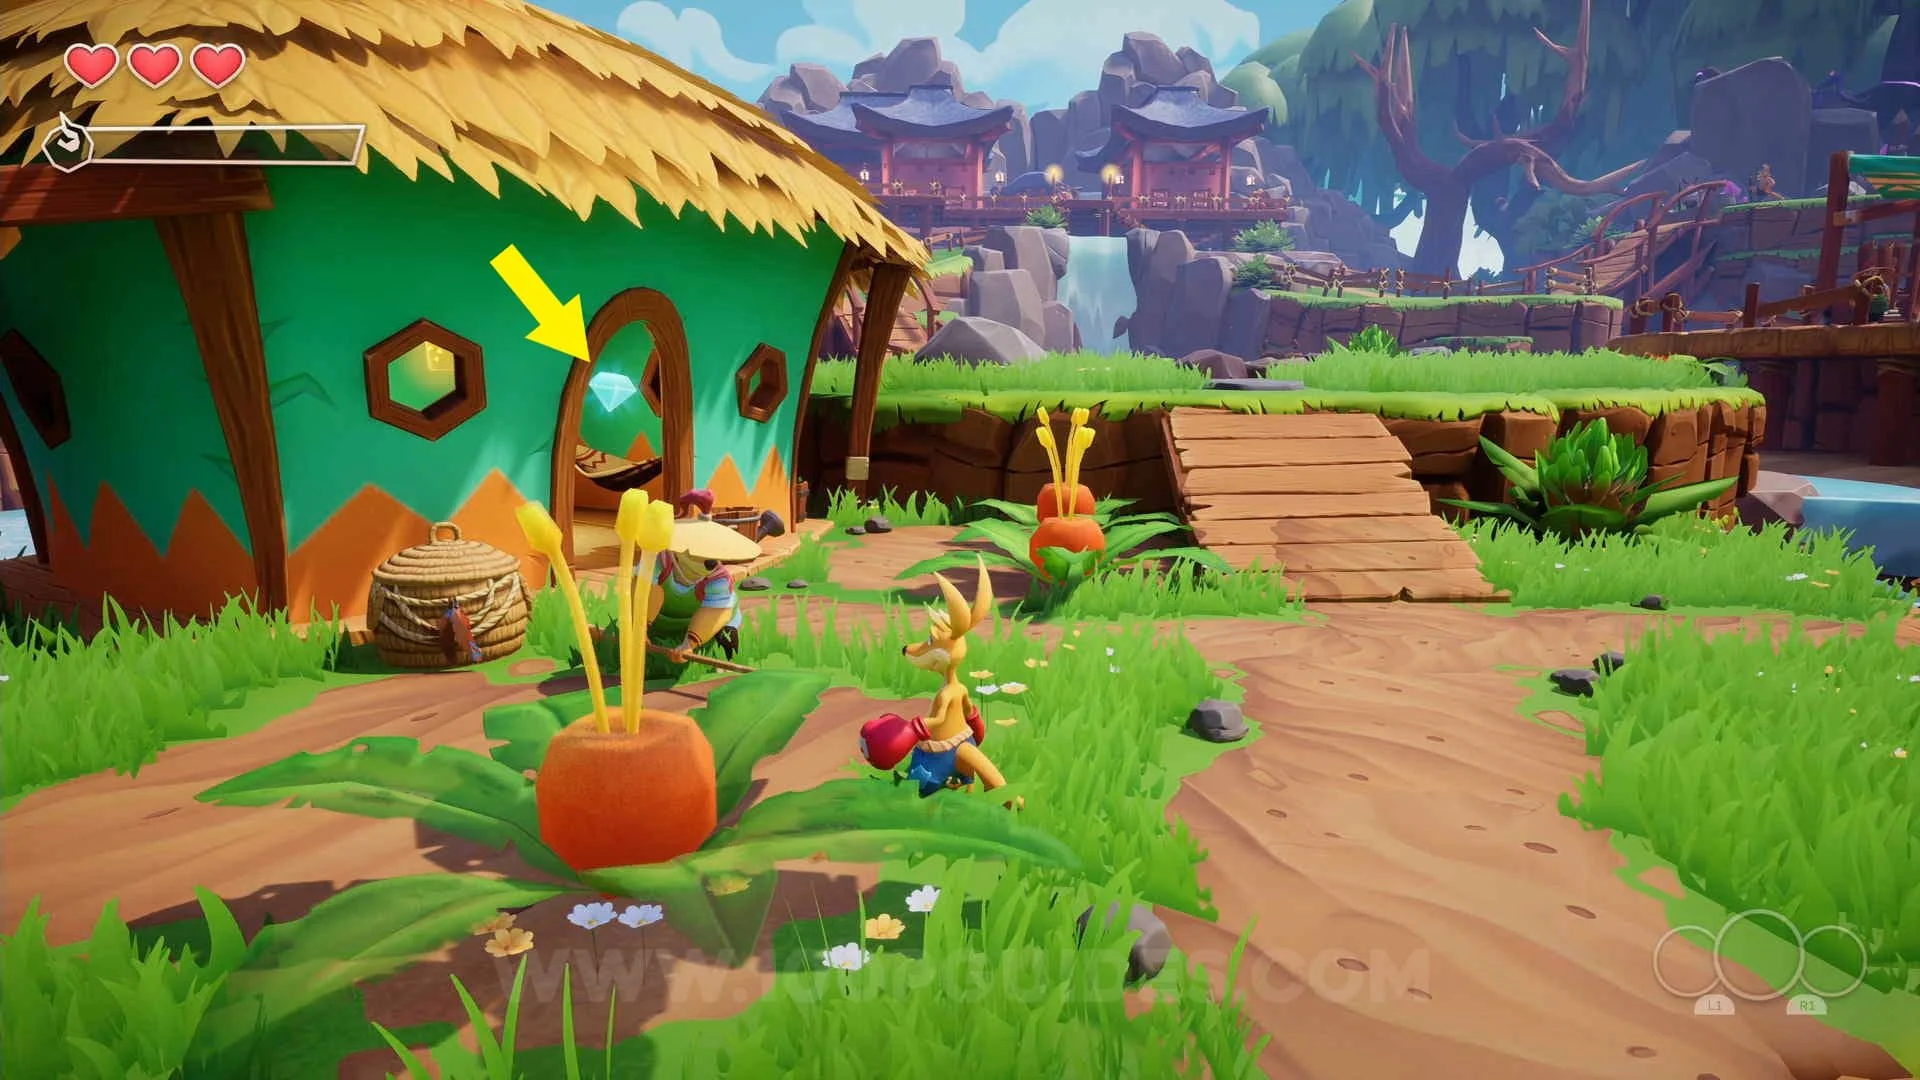
Chest #2: In the red hut just down the hill from Walt.


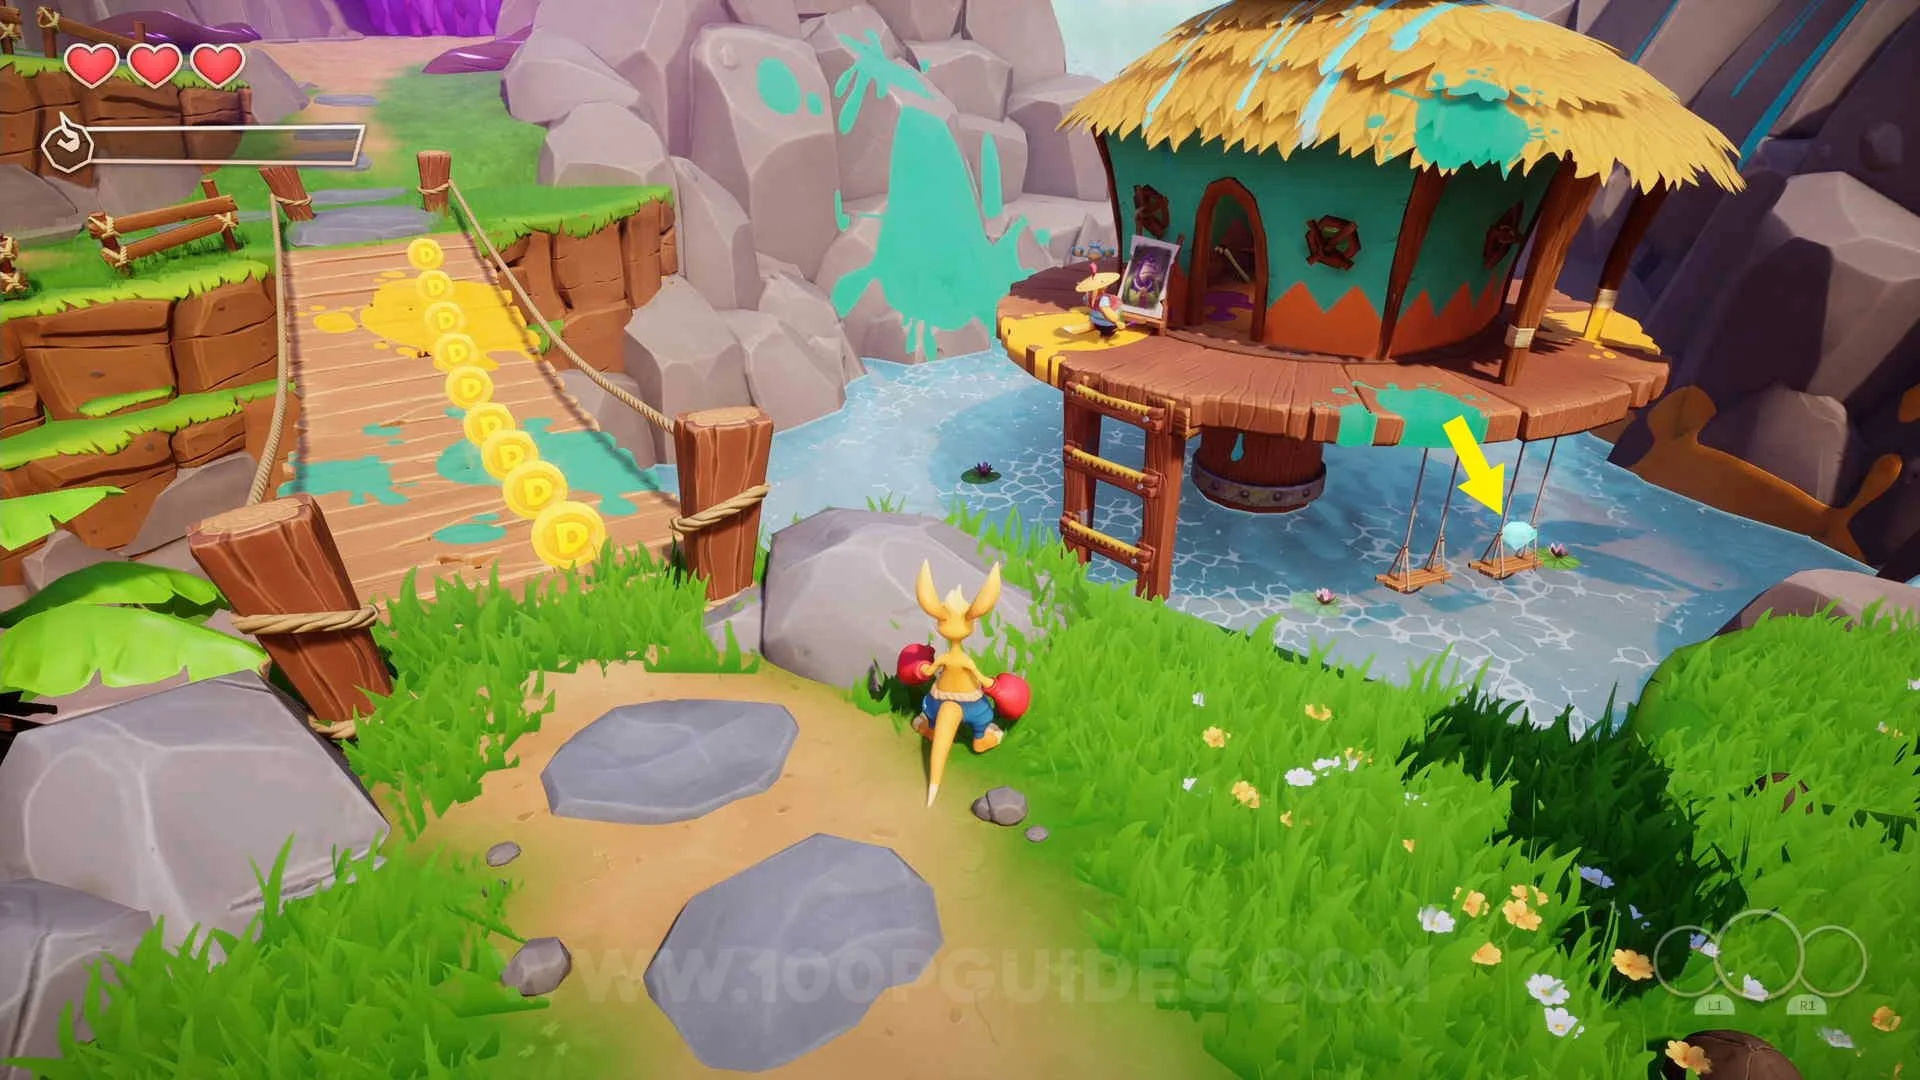
Scroll #3: Found at the bottom of the waterfall behind Walt

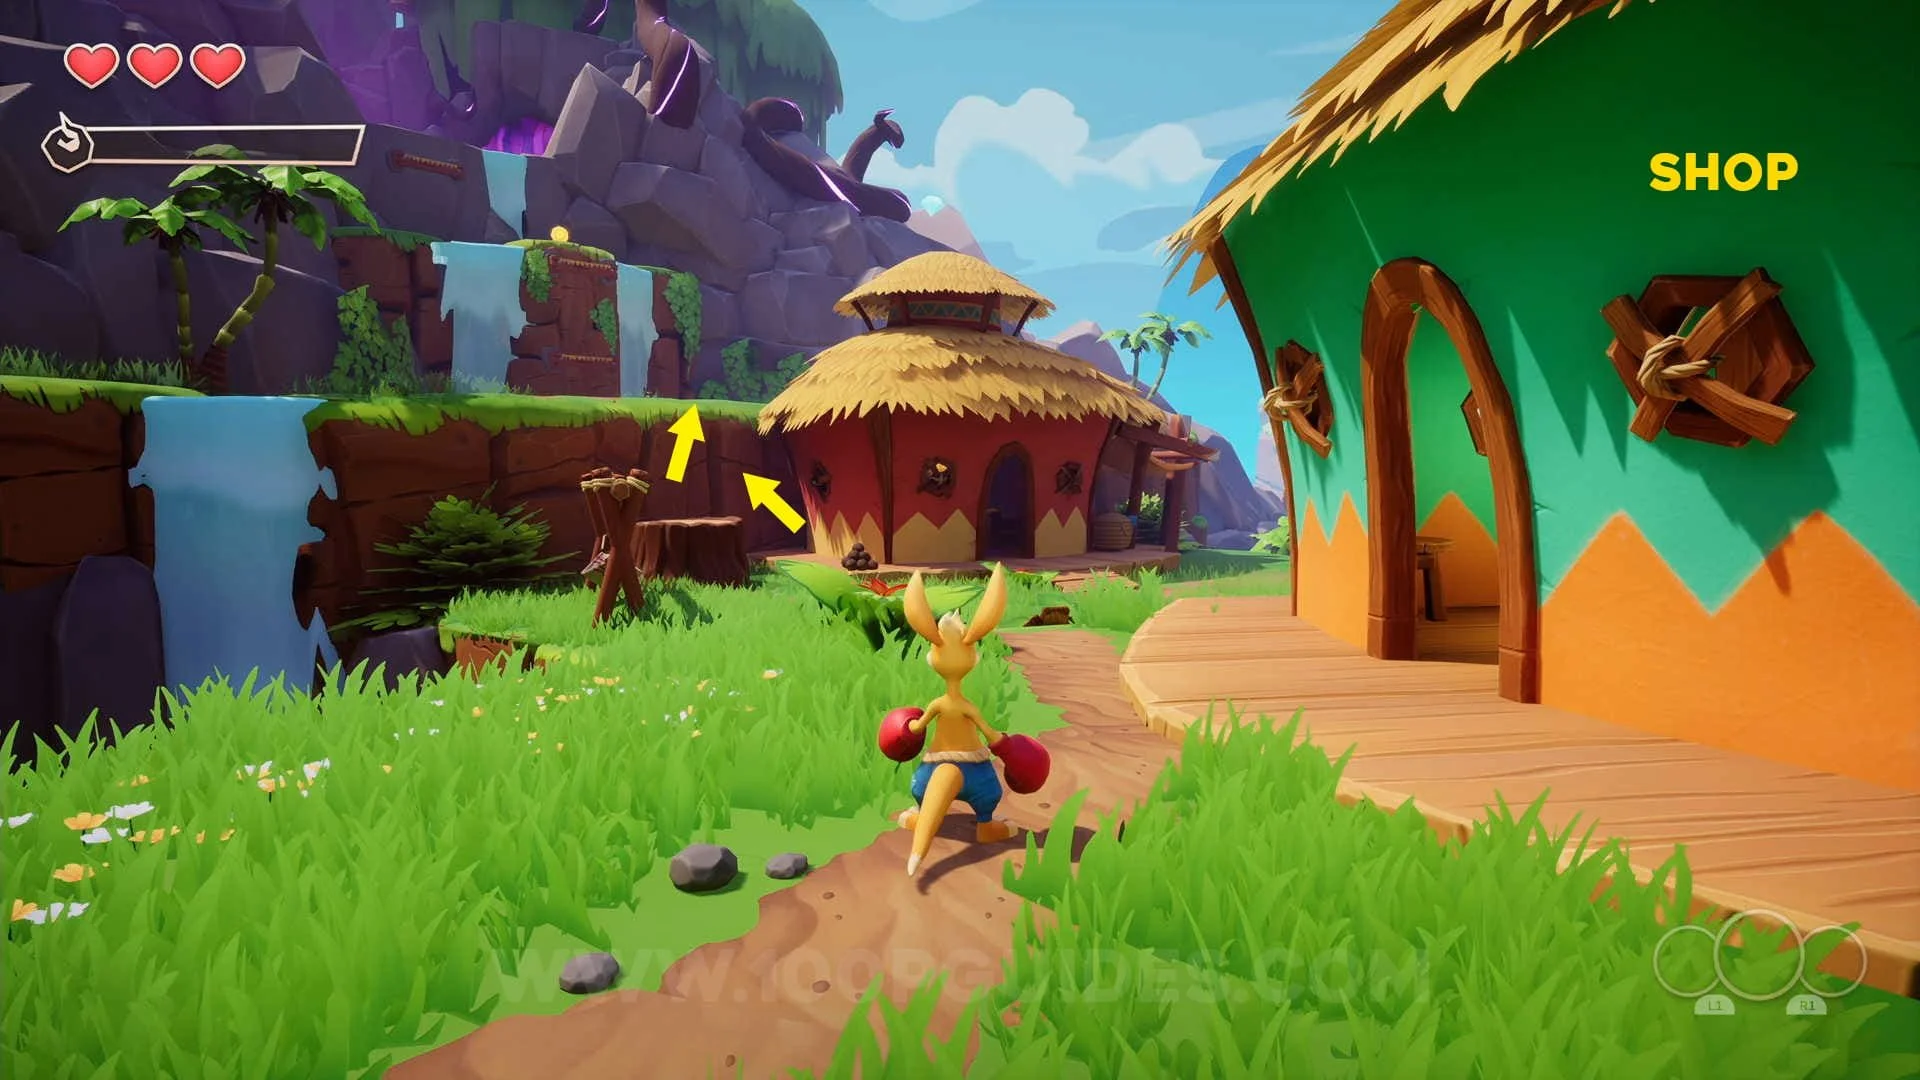
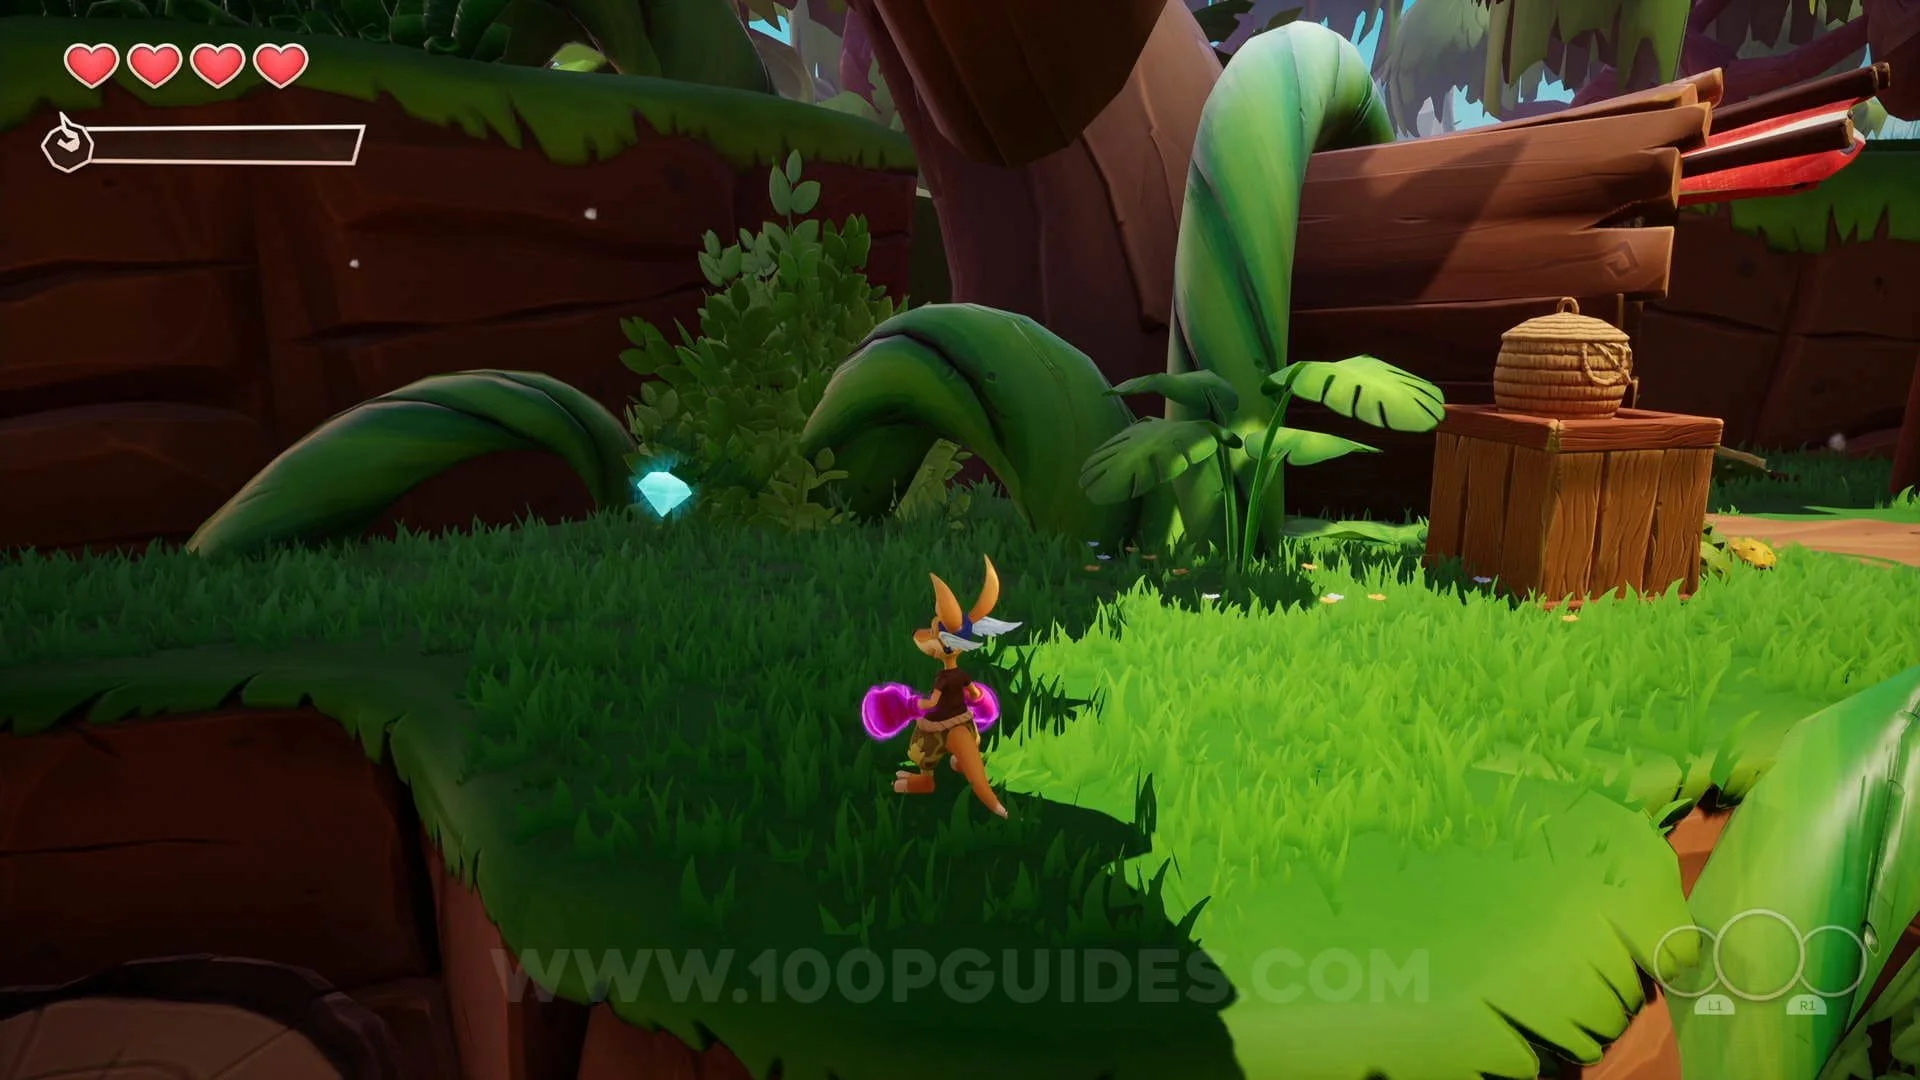
Crystal #3: In the turquoise house at the bottom of the hill (the one with the fruit outside).
Crystal #4: Under the shop.
Crystal #5: In the shop next to the items for sale.
Crystal #6: Above the pole on the small bridge behind the shop, you can double jump to get it.
Crystal #7: Jump up to the area behind the red house next to the previous crystal by using the tree trunk, then jump
up to the roof where you can find the crystal.


Scroll #4: Just like the previous collectible, jump up behind the red house, then use the planks of wood on the side of the mountain to get to the top where you can find the scroll.

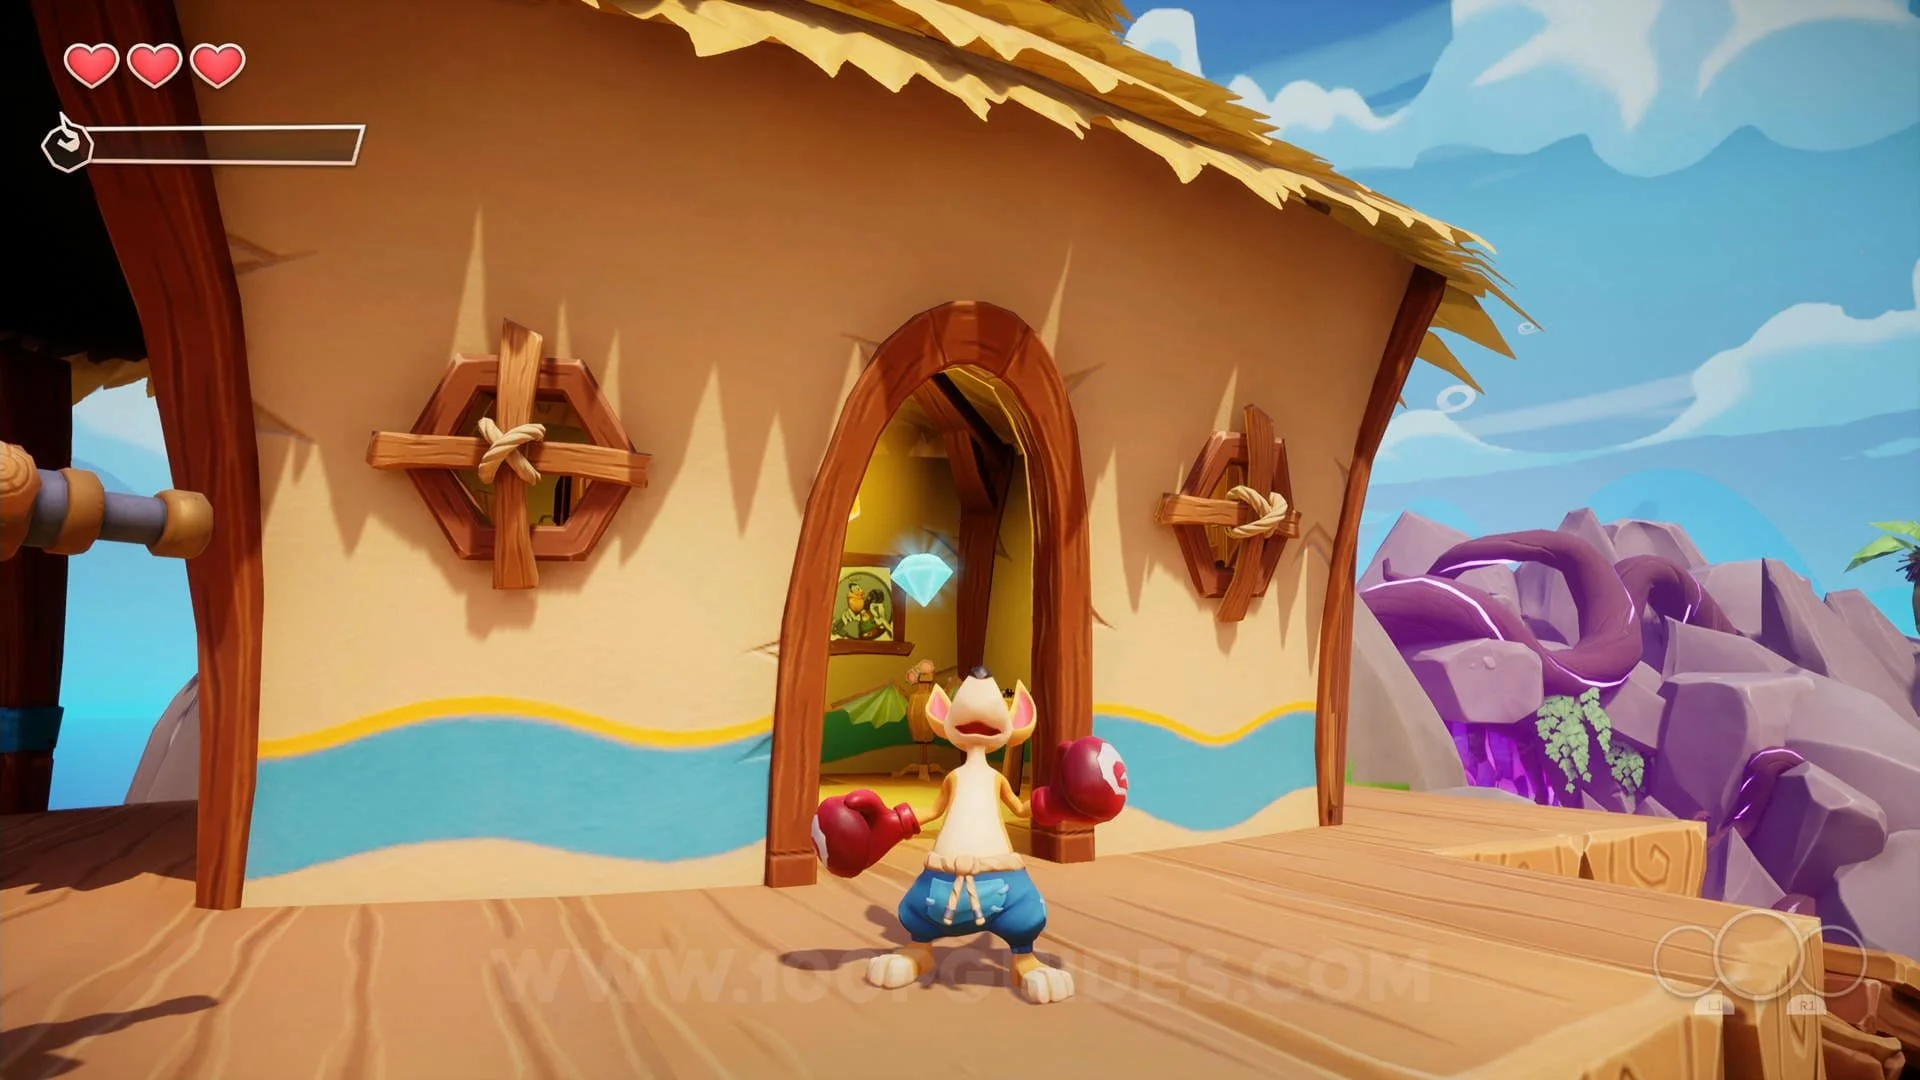
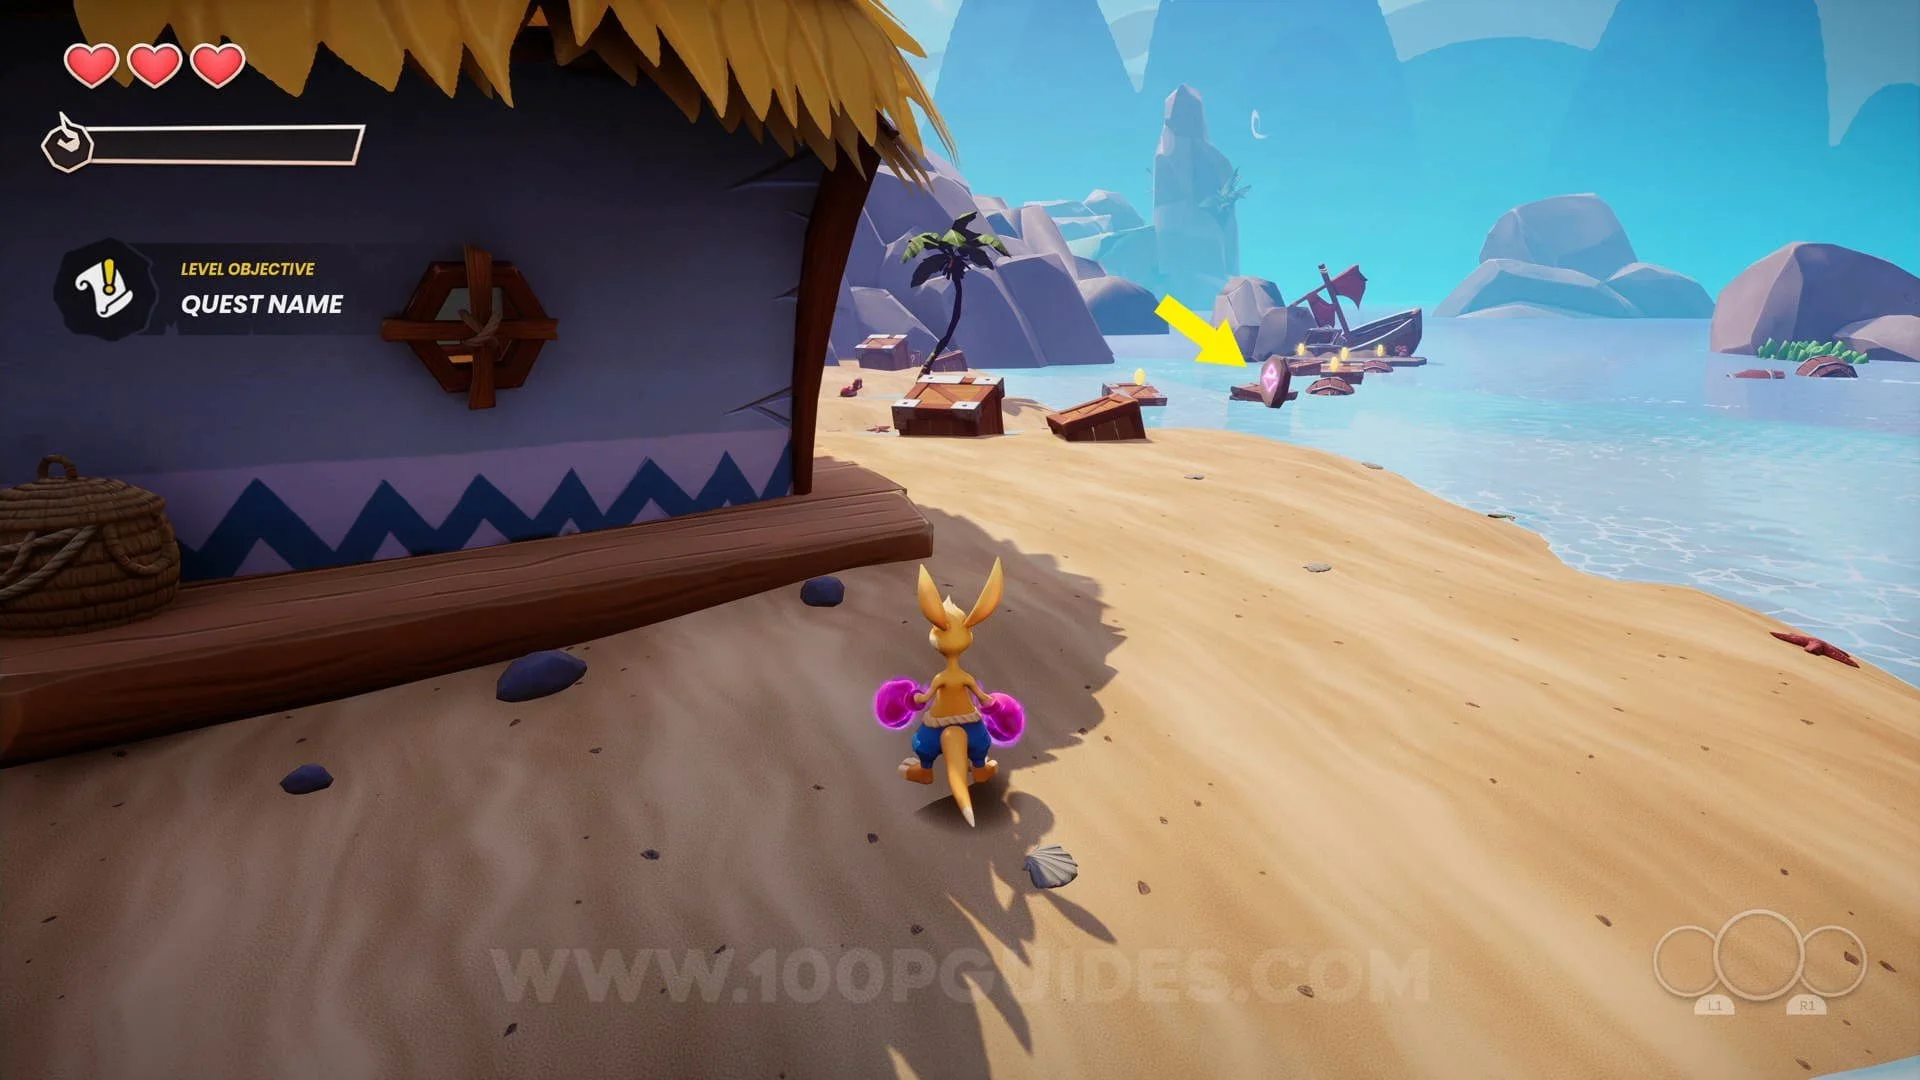
Scroll #5: In the big house on the beach.

Chest #3: On a small island with a boat behind the big house on the beach.

Crystal #8: On a barrel in the water to the right of the island where you picked up the previous collectible.
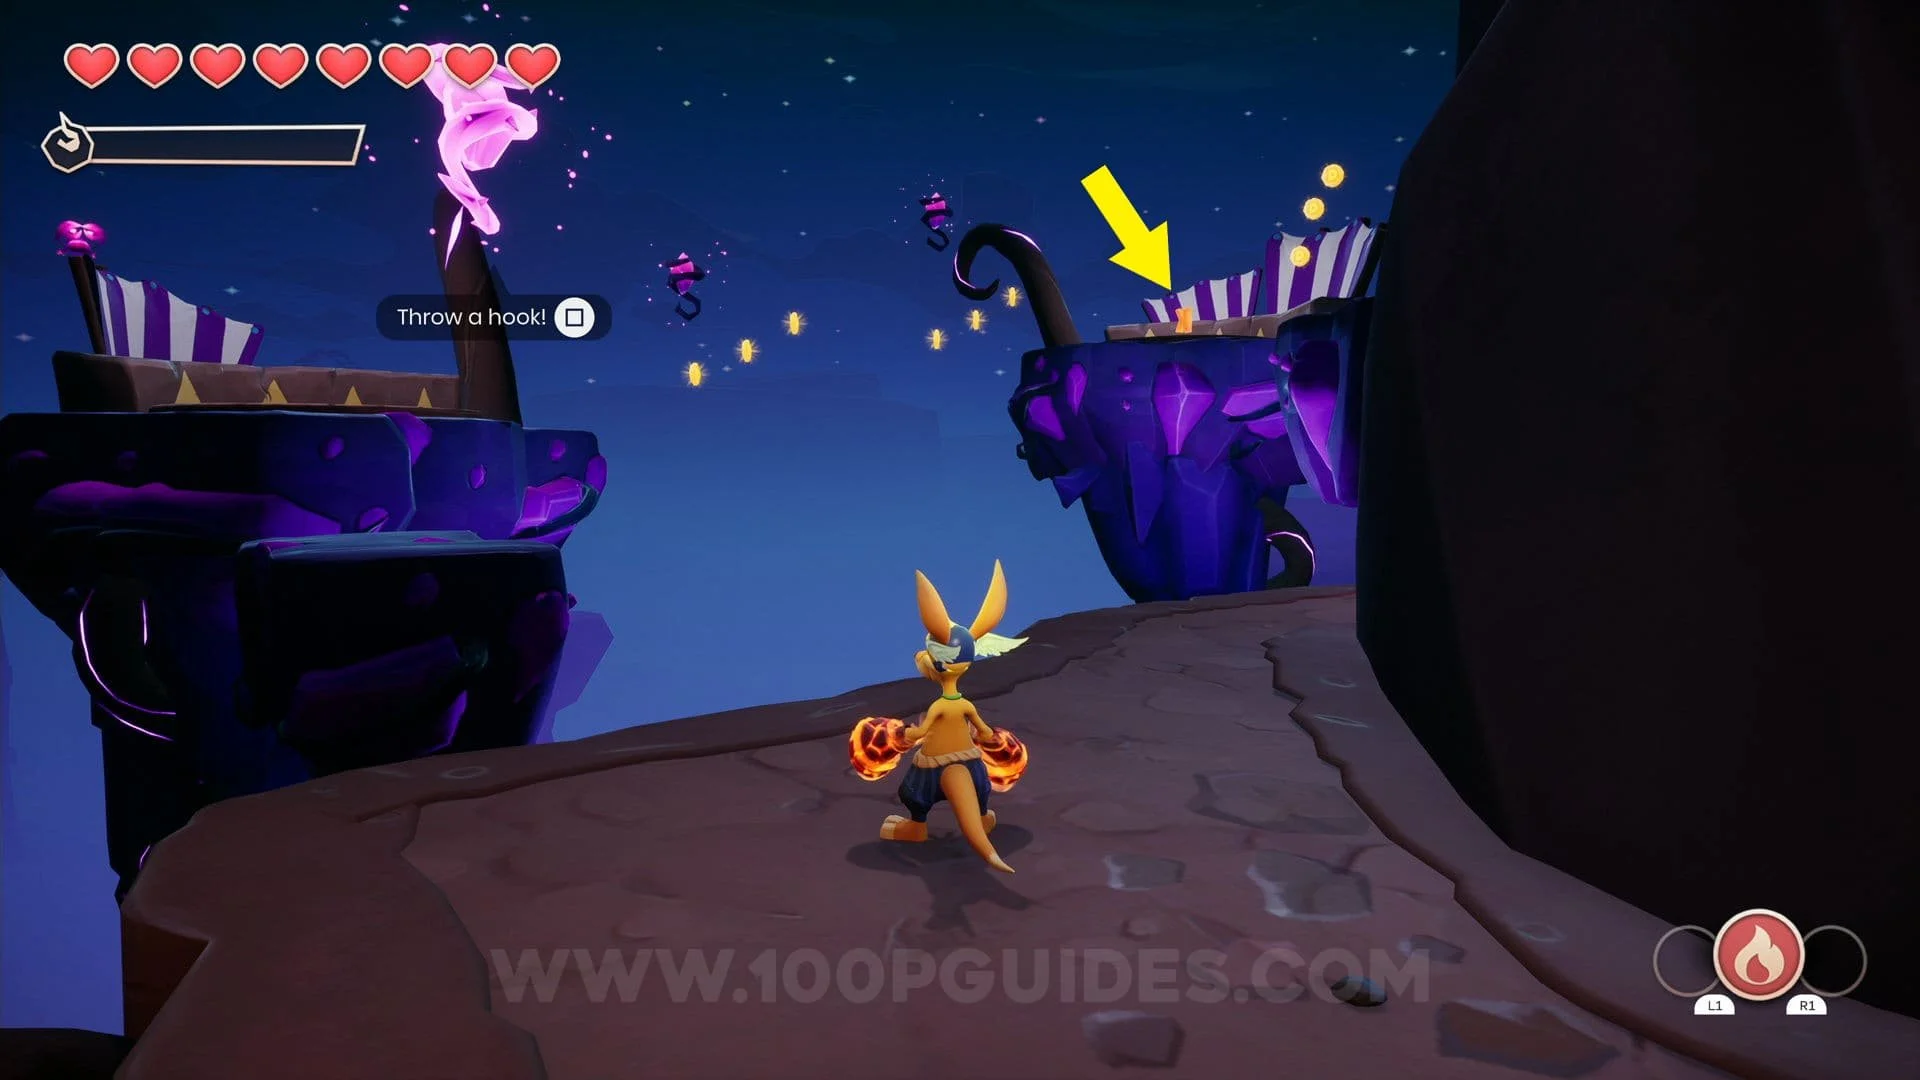
Rune #4: Next to the red house on the pier.
Crystal #9: Above the red house on the pier. You will have to jump on the beam above the hammock and then on to the roof.


Crystal #10: From Walt, go right towards the bridge with yellow paint on it, then jump down below the blue house to find the crystal.

Scroll #5: In the house at the top of the mountain onm the right side of the area. You can get there by crossing the bridge with yellow paint on it to the right of Walt.


Crystal #11: In the same house as the previous collectible.
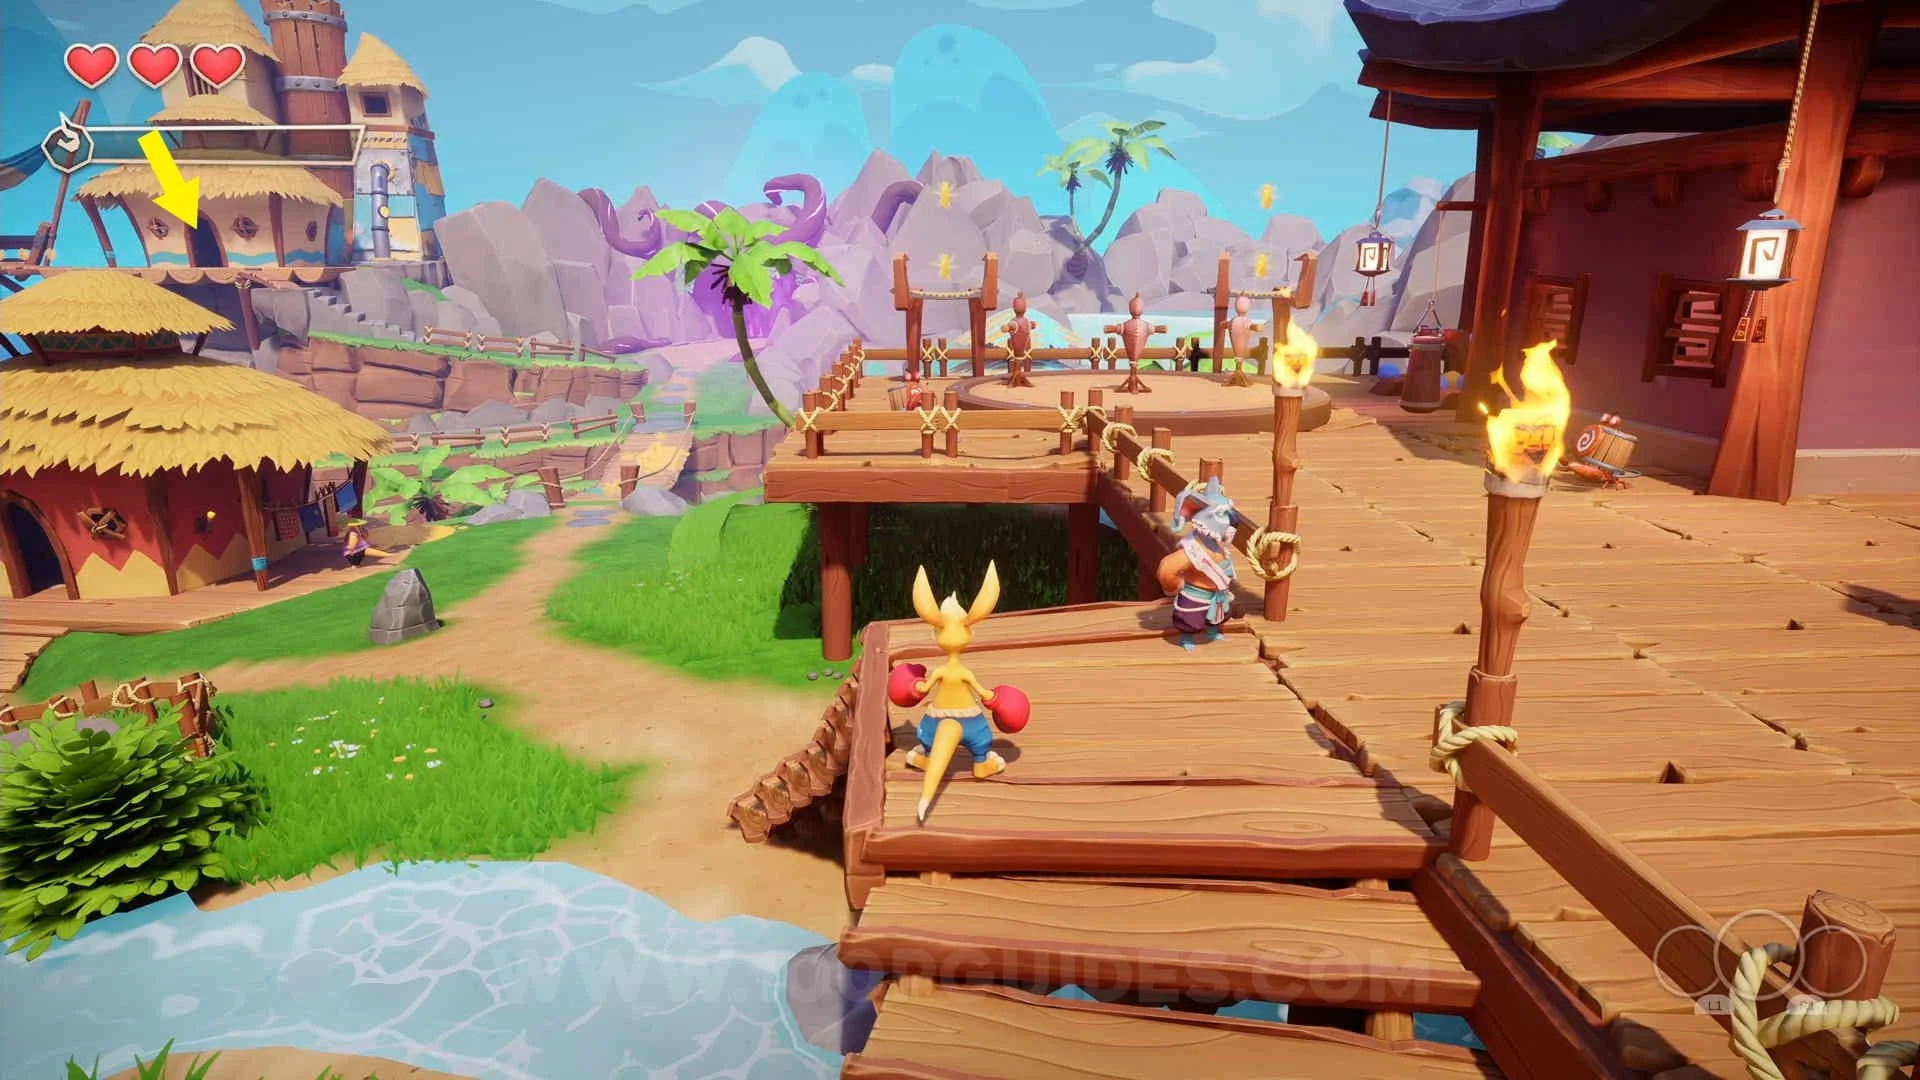
Rune #5: On top of the hill to the right of the area (next to the house with the previous collectible in it).

Rune #6: Can be found right in front of you once you exit "The Dark Forest" level.


Rune #7: Found behind the big house on the beach (only after finishing Terror's Lair).
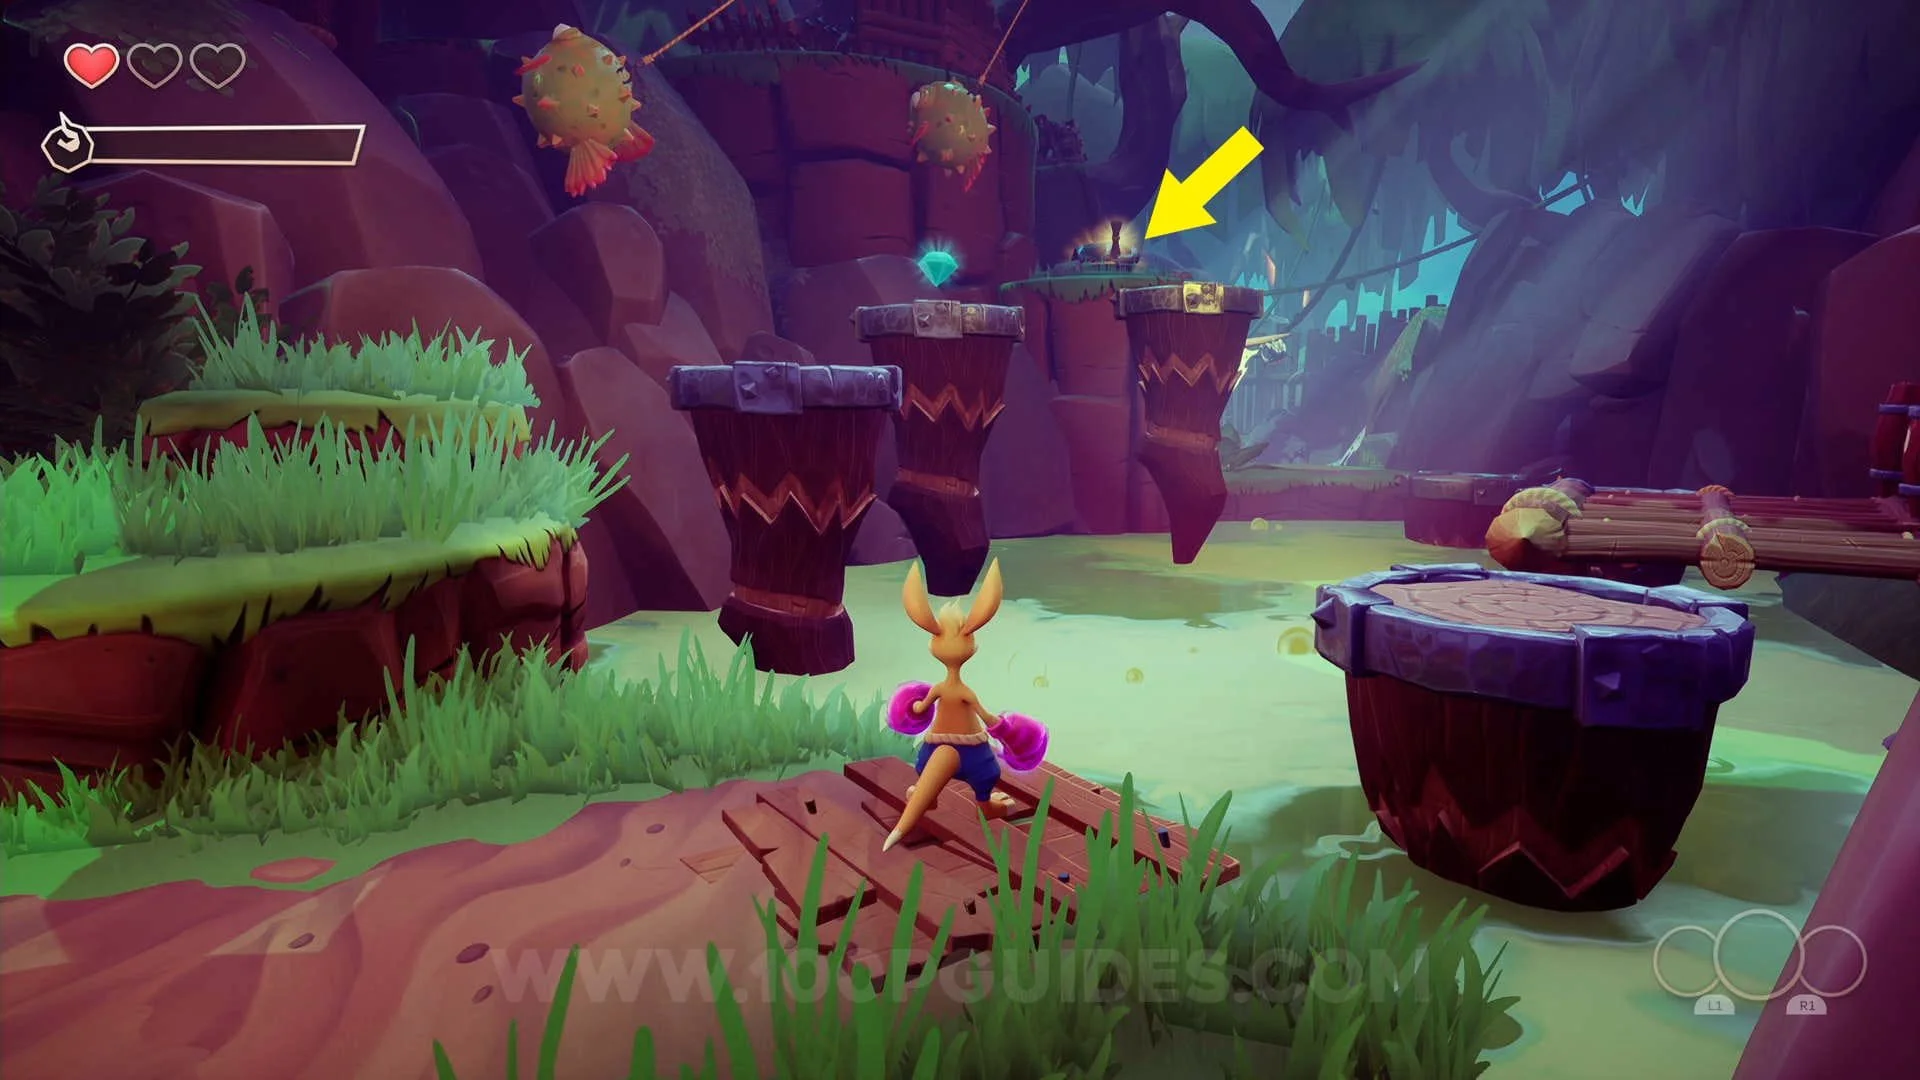
The Dark Forest Collectibles
Crystal #1: To your right as soon as you start.
Crystal #2: Jump up the platforms to the left close to the start.
Crystal #3: Above one of the bear traps in the middle of the path, double jump to reach it.
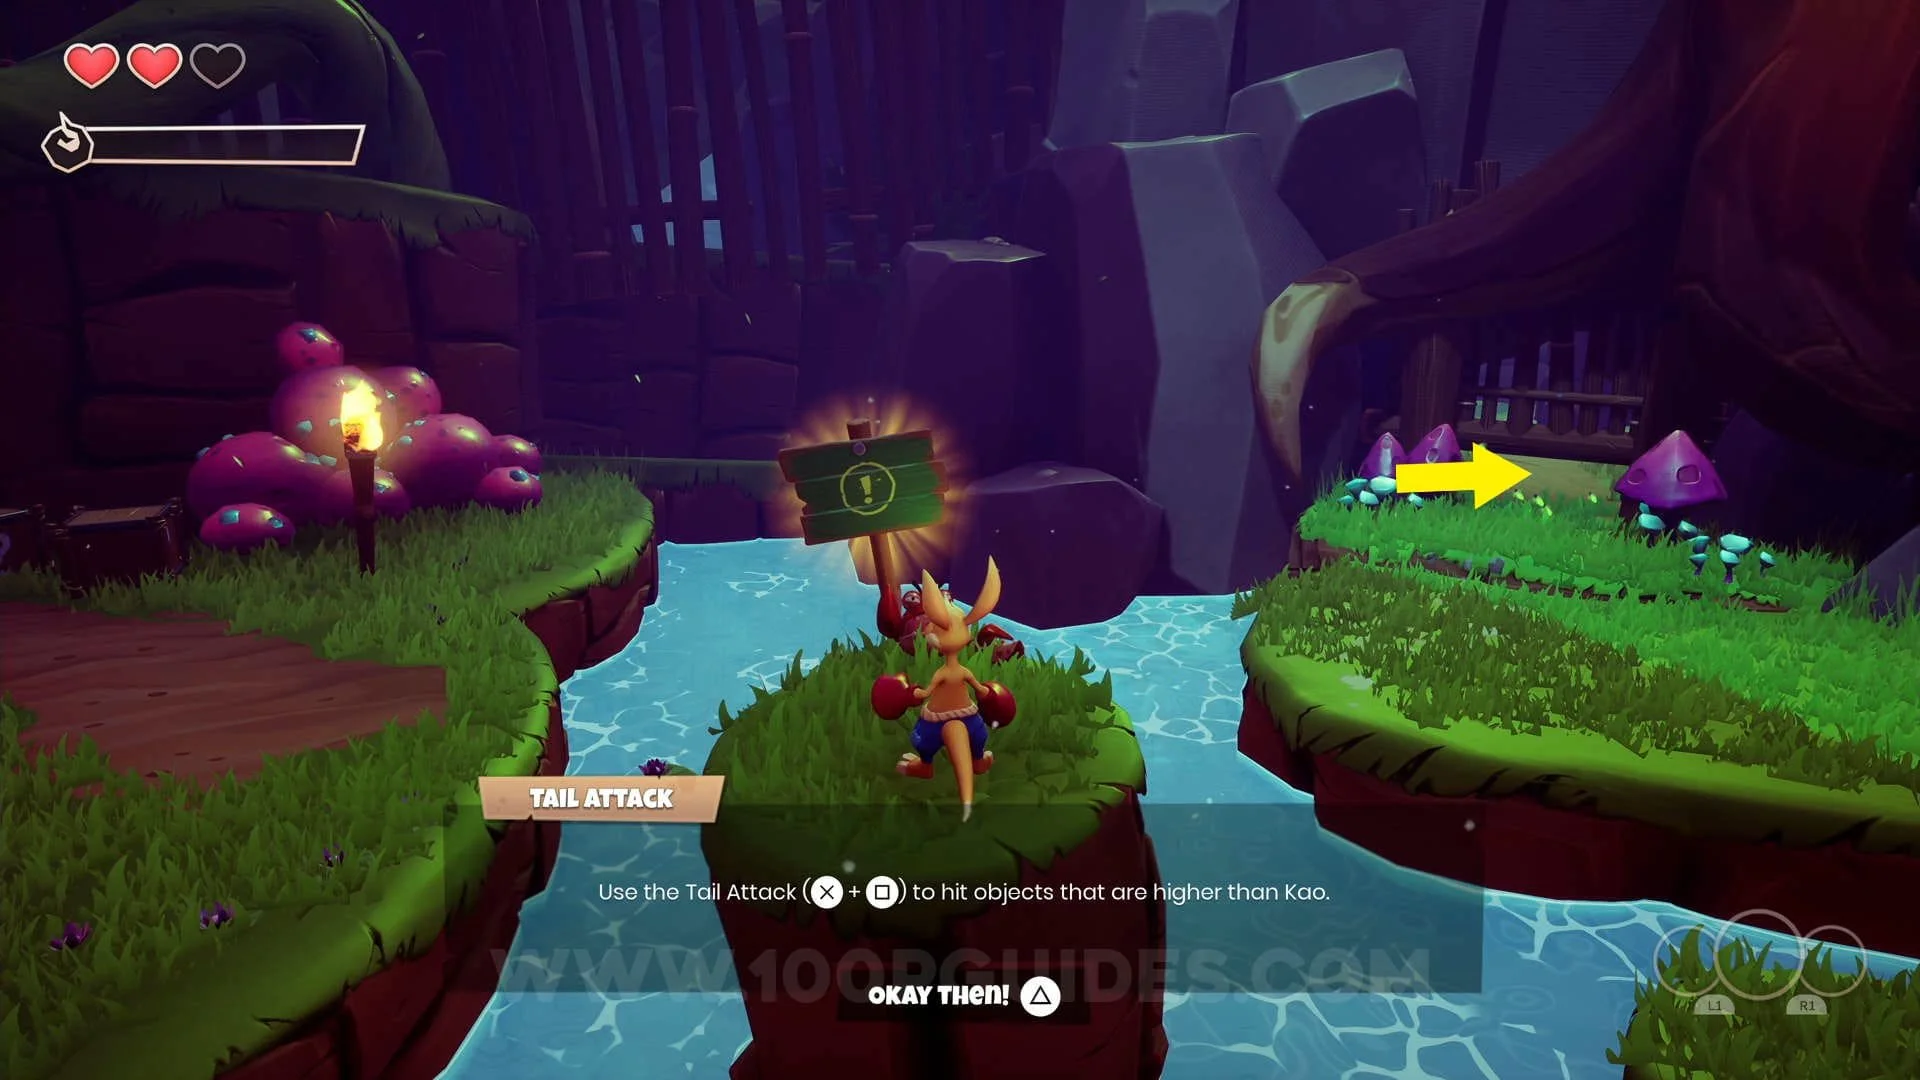
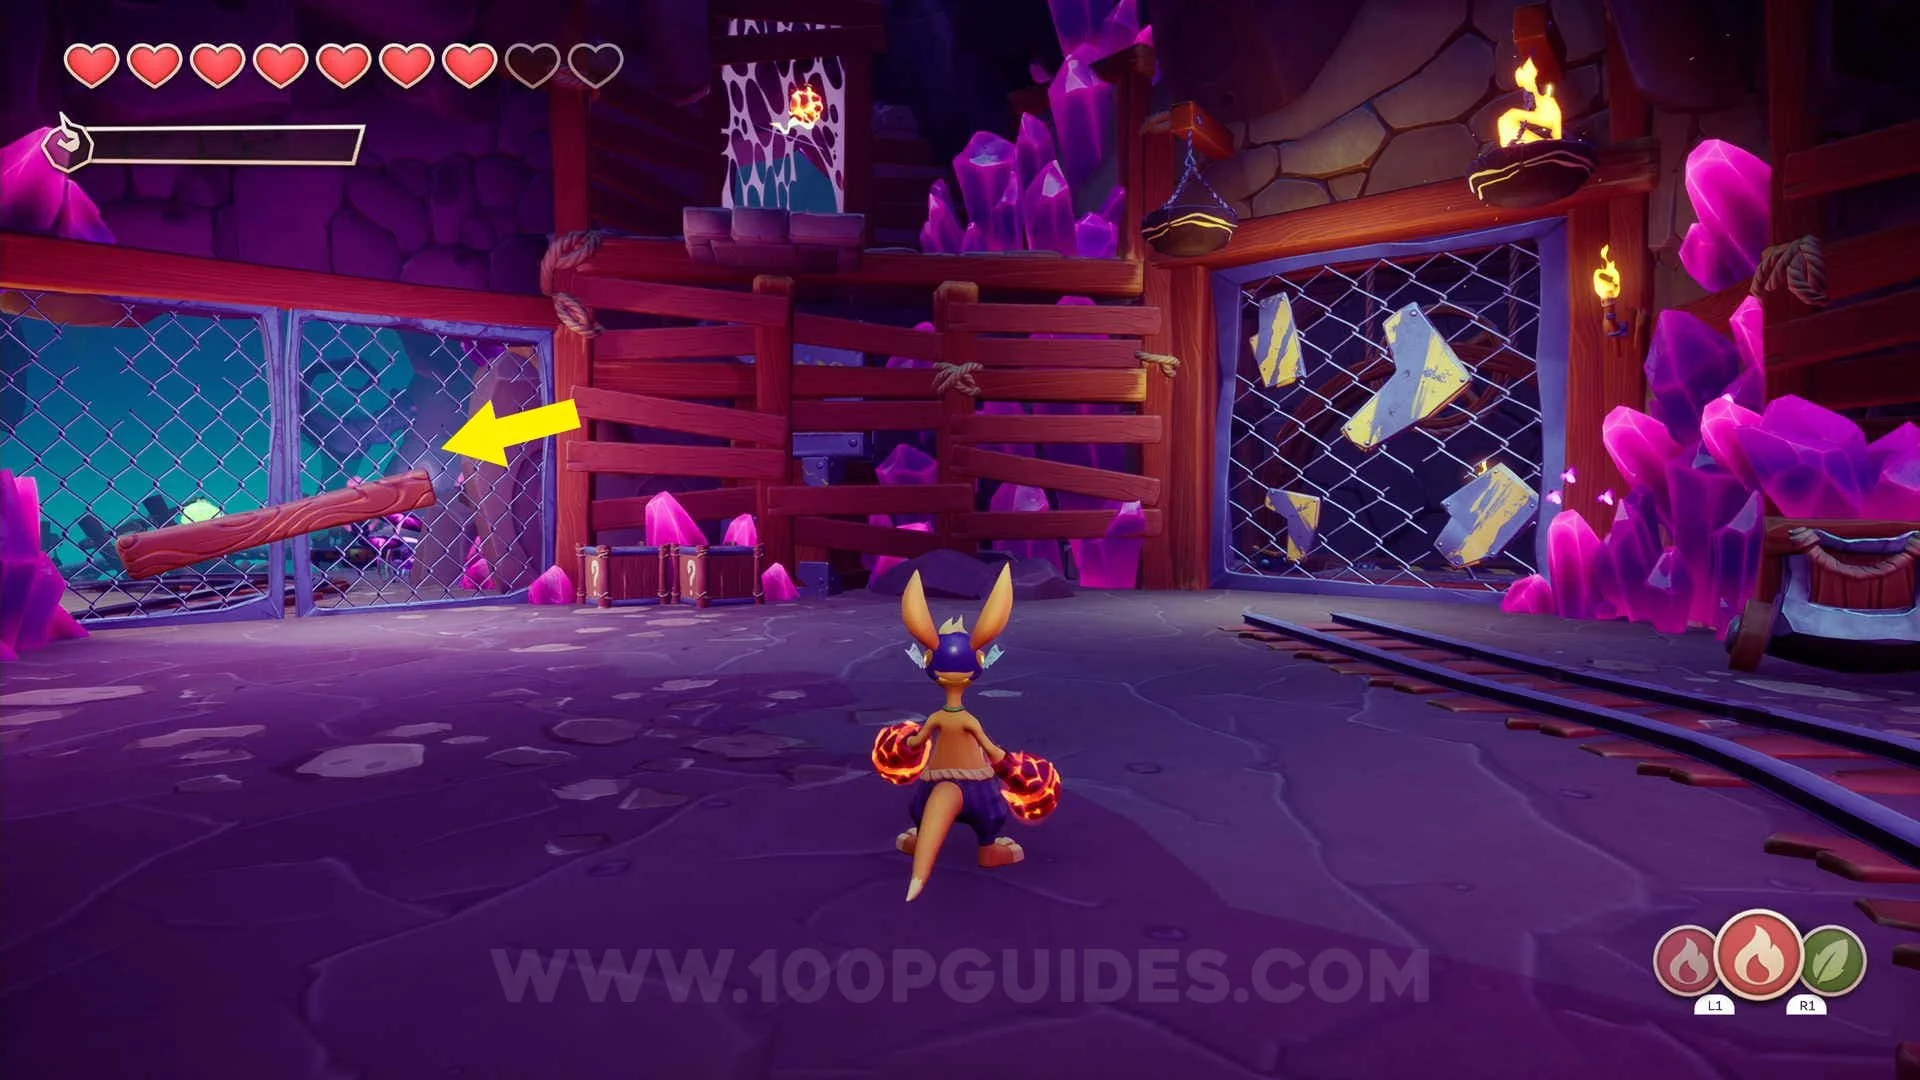
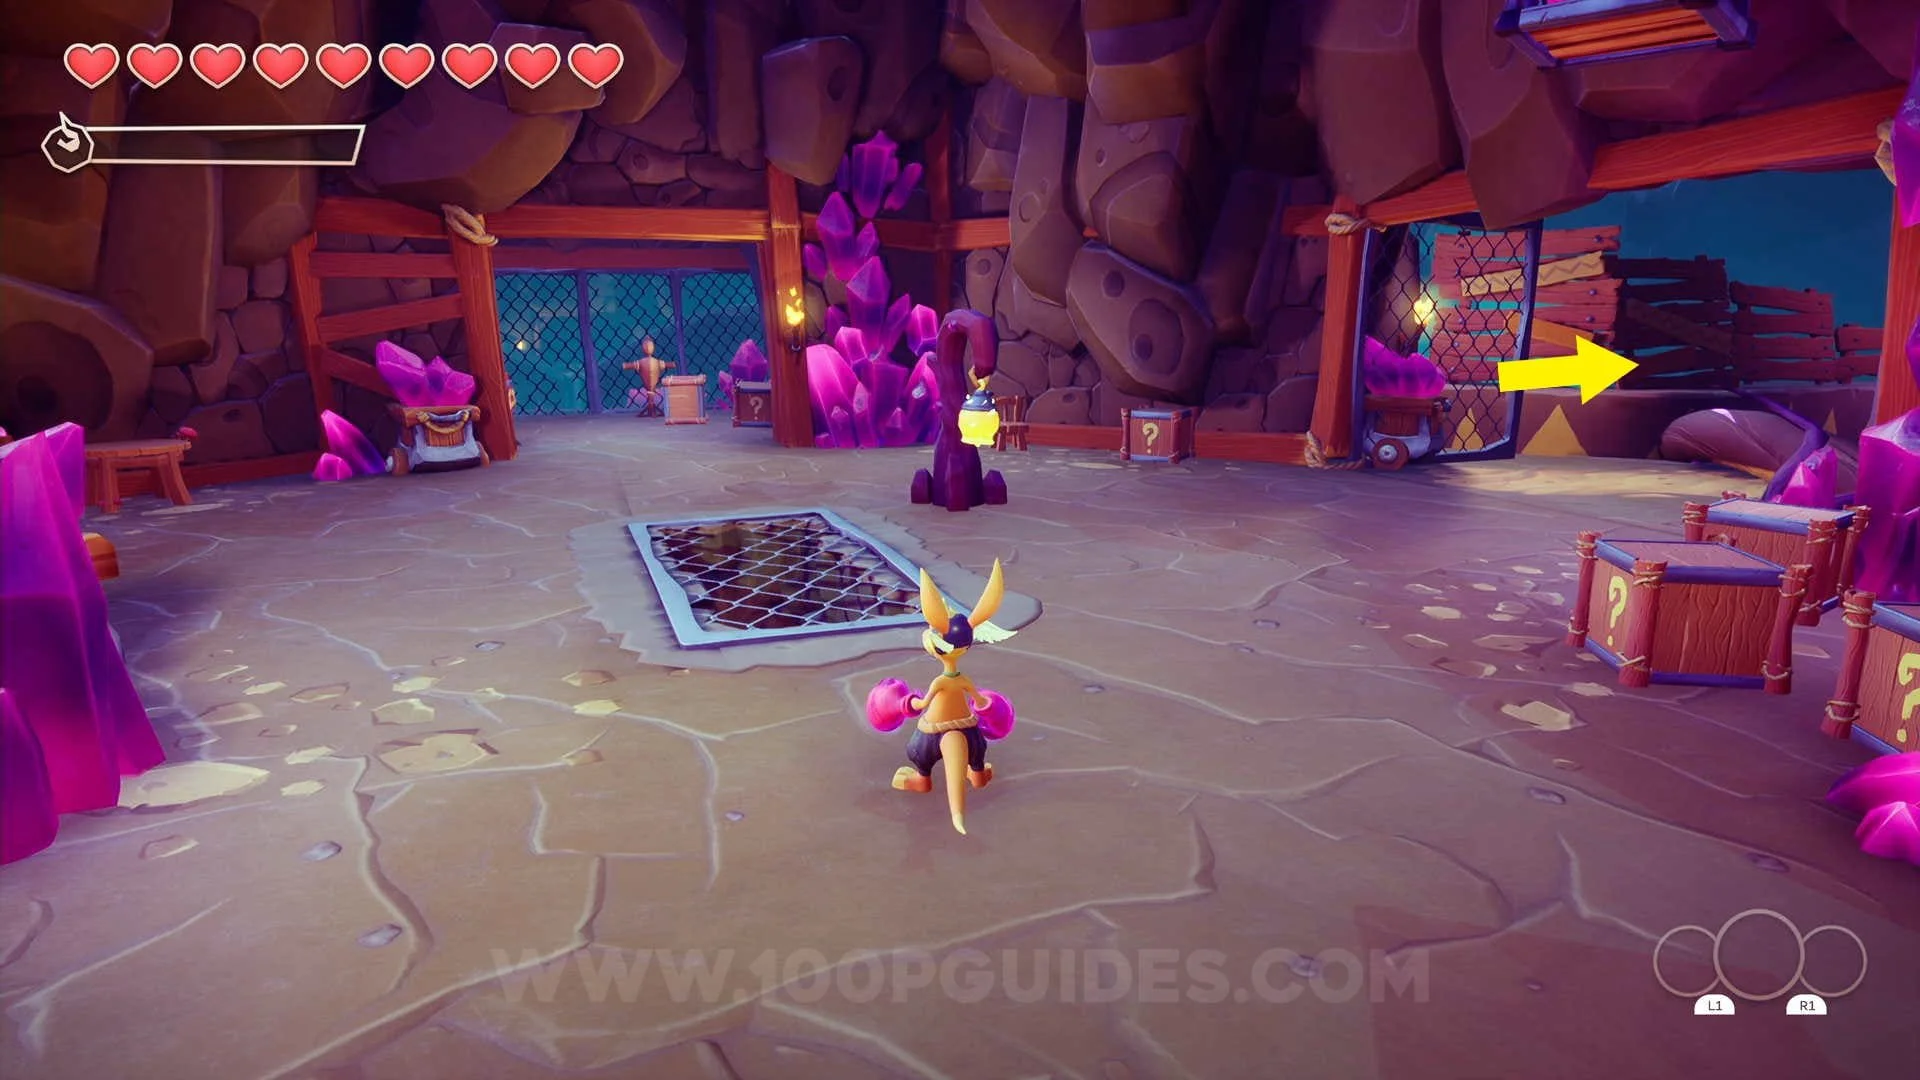
Chest #1: Roll under the wooden gate to the right of the "Tail Attack" tutorial to find the chest on top of some platforms.

Crystal #4: Take the left path just after jumping across some platforms where the tentacles attack you, you will then find the crystal behind a house at the end.


Heart Piece #1: Inside the hut next to the previous collectible.
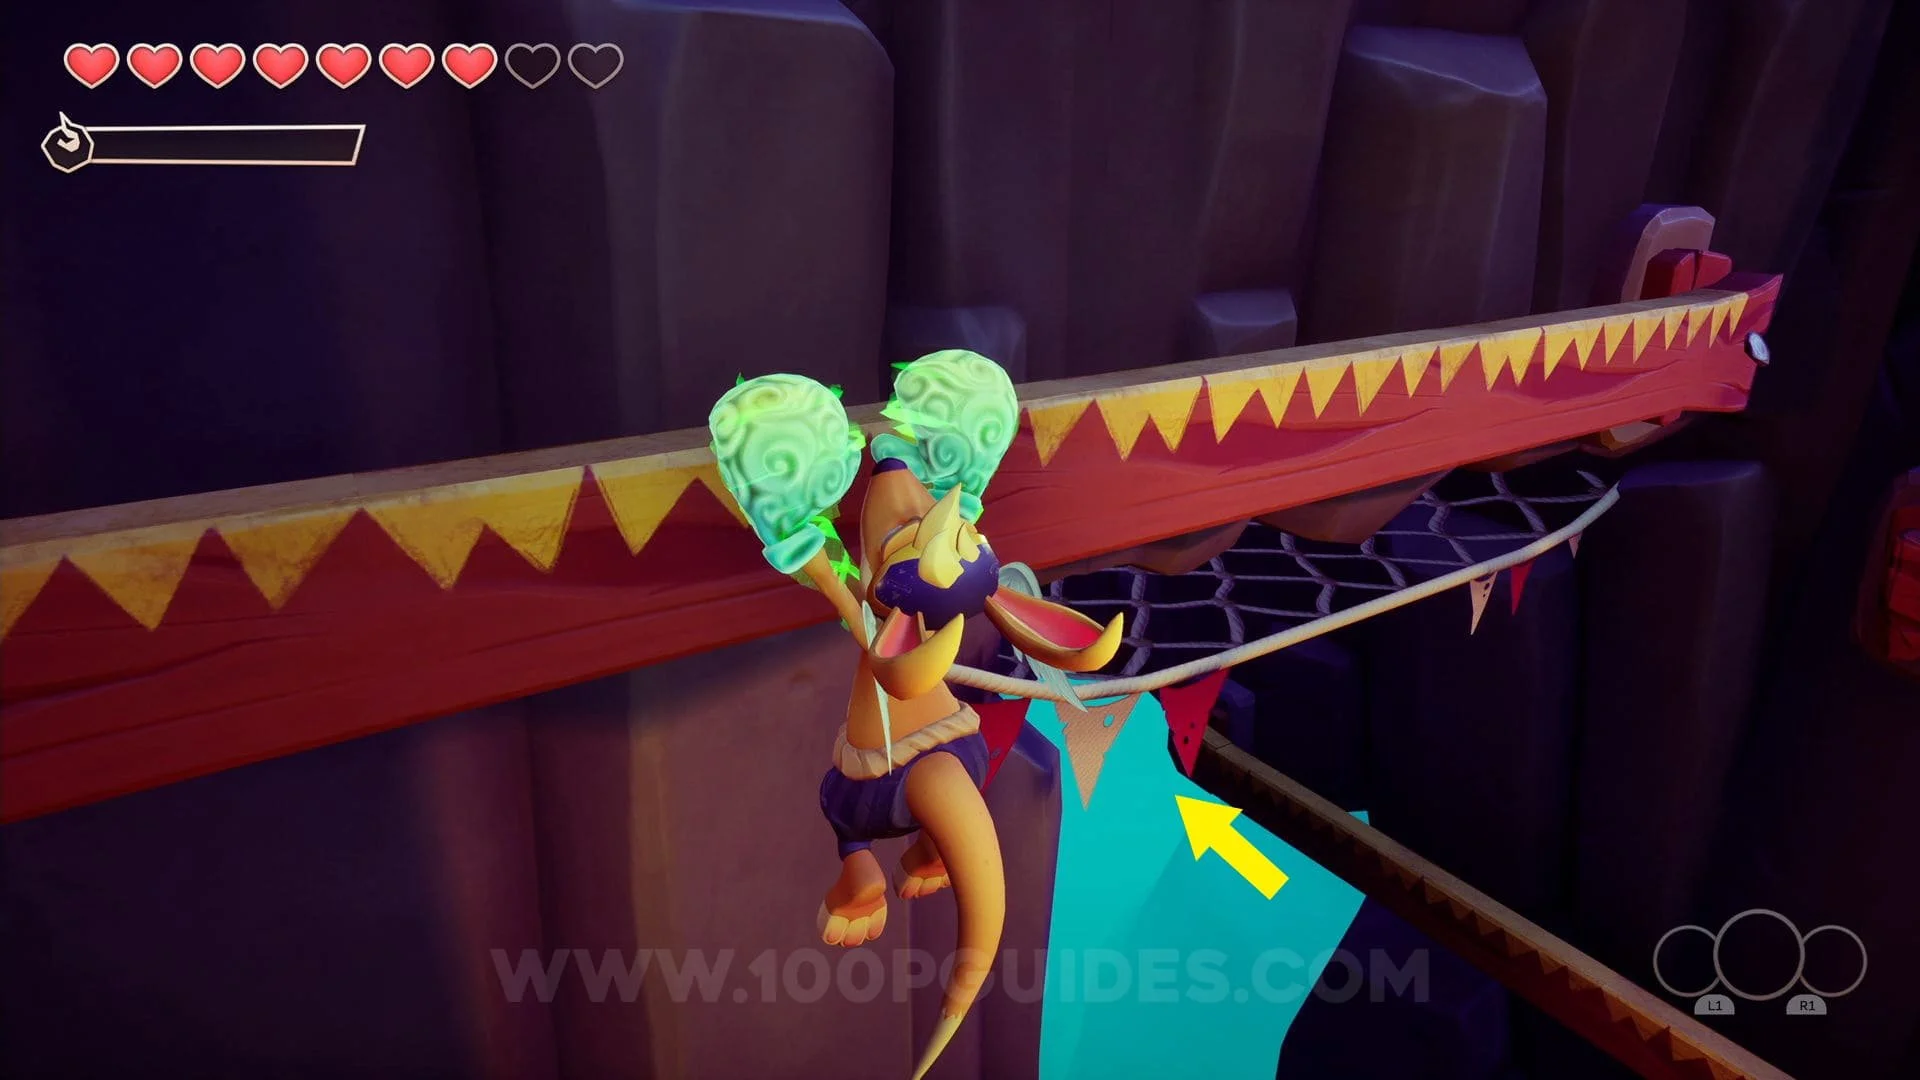
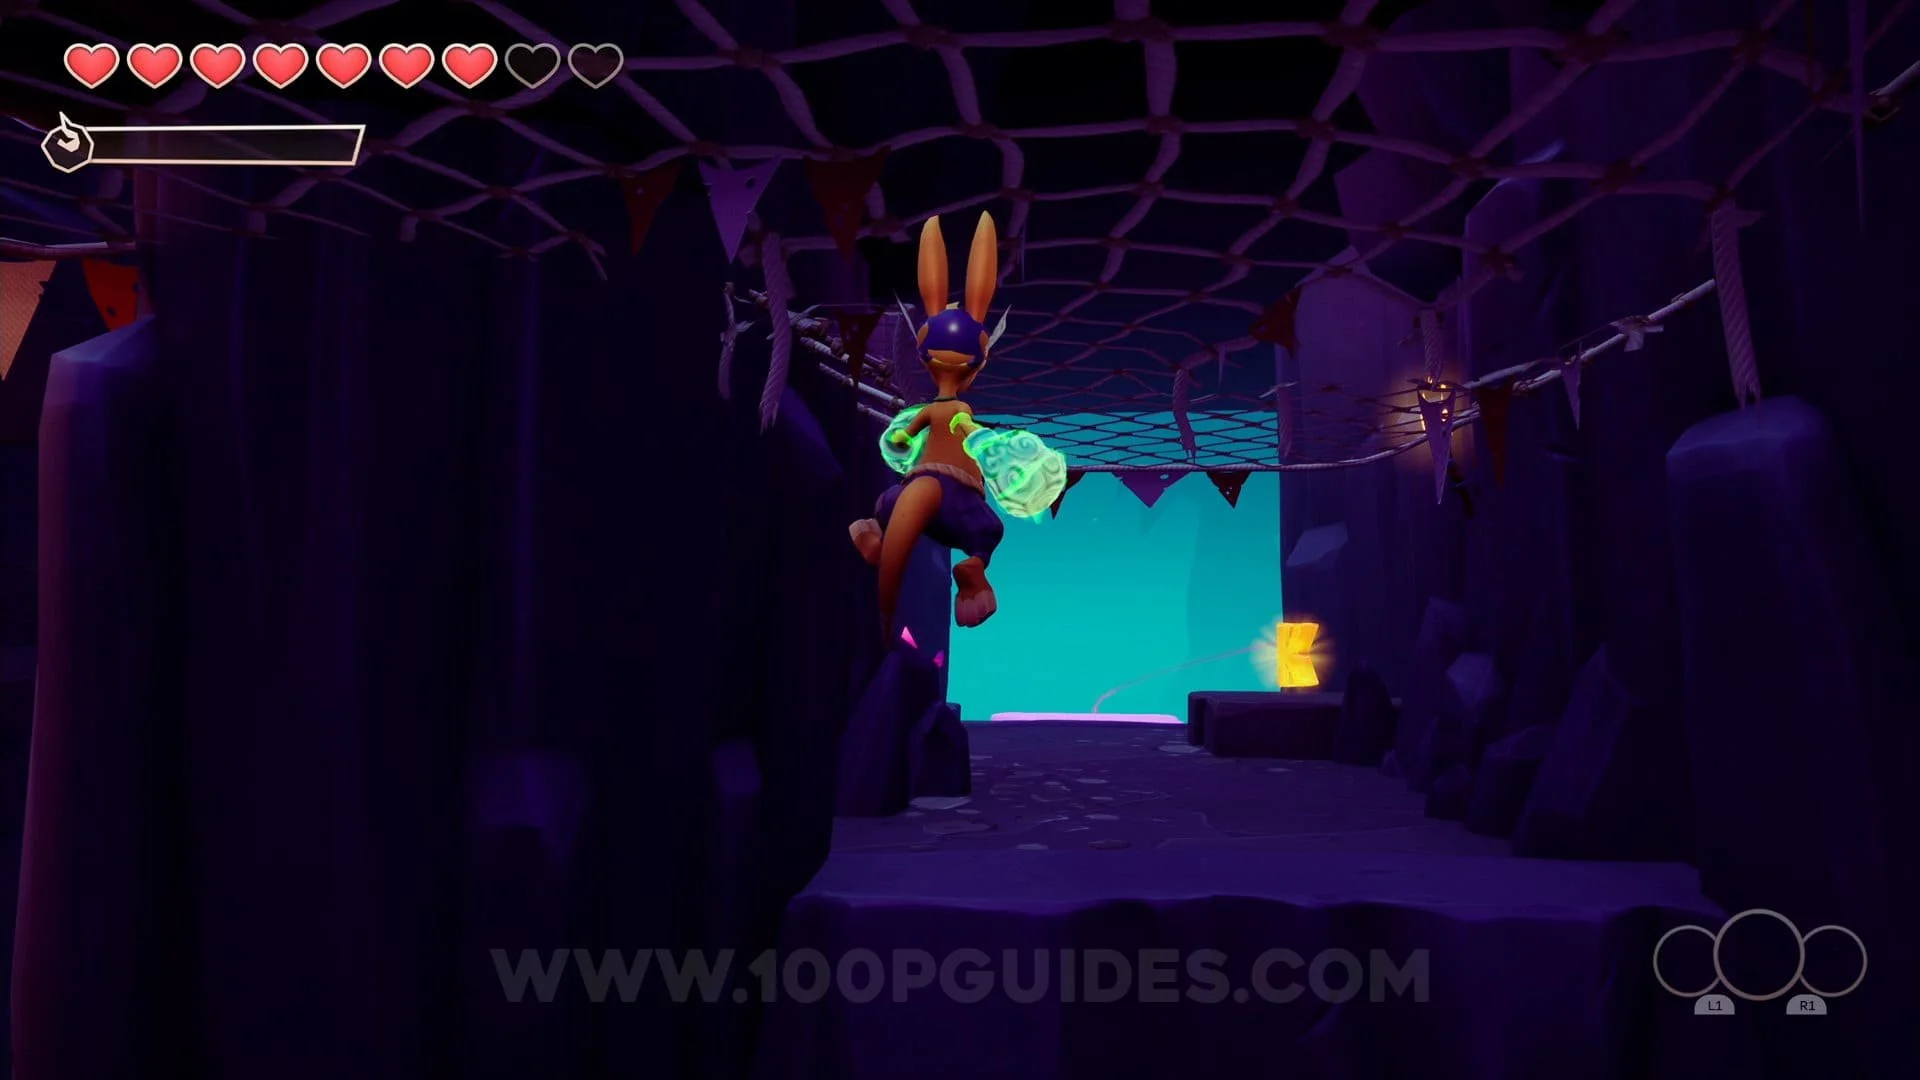
KAO Letter (K): In the area where you have to defeat the enemies to open the gate, use the platforms on your left to jump up to the building where you can then use a trampoline to bounce to the other side.
Continue across the bridge to get the collectible.


Scroll #1: Just after the conversation about talking to the gloves, where you have to hit 2 purple crystals to cross the gap, look for a small platform below with the scroll on it.


Rune #1: In the same area as the previous collectible on a platform after hitting the first crystal.
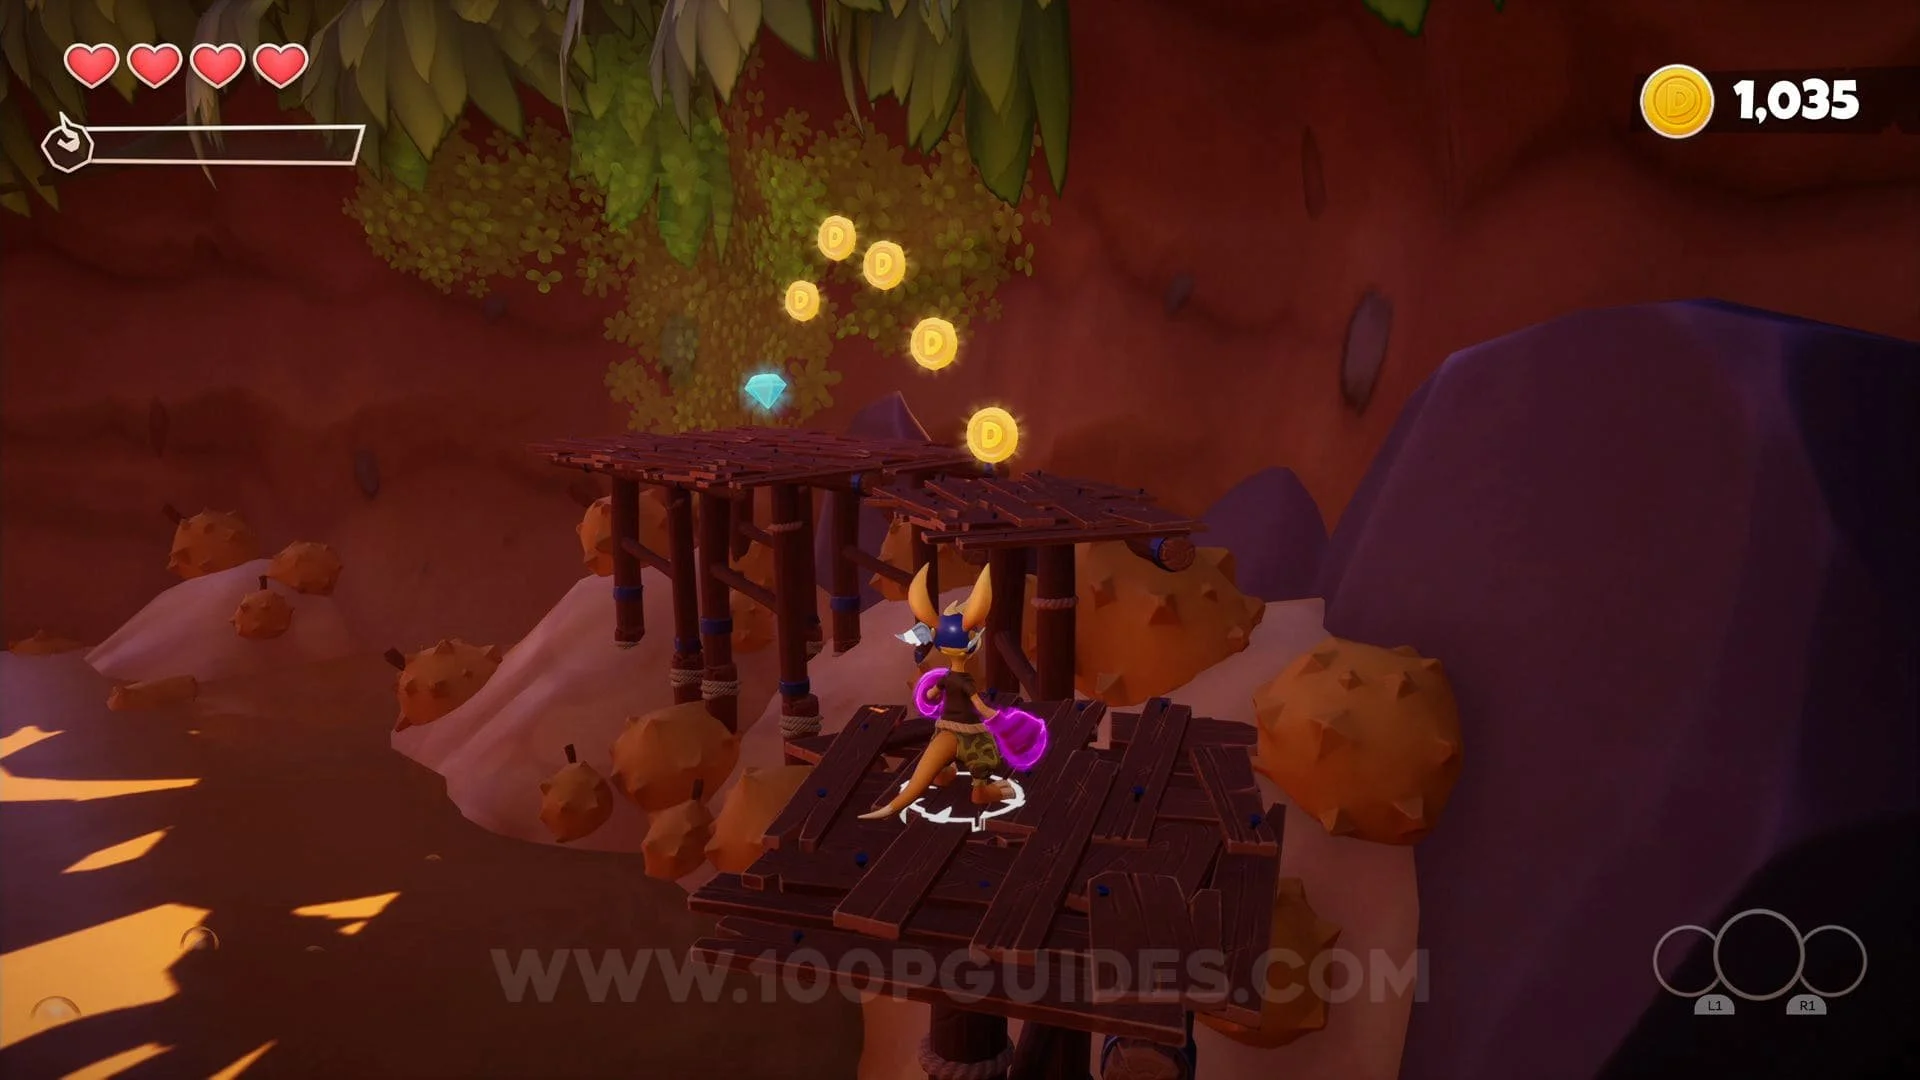
Chest #2: Where you find the first boomerang totem & boomerang tutoria, double jump up to the platform on your right.


Crystal #5: Use the moving platforms that spawn after hitting the first boomerang statue to get this crystal.
Crystal #6 & #7: These 2 crystals are hard to miss since they are on platforms you have to jump on during the main path.
KAO Letter (A): In the area whith the enemies playing on stage, use the trampoline next to the house on the left.


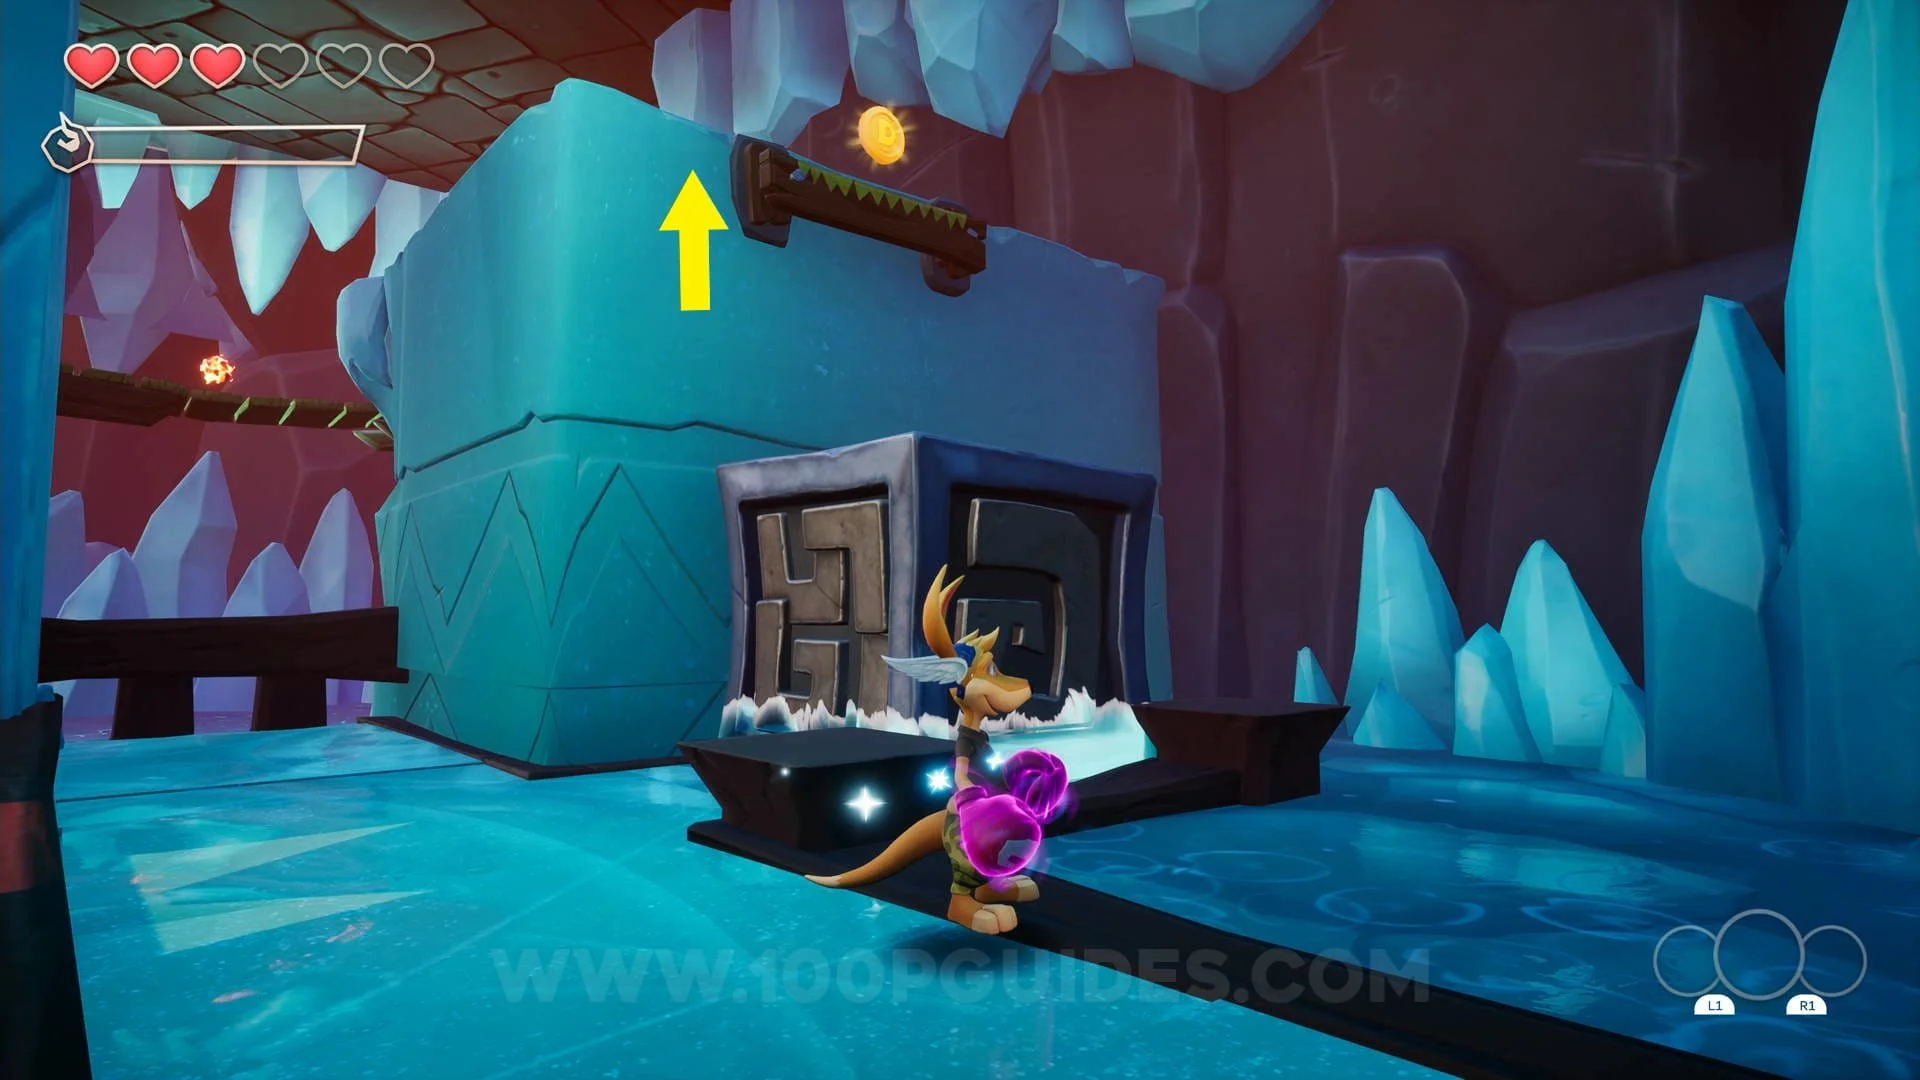
Eternal Well #1 (Contains 3 Cyrstals & 1 Chest): From the area with the enemies on stage, head down the right side path, you will find the eternal well at the end.


Crystal #8: From the area with the enemies on stage, head down the right side path and jump up some platforms at the end to get the crystal.


Chest #3 & Scroll #2: From the area with the enemies on stage, head down the right side path, then jump up the platforms where the previous collectible was to find the scroll and chest at the top.

Chest #4: behind the 2 waterfalls next to the stage where the enemy was playing the drums.
Eternal Well #2 (Contains 3 Crystals & 1 Chest): In the area just above the stage with the drums, look for a gate you can roll under to your right.

Crystal #9: Just after entering the gate you have to hit by jumping up, the crystal will be in the water (can be hard to see).
Heart Piece #2: Just after jumping and hitting the switch above you to open the gate, take the right path at the fork.


KAO Letter (O): Where the next checkpoint is, you will notice something under the wooden floor, to open it you will have to press the 2 switches in the area in quick succession. Once you have done this you will be able to go down and get the letter.


Crystal #9 #10 #11: These 3 crystals will be hard to miss since they will be on the main path just after the "puzzle" bridge.

Chest #5: To the left of the round bar where Walt is in the final area.
Heart Piece #3: Jump across the barrels to the right of the final area.


Rune #2: Just before you exit the level (if it does not spawn, talk to Walt behind the bar).
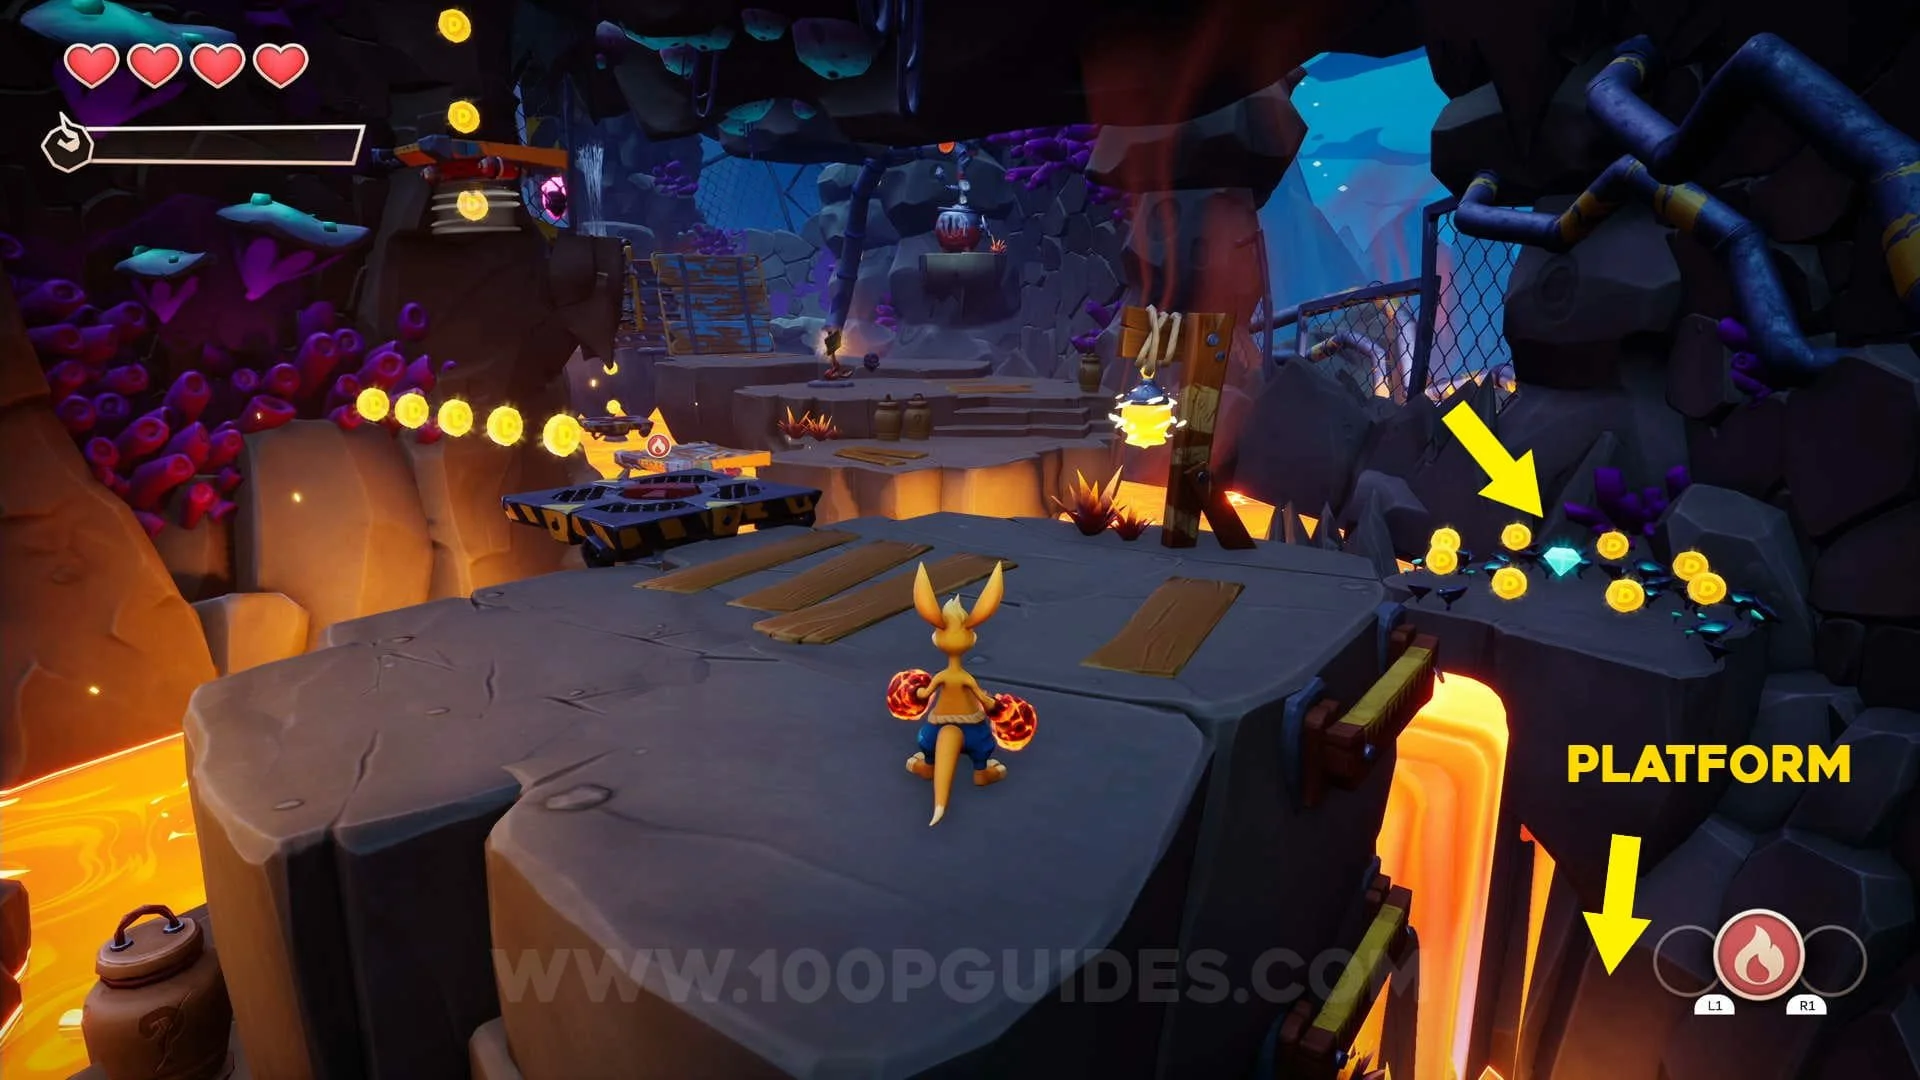
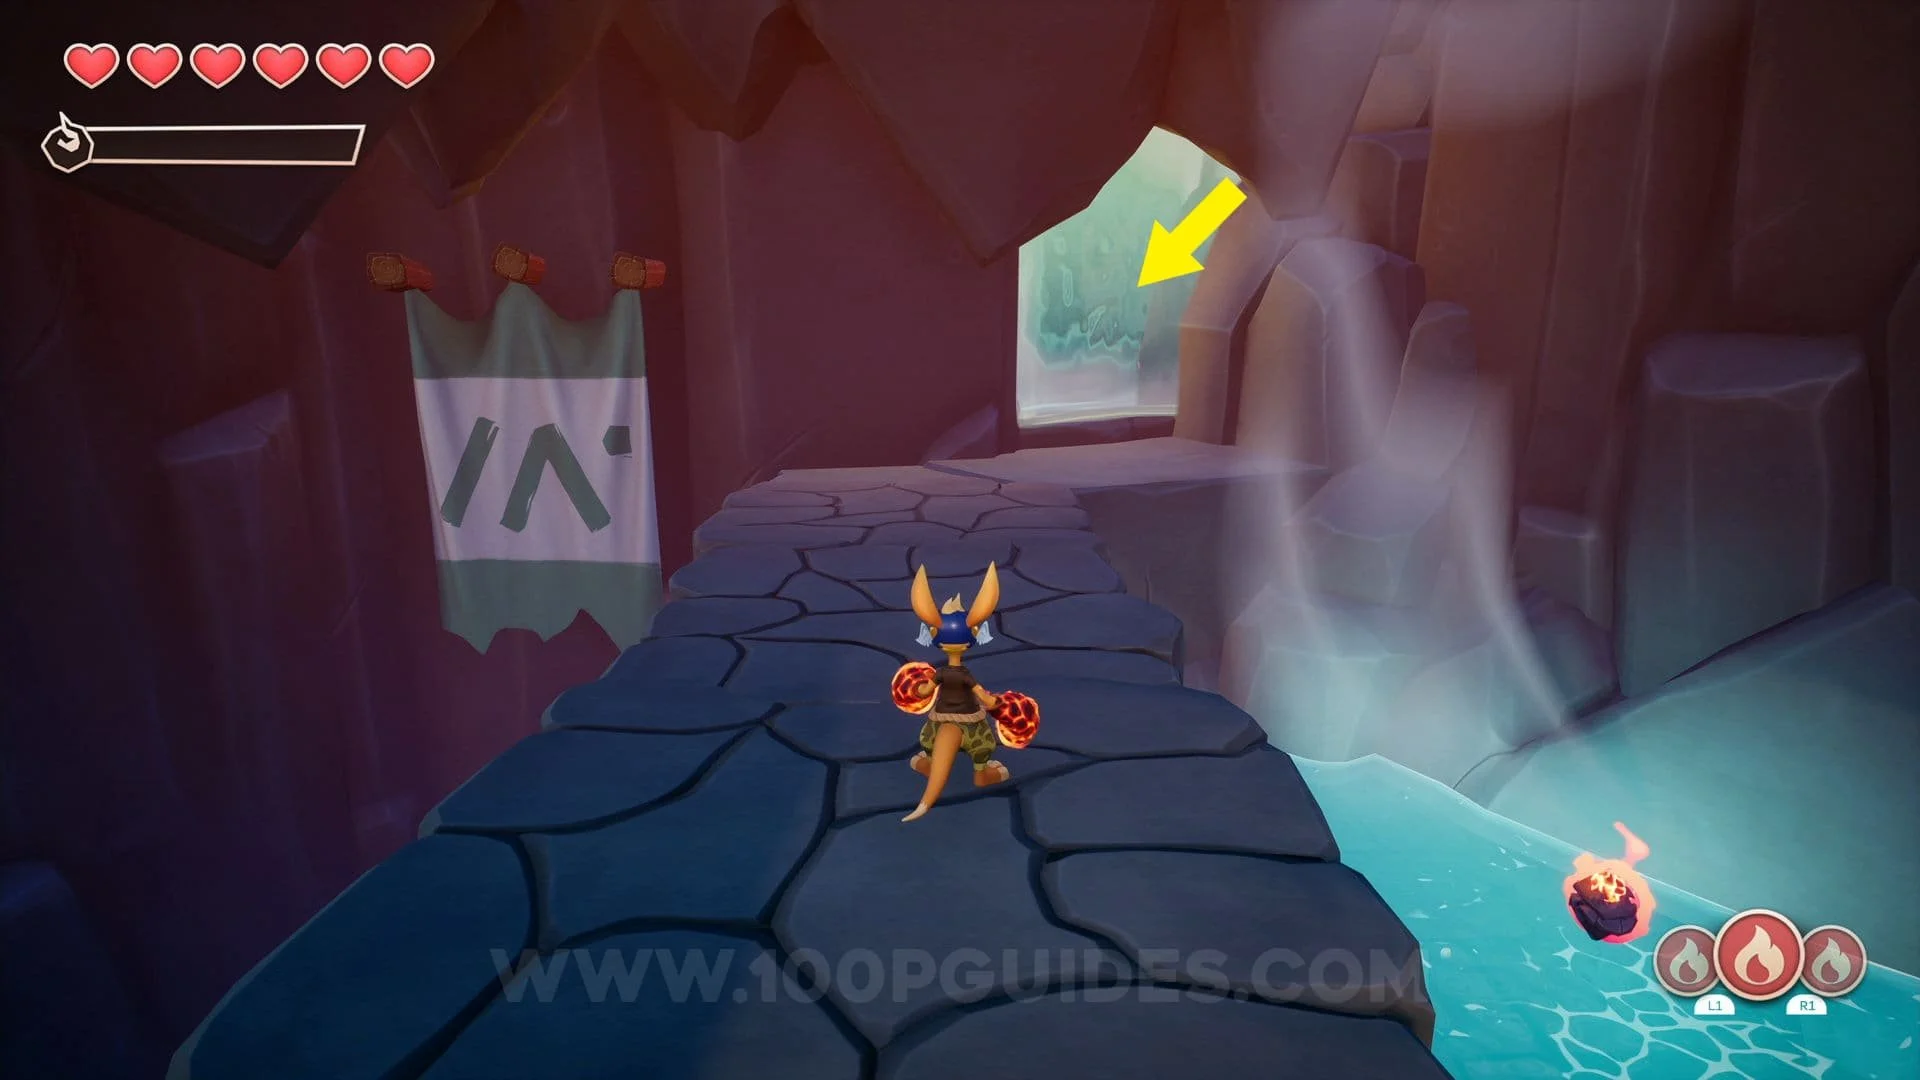
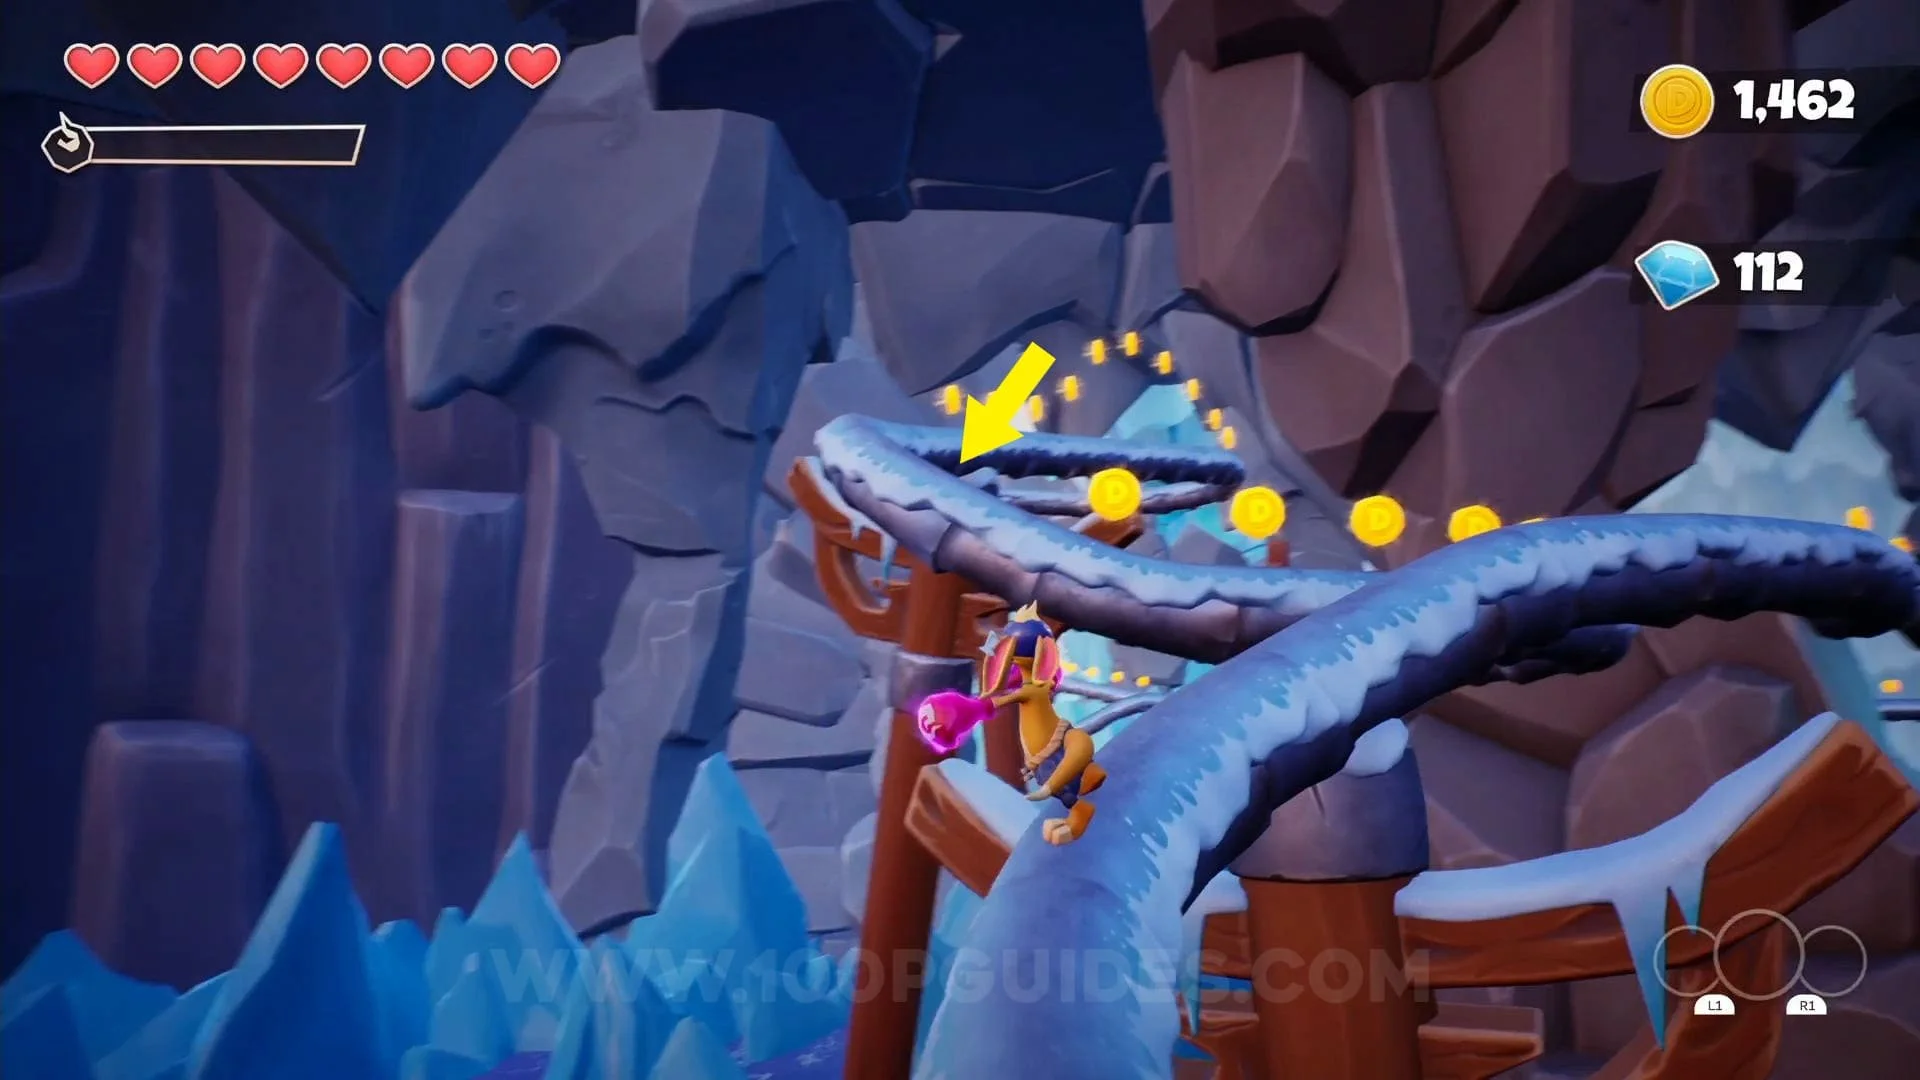
The Lava Caves Collectibles
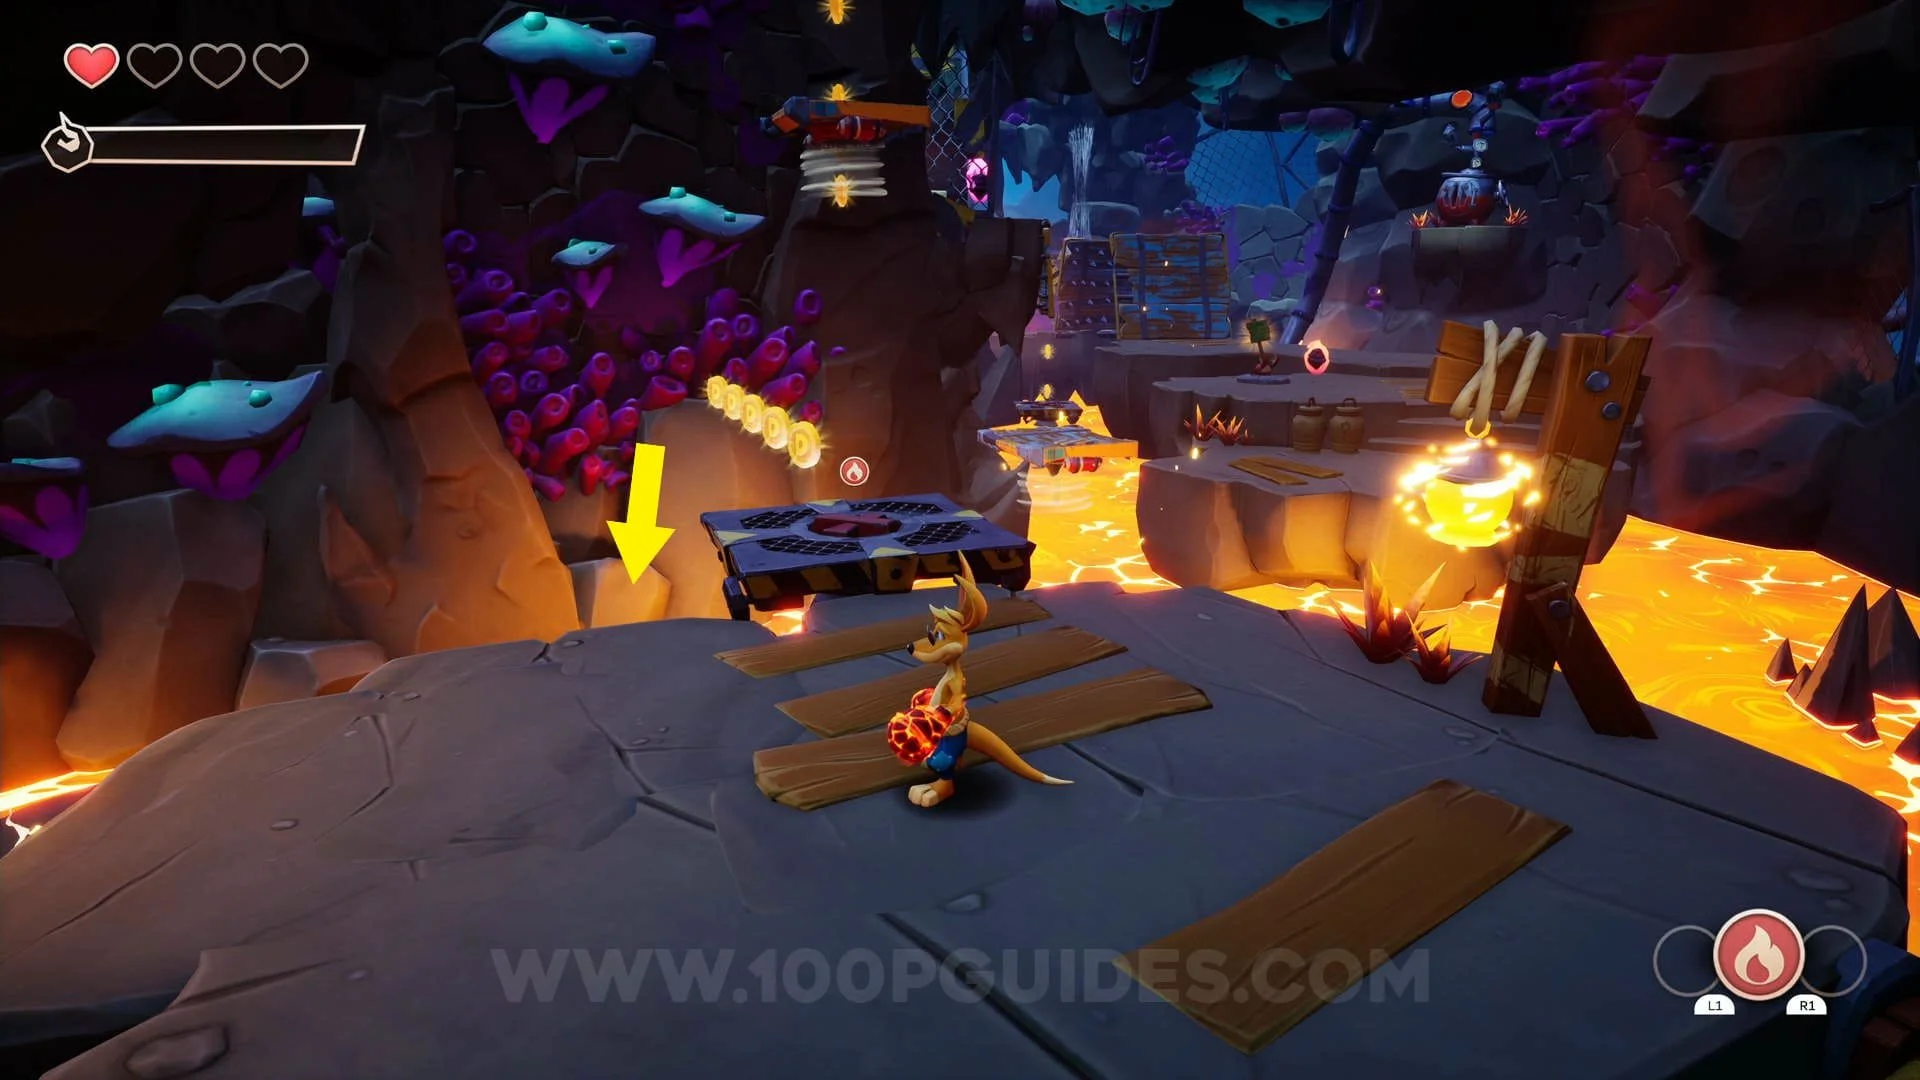
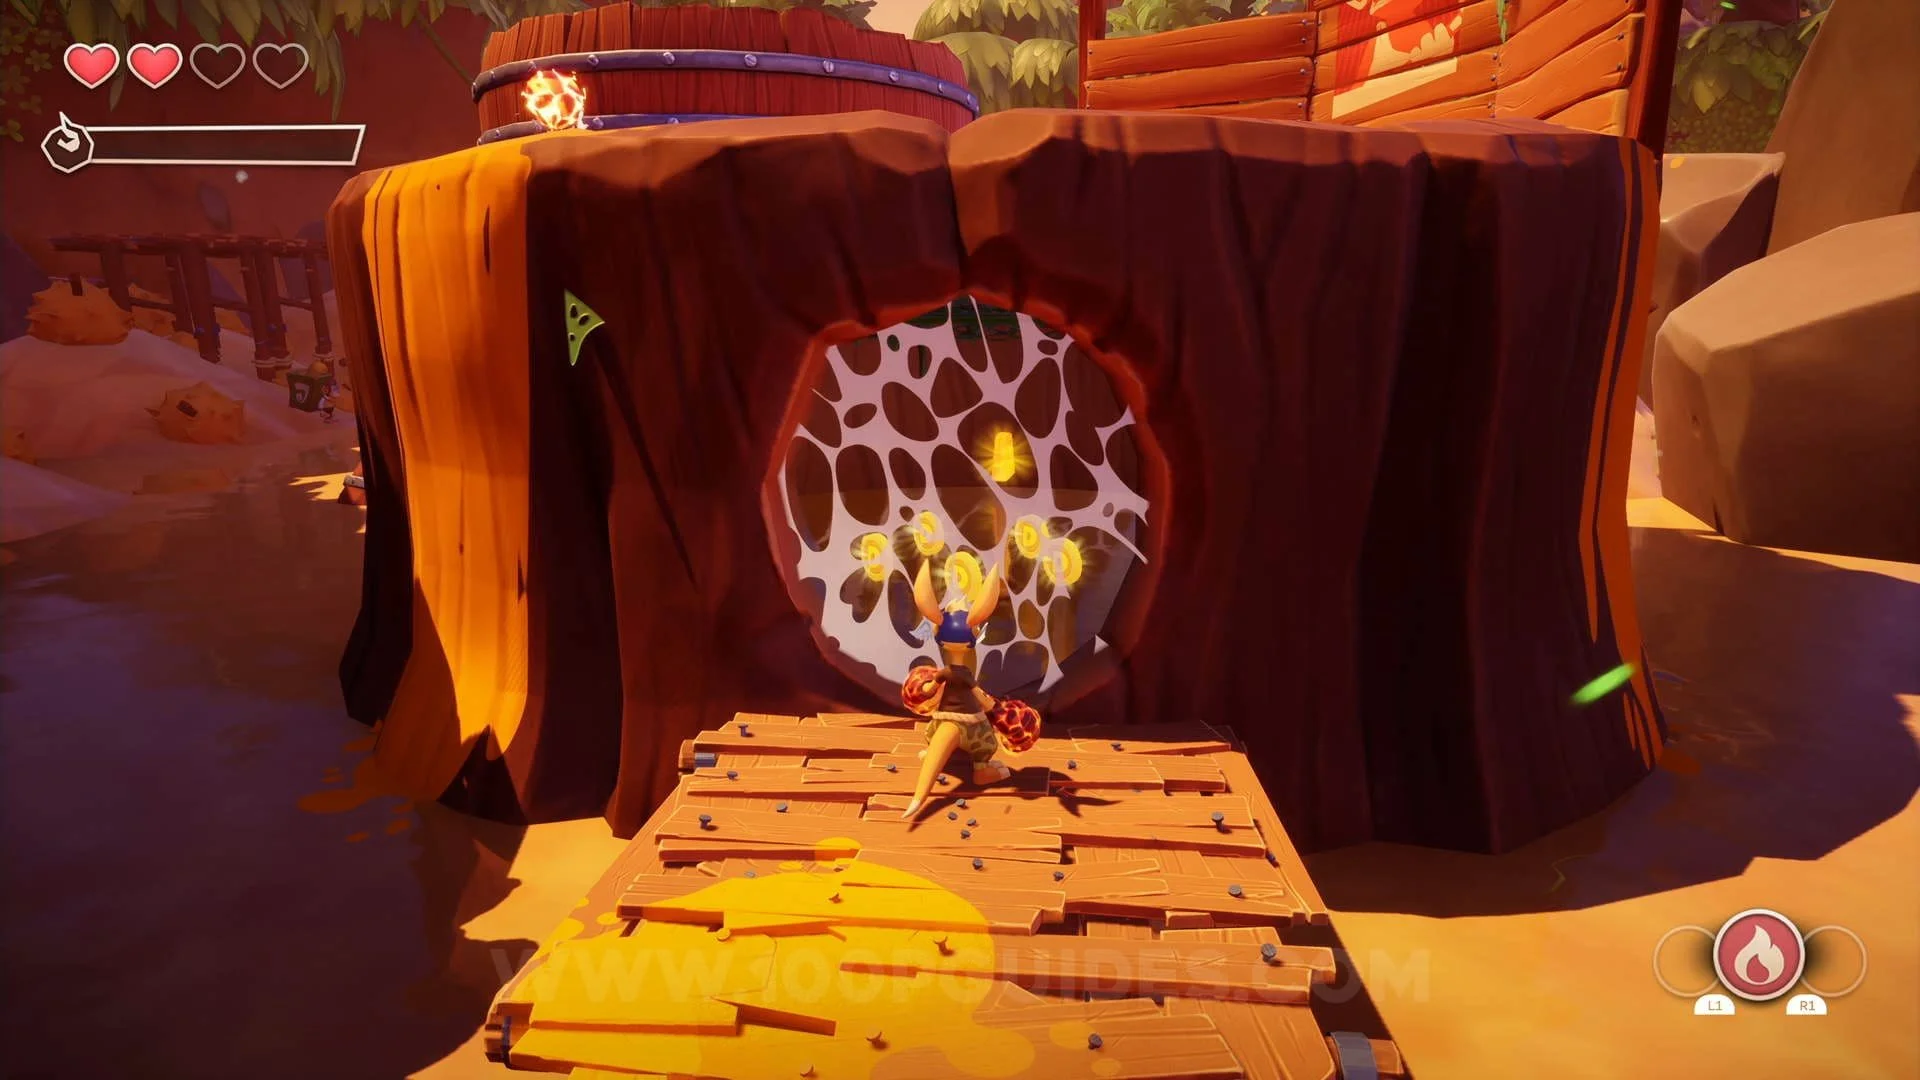
Chest #1: Just before the first spider web, jump up the platforms to your left to charge your gloves with fire, then burn the web to the right where you can then hit the crystal to spawn some platforms that will allow you to get the chest.


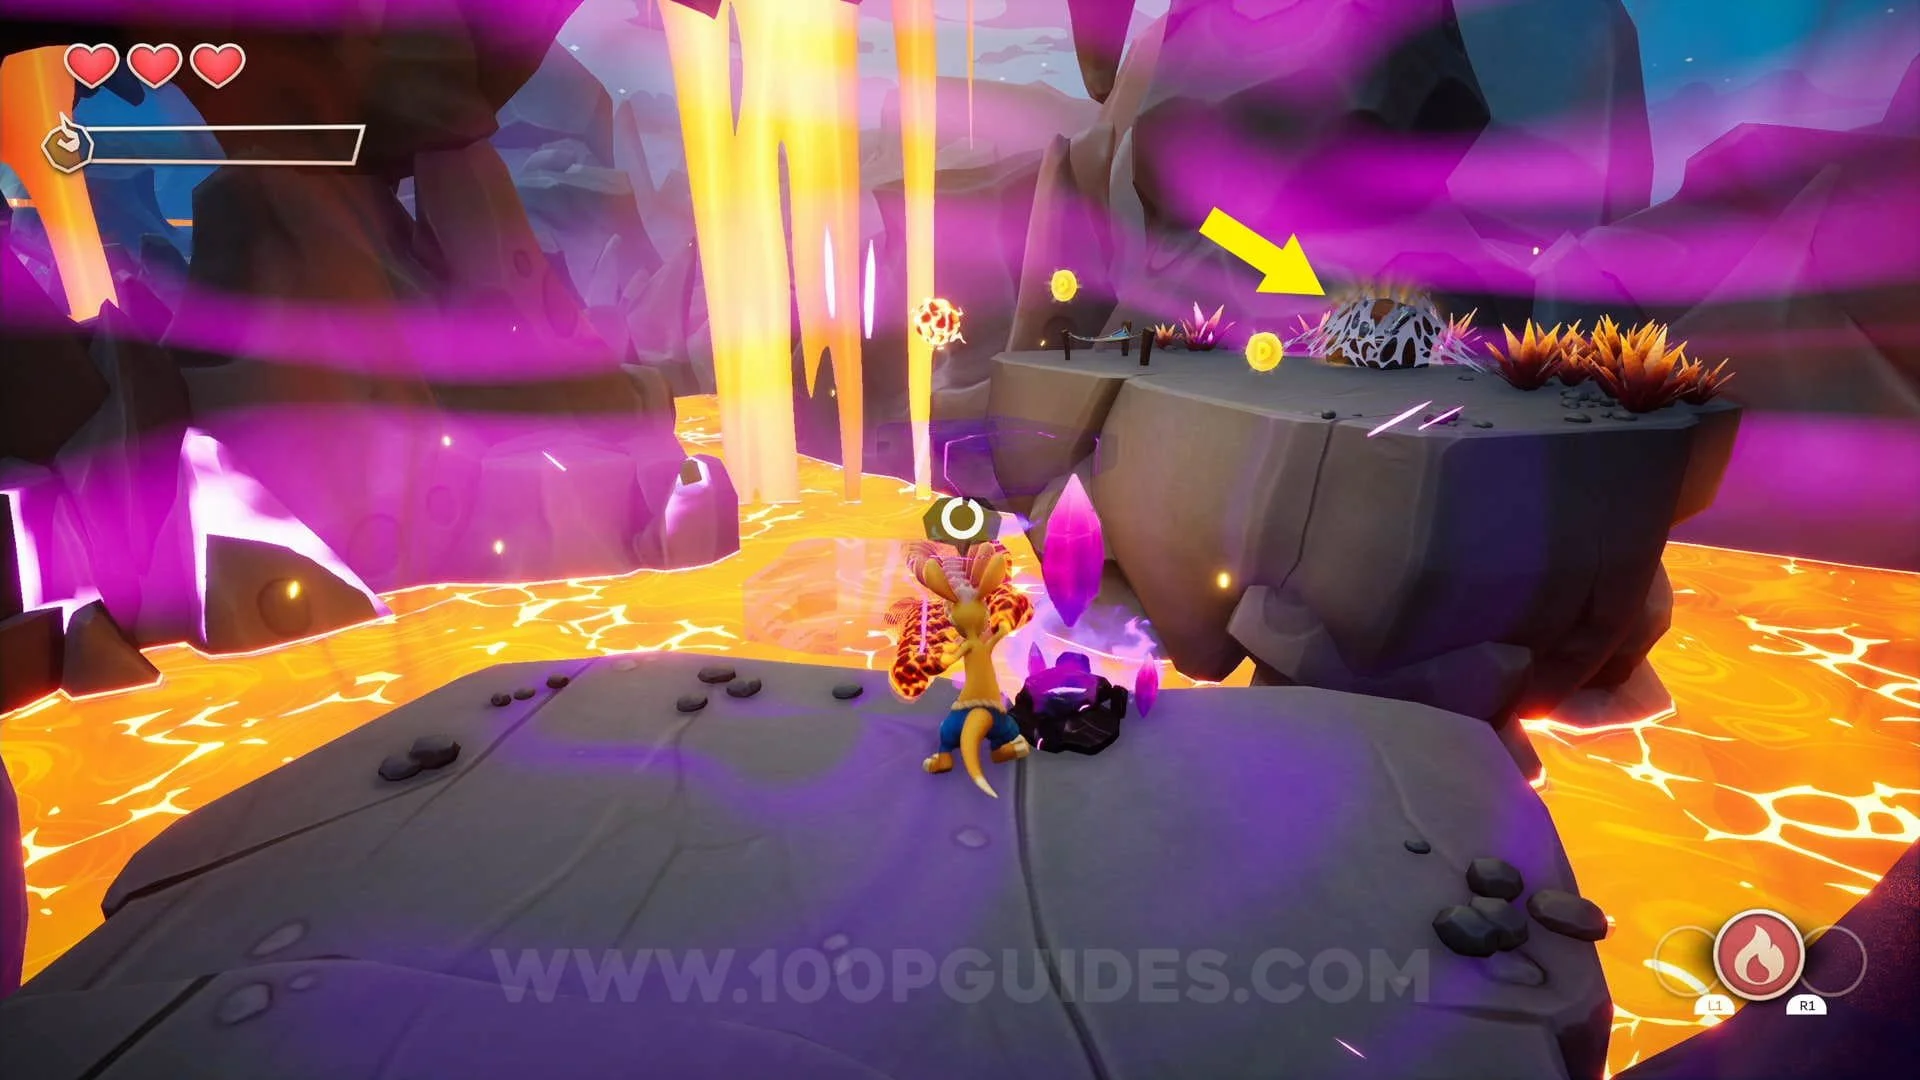
Chest #2: After activating the first 2 platforms with fire, do a 180 and activate another platform that will take you to the chest.

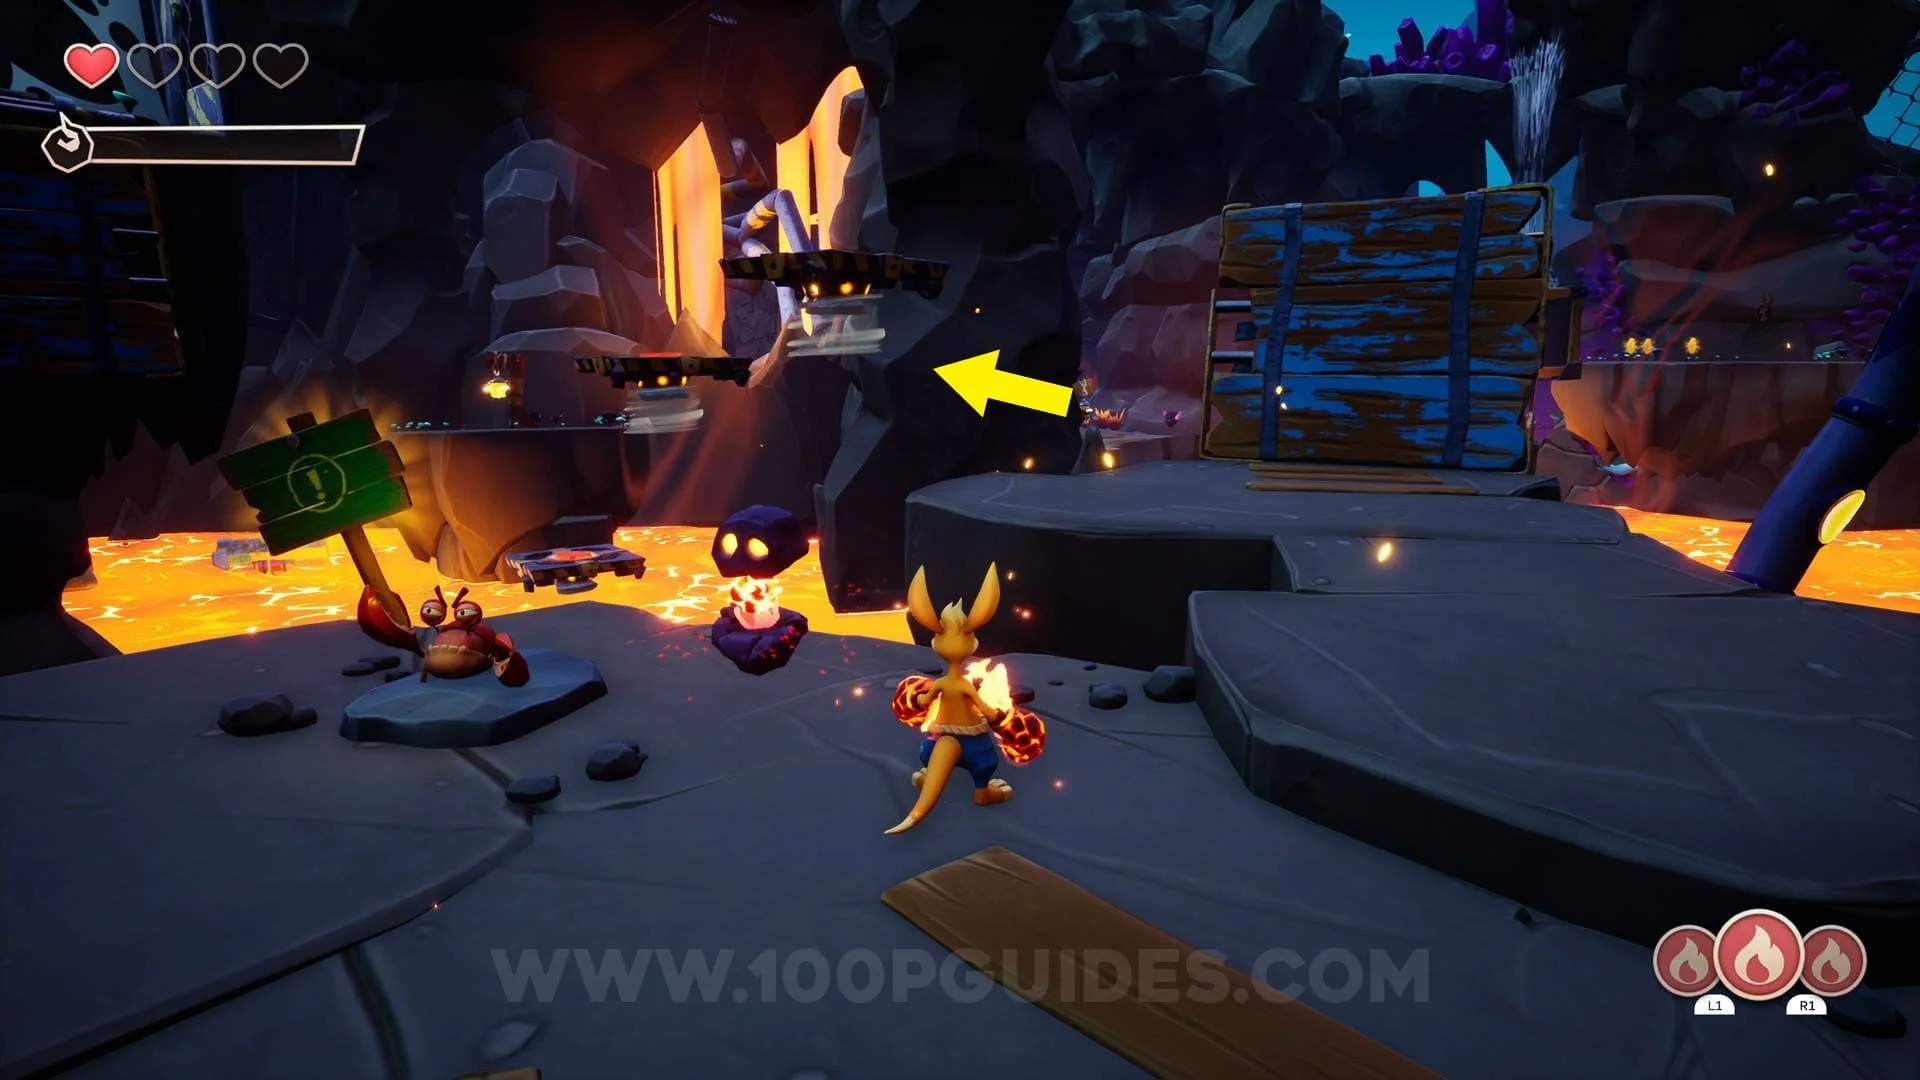
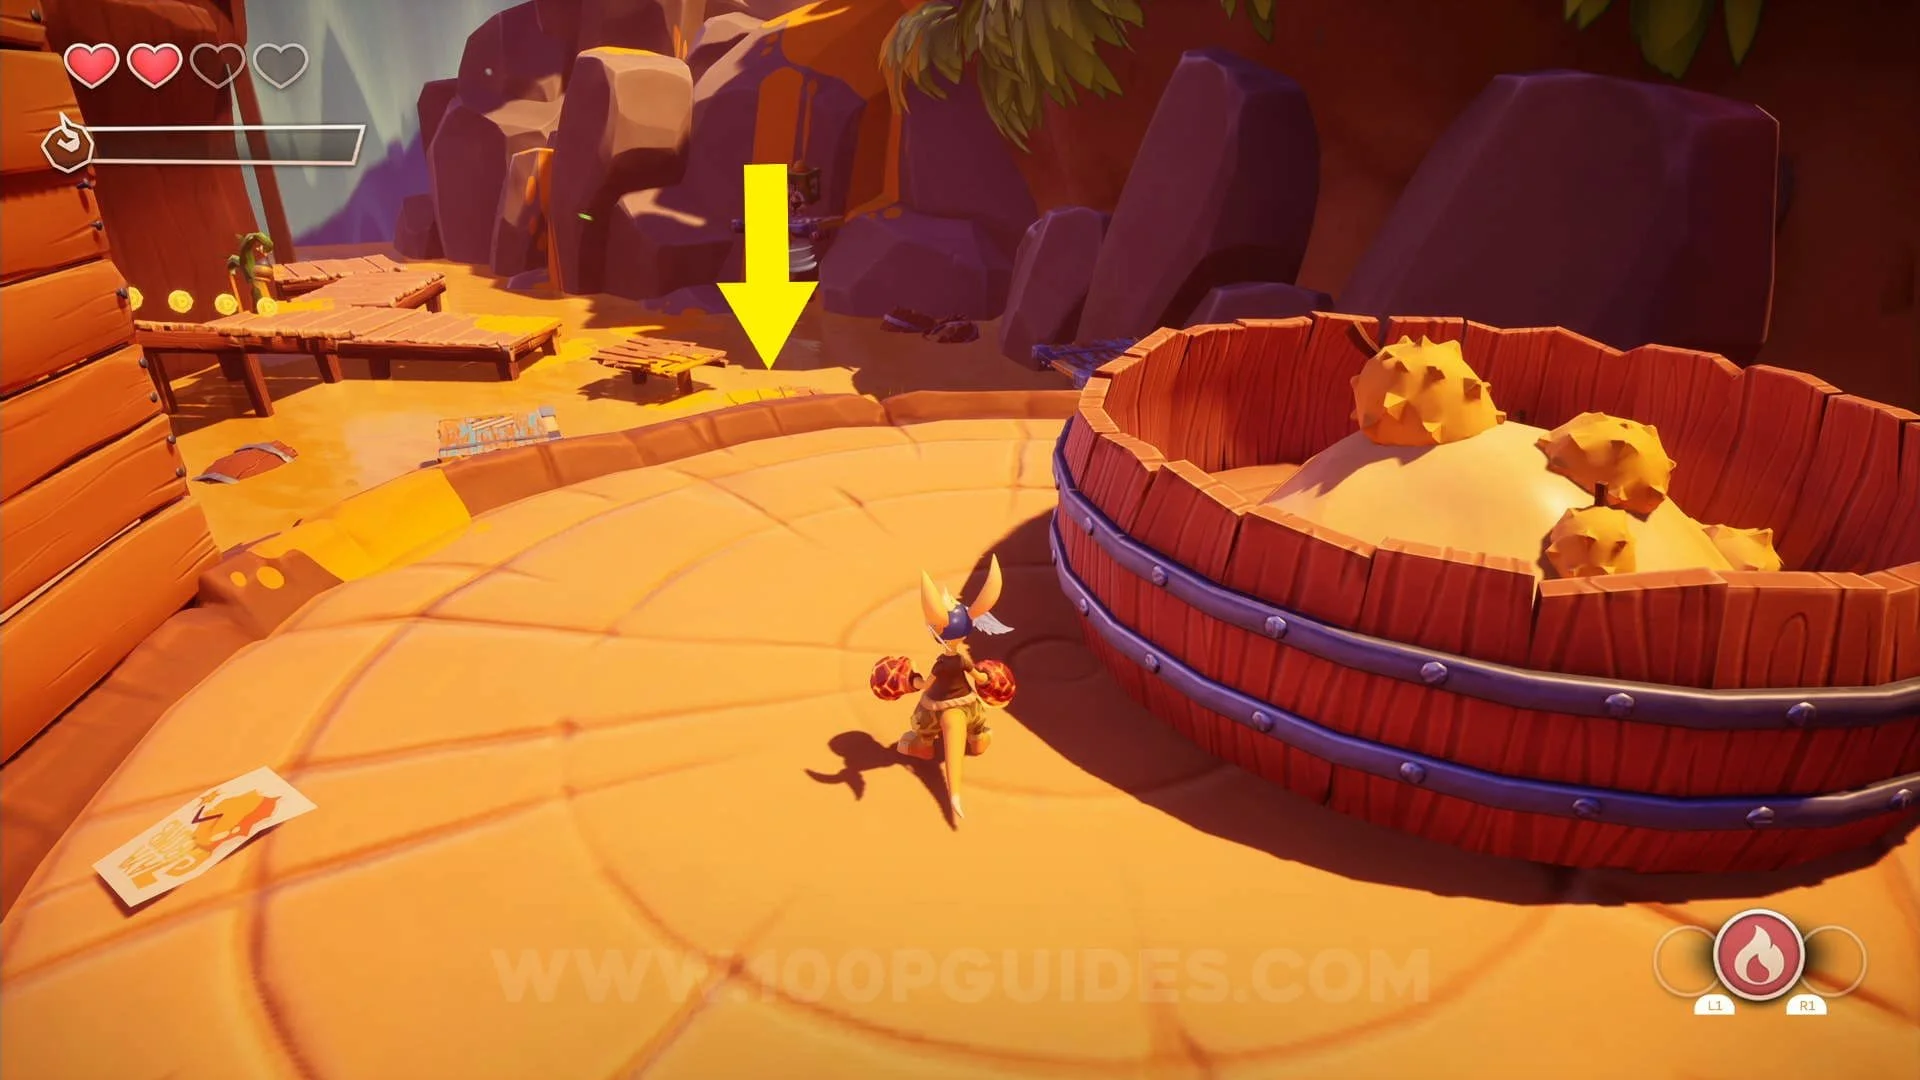
Chest #3: In the area with the spider web holding up a box and the "Fire Throwables" tutorial, pick up the fire power-up to your left to be able to open the chest to the right of the area.


Rune #1: Almost impossible to miss, this rune is found on the main path just after releasing the box from the spider web.
Heart Piece #1: After releasing the box from the spider web you will be able to go left or right. This heart piece can be found to the right.


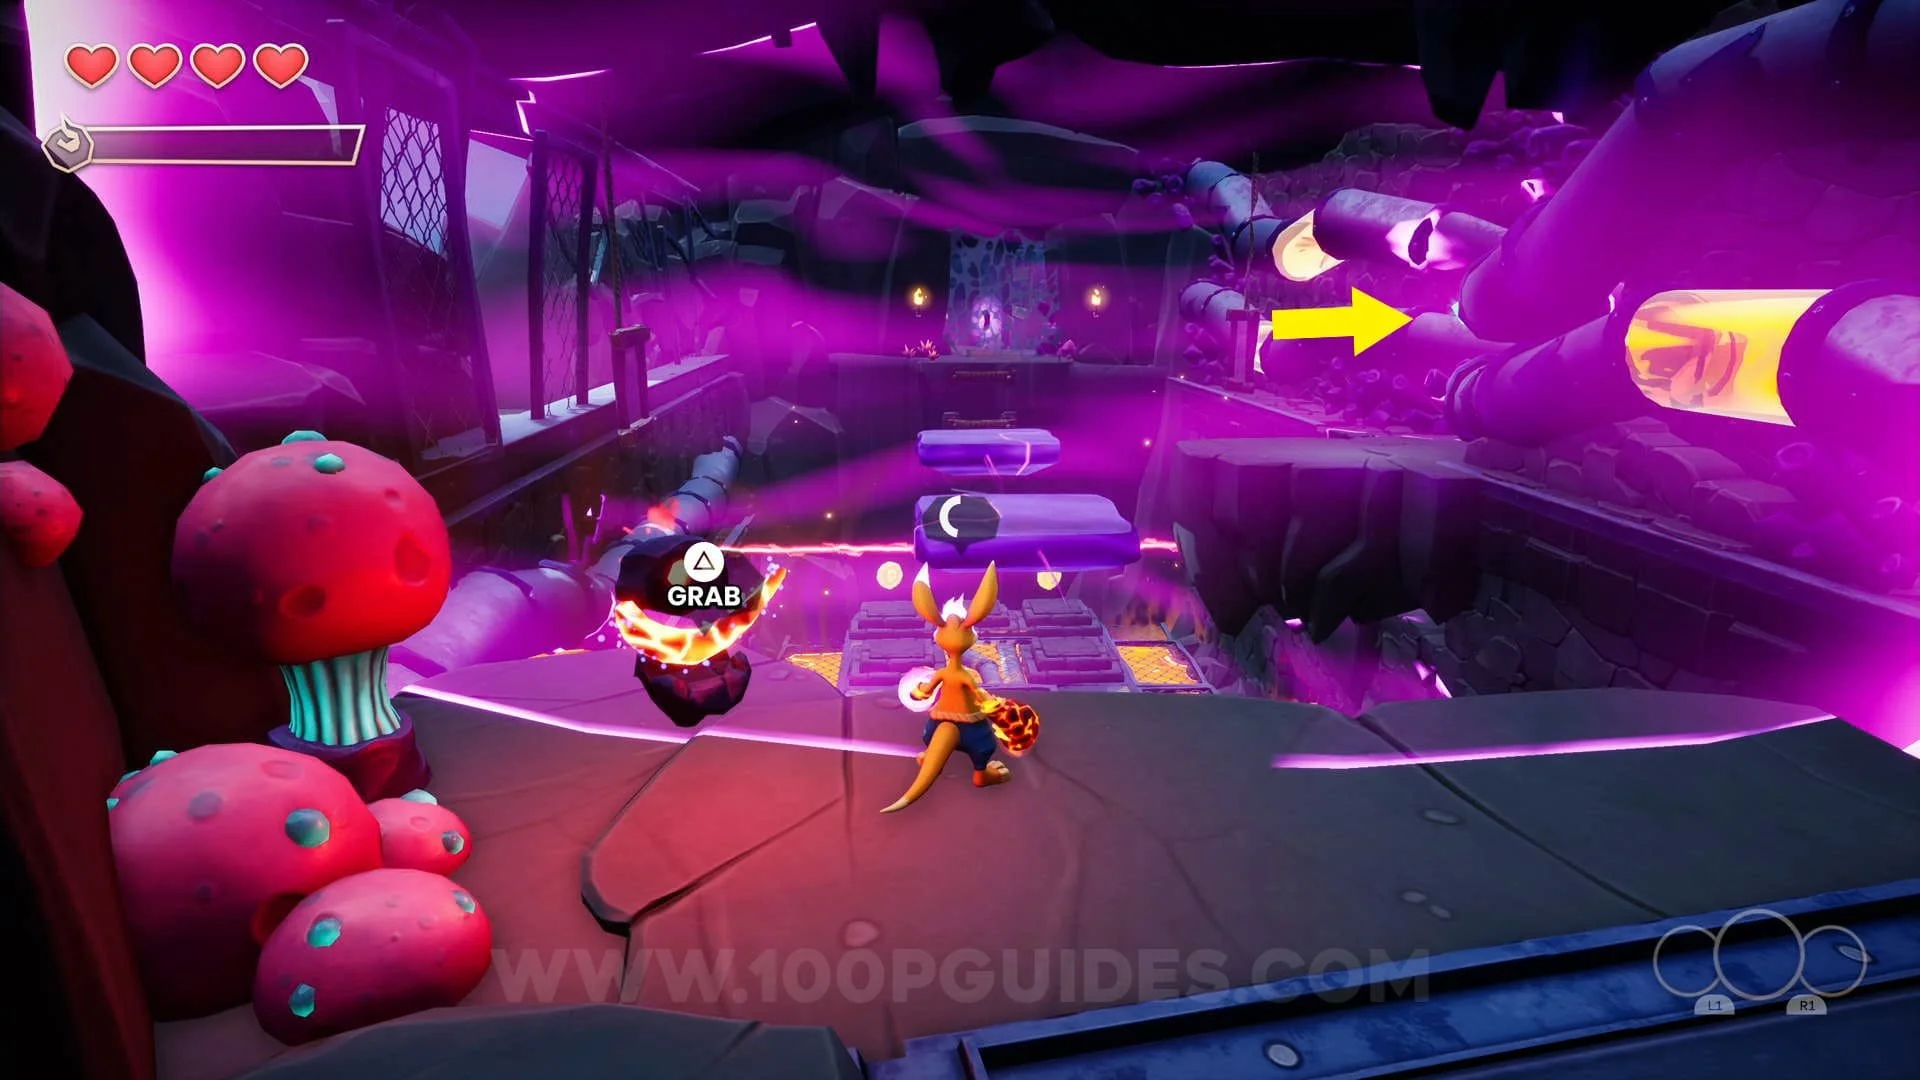
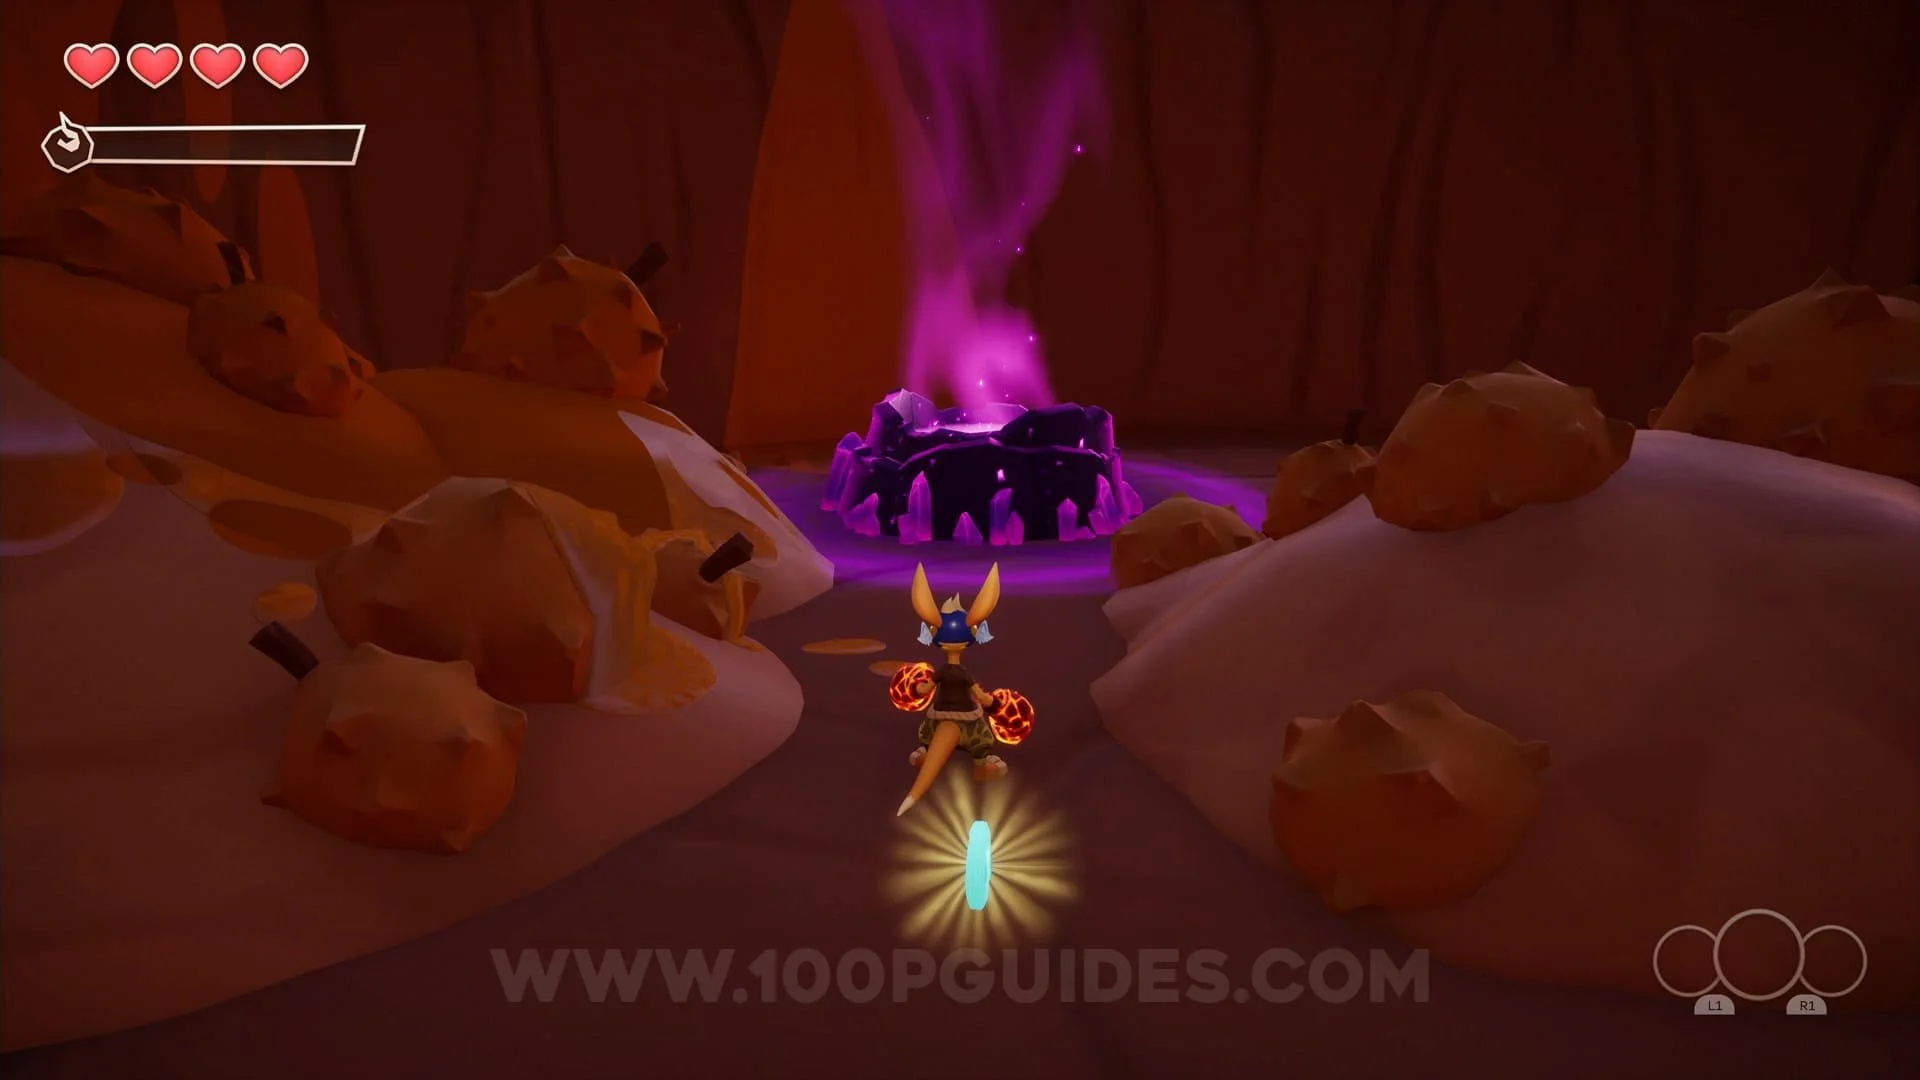
Eternal Well #1 (Contains 2 Crystals & 1 Chest): After releasing the box from the spider web you will want to take the left path, then jump down to your left and burn the web to reveal the well.


Crystal #1: After releasing the box from the spider web you will want to take the left path, then once you get to the checkpoint use the platform to your right to get to the platform with the crystal on it.

Chest #4: After releasing the box from the spider web you will want to take the left path, then once you get to the checkpoint where you can find a chest below you.


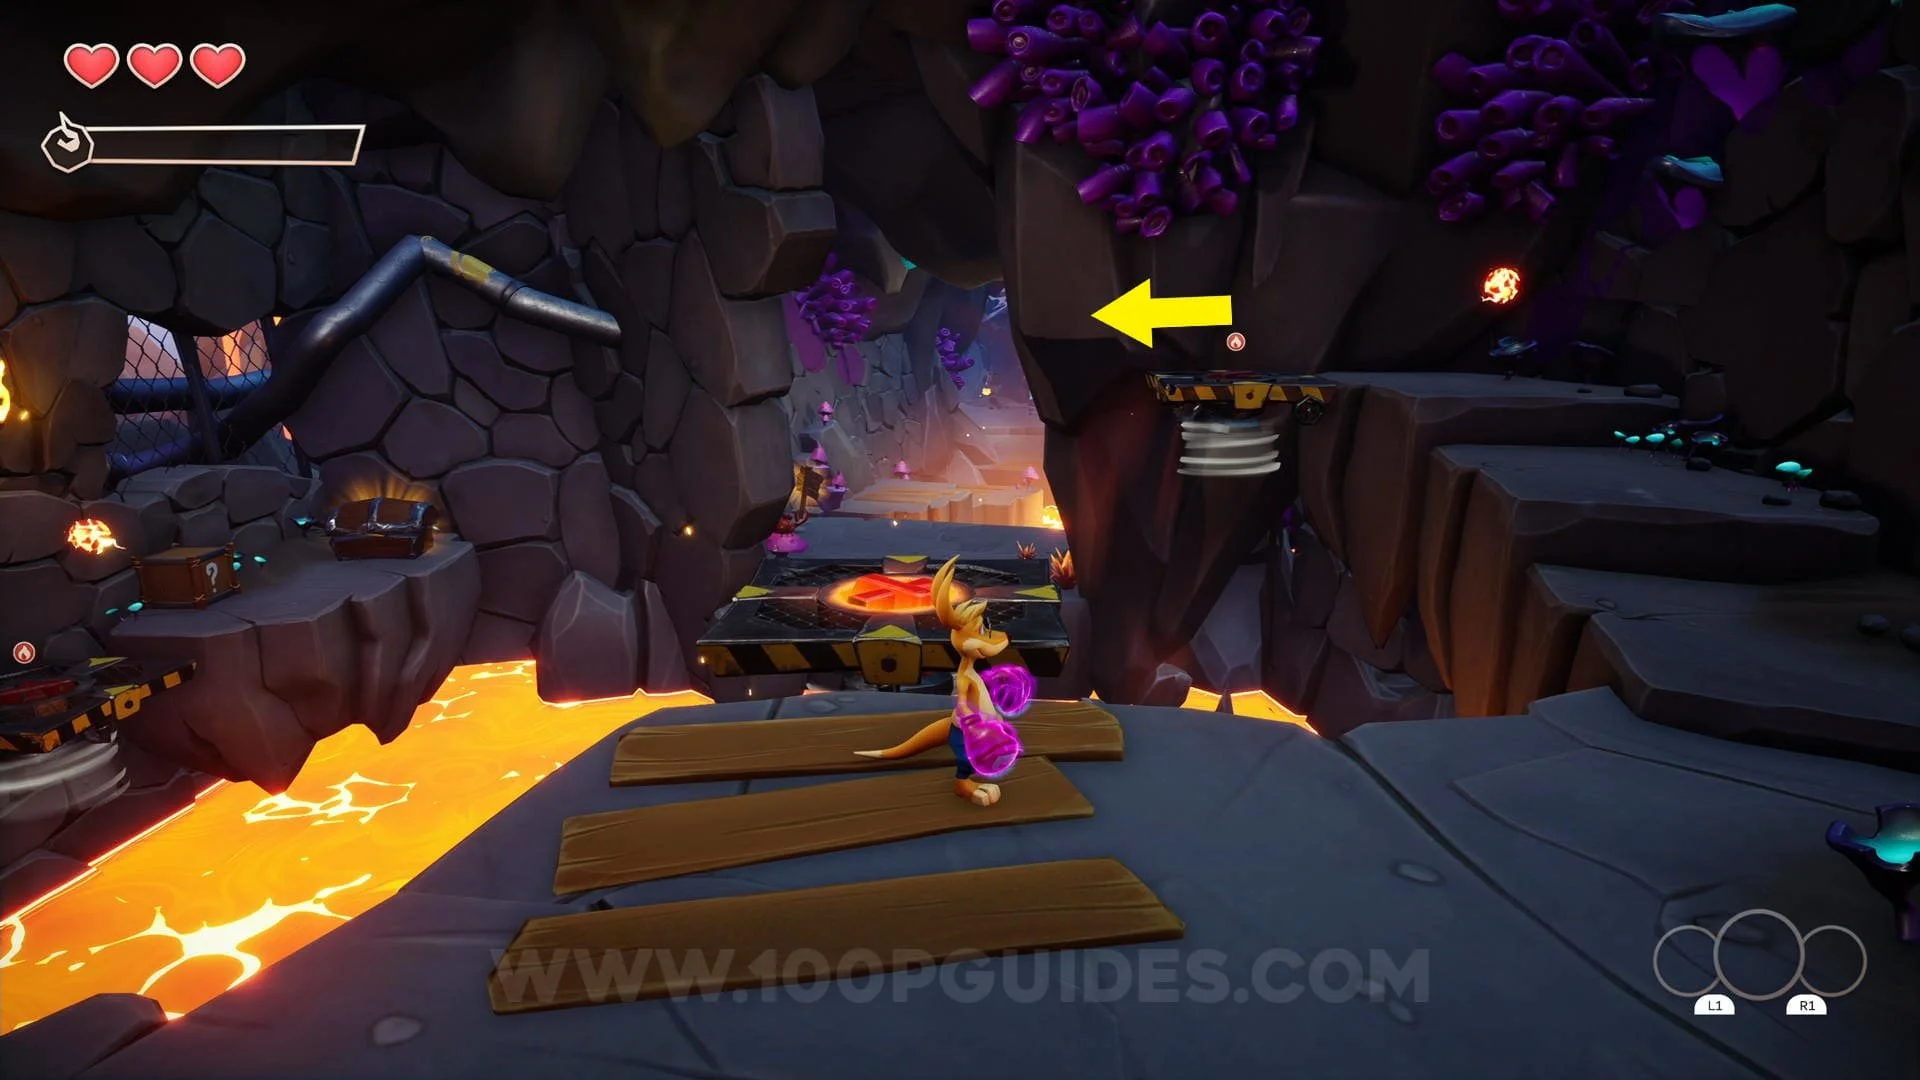
Crystal #2: Can be found by jumping across the platforms to the left of the first fire totem you come across.


KAO Letter (K): Can be found by jumping across the platforms to the left of the first fire totem you come across and then activating the purple stones to spawn some platforms that take you to the K.

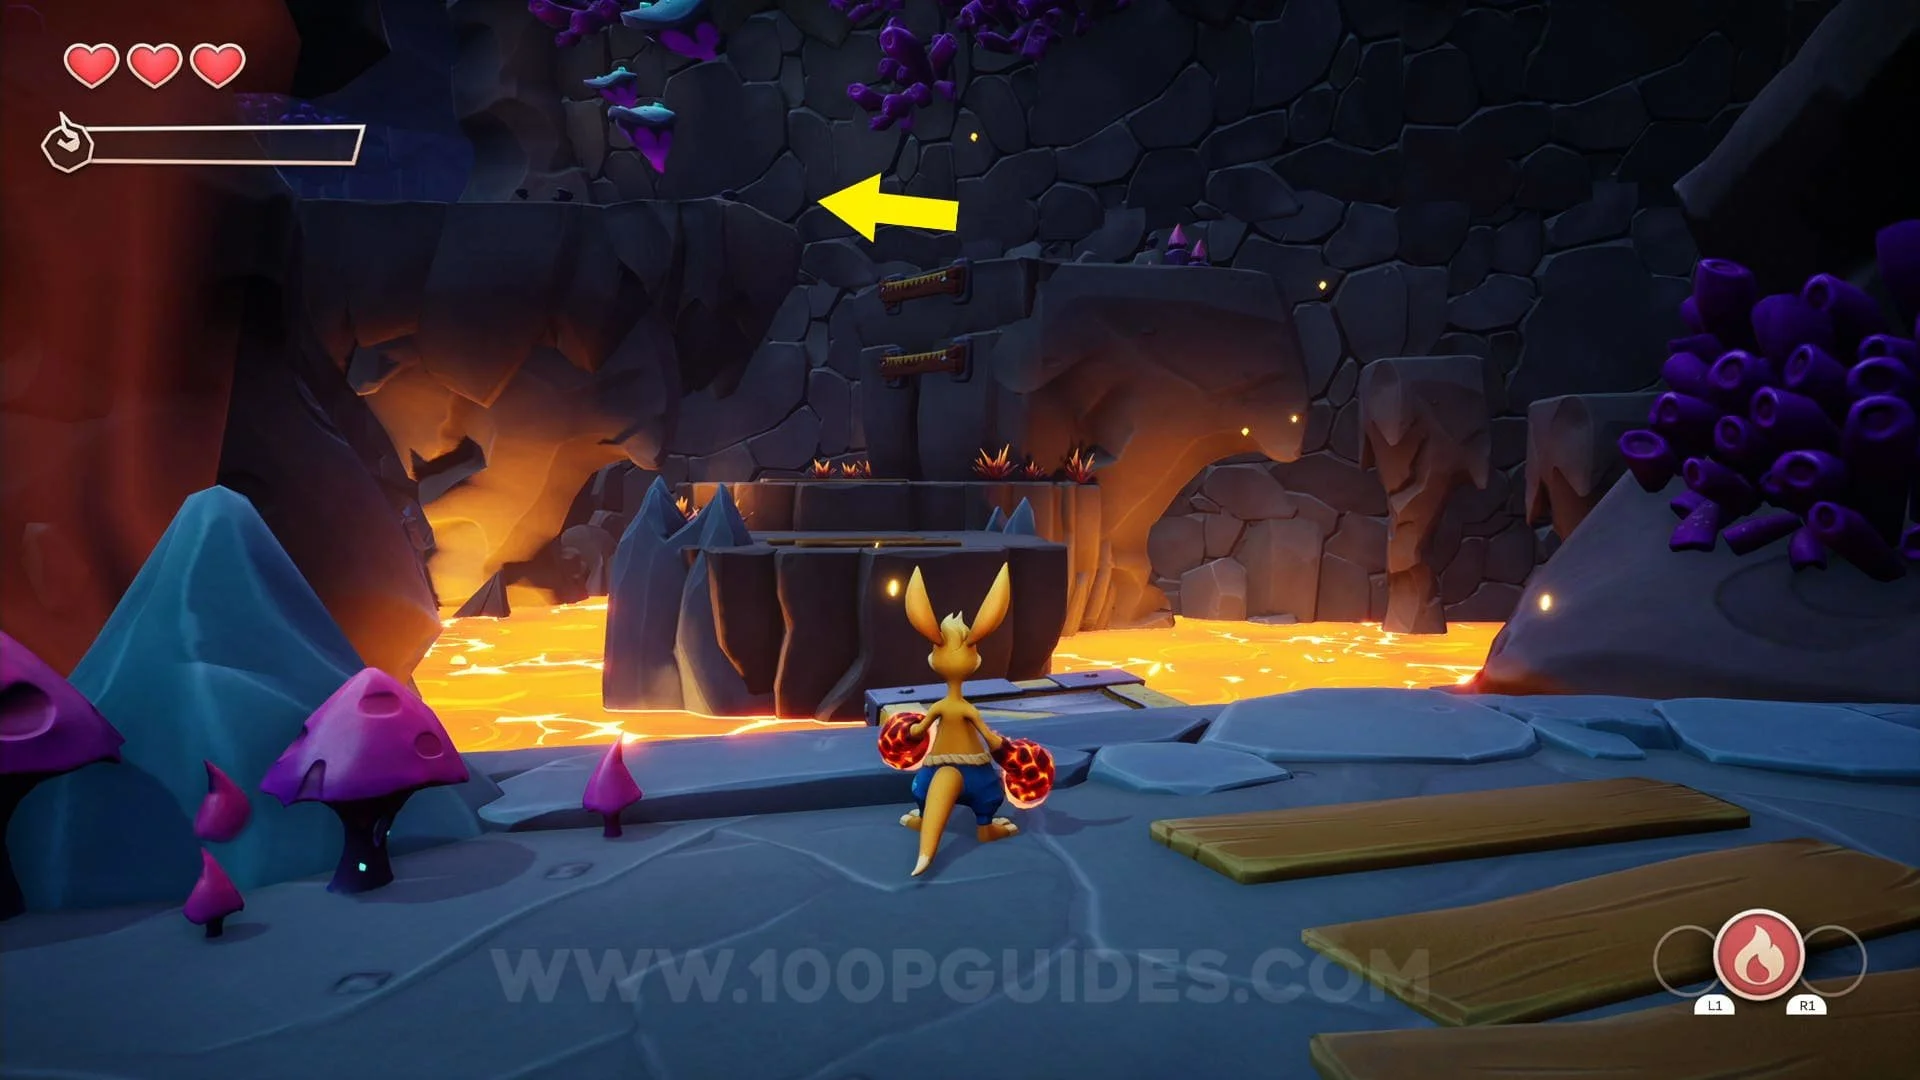
Rune #2: Found in the middle of the main path after lowering the bridge with the furnace.
Crystal #3: In the area with the lasers below you, hit the purple stone with the boomerang and use the platforms to get the crystal found to the right.

Heart Piece #2: Found right below you in the area with the lasers.

Rune #3: Found in the middle of the main path after the laser section.
Scroll #1: Just after the laser section, jump across the platforms to the left and burn the web to get the scroll.
Crystal #4: Behind some boxes to the left of the big vault door after dropoing through the trap door.
Heart Piece #3 & Chest #5: Break the boxes at the top of the box tower to the right of the vault door to reveal a gap you can roll through to find the chest and heart piece.


KAO Letter (A): After the vault door area you will climb up some planks of wood, as soon as you do that go right and break the boxes to access the A.


Crystal #5: Can be found behind the boxes in the final area with the lasers.

KAO Letter (O): Found on the platforms above the final laser area.


Rune #4: Obtained at the end of the level once you get the wrench back.
The Hungry Jungle Collectibles
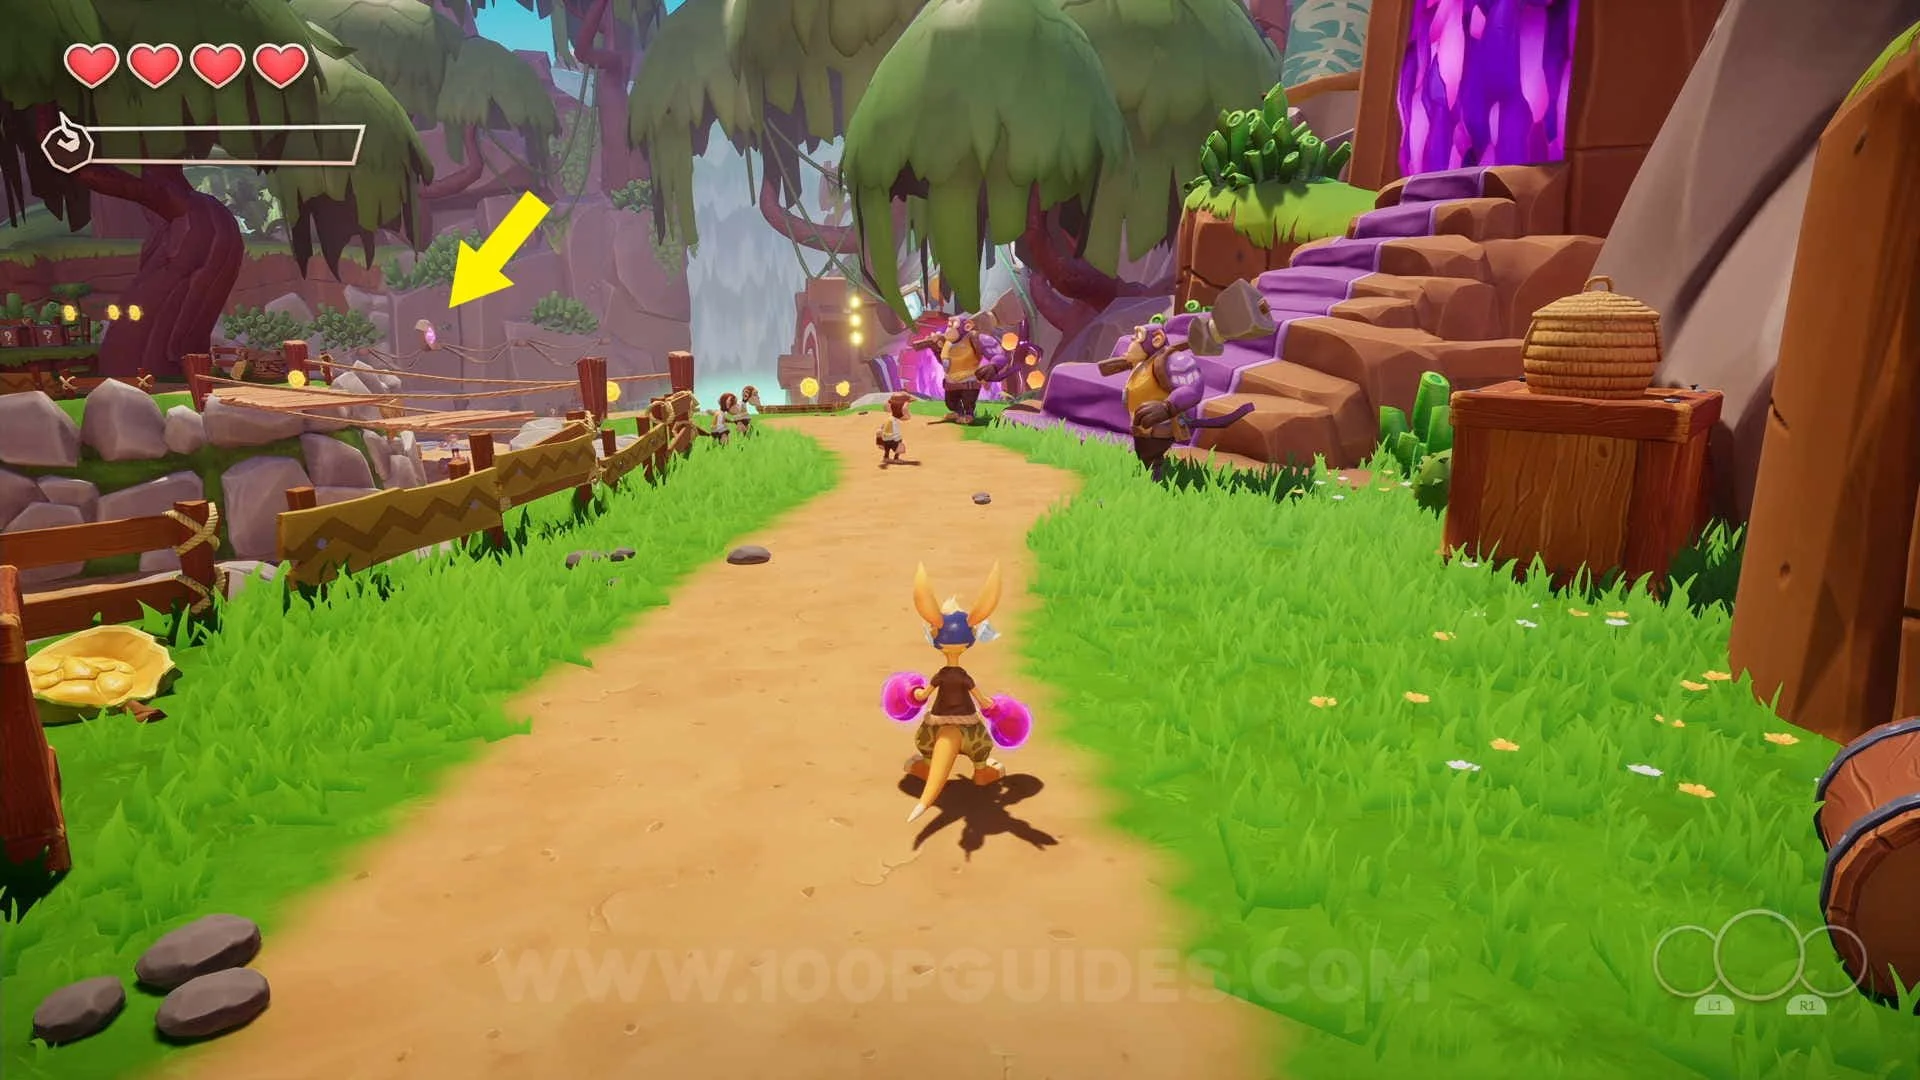
Crystal #1: After leaving the docks, take a right at the first fork to find the crystal on some boxes.

Scroll #1: Found to the left of the 2 monkeys just before you reach Walt and the massive tree.
Crystal #2: In the cave to the left of the scroll.
Scroll #2: Next to the waterwheel after coming out the other side of the cave where the previous collectible was.

Chest #1 & Crystal #3: Found the other side of the waterfall to the left of the Monkey Park level.
Crystal #4: Under the entrance to the Monkey Park level.
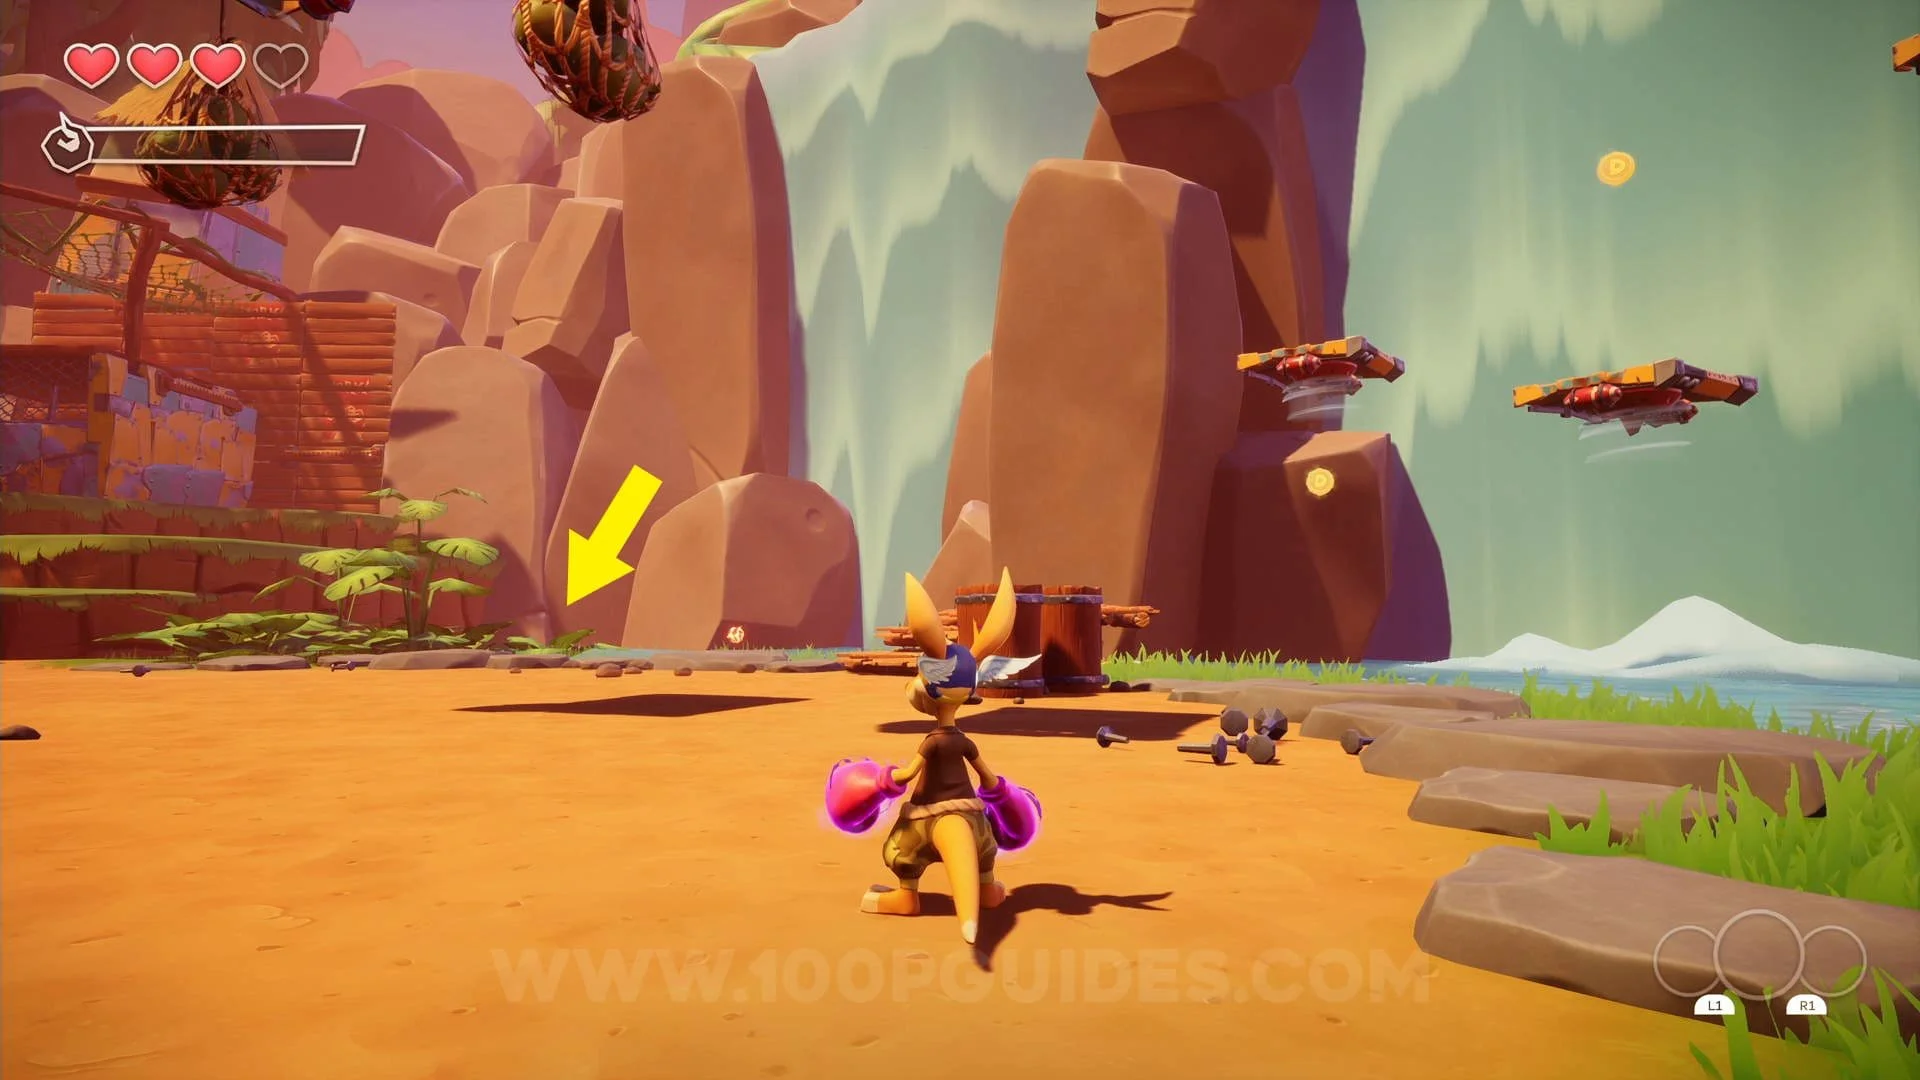
Crystal #5: Found in some bushes behind the massive purple tree.


Crystal #6: On the platform above the River Track level (to the right of the big tree).

Crystal #7: Behind some boxes to the right of The Durian Valley level entrance (found at the far end to the right of the tree).
Rune #1: To the left of The Durian Valley level.
Rune #2: Just above the entrance of the River Track level
❗ONLY AVAILABLE AFTER FINISHING THE DURIAN VALLEY LEVEL.

Rune #3: Can be found in the bridge in front of The Jungle Throne entrace
❗ONLY AVAILABLE AFTER FINISHING THE DURIAN VALLEY LEVEL.
The Durian Valley Collectibles
Crystal #1: As soon as you start jump off the platform to find the crystal in the water.
Crystal #2: On an island to the left of the first furnace.
Scroll #1: After the furnace, jump on the platforms and burn the spider web to your right to access the new area where you will find the scroll in plain sight.

Crystal #3: Continue jumping across the platforms after the previous collectible, you will see the crystal on the side of the path.


KAO Letter (K): Continue past the previous collectible and use the trampoline to get to the letter.
Crystal #4: On the main path where you have to hit the purple stones to spawn the platforms.
Rune #1: Found on the main path soon after the previous collectible.
Eternal Well #1 (Contains 2 Crystals & 1 Chest): From the platform with the first rune on it, go down to the right of the trampoline and hit the purple crystal to get to the spider web. The eternal well can be found behind it.

Heart Piece #1: As soon as you get off the vine you slide down you will be on a round platform with a checkpoint. From here break the boxes to your right and hit the purple crystals to jump across the platforms and get the heat piece.


Chest #1: From the platform just after sliding down the vine, jump across the platforms until you get to the 2nd circular platform. From here you can jump to the chest.


Crystal #5: Fromn the platform we used to get to the chest, jump to the moving platform, then go left to find the crystal.

KAO Letter (A): On the main path you will get to a platform with some fuit in a wooden container. As soon as you jump down to the lower walkway turn around and burn the spider web, then hang from the vines and strech your neck to get the letter.
Crystal #6: At the next checkpoint go right and enter the tree, here you will find the crystal to your left as you enter.

Eternal Well #2 (Contains 2 Cyrstals & 1 Chest): In the same tree as the previous collectible.

Crystal #7-8: On the main path where you have to dodge the barrels.
Rune #2: On the main path just after dodging the barrels, impossible to miss.
Crystal #9: On the main path while slidding down the pipe.


Rune #3: Right in front of you once you exit the pipe you slide down.
Crystal #10: In the water next to the left waterfall inbetween the 2nd and 3rd main objectives you have to unfreeze.
Crystal #11: From the 2nd objective, use the floating platforms that go in the towards the 3rd objective to get the crystal.

Crystal #12: Just under the 3rd frozen objective.
Heart Piece #2: In a gap under the 3rd objective.

Rune #4: After unfreezing all 3 objectives you will fight a mini boss, talk to him once he is defeated to get the rune.


Chest #2: Go past the level exit and climb across the vines to find the chest to the left.


KAO Letter (O): After crossing the vines instead of exiting the level, you can find this letter behind the waterfall.


Crystal #13: Just past the waterfall where the previous colletible was found.
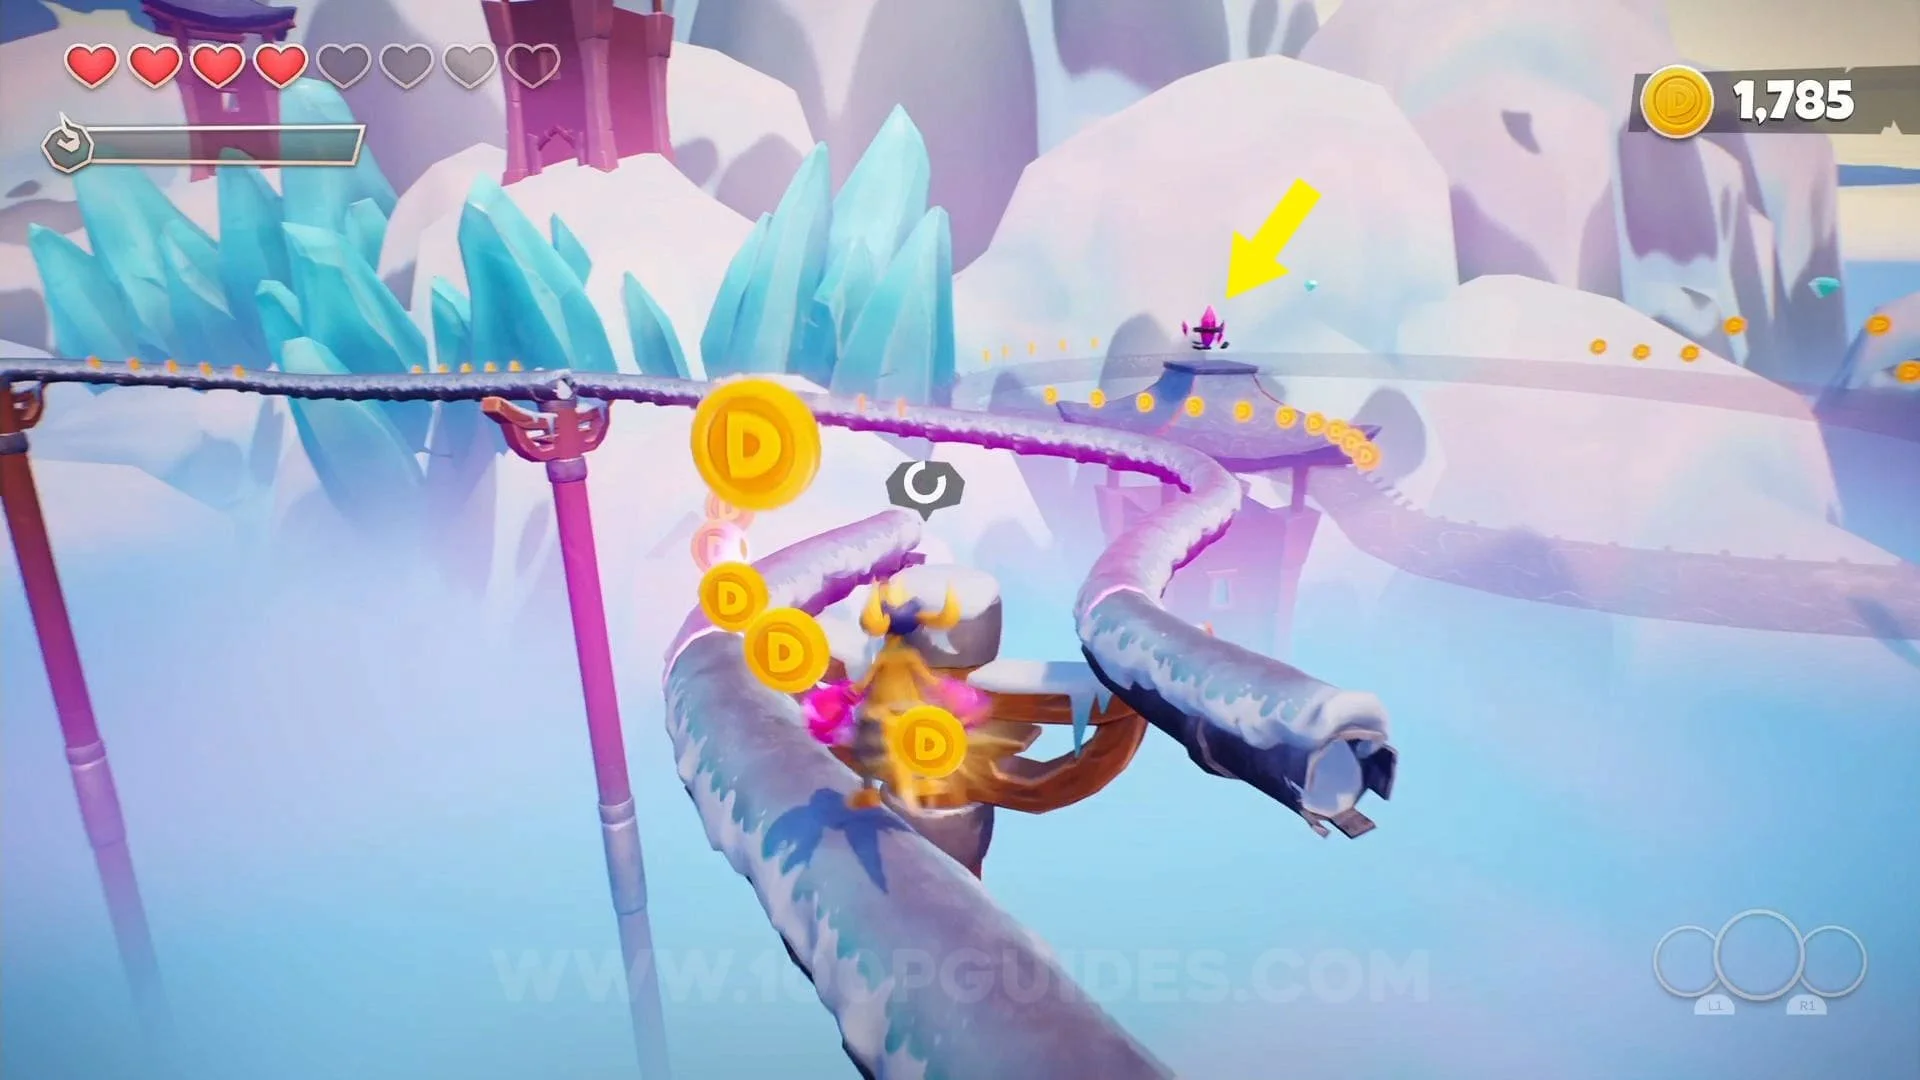
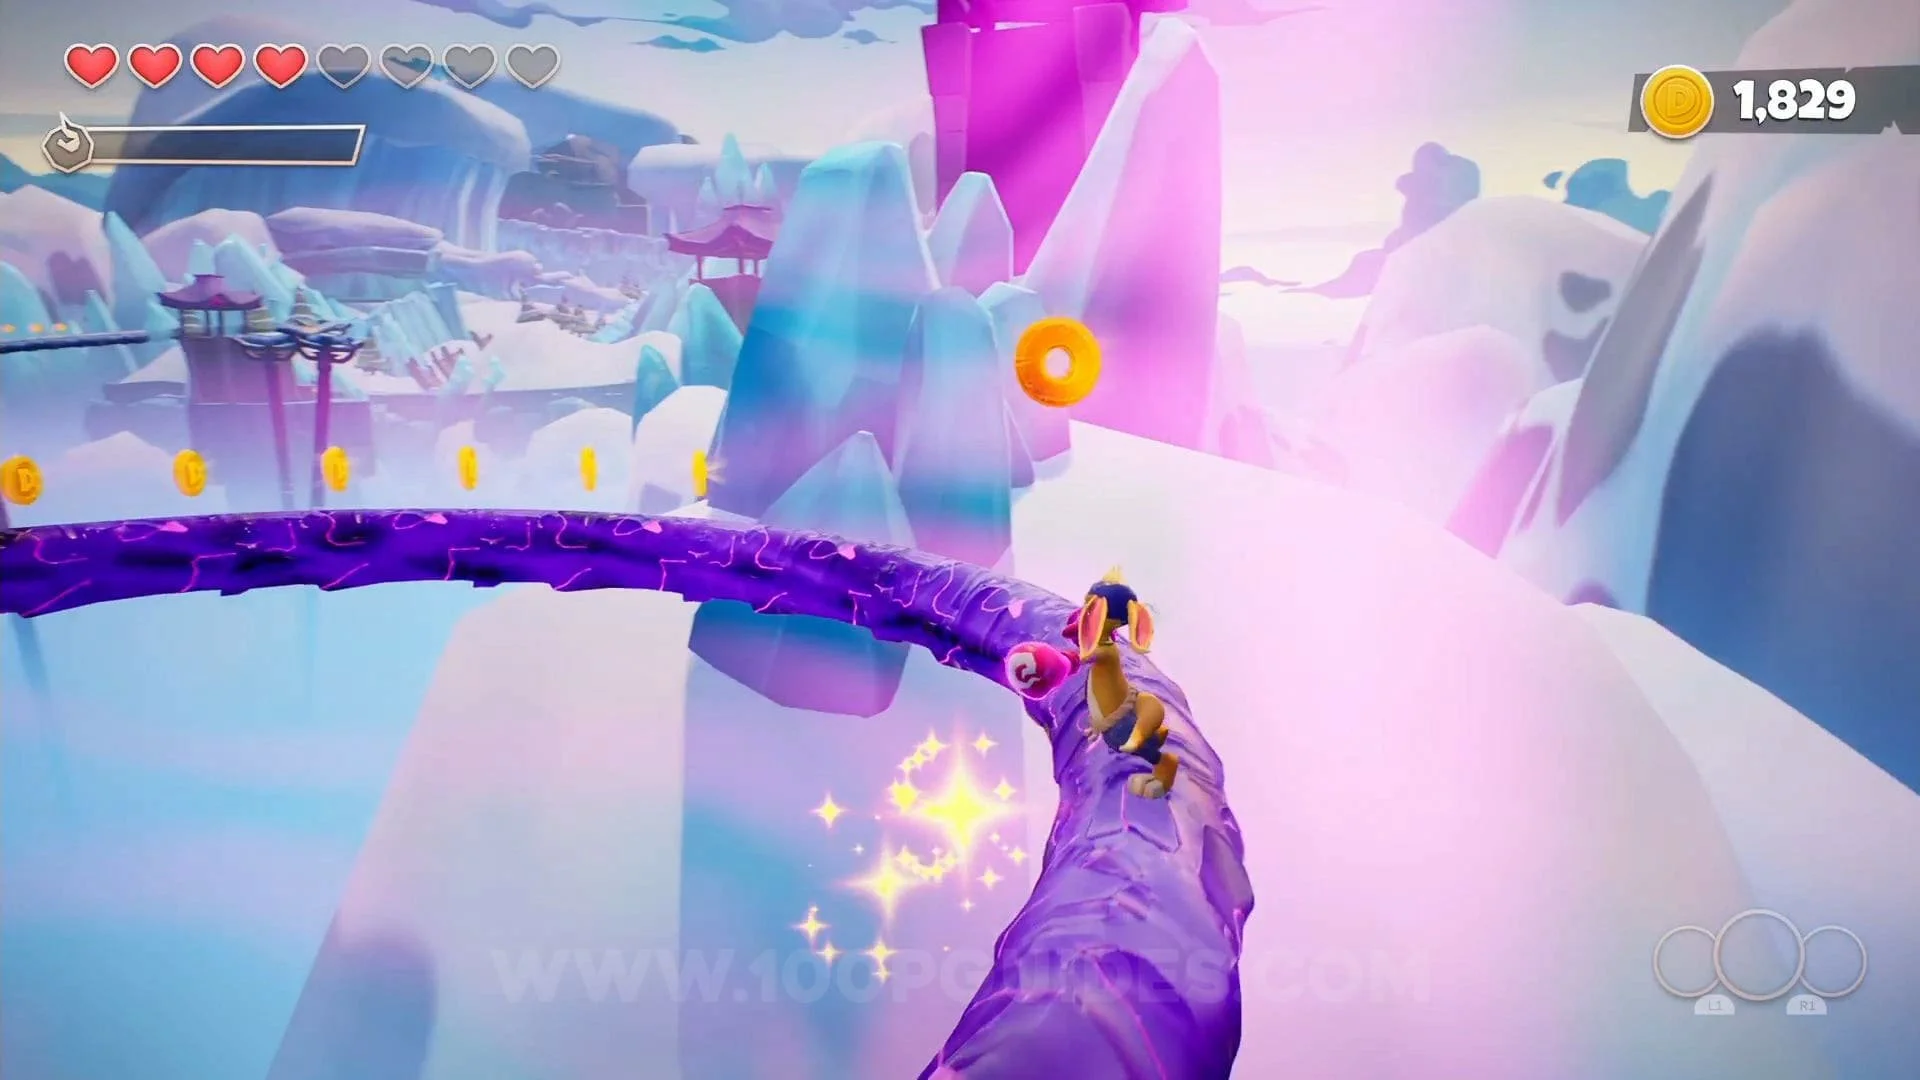
Mokey Park Collectibles
Crystal #1: On the small island to the left very close to the start of the level.
KAO Letter (K): First get the fire power-up to the left of the area with the first flying monkey, then go right and
burn the web to get the letter.


Crystal #2: After using the 3rd grapple point jump to the platform on the tree to your left.

Rune #1: Found on the platform where you have to press the big red switch, hard to miss since it's on the main path.


Chest #1: Jump out the left window in the room where the first furnace is.
Crystal #3: After activating the first furnace and crossing the new platform you will get to a circle with a checkpoint
and a boomerang. First use the boomerang to get to the platform on the left where you can then pick up another boomerang.
Use it to hit the floating purple crystal on your right to spawn some platforms and get the crystal.

Crystal #4: On the other side of the platform where the previous collectible was, use the same boomerang to hit the floating
crystal on the other side of the platform.


Eternal Well #1 (Contains 2 Crystals & 1 Chest): From the platform with the first boomerang on it, ignore the arrow and go down the
right path, then go around the left tree on the next platform.

Crystal #5: On the platforms to the right of the massive monkey head that opens once you have activated the 2 furnaces.


Rune #2: On the main path after activating the 2 furnaces.
Crystal #6: Can be obtained during the slide section.
Crystal #7: Found on the main path when jumping over the logs with spikes on them.
Heart Piece #1: Just after the previous collectible, go up to the platform on the right, the heart piece will be
at the end of this path.


Chest #2: Once you get the the area with the red and white spiral in the middle and 2 big monkey enemies, look for the
chest behind the bushes to the right.


Crystal #8: On the main path while hanging from the vines. Stretch your neck to get it.
Rune #3: Impossible to miss, on the main path.
KAO Letter (A): From the platform with the previous rune on it, take a right, use the grappling hook and burn the web to find the letter.


Eternal Well #2 (Contains 3 Crystals & 1 Chest): After hitting multiple crystals with boomerangs and hanging from a vine to get to a massive tree
with a walkway around it, go around this tree to the right until you see a vine you can grind down. You will find the eternal well at the bottom.


Heart Piece #2: Use the trampolines after the the eternal well to get to the platform with the heart piece on it.

Crystal #9: After returning to the tree with the walkway around it, go around until you see a round
platform with multiple tables and an infinite fire power-up charger. You can find the crystal behind a box on this platform.


Chest #3: On the hanging platform right next to the previous collectible.
KAO Letter (O): Return to the walkway around the tree and continue around until you see a platform you activate with fire. Continue on this path
until you see a spiral on the ground. Here go right and use the grappling points to get to the "O" found at the end of the path.


Crystal #10: After getting the "O" use the trampoline to get back to the spiral, here you will find the crystal above a box.
Scroll #1: To the left of the flying monkey you talk to at the end of the level.
Rune #4: The final rune will spawn after talking to the flying monkey at the end of the level.


River Track Collectibles
Crystal #1: On a log on the left side of the screen during the first chase scene close to the start.
Crystal #2: To the right of the screen during the first chase scene on a tree trunk.
Crystal #3: To your right as soon as the first chase scene ends.
Eternal Well #1 (Contains 3 Crystals & 1 Chest): After using the first grapple point after the first enemy encouter,
grab the fire power up and backtrack a few meters and burn the plank of wood to enter a secret room with a switch in it.
After pressing it you will be able to get back to where the enemy encounter was, here you can find a new opening to your right
where you can find the Eternal Well.


Chest #1: In the same room as the eternal well.
Heart Piece #1: Before pressing the button at the top of the area with the first enemy encounter, go past it and pick up the
fire power-up, then backtrack and burn the spider web on the floor to get the heart piece.


Rune #1: On the main path after pressing the button to stop the fan.
Crystal #4: On the right side of the screen during the second chase scene.
KAO Letter (K): In a ring during the second chase scene.
Scroll #1: In the area after the second chase scene, before climbing up the boxes take a right and enter the building
by burning the web on the window.


KAO Letter (A): In the area after the second chase scene, after climbing up the boxes and reaching the top area you will fight
2 big monkeys, here go doen the pipe to the left to find the letter at the end.
Heart Piece #2: Where you fight the 2 big monkeys at the top of the area after the second chase scene, jump through the window of the building
to your right.
Rune #2: On the main path on the stable with scrolls once you clear the room of enemies.
Chest #2: In the same room as the previous rune.
KAO Letter (O): Down the hole in the floor in the room after the 3rd chase scene.

Chest #3: Burn the plank of wood to enter the room on the left after the 3rd chase scene, here break some boxes to the left to reveal
a hole you can roll under to get to the chest.


Rune #3: In the final room after saving the crab from the cage.

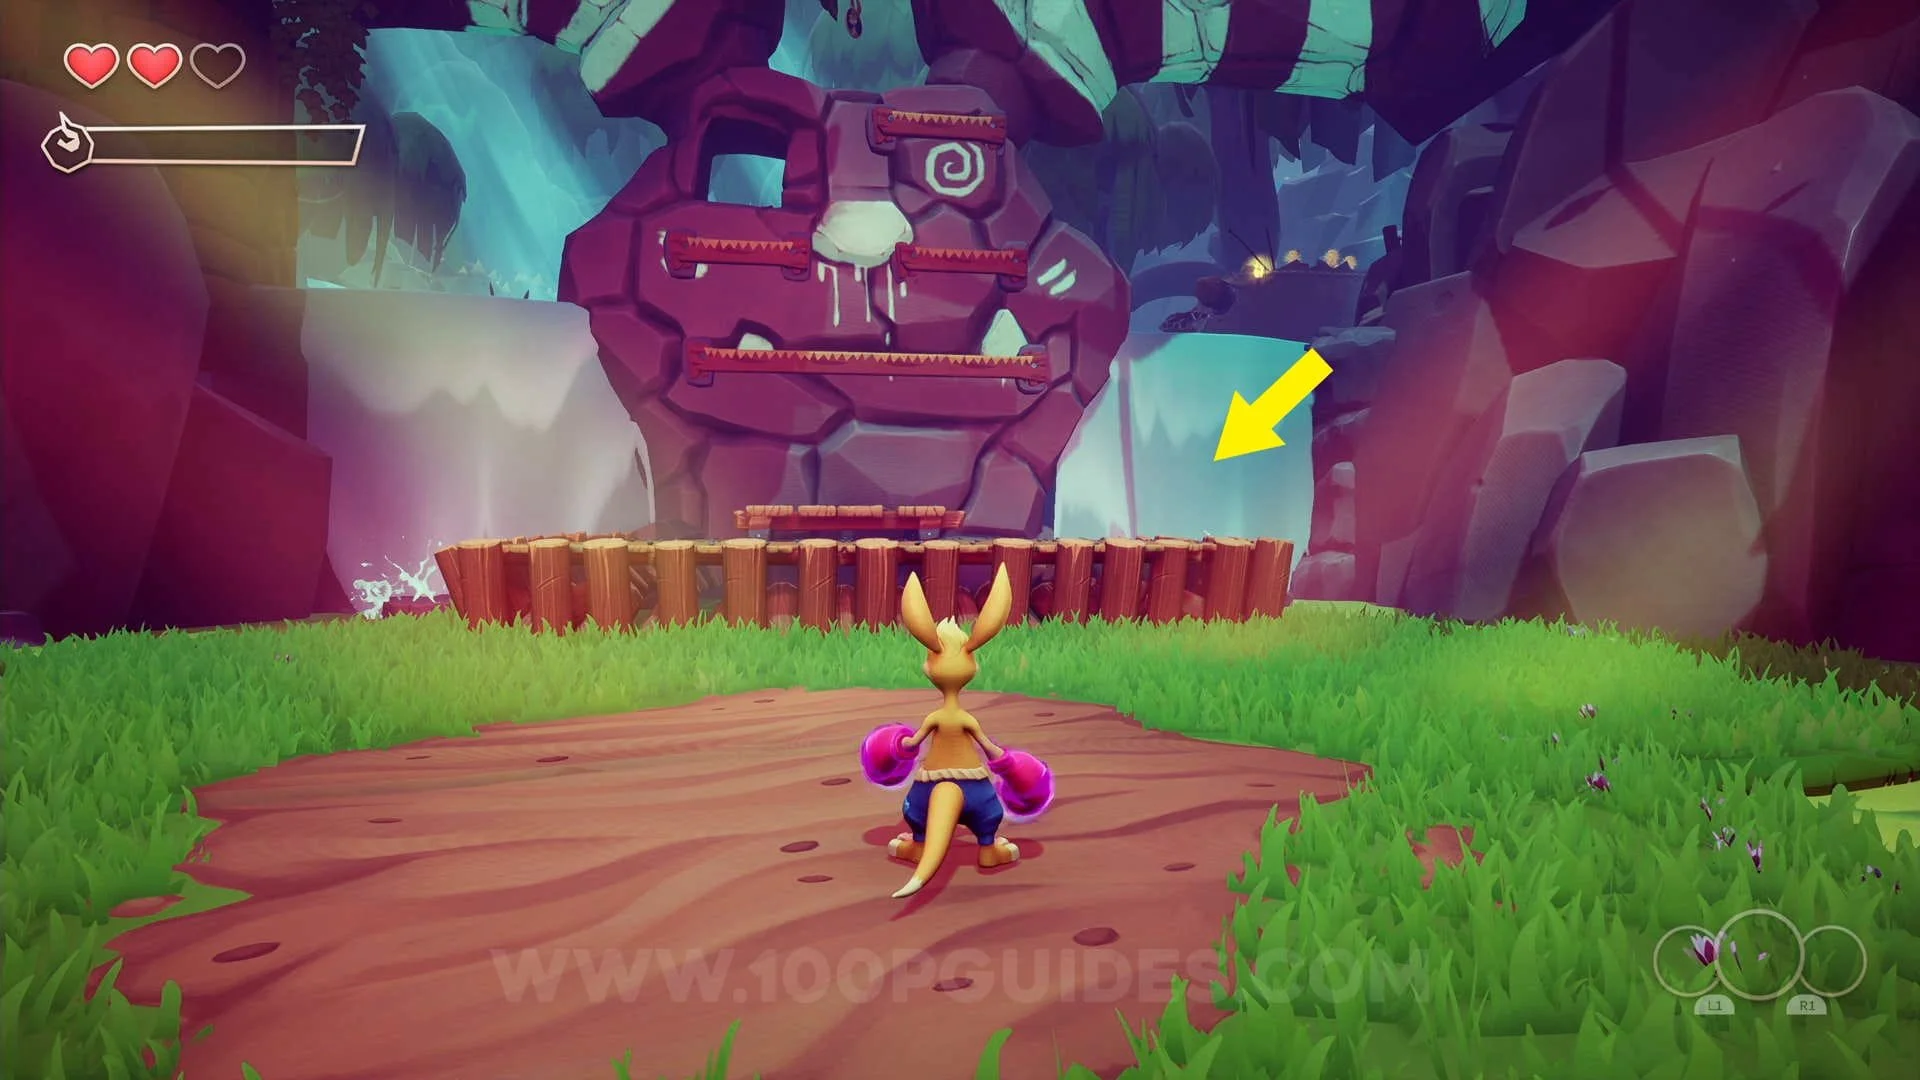
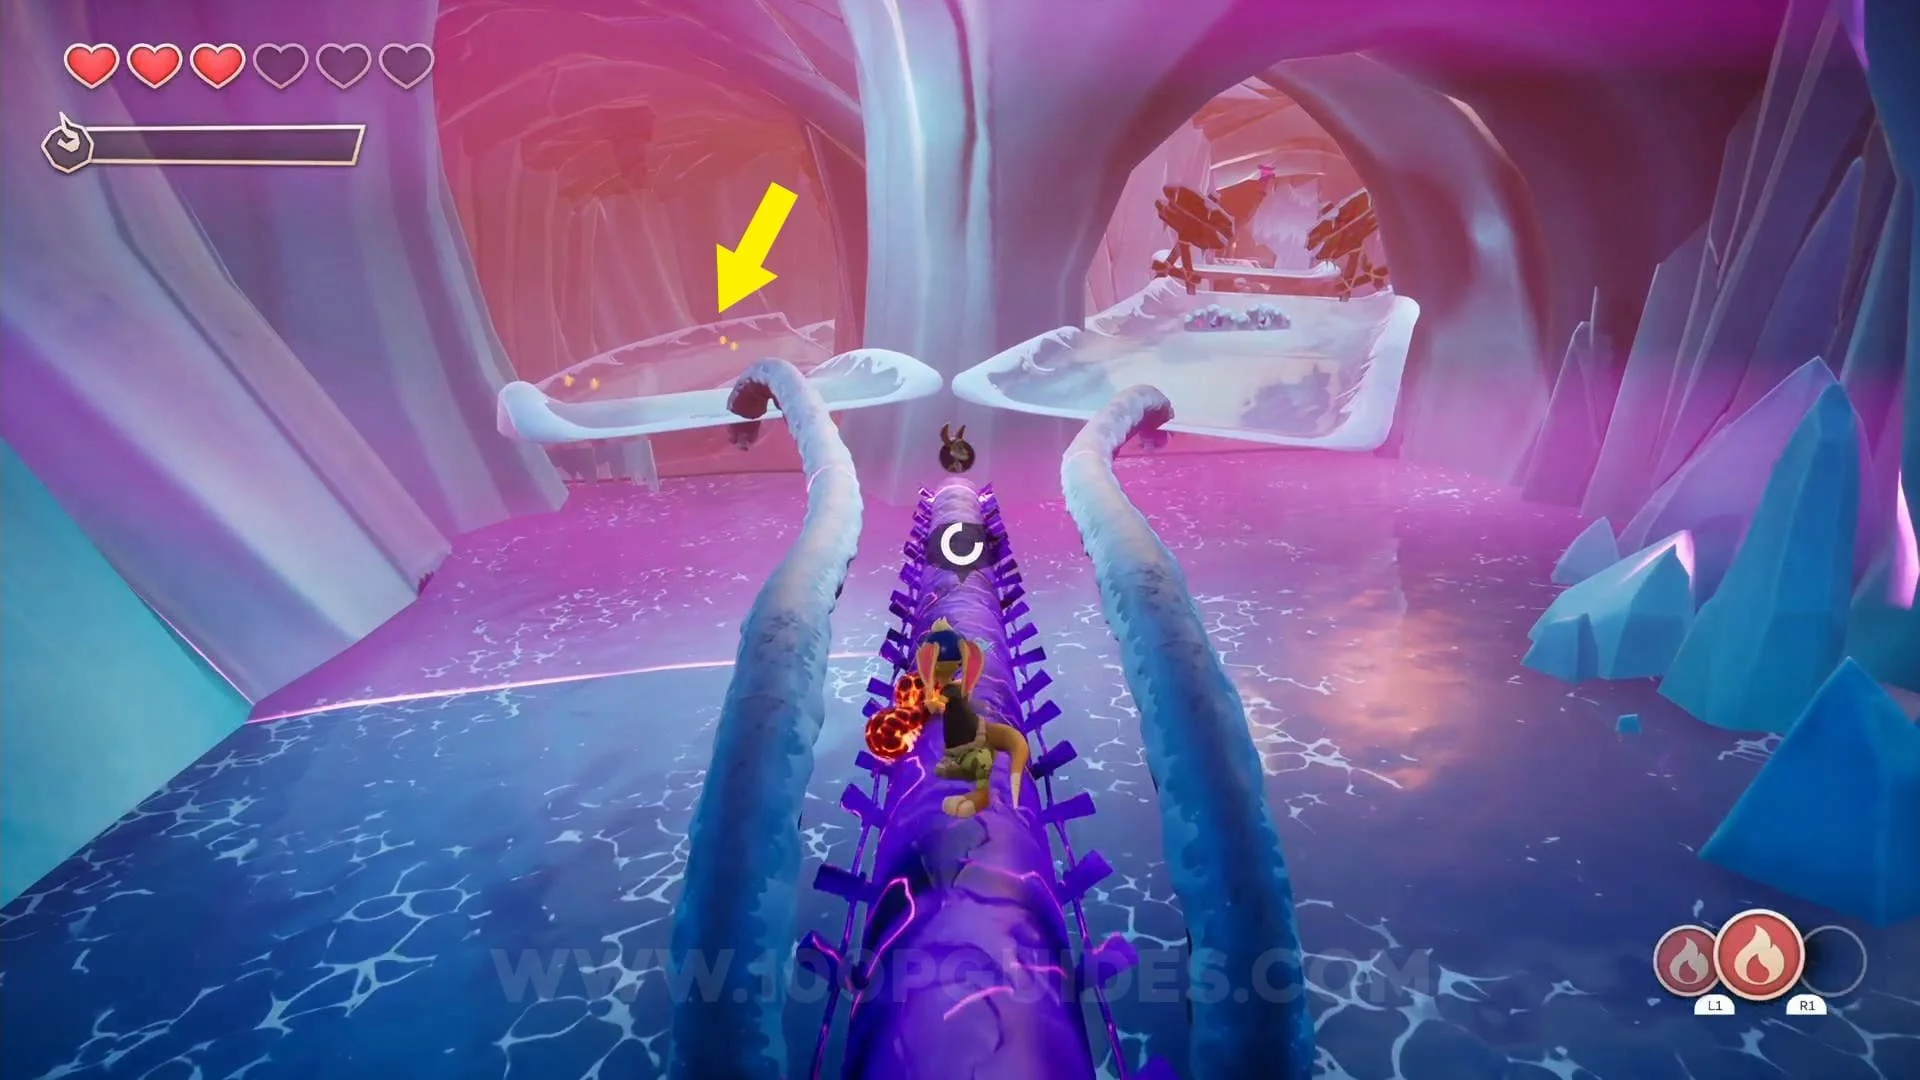
The Frosty Canyon Collectibles
Chest #1: After freezing the water and using your ice powers for the first time,
pick up a fire charge and melt the ice blocking the entrance to the building behind
you, then melt the ice around the chest to open it.


Rune #1: On the main path just after you climb across the gap.
Chest #2: Soon after the rune, you will see a frozen door that you can freeze on your left,
you will find the chest inside (you can get fire charges behind the building to your left as
soon as you climb up after the rune).

Crystal #1: After jumping across some ice platforms being held up by ballons, look for a gap
to your left in the area where you have to freeze the ground and push a block.

Rune #2: On the main path soon after the previous collectible.
Scroll #1: Just after the area with all the fish jumping about in the water, melt the ice
wall on the right to get the scroll.


Heart Piece #1 & Chest #3: In the area with all the fish jumping about in the water, use the
left platforms and hit the purple crystals through the cave, then pick up the boomerang and
hit the final crystal to get access to the room with the chest & heart piece.


KAO Letter (K): As soon as you start hanging from the ropes white the sheep cannons, take a left.


Rune #3: On the main path just after the first time you see the sheep cannons.
Rune #4: Obatined after defeating the goats that attack you in the arena.
Chest #4: In the area after the arena, head in to the building on the left, here you can find a
frozen chest next to the fire power-up charger.

Heart Piece #2: In the area after the arena, head right and then use a floating box to get
to the heart piece.


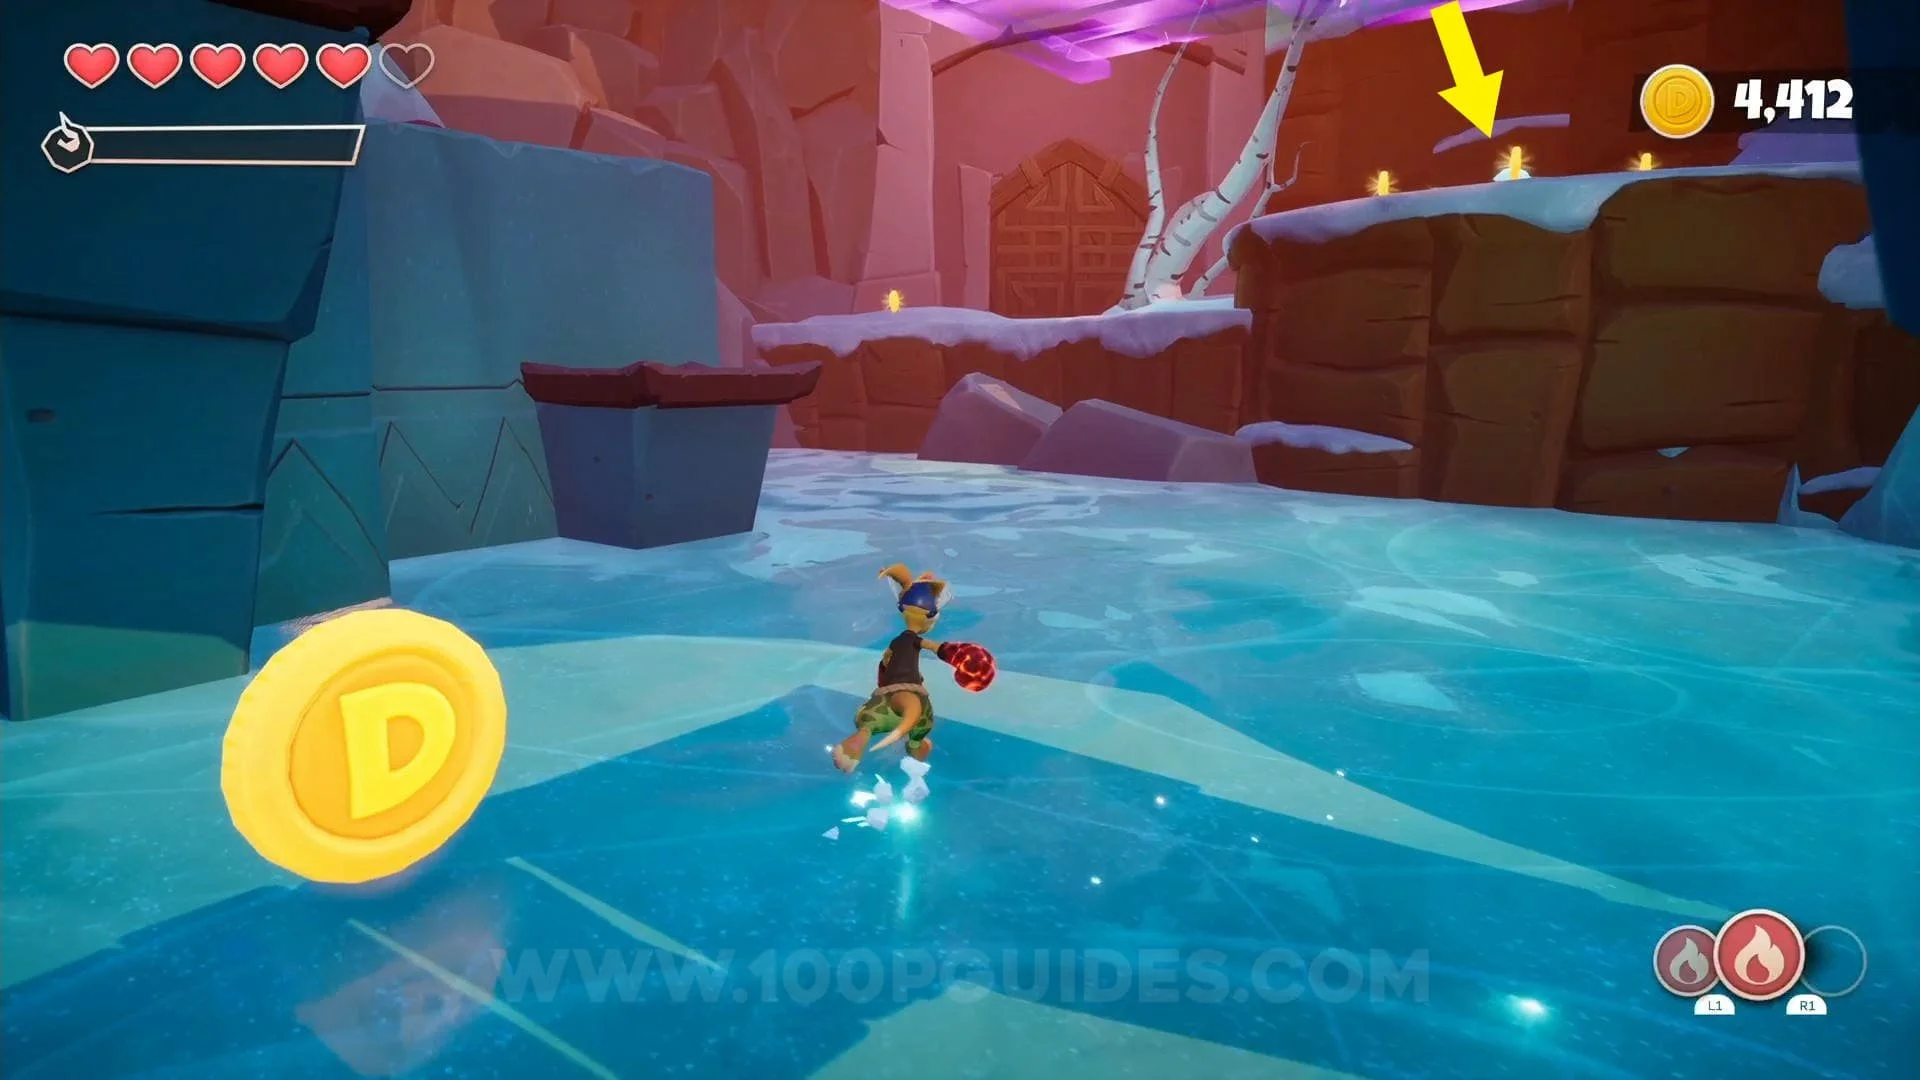
Eternal Well #1 (Contains 5 Crystals & 1 Chest): In the area after the arena, head right and then continue around this path
until the end.

KAO Letter (A): Just before starting the climbing section shortly after the ice slide, go right and use the floating platforms
to get to the "A".


Crystal #2: On the table to the right in the area where you first encounter the goats with sheep cannons.
Eternal Well #2 (Contains 5 Crystals & 1 Chest): As soon as you leave the area where you fight the goats with sheep cannons,
take a left and jump across the narrow ledges and then climb up to the eternal well.


KAO Letter (O): Melt the wall to your left just before the wall covered with a big waterfall.


Crystal #3: Can be found at the bottom of the wall that you have to climb after freezing the waterfall.


Rune #5: Obtained after talking to the goat at the end of the level.

The Hot Springs Collectibles
Chest #1: Hit the door to your left at the start to break it and enter the building.
Once inside, pick up a fire power-up and jump up the shelves to get to the frozen chest.


Rune #1: On the main path after climbing up some ledges that you had to freeze.
Heart Piece #1: From the rune, turn around and cross the stone bridge, then drop down
to where the fire power-up charger is and use the ropes to get the heart piece.
KAO Letter (K): From the rune, turn around, cross the bridge and melt the ice at the end.

Rune #2: On the main path just after the slide section.
Scroll #1: Break the boxes to the right of the previous rune to reveal some ice you can
melt to get to the scroll.

Crystal #1: After crossing the first set of platforms with the crystal you can pick up,
jump up to the room on your right to get the crystal.


Chest #2: Just after you put down the first crystal and roll under a gap, you will have to melt the ice blocking an entrance on your right. The chest can be found inside.

Crystal #2: Once on the second set of platforms that spawn with the crystal you pick up,
get on the moving platform to the left to get to this crystal.
Crystal #3: To your right after getting past the first piranhas with the crystal.
Chest #3: Jump across the platforms to the left of the 3rd crystal you can pick up.
KAO Letter (A): As soon as you pick up the 3rd crystal, you will drop down through a purple
tile, as soon as you drop down, turn around to see the letter.


Eternal Well #1 (Contains 4 Crystals & 1 Chest): In the area where you freeze the water, melt the
ice covering the entrance next to the switch you use to freeze the water, then push the box to get
up to the higher area where you can met some ice to access the room with the eternal well.


Crystal #4: After freezing the lake, head back towards the start and climb up to the right where you
can find the crystal.

Chest #4: Once you freeze the lake, cross to the opposite side to find the chest.
Crystal #5: At the start of the slide section take the left slide, once at the end you will
see the crystal right in front of you.


KAO Letter (O): At the start of the slide section take the left slide, once you are at the end and off
the slide, go to the right and melt the ice to reveal the letter.


Chest #5: At the start of the slide section take the left slide, once you are at the end and off
the slide, ebter the far right door to find the frozen chest.


Rune #3: Jump down to the bottom floor (where the right side slide ends) to find the rune in the middle
of the room.
Heart Piece #2: On the bottom floor (where you picked up the rune) exit through the door on the left, then use the wooden
planks to climb up to the heart piece.


Crystal #6: After a short slide you will be on an icy platform, look behind the fan to your left to find the crystal.
Crystal #7: Found behind the fan on your right after the short slide.
Crystal #8: On the icy platform after the short slide.
Crystal #9 & Chest #6: On the icy platform after the short slide, use the boomerang at the end with the flame power-up to
melt the ice around the grapple point, then use it to get to the small room with the crystal and chest in it.

Rune #4: Found at the end of the level after talking to the pogo stick goat after defeating him.
The Icy Slopes Collectibles
Rune #1: In the middle of the main path after the first slide section.
KAO Letter (K): During the 2nd slide section (down the rail) you will see the K
on a circular rain to your right going around a rock.
Crystal #1: Hard to miss, you will find this while slidding down the rain soon after the
previous collectible.
Crystal #2 & Scroll #1: Almost immediately after the previous crystal jump to the rail on your left.

Crystal #3: You will find this crystal on the main path while slidding down the rail, hard to miss.
Heart Piece #1: Jump at the end of the first rail.
Rune #2: On the main path after the 2nd slide section.
KAO Letter (A) & Chest #1: In the area where you pick up the 2nd rune, get the fire power-up from the left of the
building to melt the ice covering the door where you can pick up the letter and the chest.
Crystal #4-6: Soon after getting on the 2nd rail, hit the purple crystal to spawn a circular rail to your right.
The 3 crystals will be on this rail.

KAO Letter (O): Soon after the previous 3 crystals, hit the floating crystal that spawns a circular rain to your left.
This rail will have th O on it.

Crystal #7: Jump at the very end of the 2nd rail section.
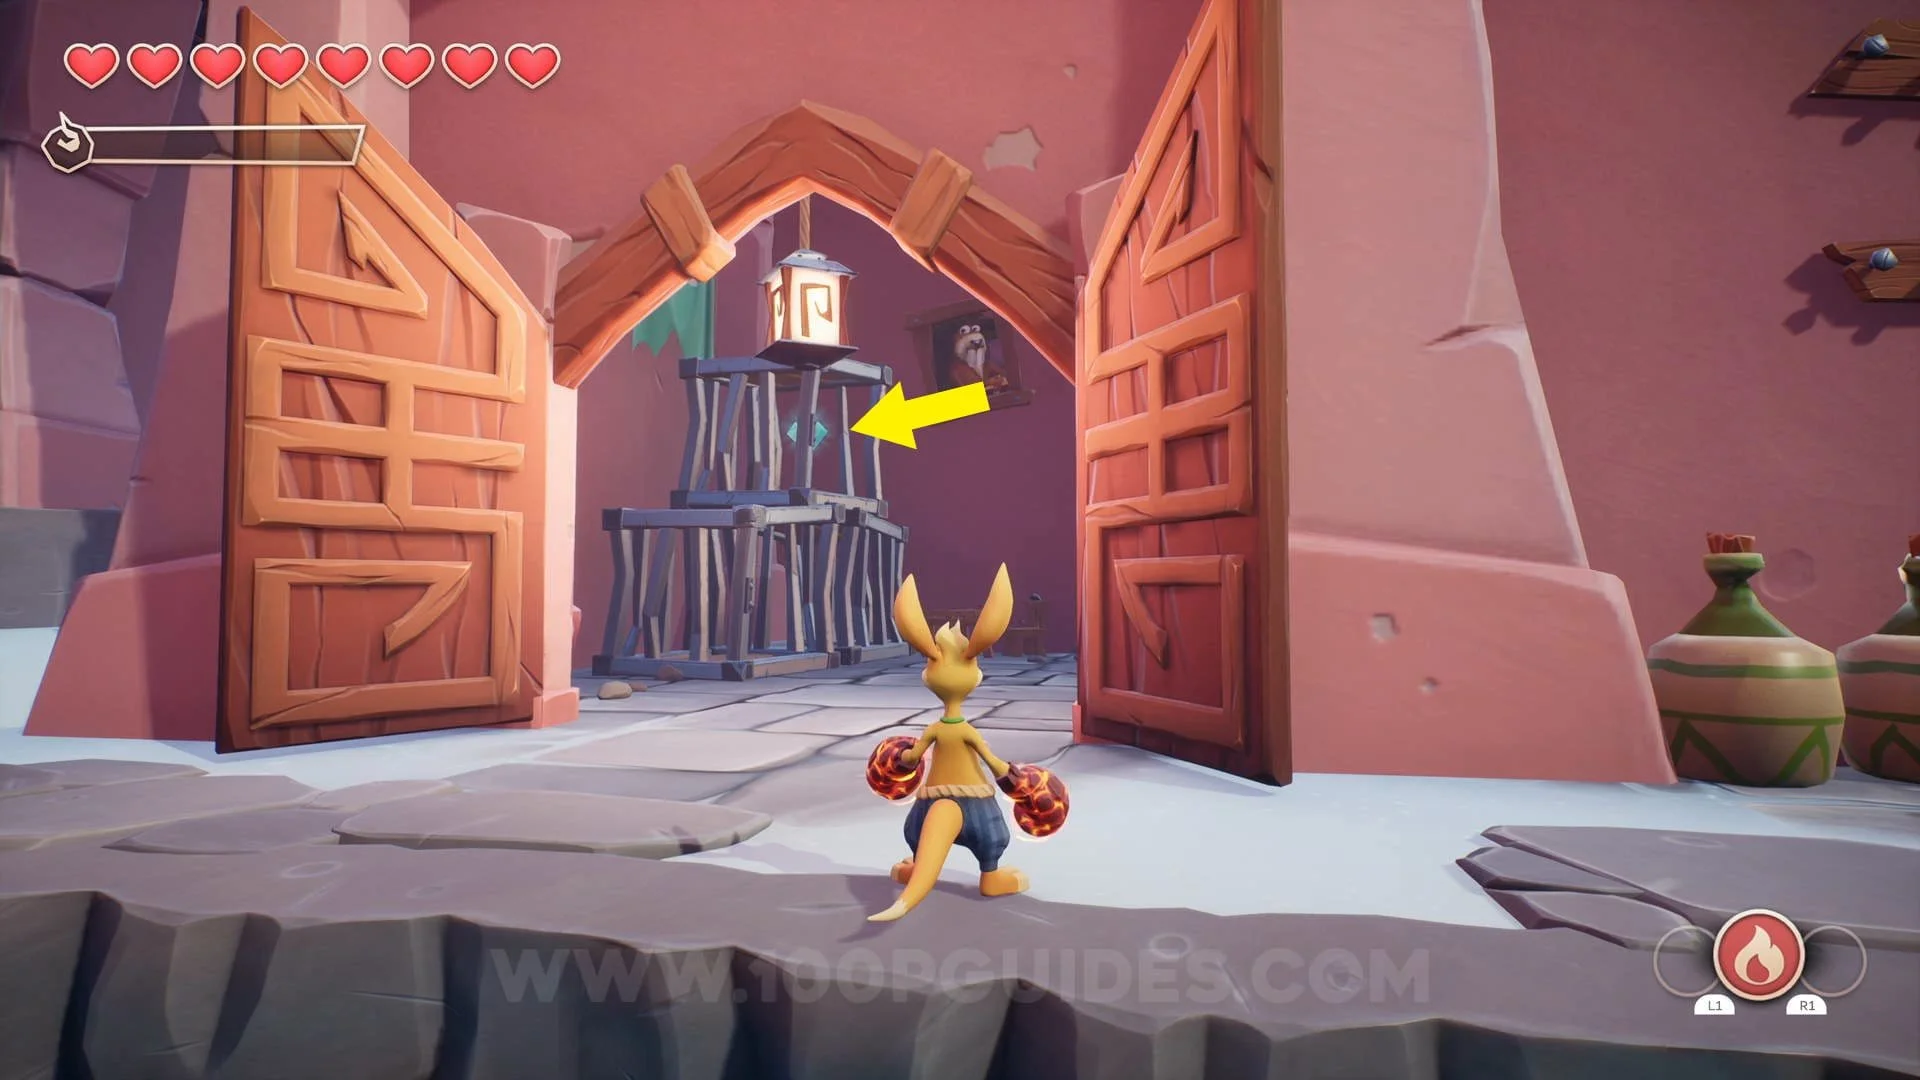
The Frozen Mountains Collectibles
Chest #1: First enter the room to the left (starting from the travel point) and pick up the fire
power-up. Now drop off one of the sides just before crossing the main bridge to the center to find
the frozen chest.


Scroll #1: To the right of The Hot Springs level entrance.
Crystal #1: To the left of The Hot Springs level entrance.
Chest #2: Drop down to the platforms to the left of The Hot Springs level entrance, then stick to the right
and use the rail to get down to the chest (you will have to get the fire power-up close to the entrance
of The Icy Slope level.


Rune #1: Just before the "Eternal Well Challenge Selector".
Chest #3: In the area past the "Eternal Well Challenge Selector" enter the shop (building on the left)
and climb the wooden platforms to find the frozen chest (you can find a fire power-up in the building
to the left of the shop).


Rune #2: In the area past the "Eternal Well Challenge Selector", found on one of the platforms
in the water.
Crystal #2: Found in the water right under the rune.
Crystal #3: To the right of the previous collectible, on a market stand.
Crystal #4: In the area past the "Eternal Well Challenge Selector", in a cage in the right
side building.

Scroll #2: In the same building as the previous collectible.


Rune #3: Above the water to the right in The Icy Slopes level entrance area.
Crystal #5: Same area as the previous rune.
Scroll #3: To the right of the boss level entrance.
Crystal #6: Behind the gong to the left of the boss level entrance.


Crystal #7: In the water on the last water covered platform to the left as you head up the stairs towards the boss level.

Crystal #8: Head right at the entrance to the boss, then jump to the roof where you can find the crystal.


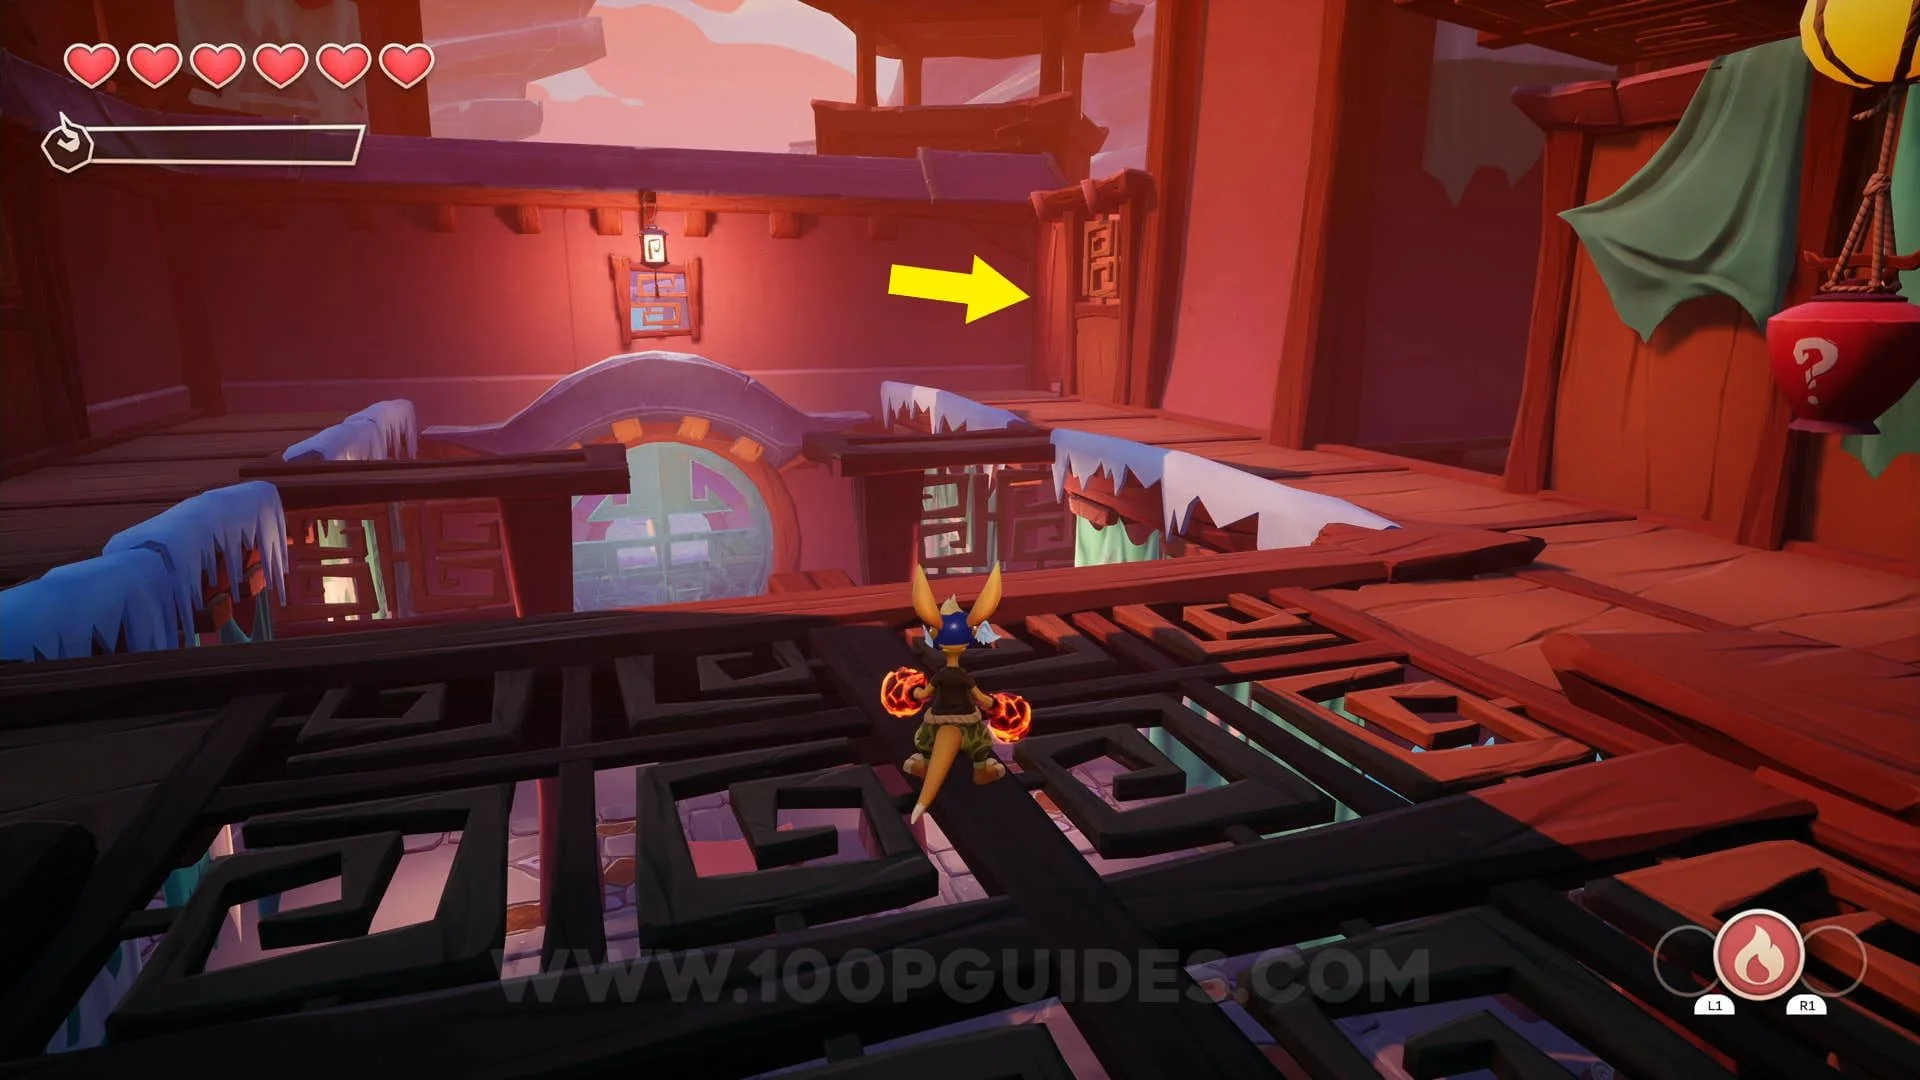
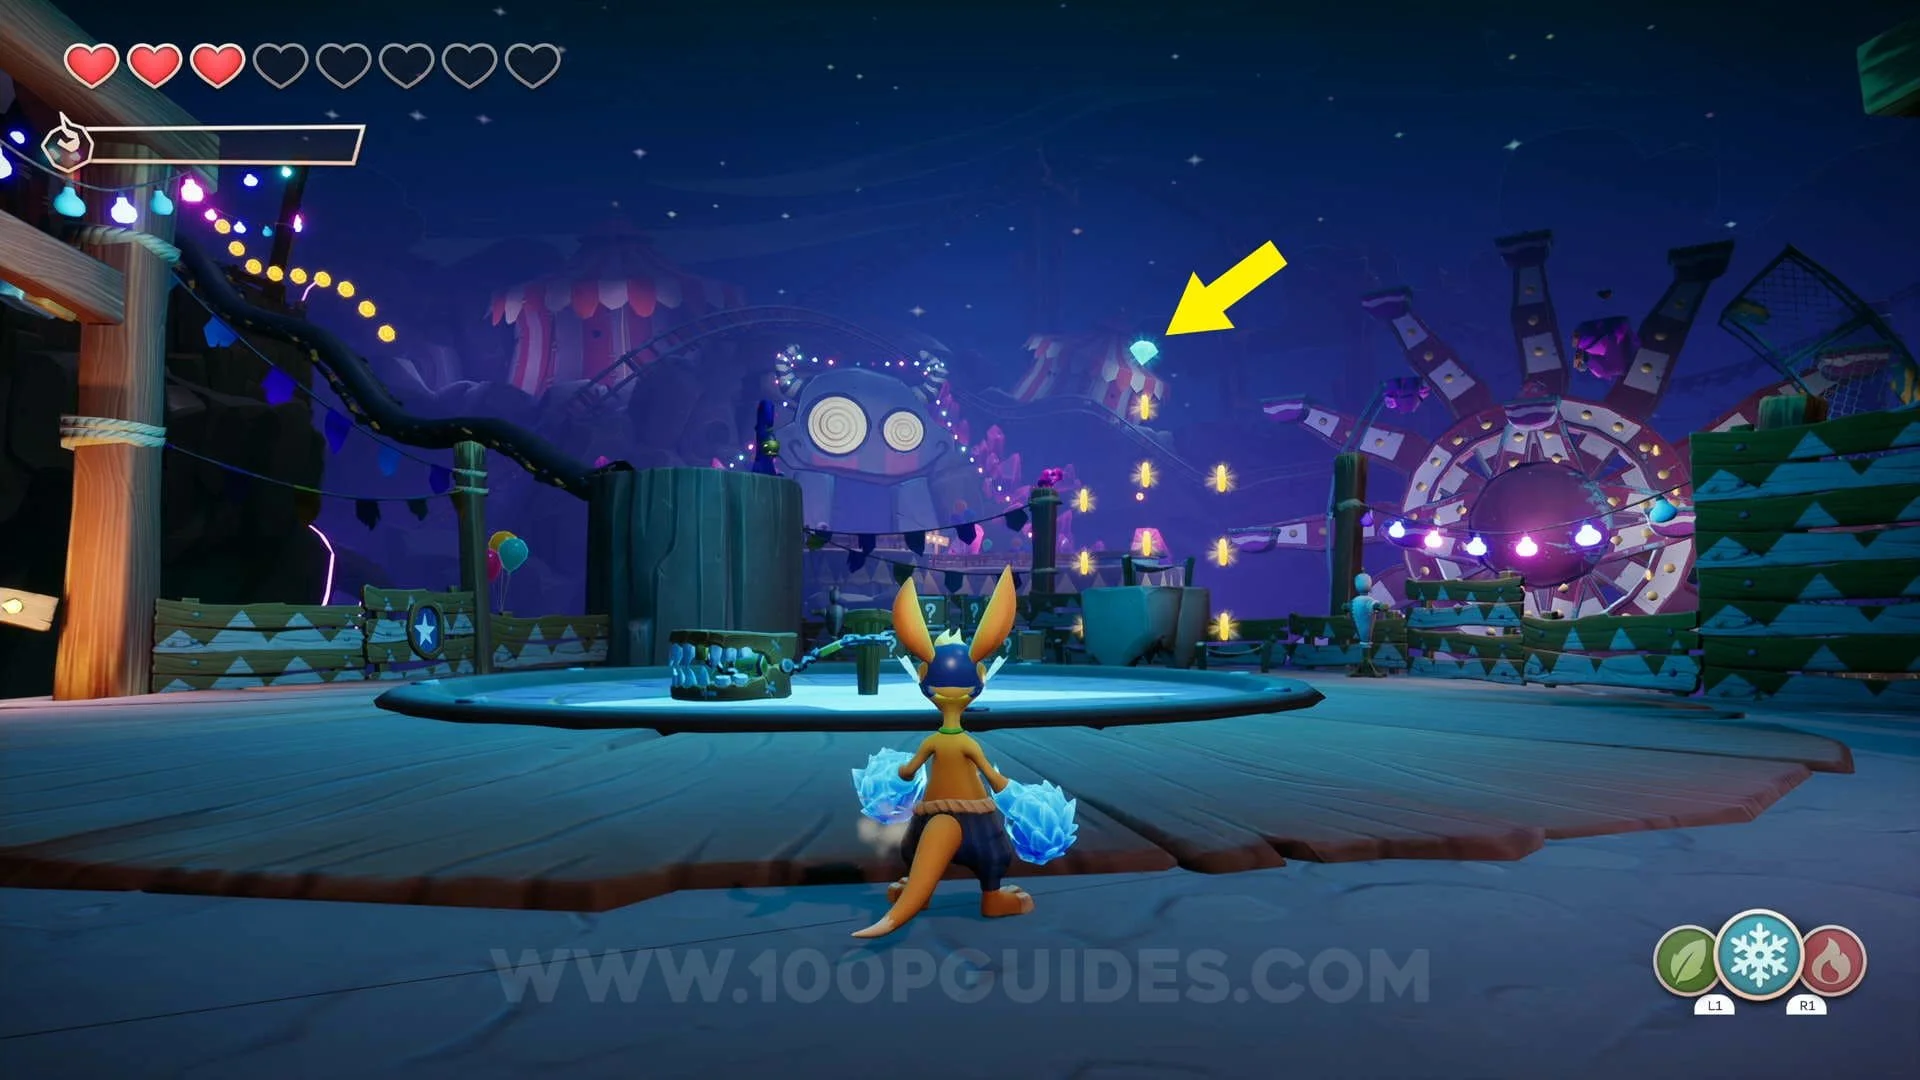
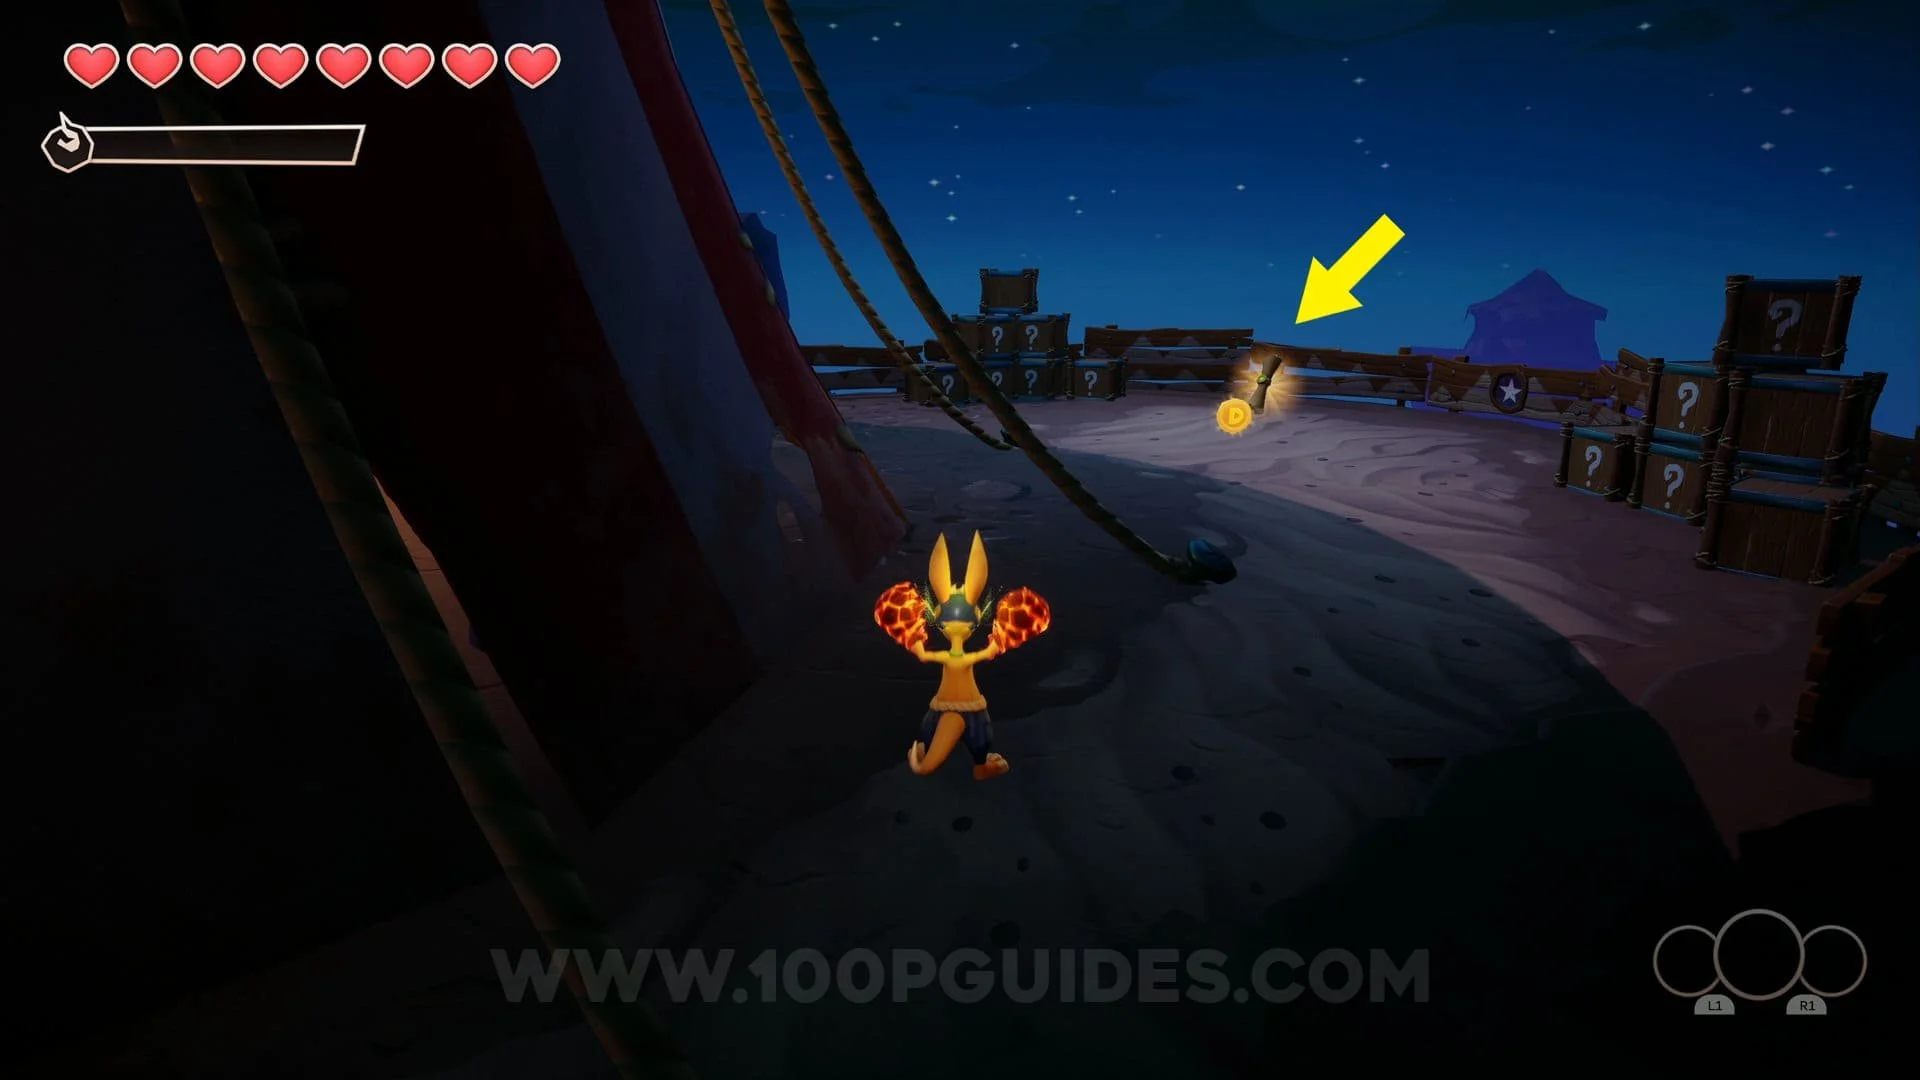
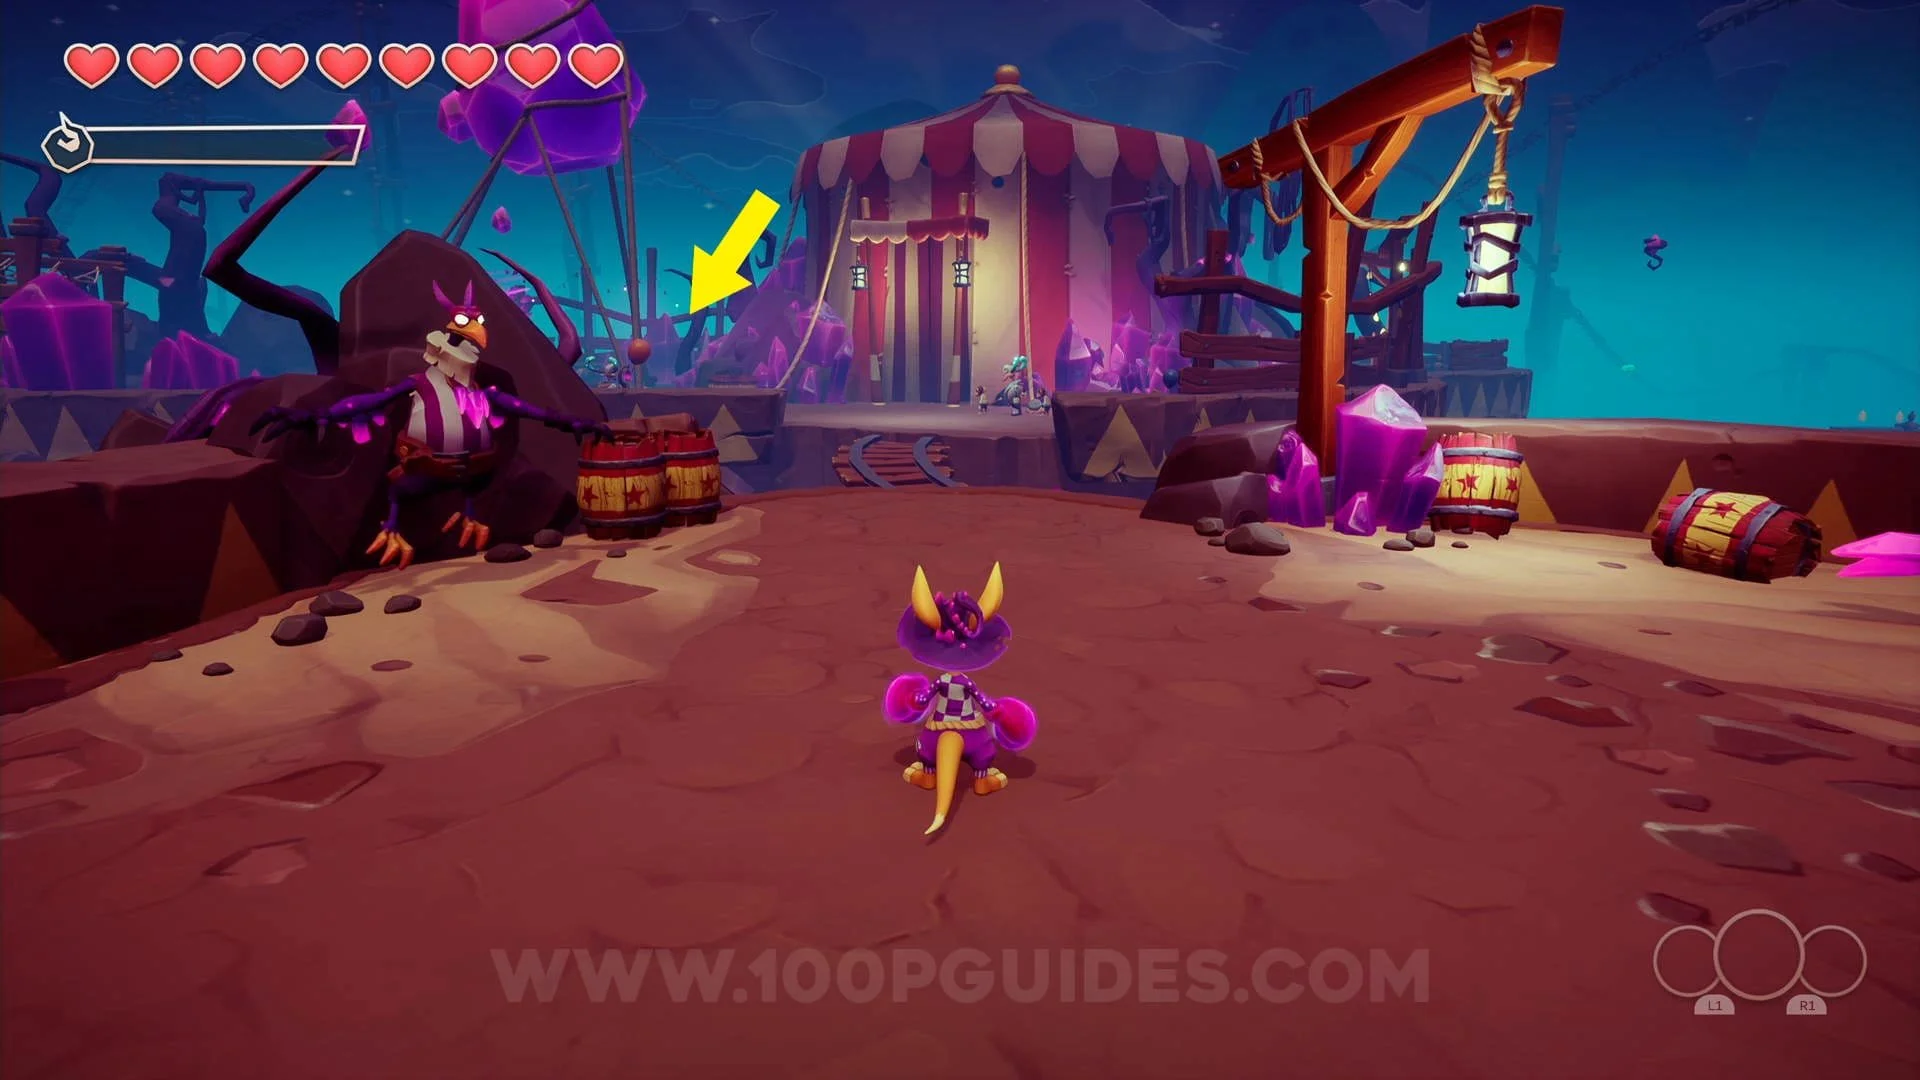
The Sparkly Funfair Collectibles
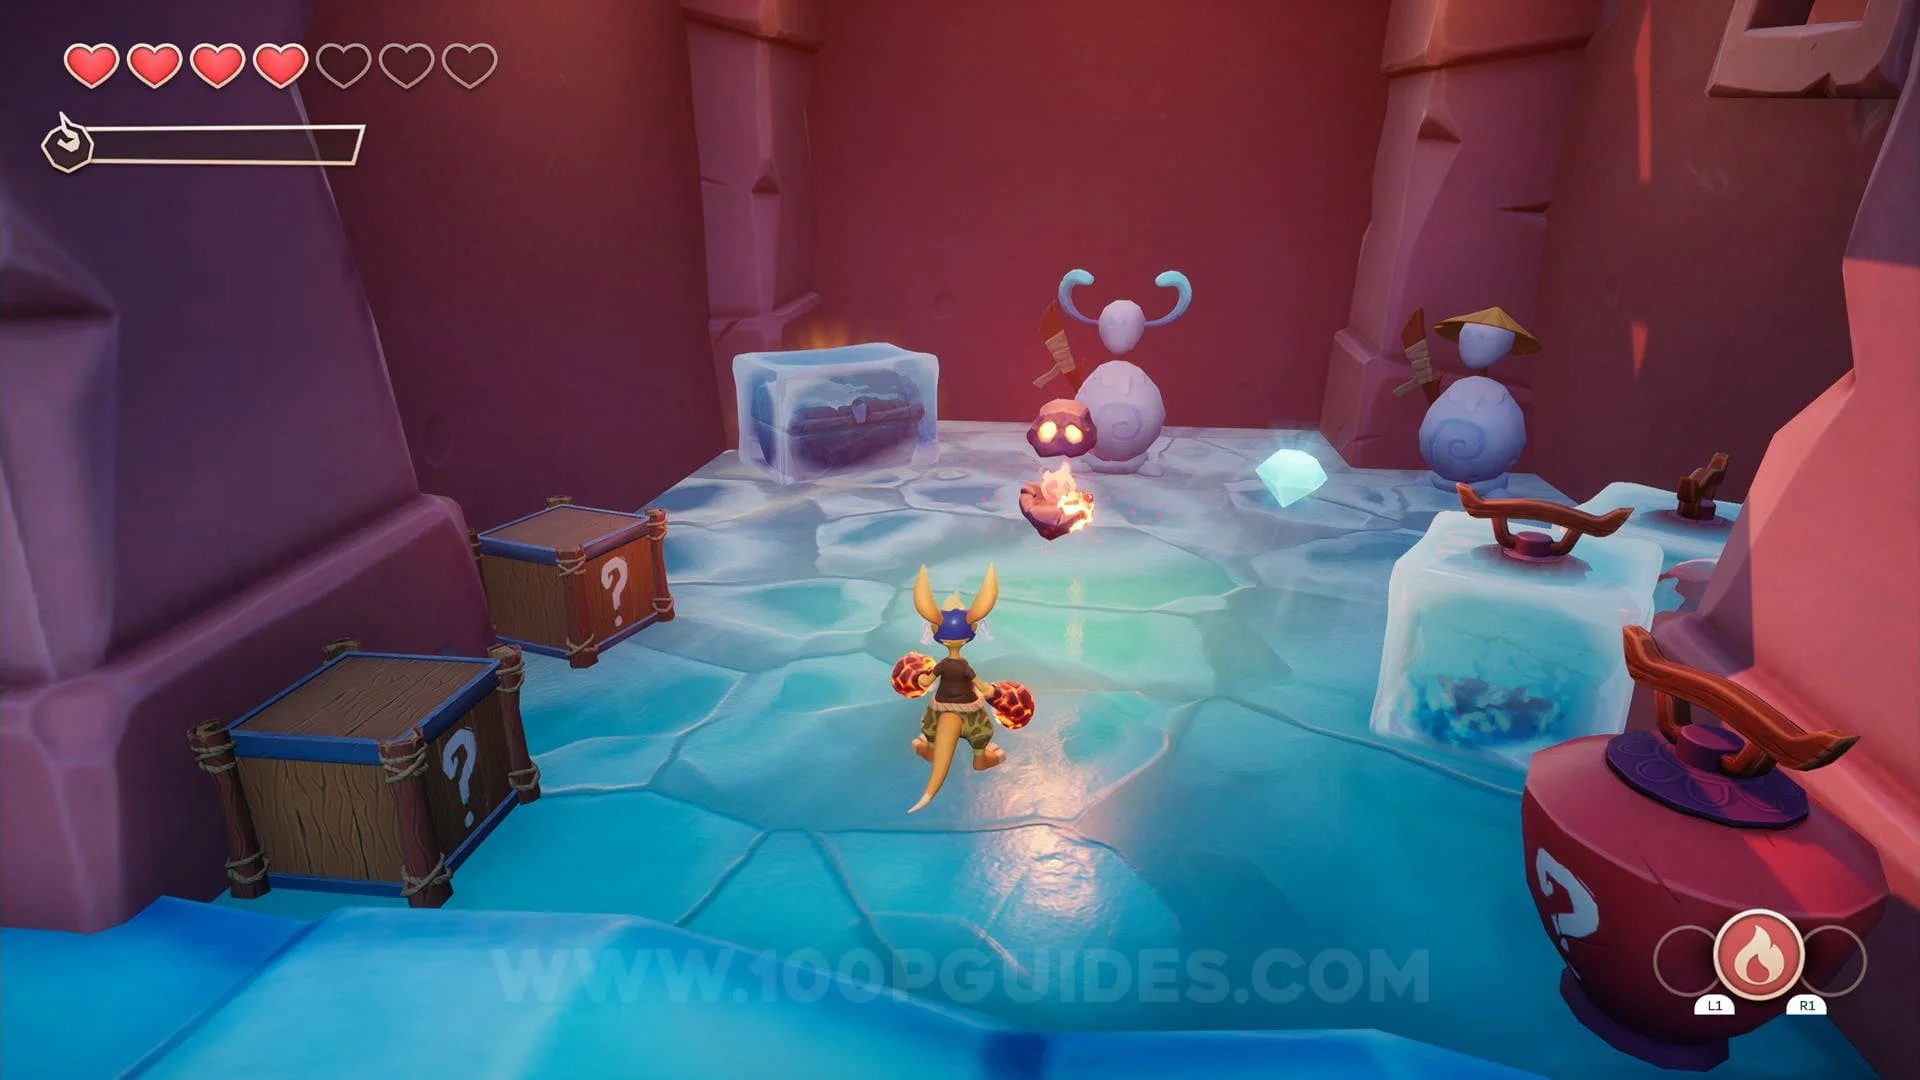
Chest #1: After moving and jumping up the 2nd box take a left to find the frozen chest at the end (a fire power-up
can be found on the rock next to the chest)


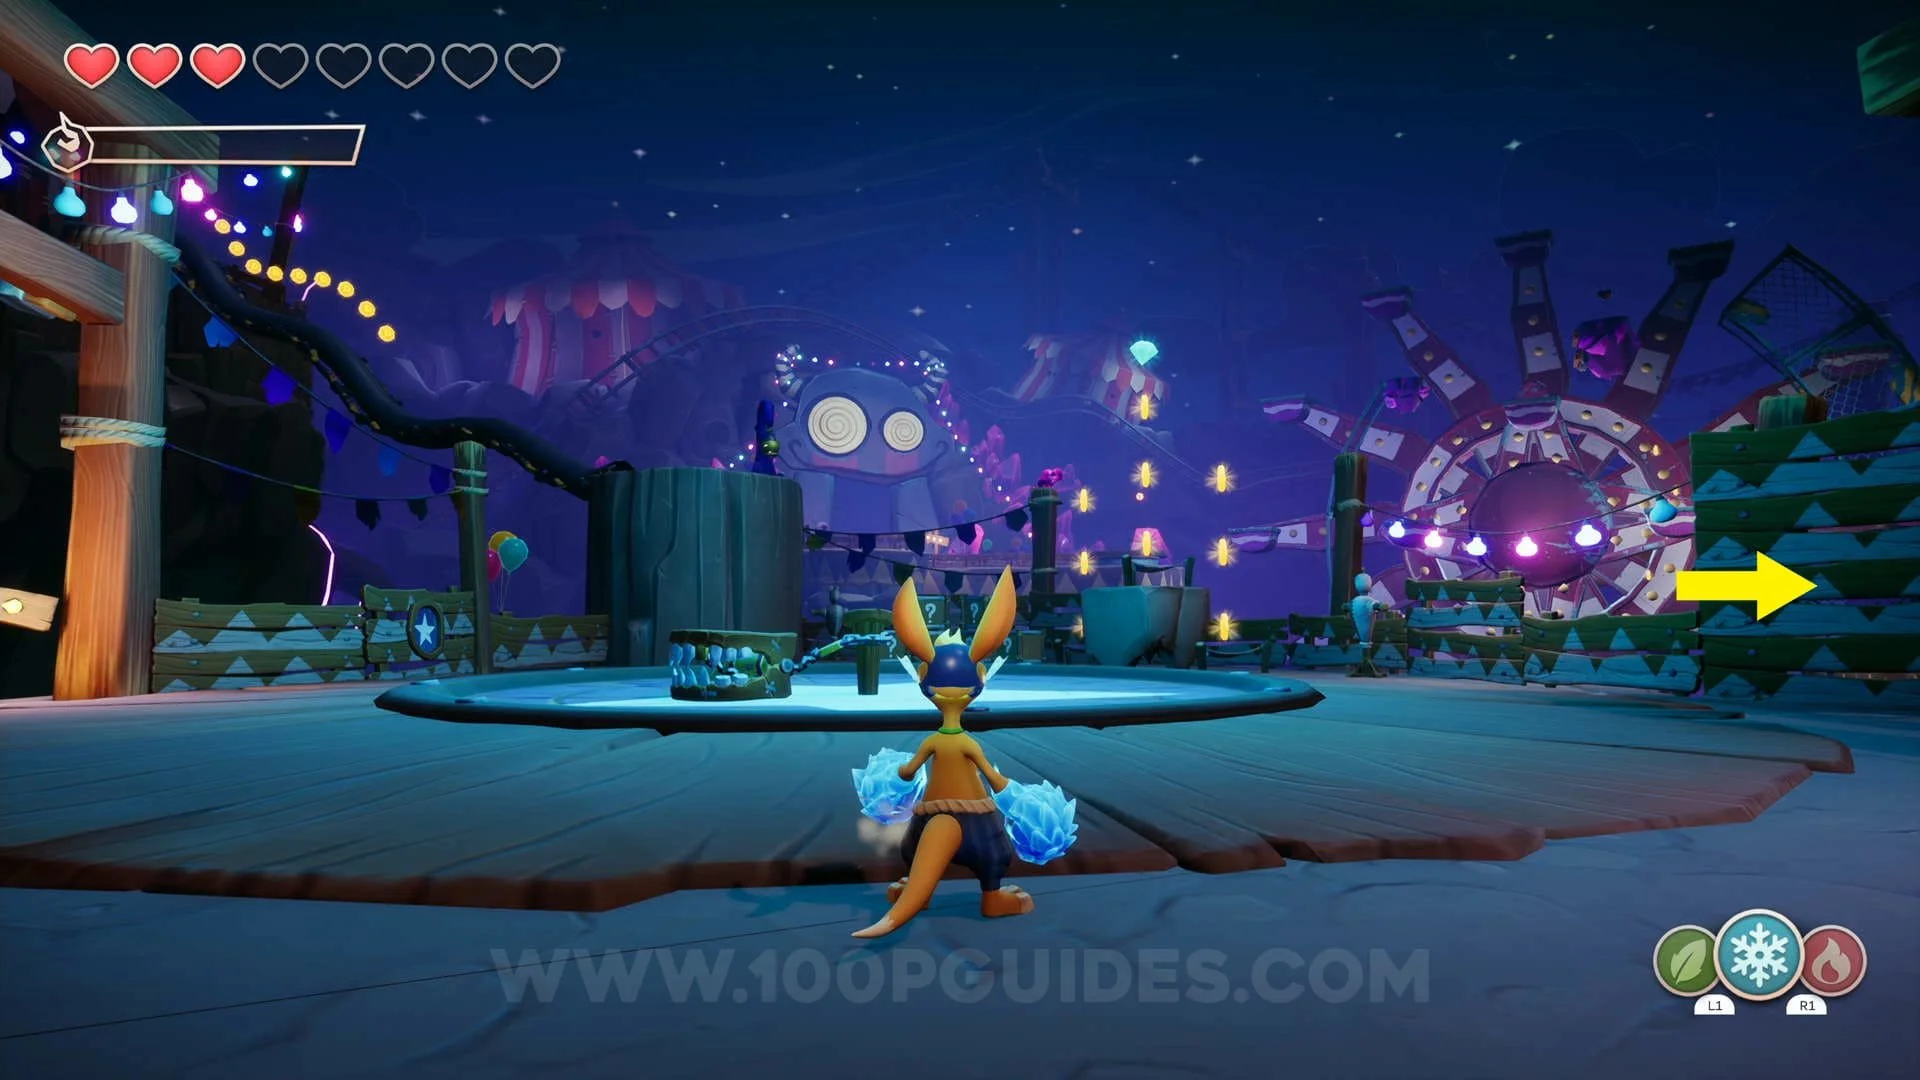
Crystal #1: To the right of the first enemy group you encounter in this level.
Chest #2: To the left of the first enemy group, on the platform opposite the crystal.
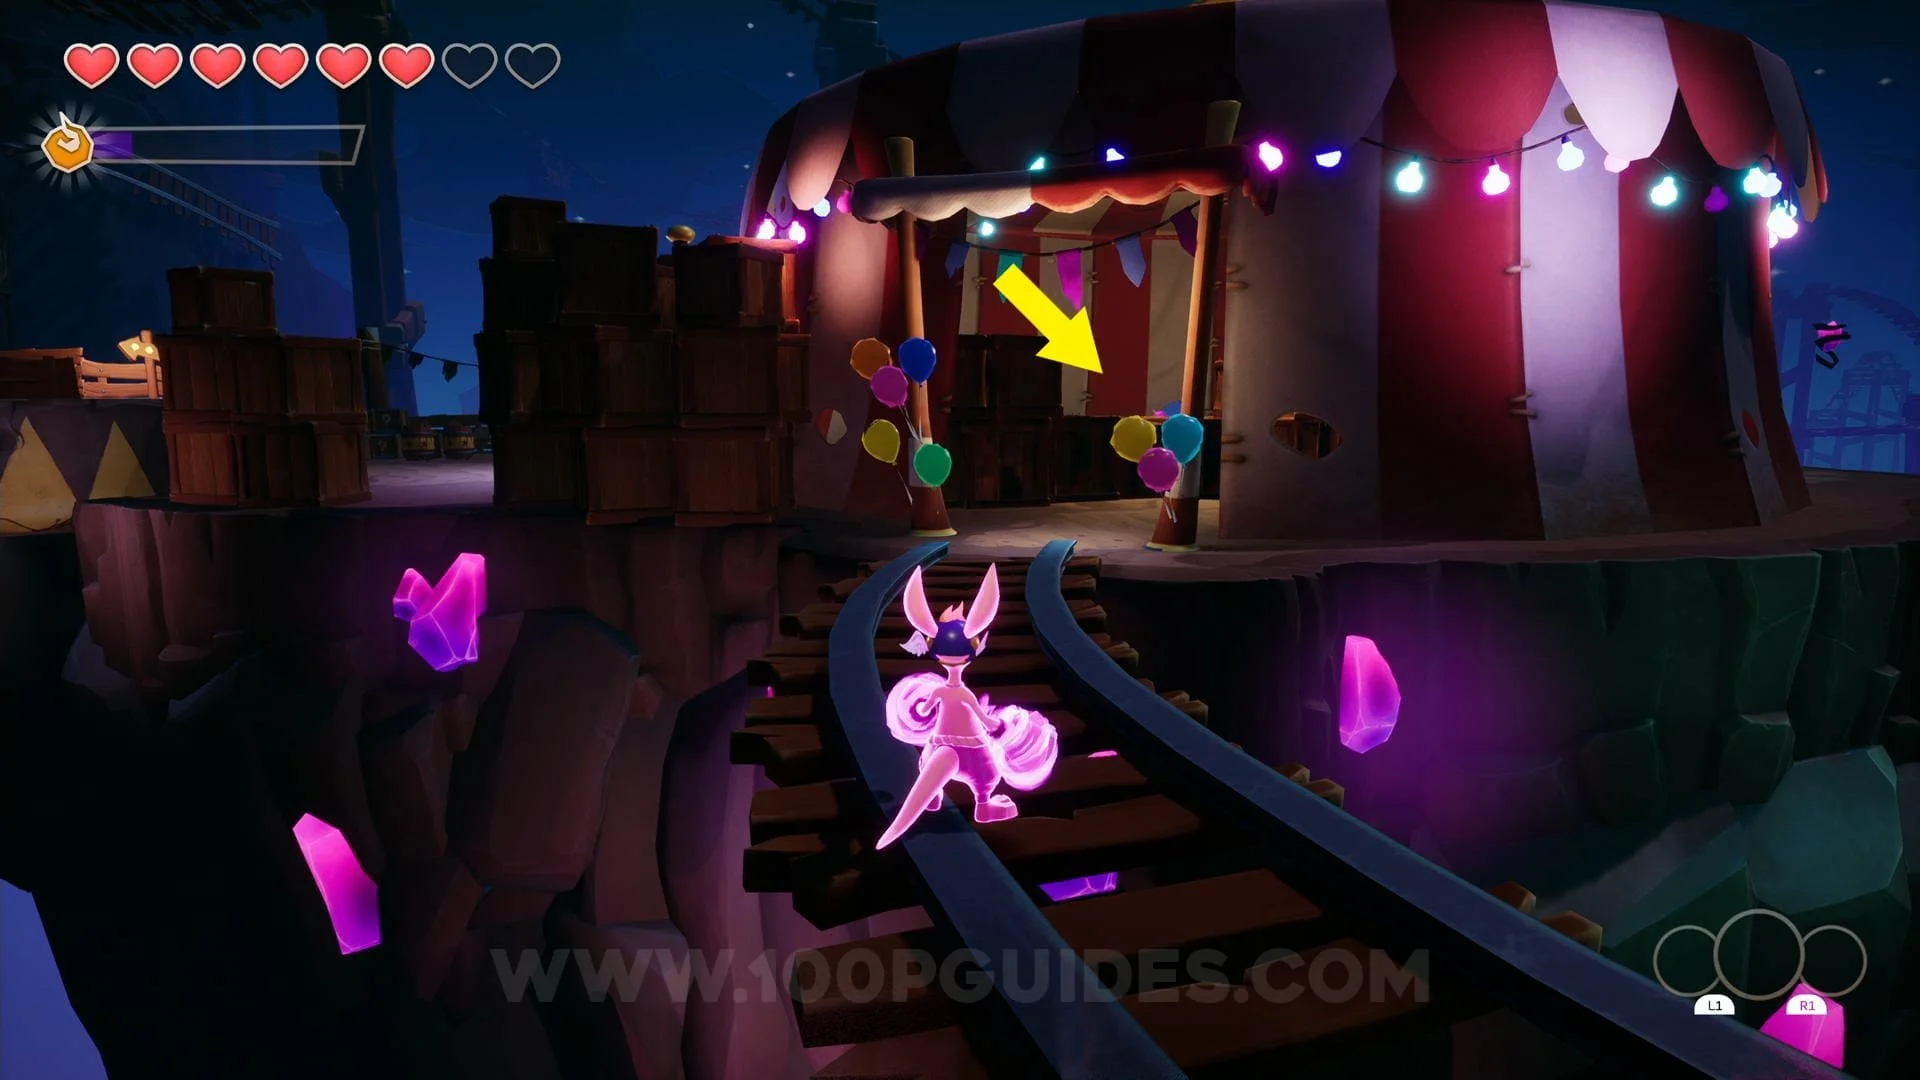
KAO Letter (K): At the entrance of the tent, head right and use the grapple points to get to the letter.

Crystal #2: Go right as soon as you leave the 1st tent where you fight the bird enemy, then climb the boxes to
find the crystal at the top.


Chest #3: After going through the first tent and exiting to the big open area with multiple paths, head to your left,
then move a box to climb some planks of wood. After the climb, turn around 180º and jump across some platforms to
get to the chest.


KAO Letter (A): Take the same path as you took to get the previous chest, this time continue to the end to find the
letter in a cave above the waterfall.


Crystal #3: Once in the big open area after the first tent, head straight and find the crystal on top of a box
in the area with the teeth enemy, just use the trampoline to get it.

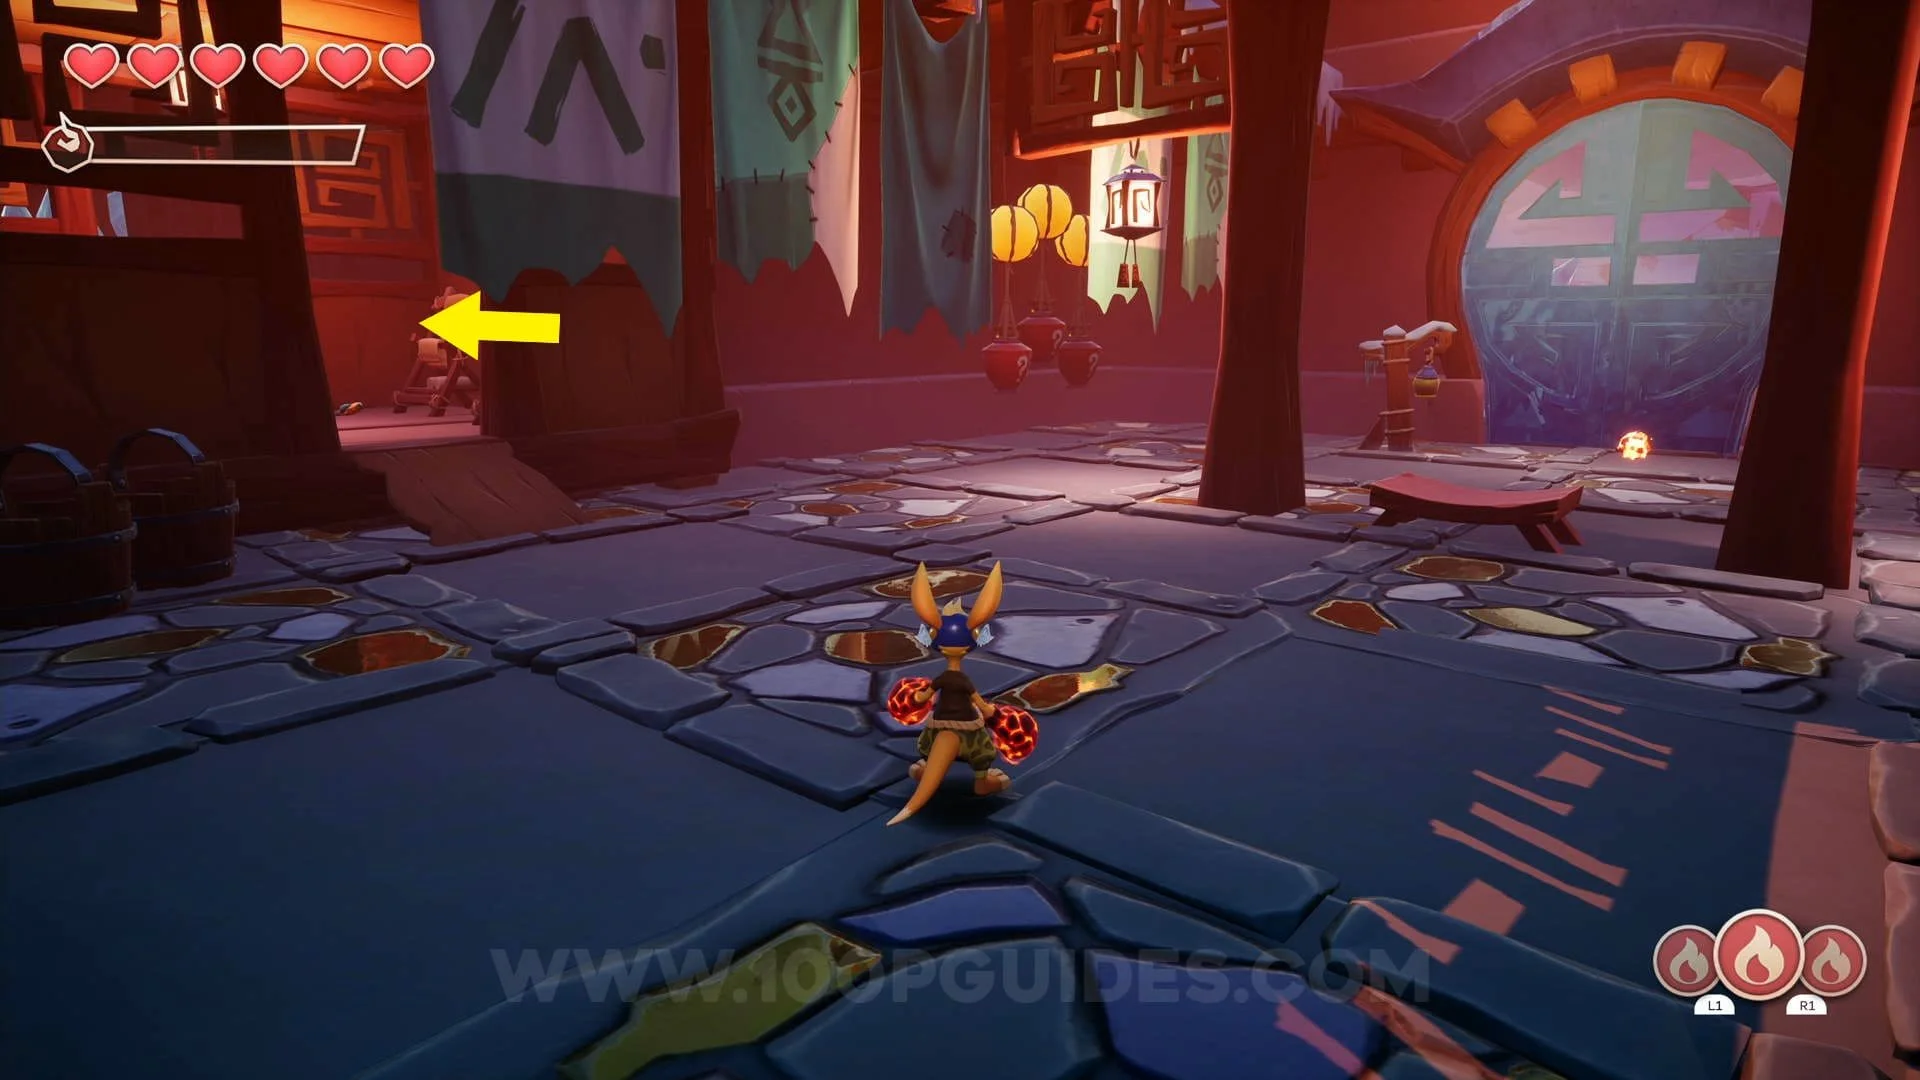
Chest #4: Take the left path from the teeth enemy, you will then find the chest to the left outside the tent.


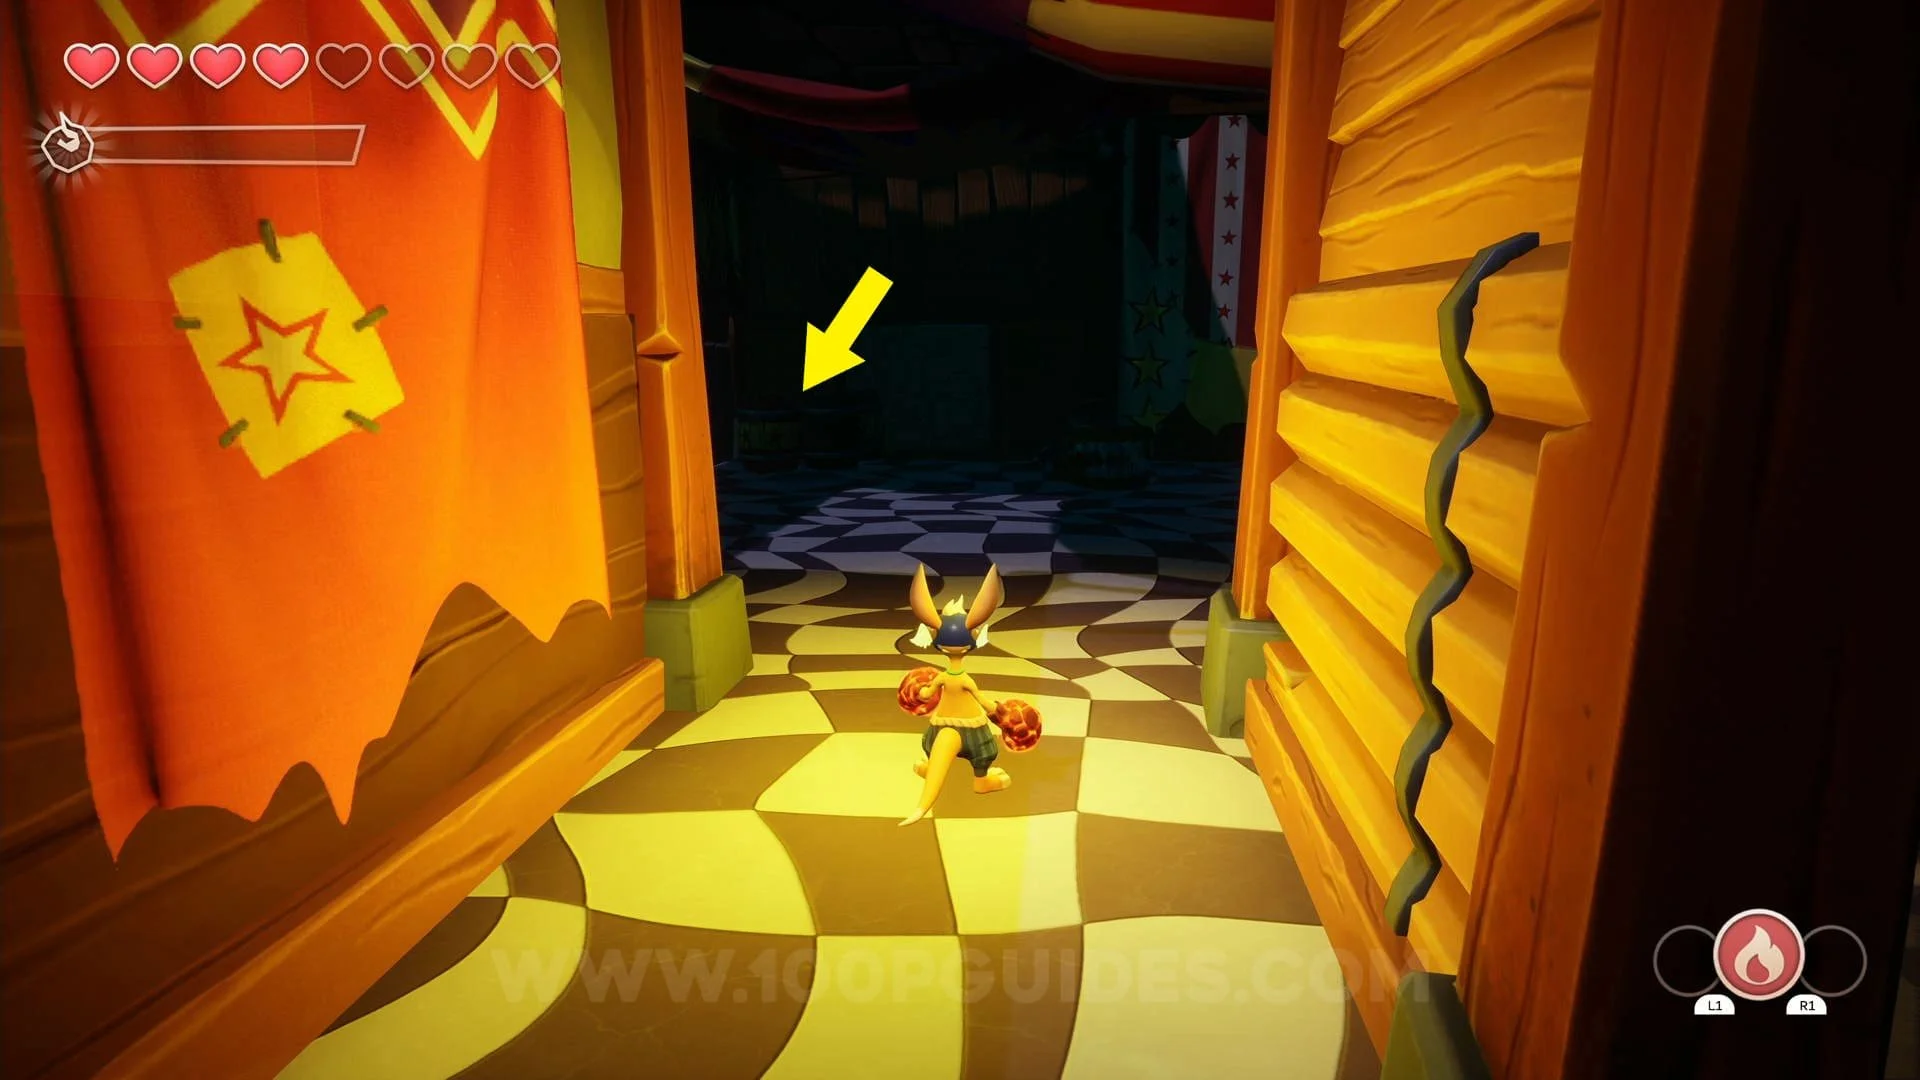
Scroll #1: Can be found the other side of the same tent as the previous chest.

Rune #1: Found on the main path after defeating the bird enemies in a tent when advancing up the path to the left
of the teeth enemy.
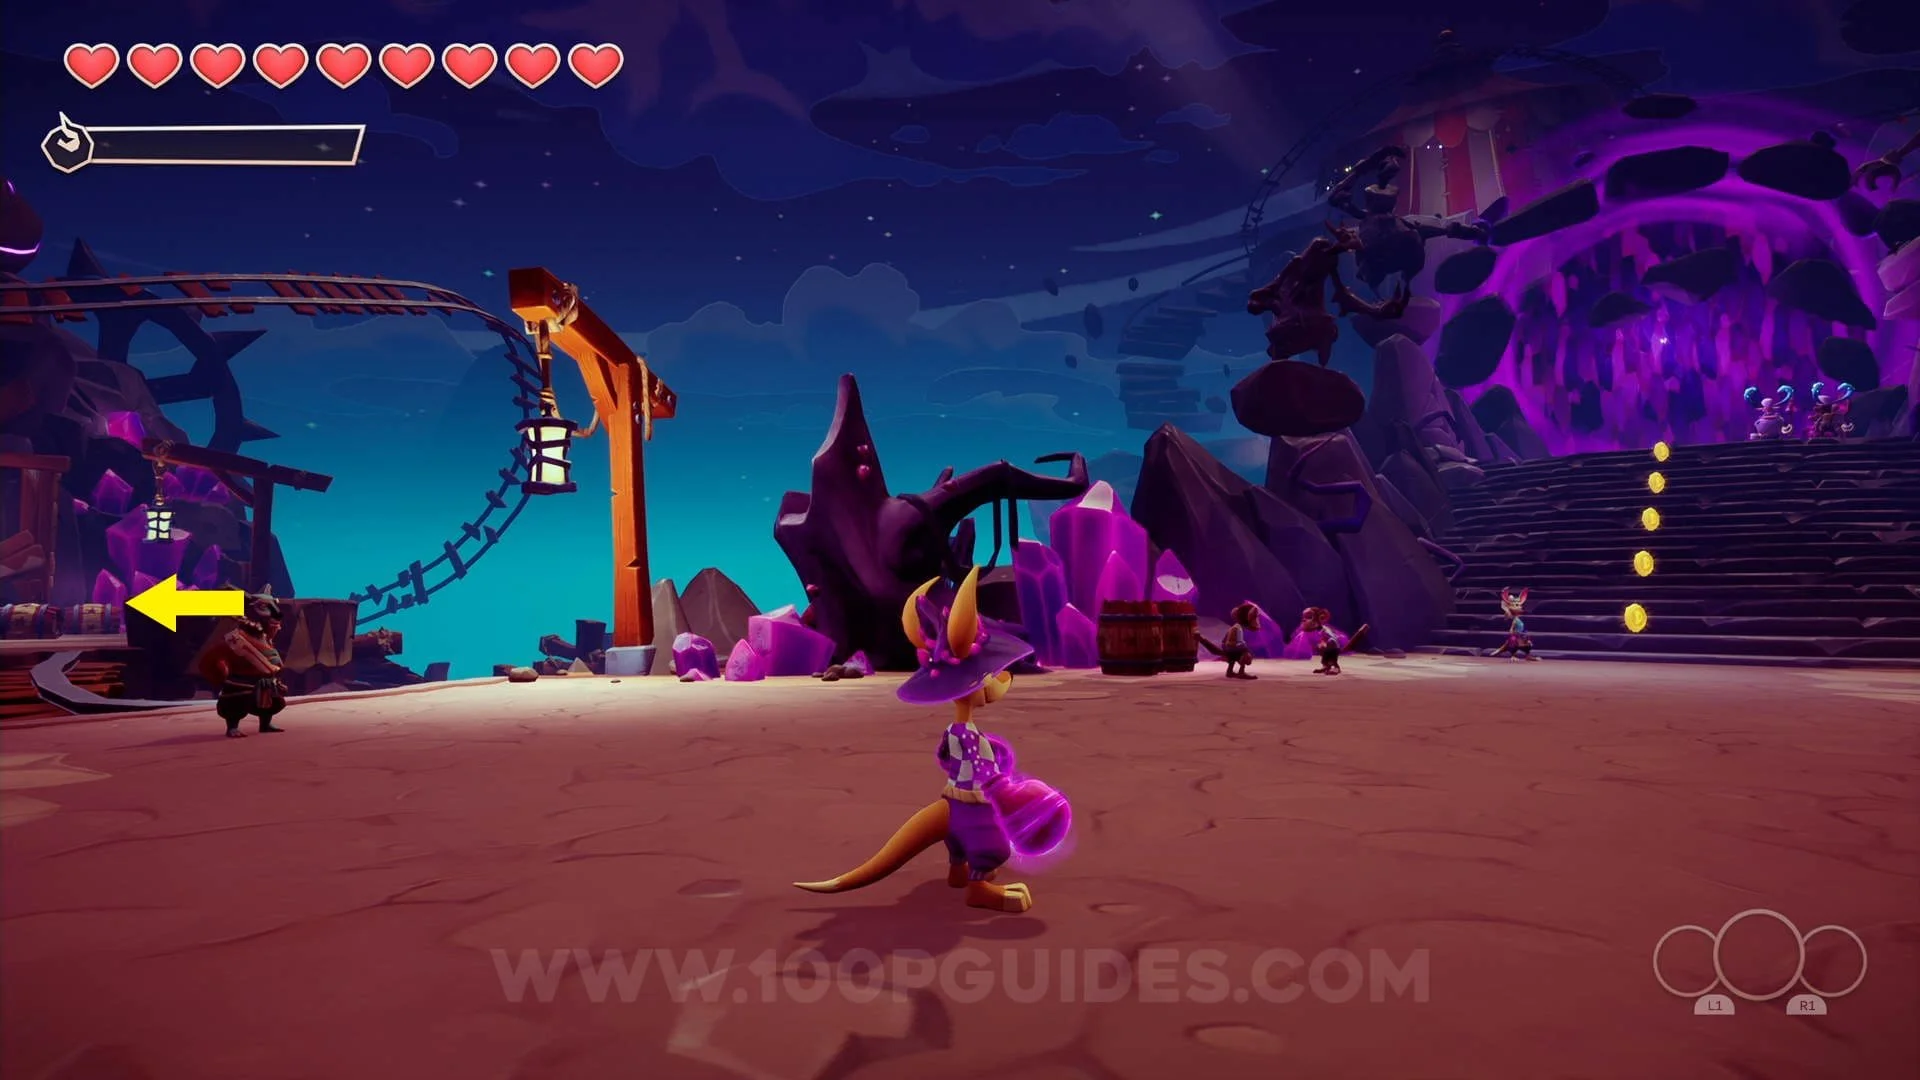
Chest #5: after hitting the switch at the end of the left path, return to middle platform (where the teeth enemy is) and
head down the right path. The chest will be to the right of the entrance of the first tent you come across.

Eternal Well #1 (Contains 5 Crystals & 1 Chest): Use the grapple points next to the previous chest to get to the lone
tent that has the well inside.


Crystal #4: Behind the tent with the eternal well.
Crystal #5 & Chest #6: Return to where you got chest #4 and enter the tent to find these 2 collectibles inside.

Crystal #6: Above the purple crystal found to your left as you leave the tent with the previous collectibles in
it, activate the crystal to land on the purple platform.
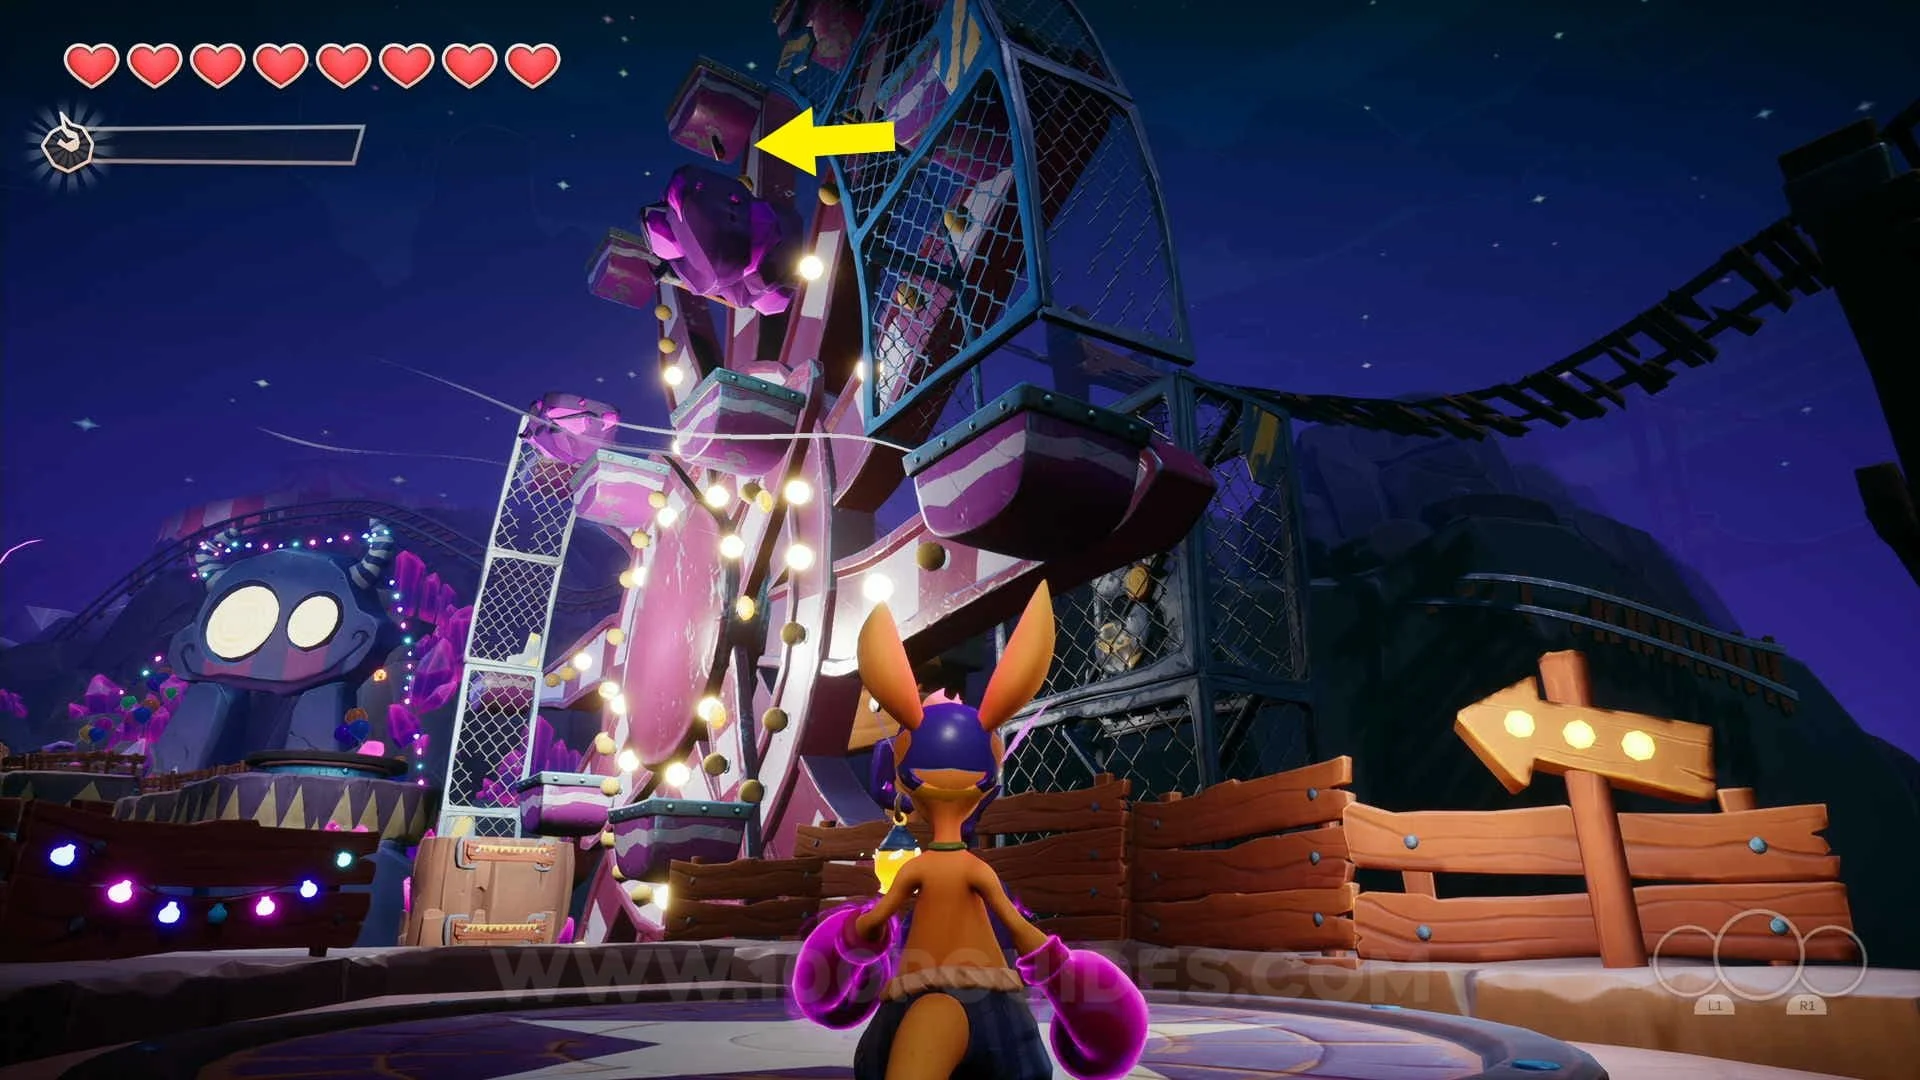
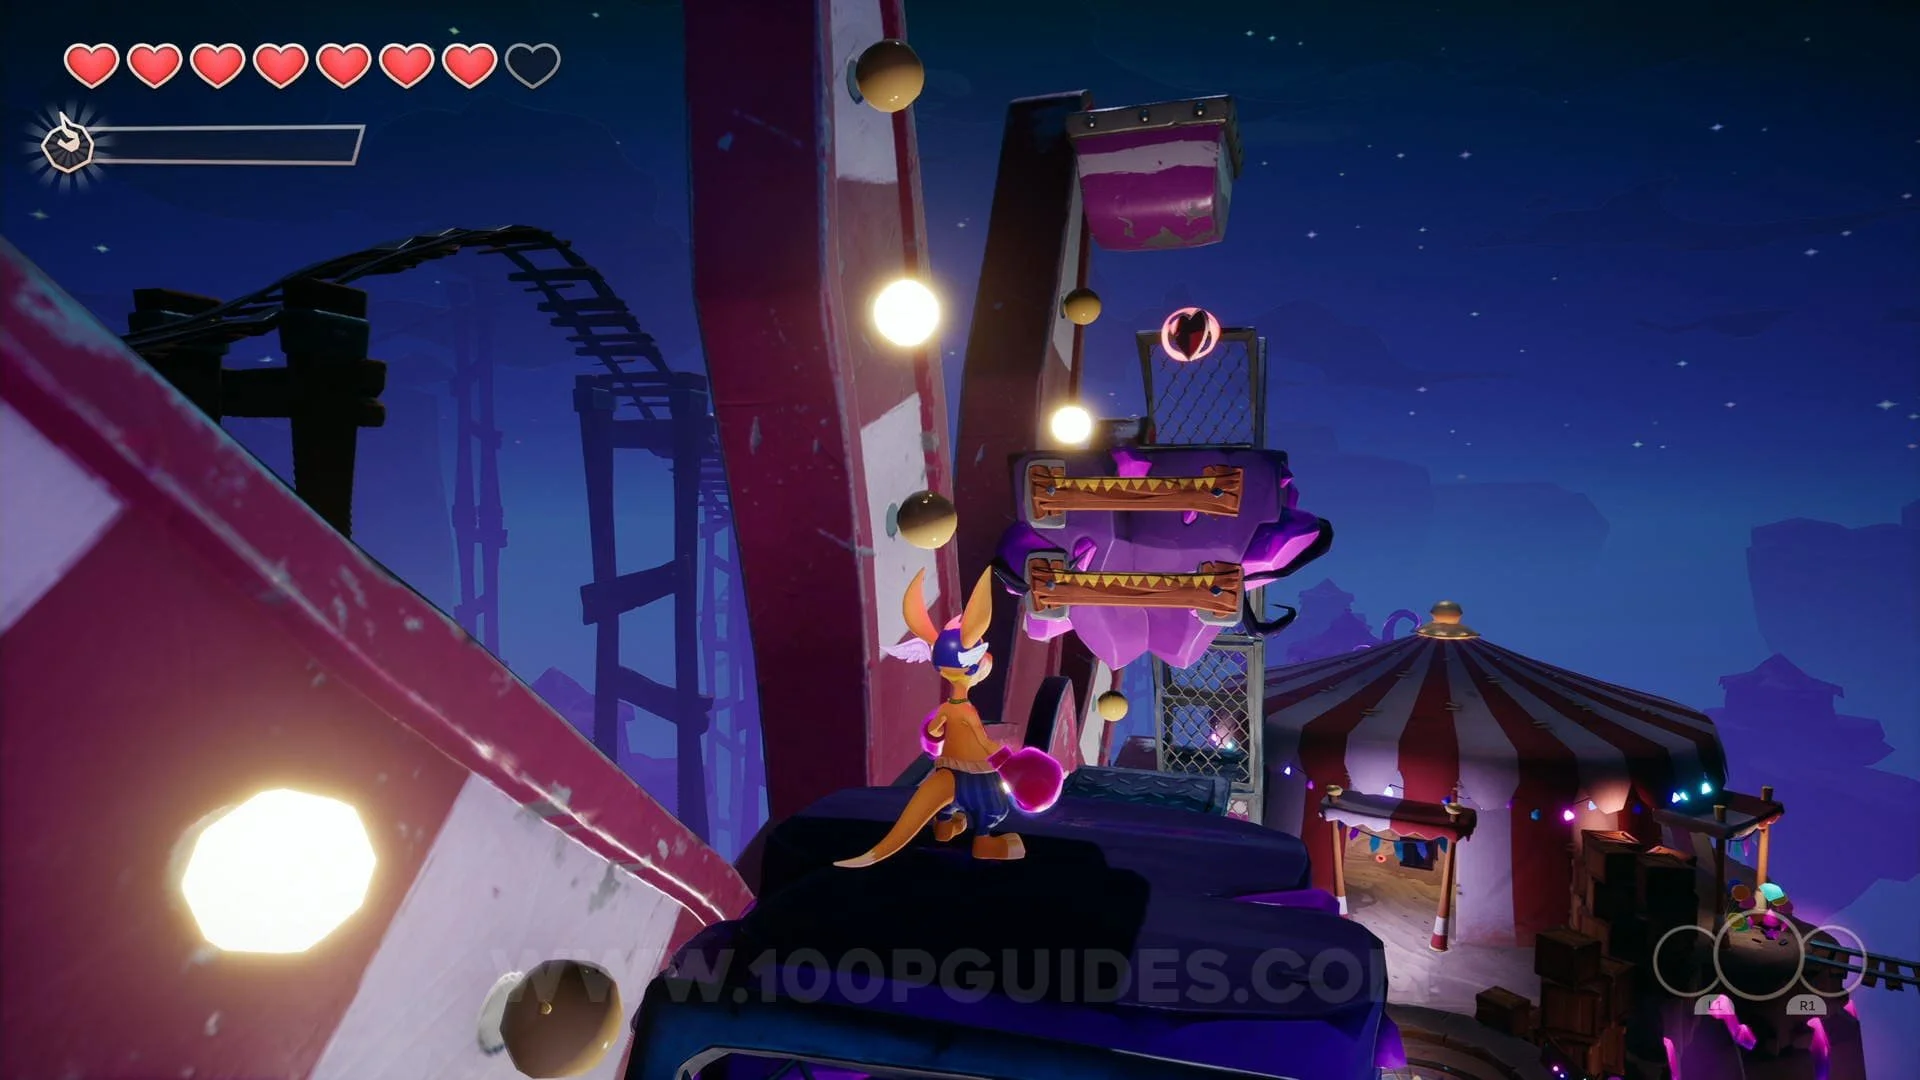
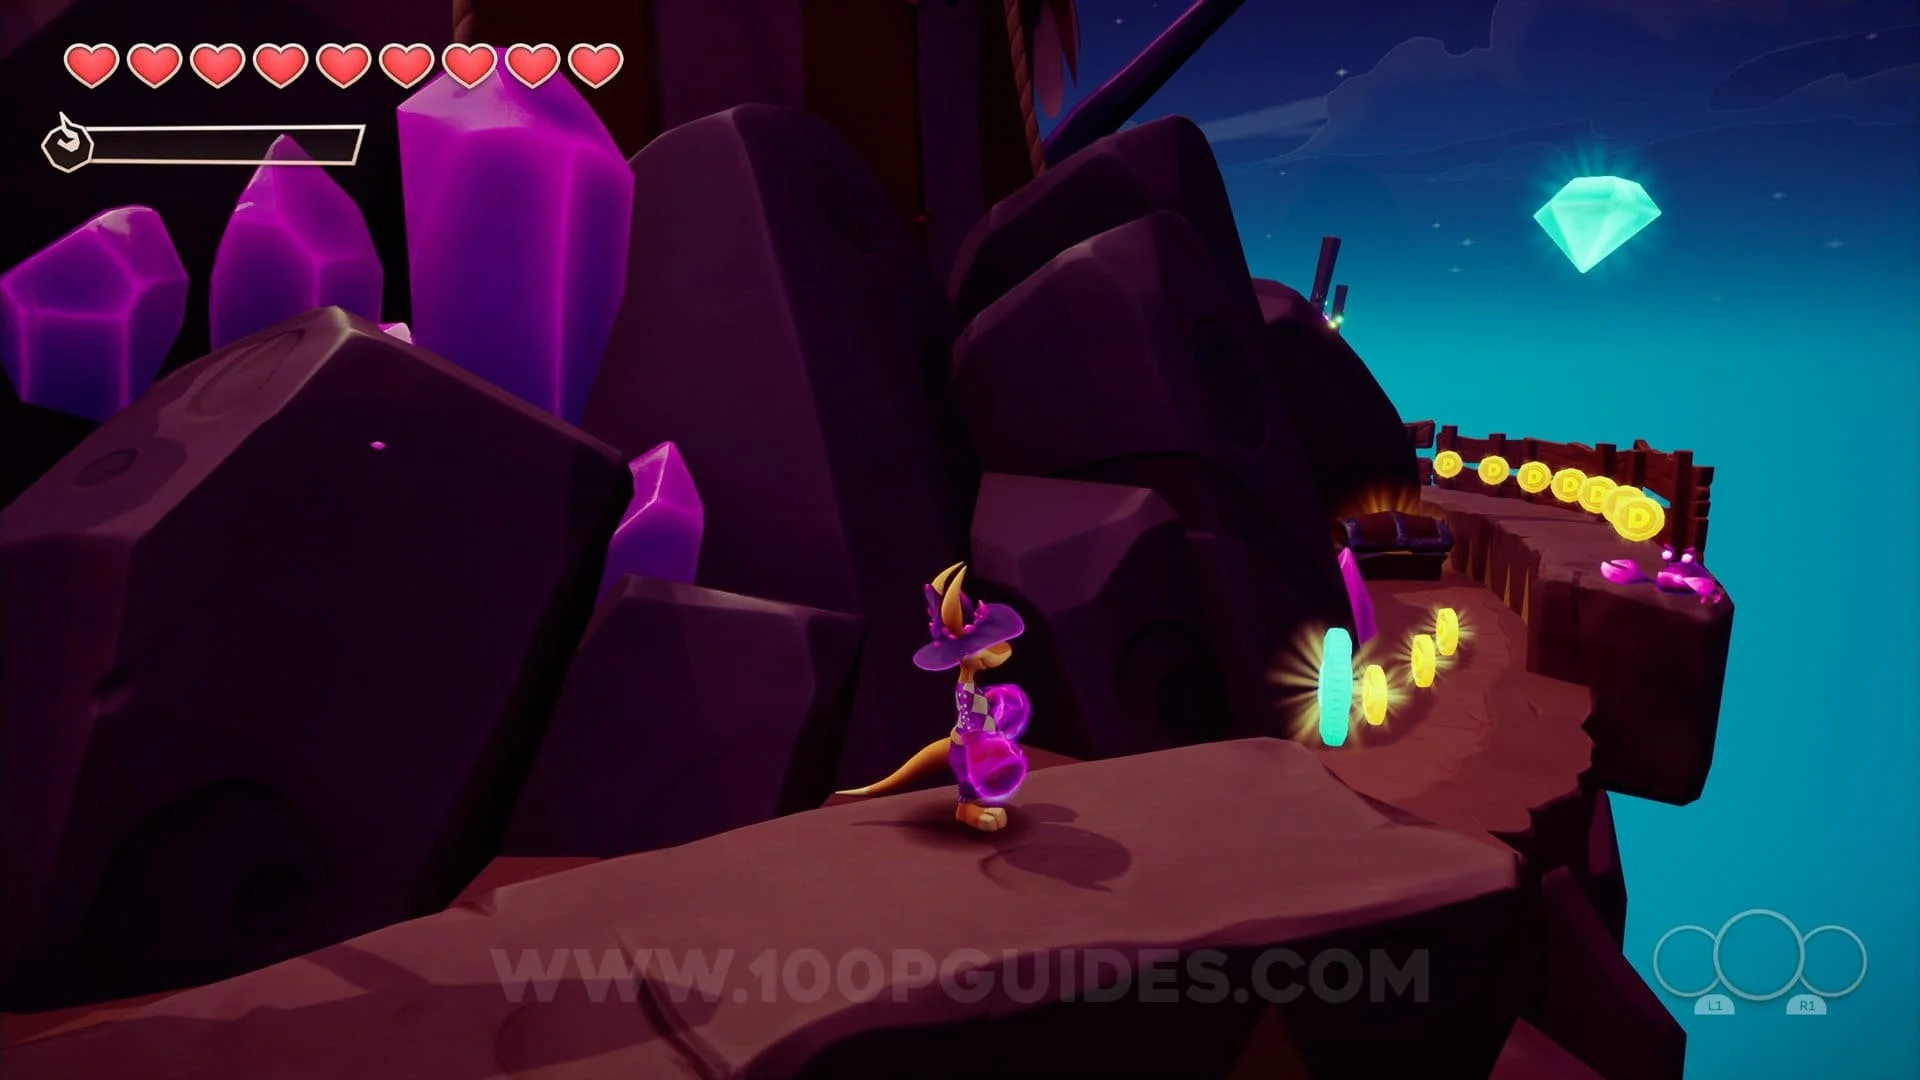
Heart Piece #1: Found close to the top of the ferris wheel.
Chest #7: Once you enter the main circus (after the ferris wheel), head straight once you get to the black
and white floor.


Crystal #7: Once you enter the main circus (the cave after the ferris wheel), head left as soon as you reach the
black and white floor, then head left again to find the crystal.


Crystal #8: Once you get to the long hall in the main circus, take the first left and find the crystal behind some
barrels in the far left corner.

Crystal #9, Chest #8-9 & Heart Piece #2: Continue down the main path and head down the path to the left with the
bear traps just before the next checkpoint. The 4 collectibles will be in the small room at the end.


Crystal #10: Head left just after the next checkpoint on the main path.
Eternal Well #2: Soon after the previous collectible you will see a fork in the path. Here take the left where the purple
crystal is, activate it to get to the room with the eternal well in it.


KAO Letter (O) & Crystal #11: After multiple spike traps in a hall on the main path, take the left path at the end to get to
a room where you can find the letter and a crystal.


Rune #2: On the main path after going up a lift.
Crystal #12: Found on some boxes where you play the Whac-A-Mole minigame.
Rune #3: Found at the end of the level.
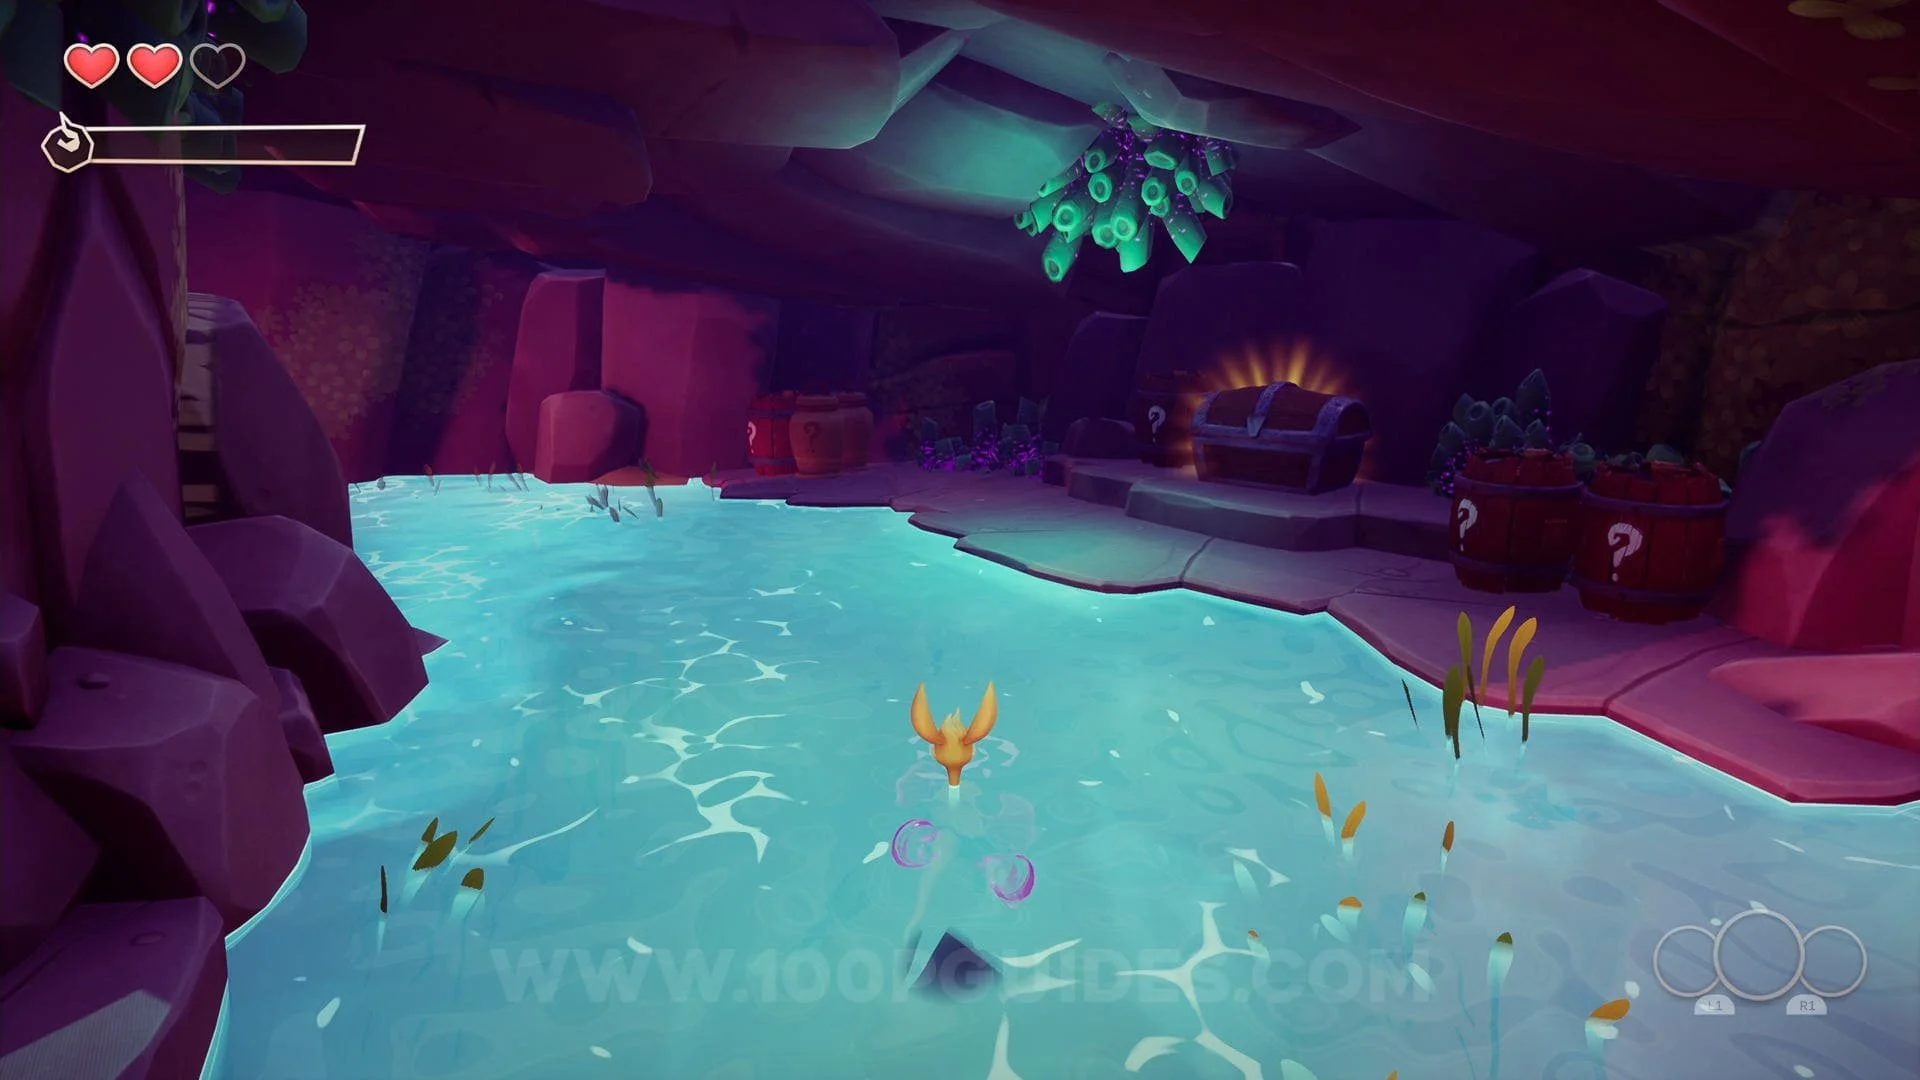
The Crystal Caverns Collectibles
Crystal #1: Take the right path at the locked gate, you will then find the crystal below you in plain sight.
Crystal #2-3: On the path to the right of the locked gate, take a left on the falling platforms to find
the 2 crystals.

Crystal #4: Soon after the previous collectibles you will be in a cave with a puzzle in front of you.
Take a left at the puzzle and jump around the platforms to find the crystal.


Chest #1: Behind the puzzle in the cave.
Crystal #5: From the previous chest, turn around and climb up the wall, then turn around again to find the crystal.


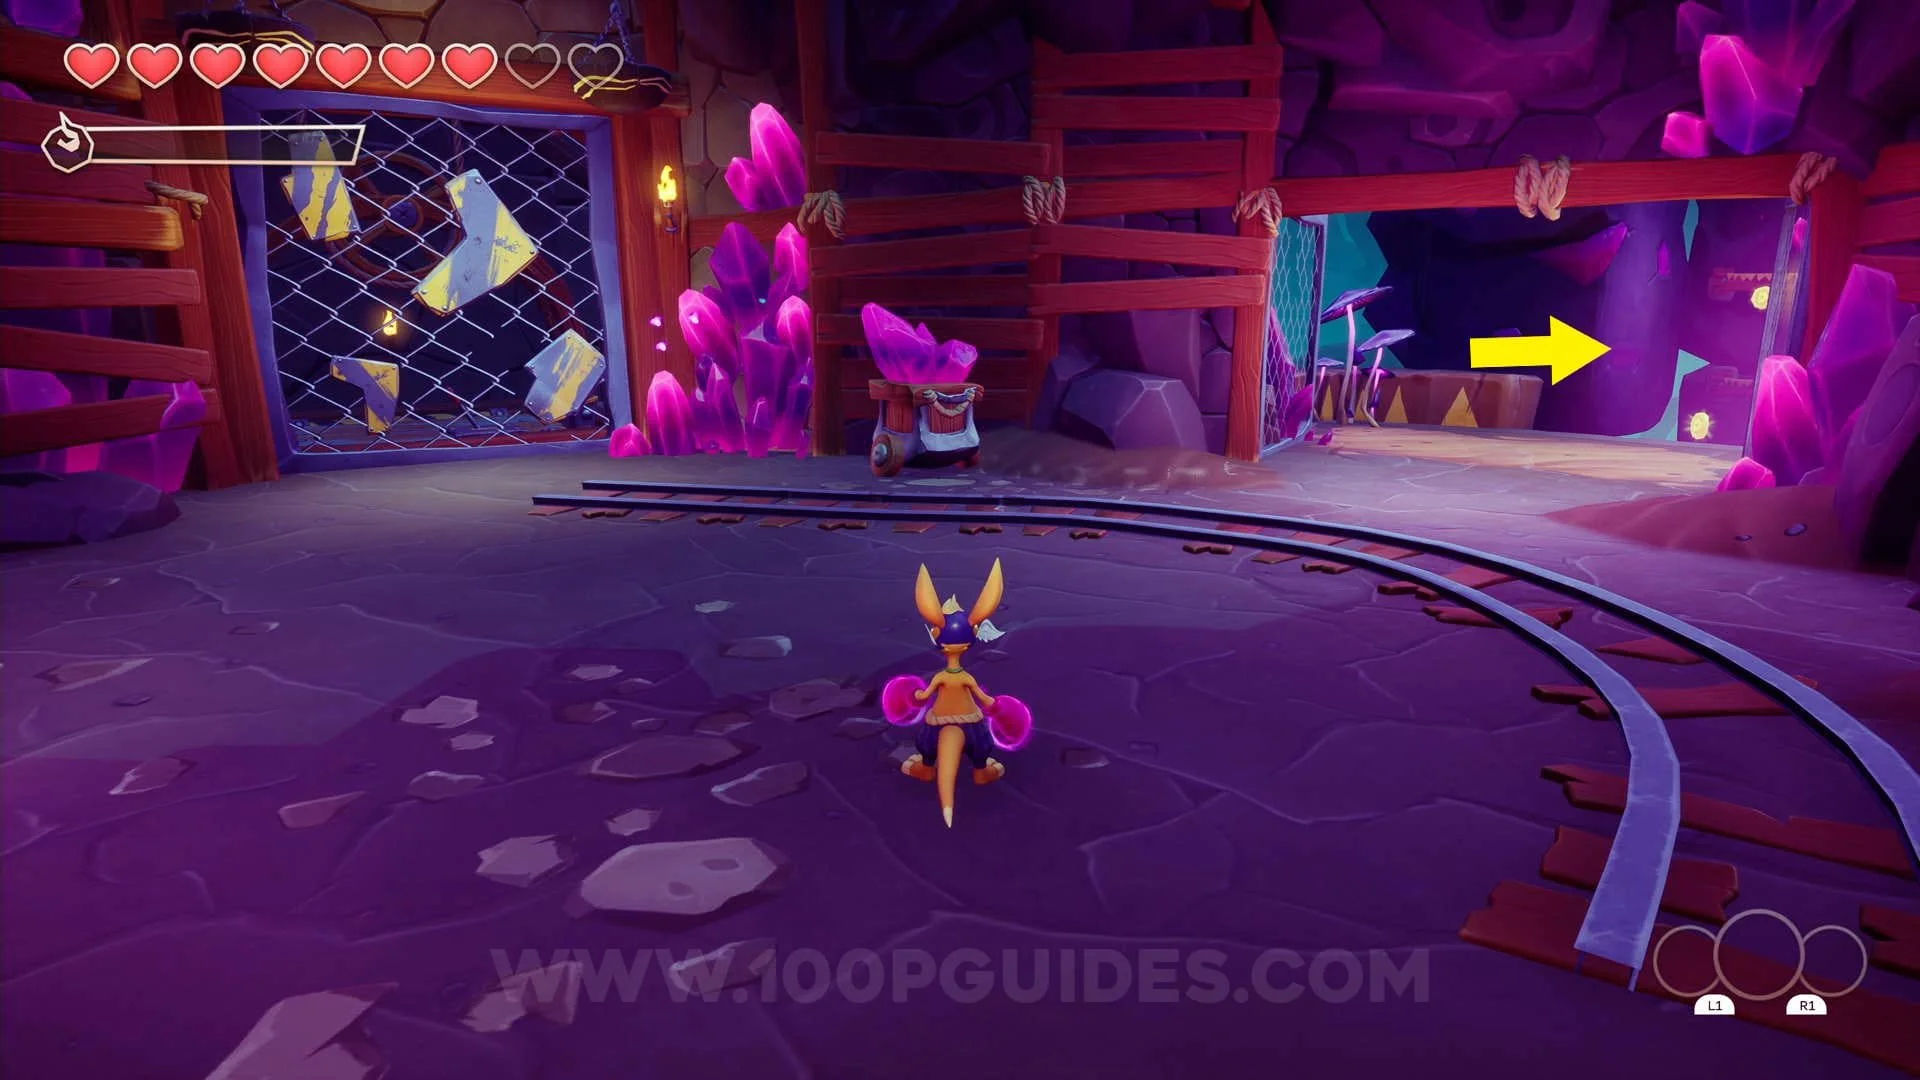
Rune #1: At the end of the right path after lighting the furnace.
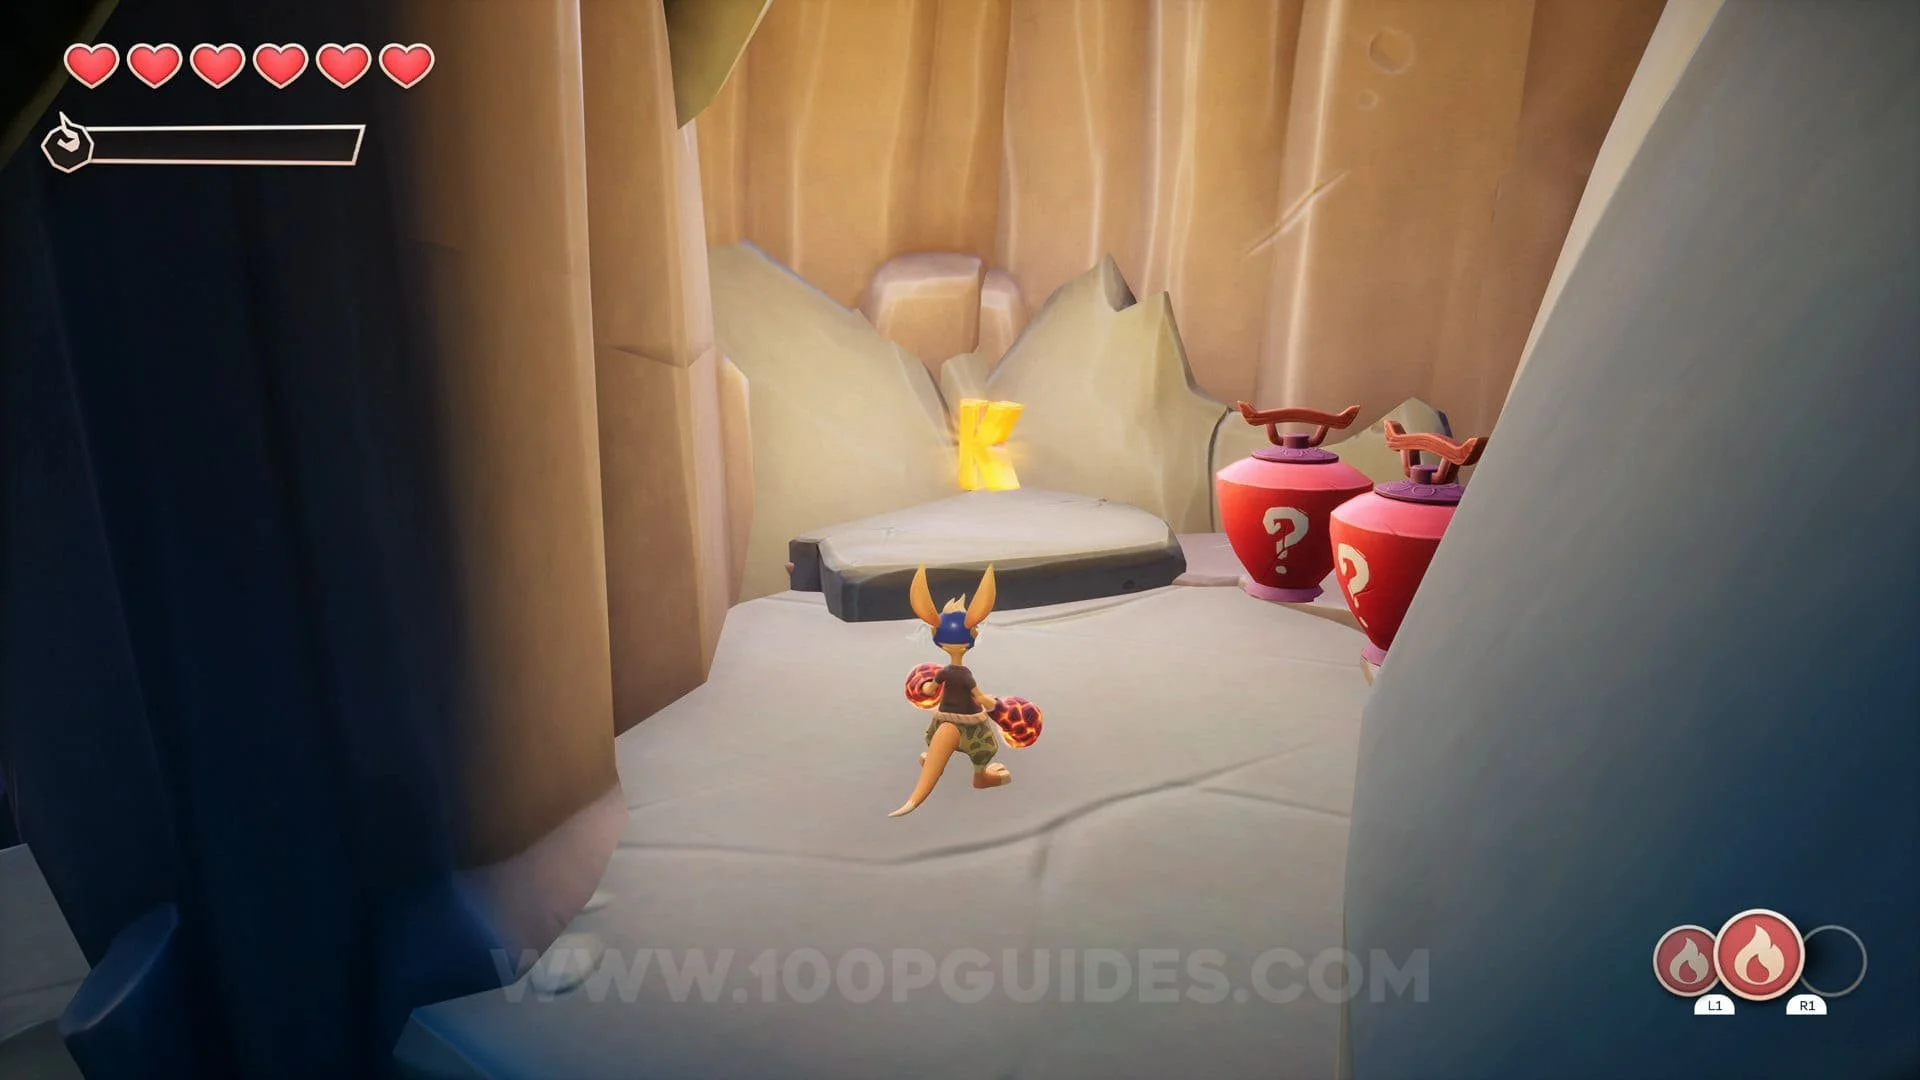
KAO Letter (K): Take the left path at the locked gate, continue until you get to the furnace area. Here drag the box
out from the left to reveal a hole you can climb down. You will find the letter below.

Rune #2: At the end of the left path after lighting the furnace.
Crystal #6: After taking the lift down (after lighting the 2 furnaces), in the area with the big monkey enemy.


Eternal Well #1 (Contains 4 Crystals & 1 Chest): Look for a hole behind the boxes in the corner of the same room
where you picked up the previous crystal.


KAO Letter (A): Just after you exit the room where you found the previous 2 collectibles, take a right and drop down
to the letter before jumping on the trampoline.
Rune #3: On the main path after taking the elevator down after lighting the 2 furnaces.
Heart Piece #1: Behind the spider web to the left of the previous rune.
Crystal #7: Behind the boxes at the back of the room where you picked up the previous rune.
Crystal #8-10: In plain sight after taking the right side path from the room with the rune in it.

KAO Letter (O): Soon after the previous 3 crystals, to the left in the area with the 2 bird enemies.
Crystal #11: In plain sight on the main path close to the end of the level.
Crystal #12-13: Again, in plain sight soon after the previous crystal.
Scroll #1: In the first room to the left in the area with the final crystal puzzle.

Rune #4: In the middle of the area after solving the crystal puzzle.
The Isle Of Eternity Collectibles
Scroll #1: In the area where the flying boat is.
Crystal #1-3: Hang from the ropes close to the flying boat to get these 3 crystals.


Crystal #4 & Chest #1: Found behind the entrance of The Sparkly Funfair level.
Crystal #5-7 & Rune #1: Use the grappling hook to the right of The Sparkly Funfair
level entrance.


Chest #2: Jump up the platforms to your left on the path towards The Crystal Caverns level entrance.

Rune #2: In the middle of the path on your way to The Crystal Caverns level.

Video Guide
If you found this guide helpful and would like to support our work, you can do so by pressing the Ko-fi button below