Souldiers All Secondary Weapon Locations (Expert Trophy Guide)
In this guide we will show you where to find all secondary weapons in Souldiers. This will also get you the "Expert" trophy / achievement.
🎮 Find more Souldiers guides here.
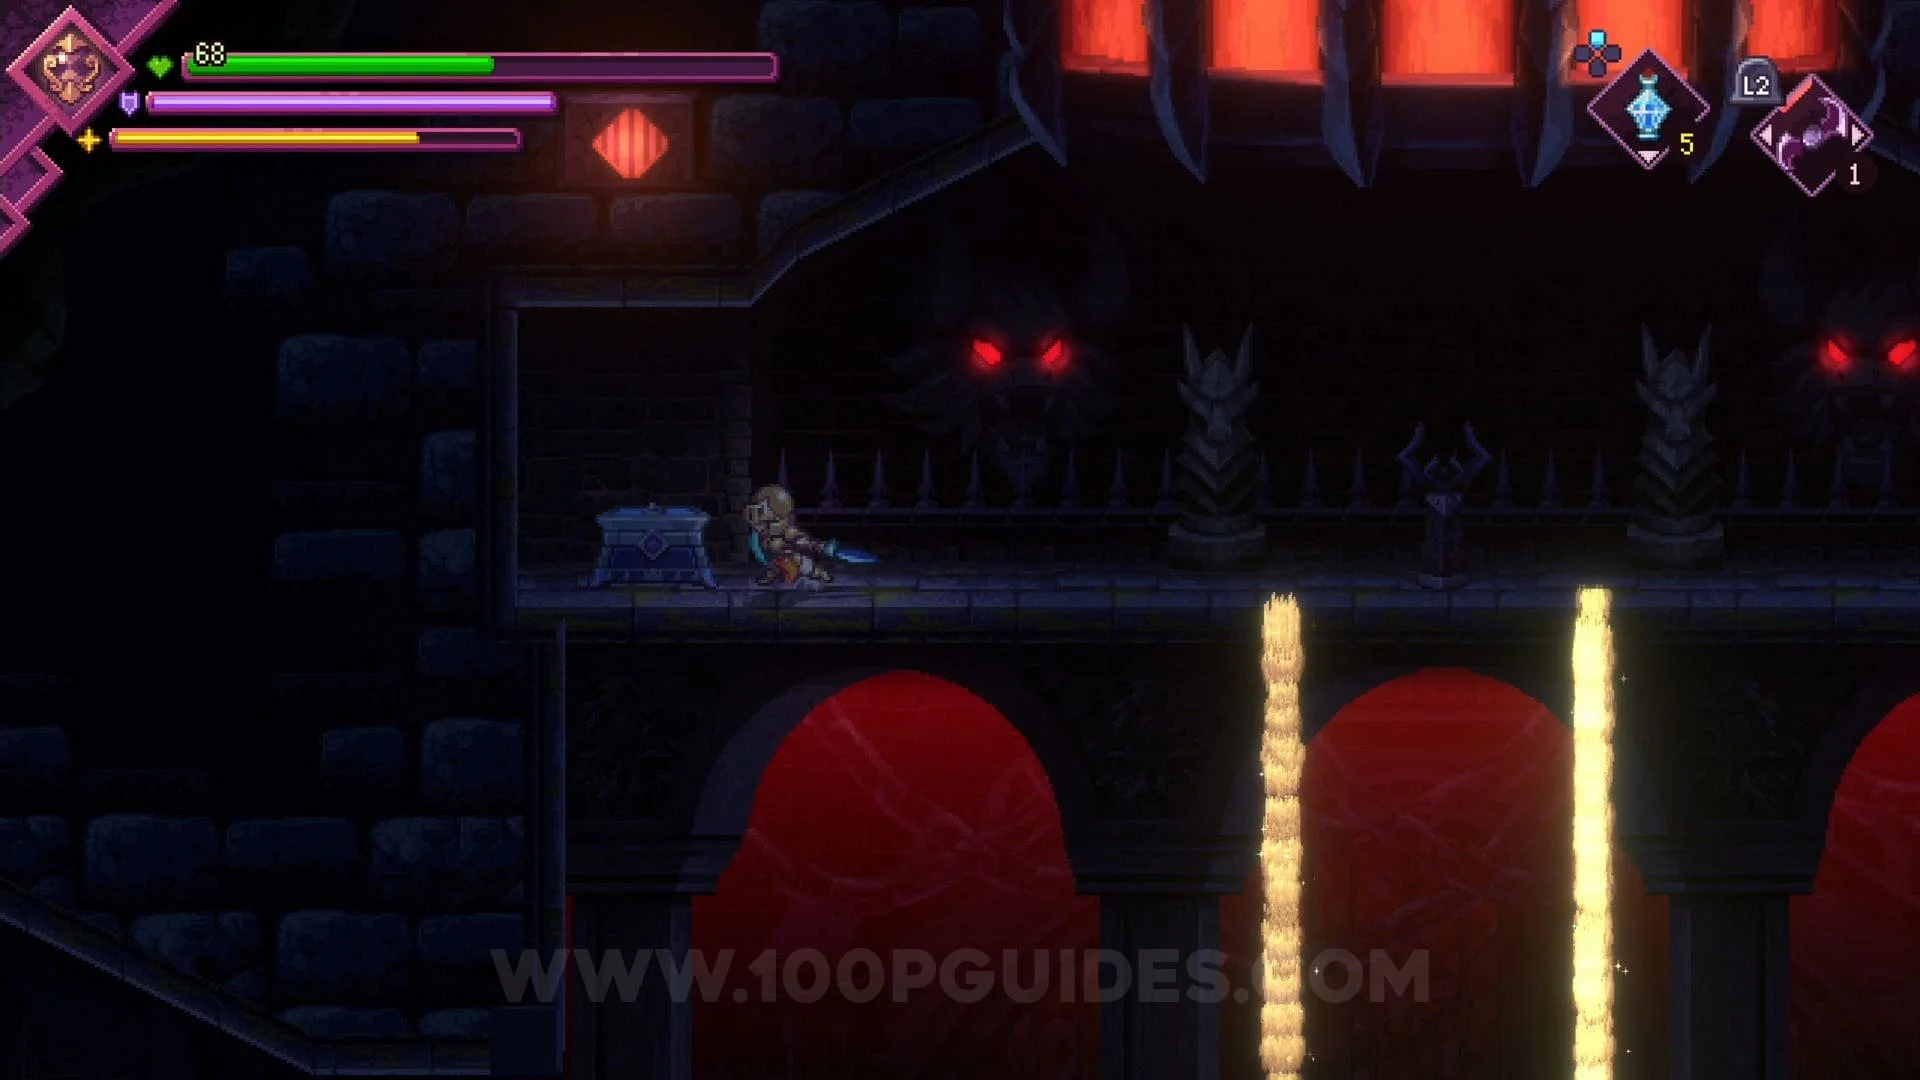
Spider Lair
Bomb: Can be obtained by saving the pig NPC from the spiders.


Acolyte Fire: Found in a blue chest.


Dark Lance: Found in a blue chest under a pile of corpses.
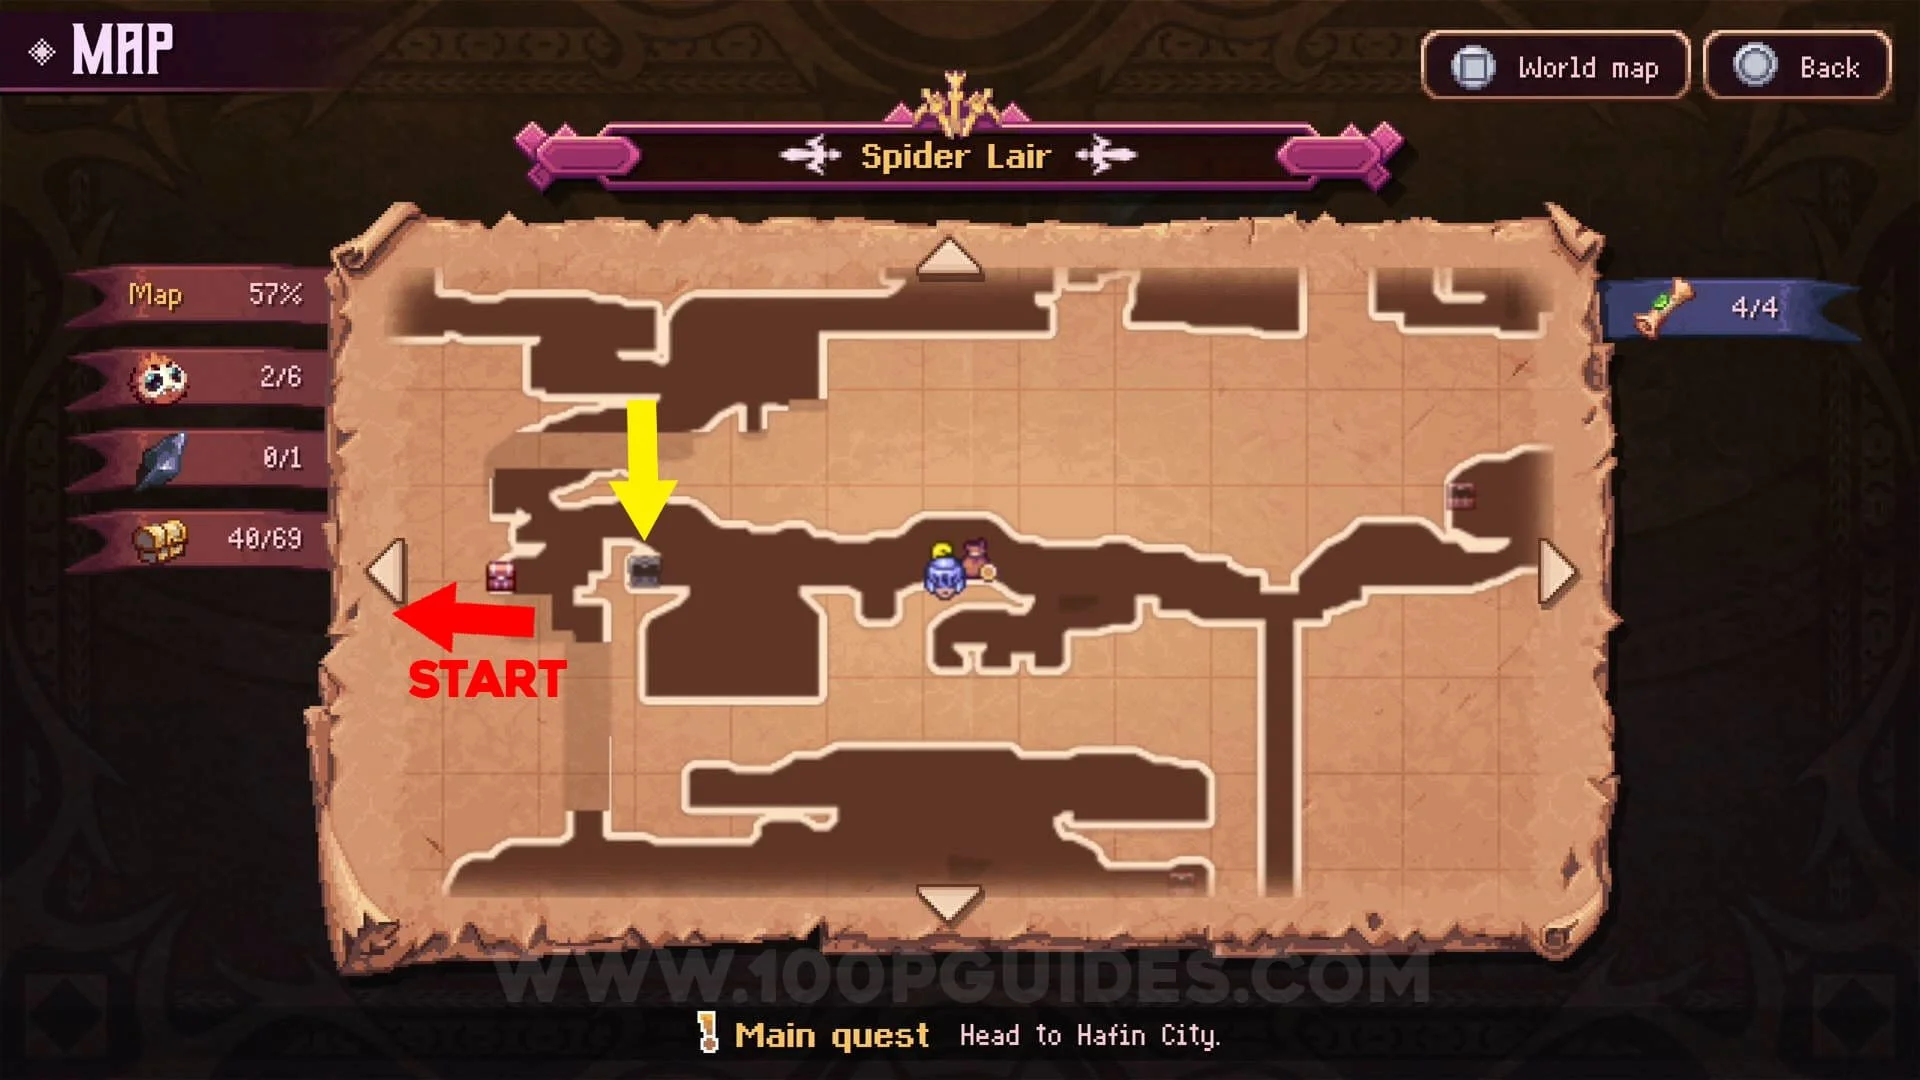


Mandrake: Found in a hidden room at the bottom of Spider Lair. To get to this area you will have to advance through the game until you can go underwater.


Forest Of Fyr
Kobold Hammer: Dropped by the fox enemy throwing hammers.


Sibuna Desert
Nomad Dagger: Found in a hidden room after exiting the secret hideout for the second time.


Great Pyramid
Posion-laced Khopesh: Found in the bottom area of the Great Pyramid. You will have to get the red orb in the pyramid (Story Related) to open the chest.


Flash Bomb: Found in a blue chest in the top-right area of the Great Pyramid, you can access this area through the Deep Pyramid entrance found in the right area ( 👀 available after getting the Arid Orb).


Sand Mortar: Found near the center of the Great Pyramid. You will need to advance through the pyramid until you get the blue orb to be able to access this area.


Dark Axe: Found close to the top area in the Great Pyramid. You will have to advance through the pyramid until you get the green orb to open the chest.


Hafin City
Shield Of Zarga: Obtained as a reward for finishing the "Ironclads In Trouble" side quest.
Garnerock Chakram: Reward for finishing the “Reddish Blade” side quest. Guide can be found here!
Remote-Control Bombs: Reward for finishing the “Vimana Technology” side quest.
Spawn Lance: Reward for finishing the “The Fastest Captain In Zarga” side quest.
Sword Of Zarga: Reward for finishing the “Monster Hunter” side quest.
Wind Bow: Reward for finishing the “The Colosseum” side quest.
Floating Module
Ionic Nail: Found on your way to the 3rd generator in the bottom-left area. You will have to push a nearby block on to a switch to access the blue chest containing the secondary weapon.


Robopichiti: Found behind a fake wall that you can blow up on the way to the 3rd generator.


Electrical Essence: Found early on in the Floating Module dungeon. You will have to come back here once you have the dash ability to reach the blue chest containing the secondary weapon.


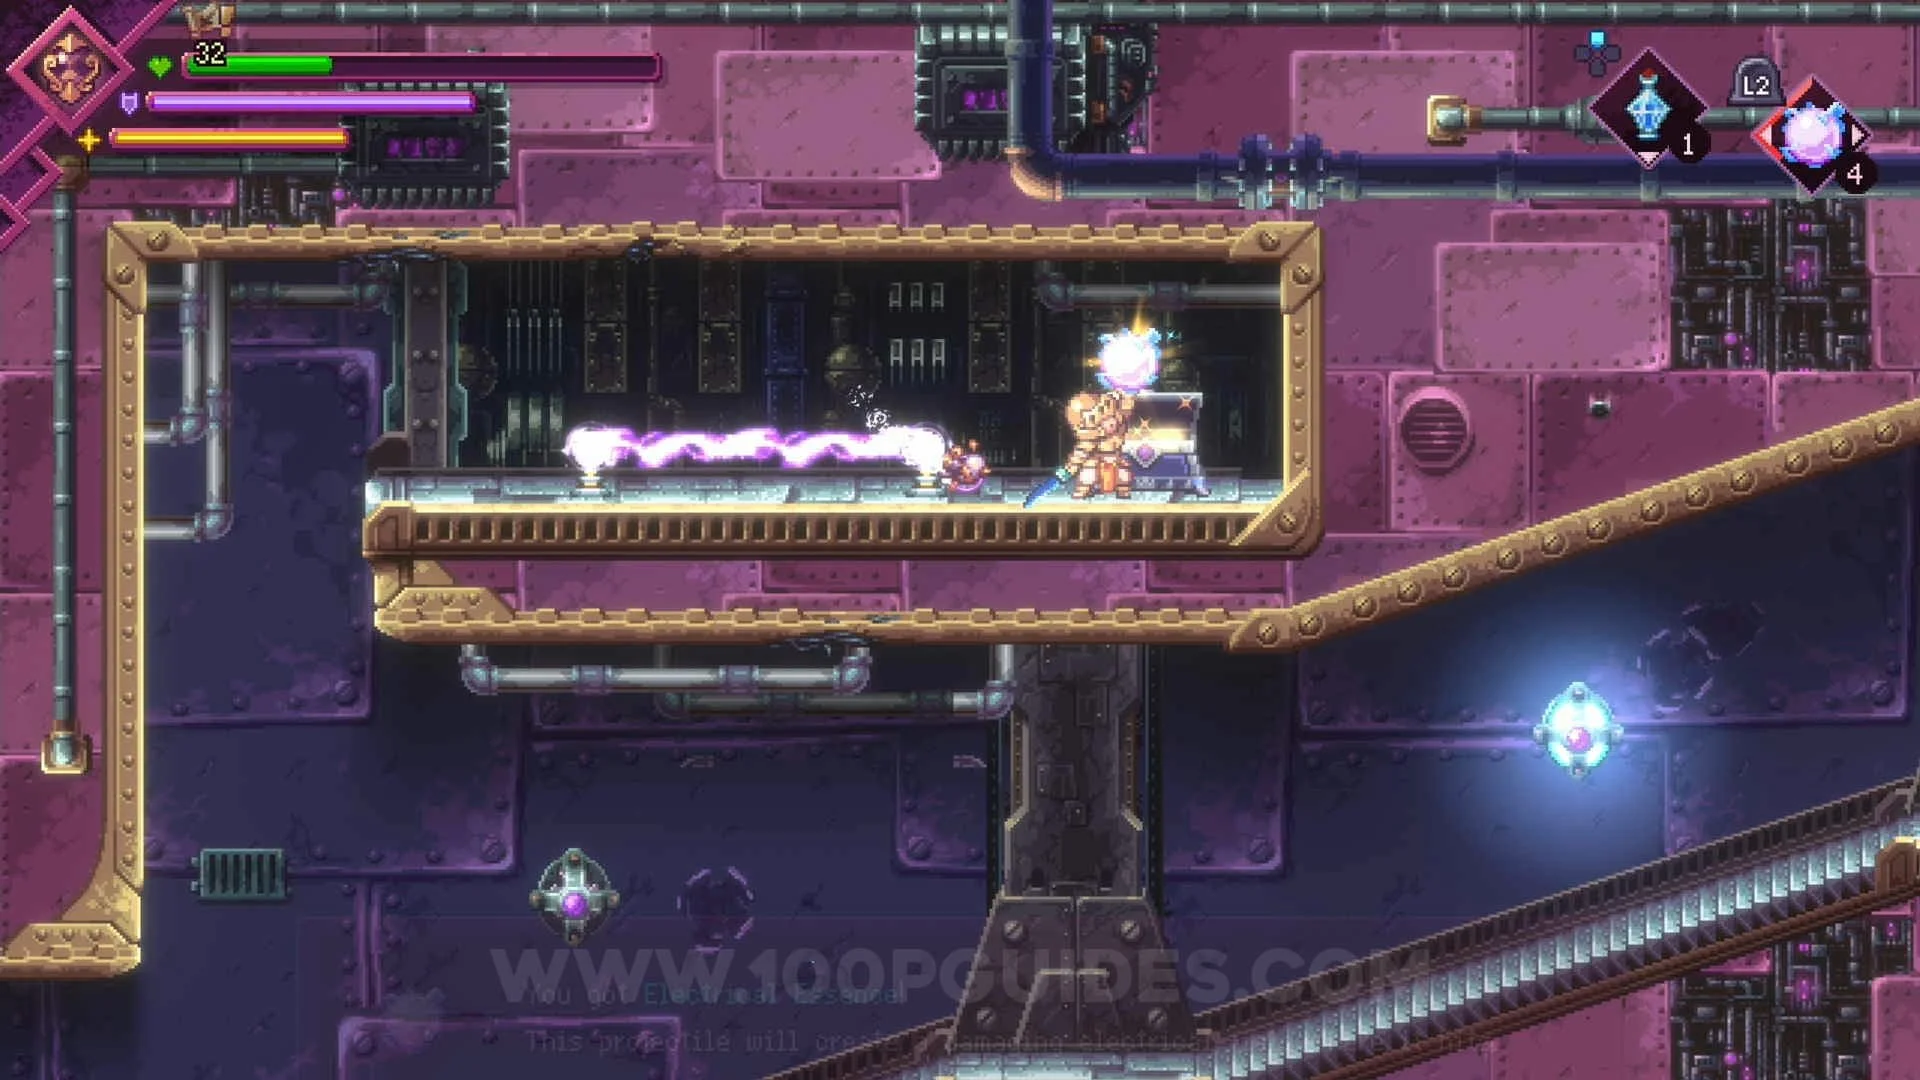
Dark Claw: Found in the bottom-left area of the Floaring Module. You will need the water orb (obtained automatically during the story) to access this area.


Hafin Sewers
Pig Bombs: Obtained automatically during the main story.
Dark Whip: After defeating the main boss in the Sunken Laboratory, you will go up a lift and return to Hafin Sewers, here you
will find a hidden room to your right with a bubble in it. You wil have to hit the bubble while the Glacial Orb is active
and follow the combination of bubbles shown in the image below to get the dark whip.


Sea Urchin: Found in the blue chest in the water part just below the entrance to the sewers.


Sunken Laboratory
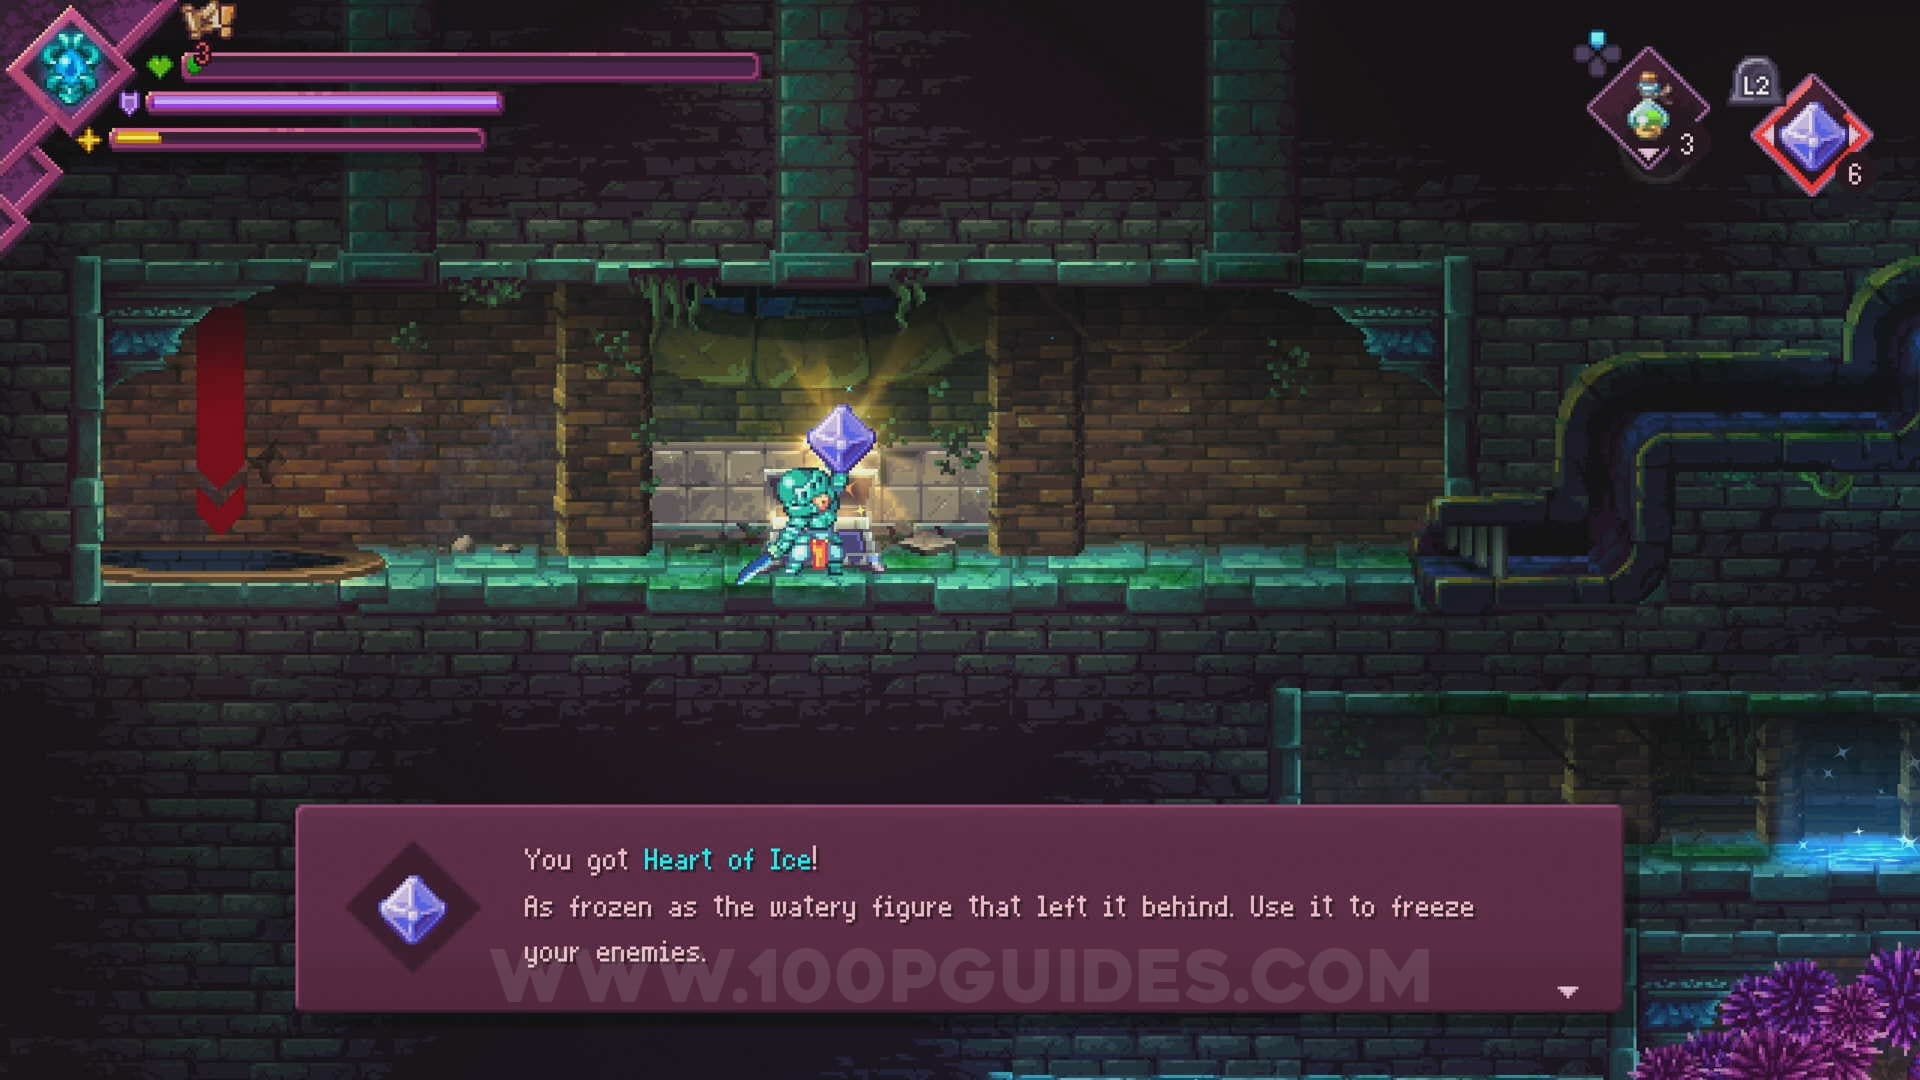
Heart Of Ice: In the bottom-right most area, use the sand stone in the hidden room. Then use the blue circle to transform.
Now go down and follow the sand bridges all the way to the left. Next, go up to the right past the squid type enemies (that will not attack you in this form). Here you will want to turn the valve and head left where you will press a switch to open the barrier to the right. Go past the barrier and head up, then go all the way to the left to find the chest with the Heart Of Ice inside.


Winter Rose: Use the wind switch (You will need the Aeolian Orb that you obtain in the Fire Temple during the main story) in the bottom-left corner
of the dunegon to open the door on your left. The Winter Rose will be inside.


Hipicus Crystal: Found in the bottom most room of the dungeon. Here you will have to solve a puzzle to get the weapon.
To solve it, first place the box below the hanging crate, then jump up and go left just below the hanging crate on the left.
Here press a switch that will release the claws grabbing the chain. Now go around the left of the room and climb to the top
where you want to activate the valve. This will release water that will push the left crate on to the box, positioning the
crate hanging on the right to press the switch that will now allow you to push the box on to the siwtch where you can now
get the weapon from the chest.


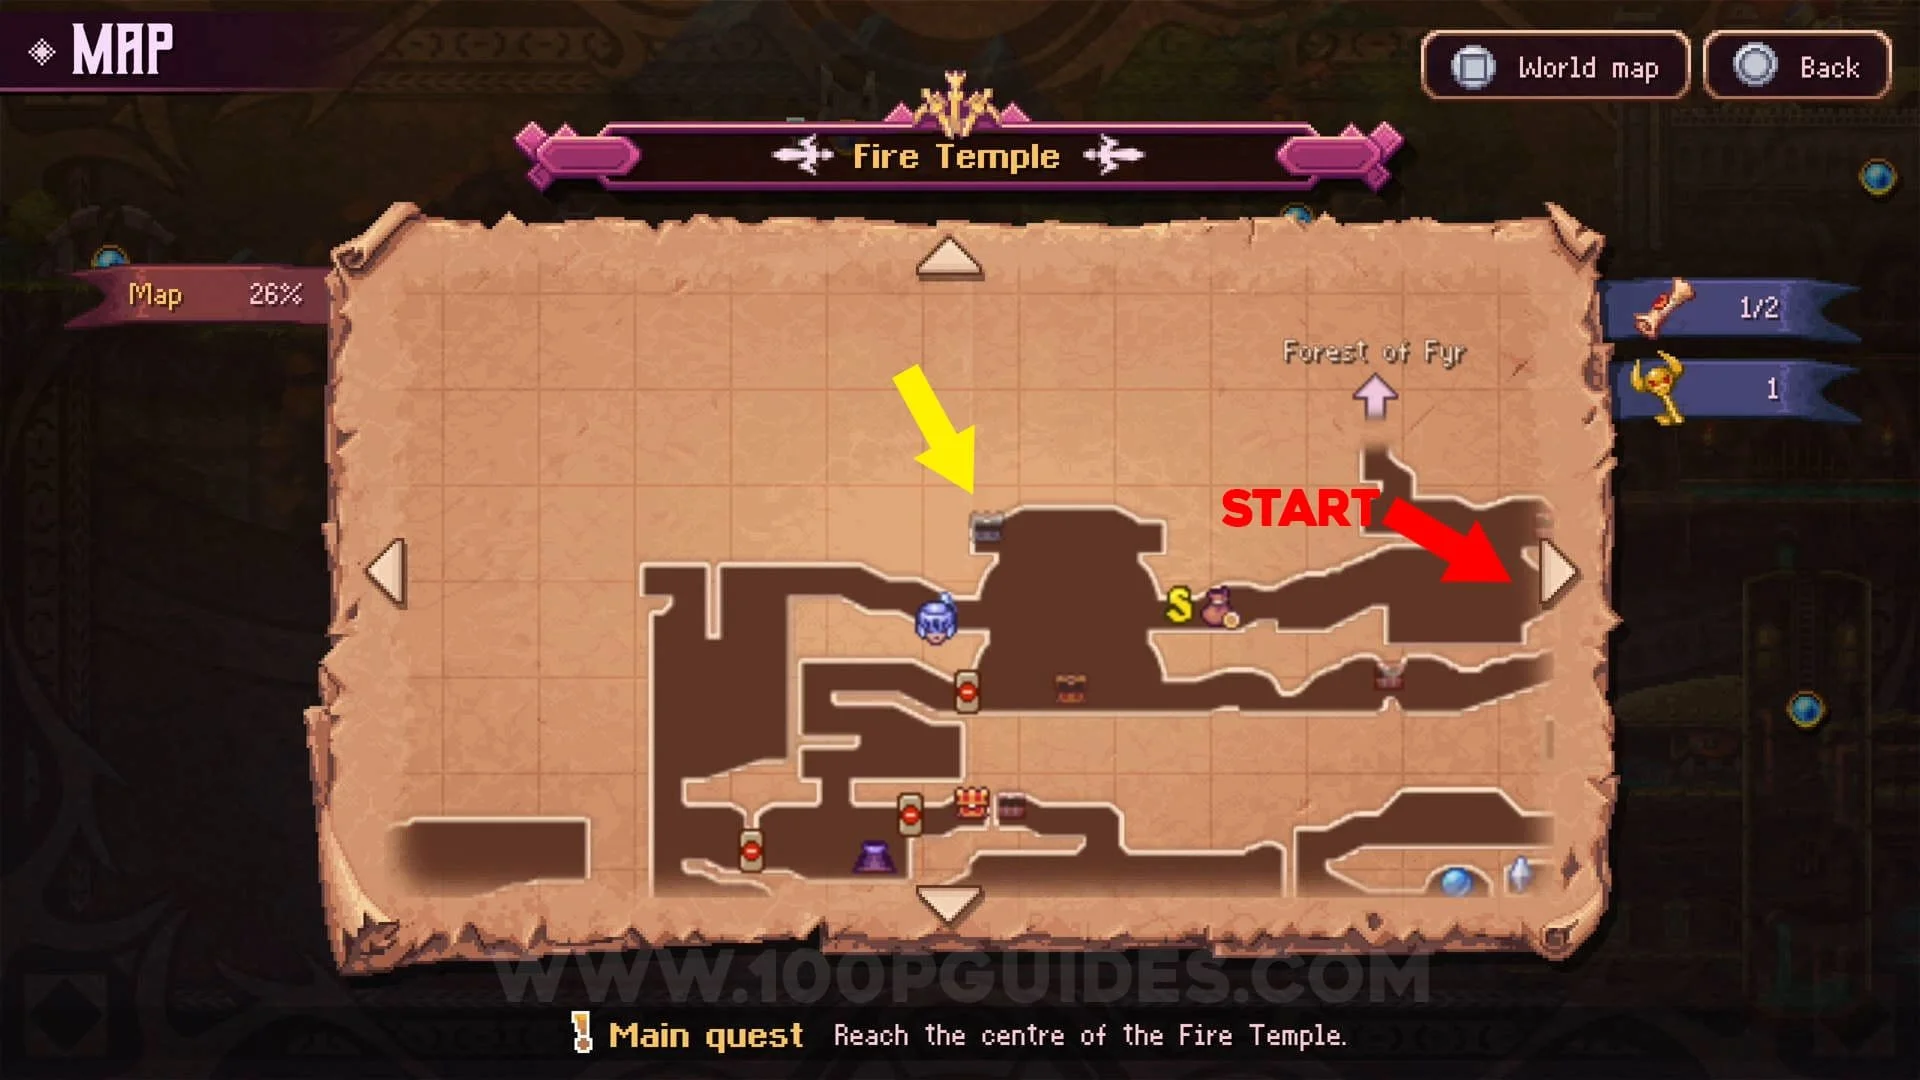
Fire Temple
Dark Razor: In the room where you defeated the Dark Razor boss. Use the sand stone to spawn some platforms. From the second platform jump in to the hole in the roof to find the chest with the weapon.


Fire Viper: Found in the top most area in the Fire Temple. You will have to make your way around the left and activate the sand stone to spawn 2 walls you will use to wall jump to the chest with the secondary weapon in it.


Flaming Sceptre: Found just before getting to the final boss in The Fire Temple.

Dark Sword: After defeating Agginox, head to the left and use the bomb on the floor. In the hidden room you will find a switch on the floor. After pressing it, use the sand stone and cross to the right. Here use the bubble to climb up until you land on a platform to the right. Here push the block found behind the hidden wall off the ledge. Drop back down and then down again through the hole the block has created to find the Dark Sword in the chest.


If you found this guide helpful and would like to support our work, you can do so by pressing the Ko-fi button below