AI: THE SOMNIUM FILES - nirvanA Initiative Tearer's Somnium Walkthrough
In this guide we will show you how to finish Tearer's Somnium in AI: THE SOMNIUM FILES - nirvanA Initiative.
🎮 Find more AI: Somnium Files - nirvanA Initiative guides here.


❗This walkthrough will only show you how to finish the somnium and will not show you where to find the eyeballs.
📝 You can find a guide on the eyeball locations clicking here.
With that said let's begin the walkthrough!
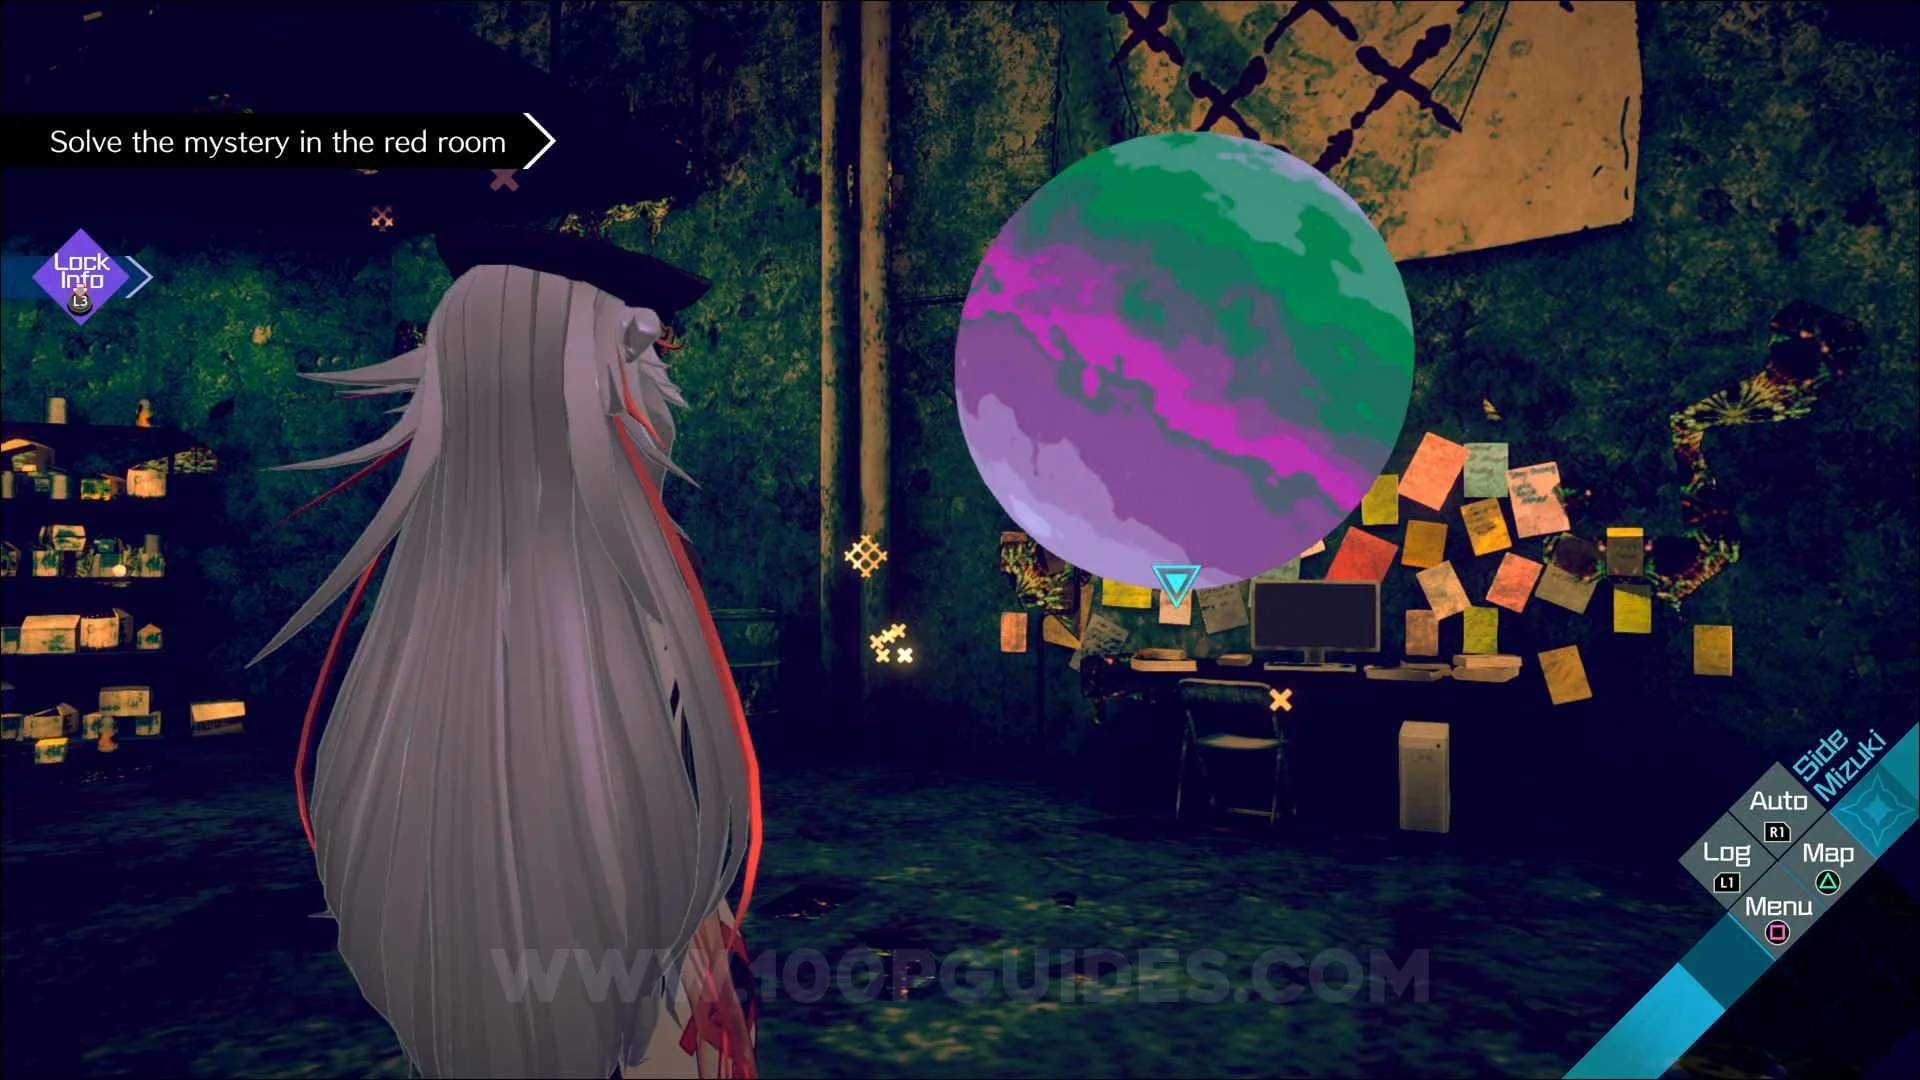
First examine the sphear on the bottom floor and then go back to where you start and PRESS ENTER on the PC.

In the next room pick up the paper from off the ground and then enter "215" in to the door that you just entered.
👀 If you would like the full explanation of the puzzle in this room you can find it below.

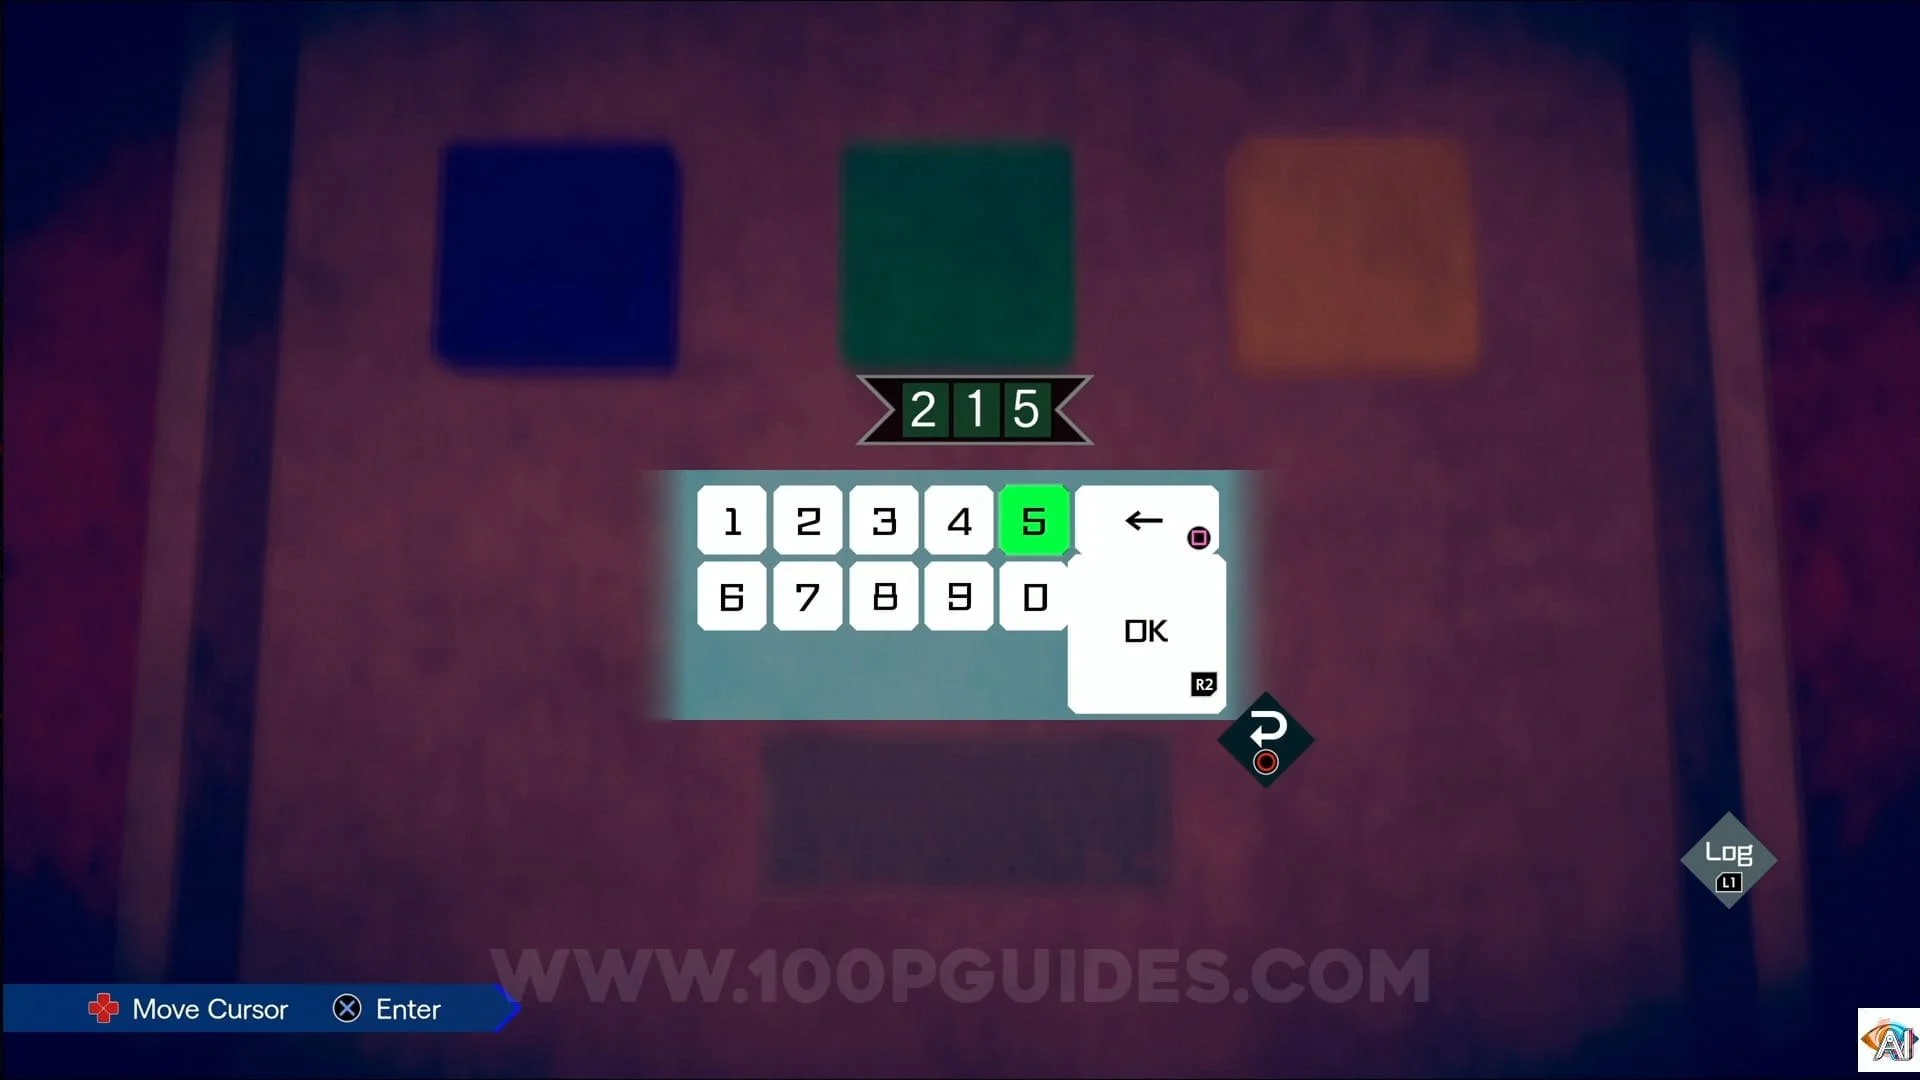
🔓 Puzzle explanation:
First solve the symbols on the wall with the paper you found on the ground, so e.g. N+A=3+6=9. Once you have solved all the wall sybols you will have to go to the lockers and imput a password.
The code can be obtained by looking at the sybols on the locker door and the matching them with the ones on the wall (and corpse in the middle of the room). You will also have to spin the sybols and numbers on the wall so they match the ones on the locker doors, rotating the number in the correct way will make it look like a letter. Input the letters in to the lockers to open them and reveal a number in each one. Now order the locker numbers by the colors found on the doors, so BLUE locker, GREEN lockers & then YELLOW locker = 215.
Once you are back to the main area, examine the sphear again to turn on a computer up the stairs to your right. Go up to the computer and PRESS ENTER.


In the next room you can open the exit door with the code 229 (explanation found below).
🔓 Puzzle explanation:
First walk around the room in a circle so that you can make as many of the fake walls go away. Now stand at one of the shapes on a pole and look through it. If the right walls are invisible you should be looking at a painting through the shape. Now just take notice of the colors on the painting that share a color with the shape. Each painting should give you a number.
Once you are back in the main room, interact with the sphere again and then with the PC that is behind the sphere and PRESS ENTER to enter another room.


The code to exit the 3rd room is 999 (explanation can be found below).
🔓 Puzzle explanation:
After reading the first book, some clocks will appear on the wall, as well as a pad with arrows on it next to each one. You will have to try and imagine a half drawn arrow make by the hands on the clock e.g. the clock on the left = <--. Now just imput the directions in each pad to reveal the first number. After reading the second book you will get the word MOTH. If you open up the chart you will notice that these letters are placed like a direction bad on a controller. So M = Left, O = Right, T = Down & H = Up. Now go around the roof from left to right inputing these direction in the pads to reveal the 2nd number.
The final clue from the final book is the easiest. U = Up, R = Right, so just input the direction in the order the book tells you to in to the pads from left to right to get the final number.
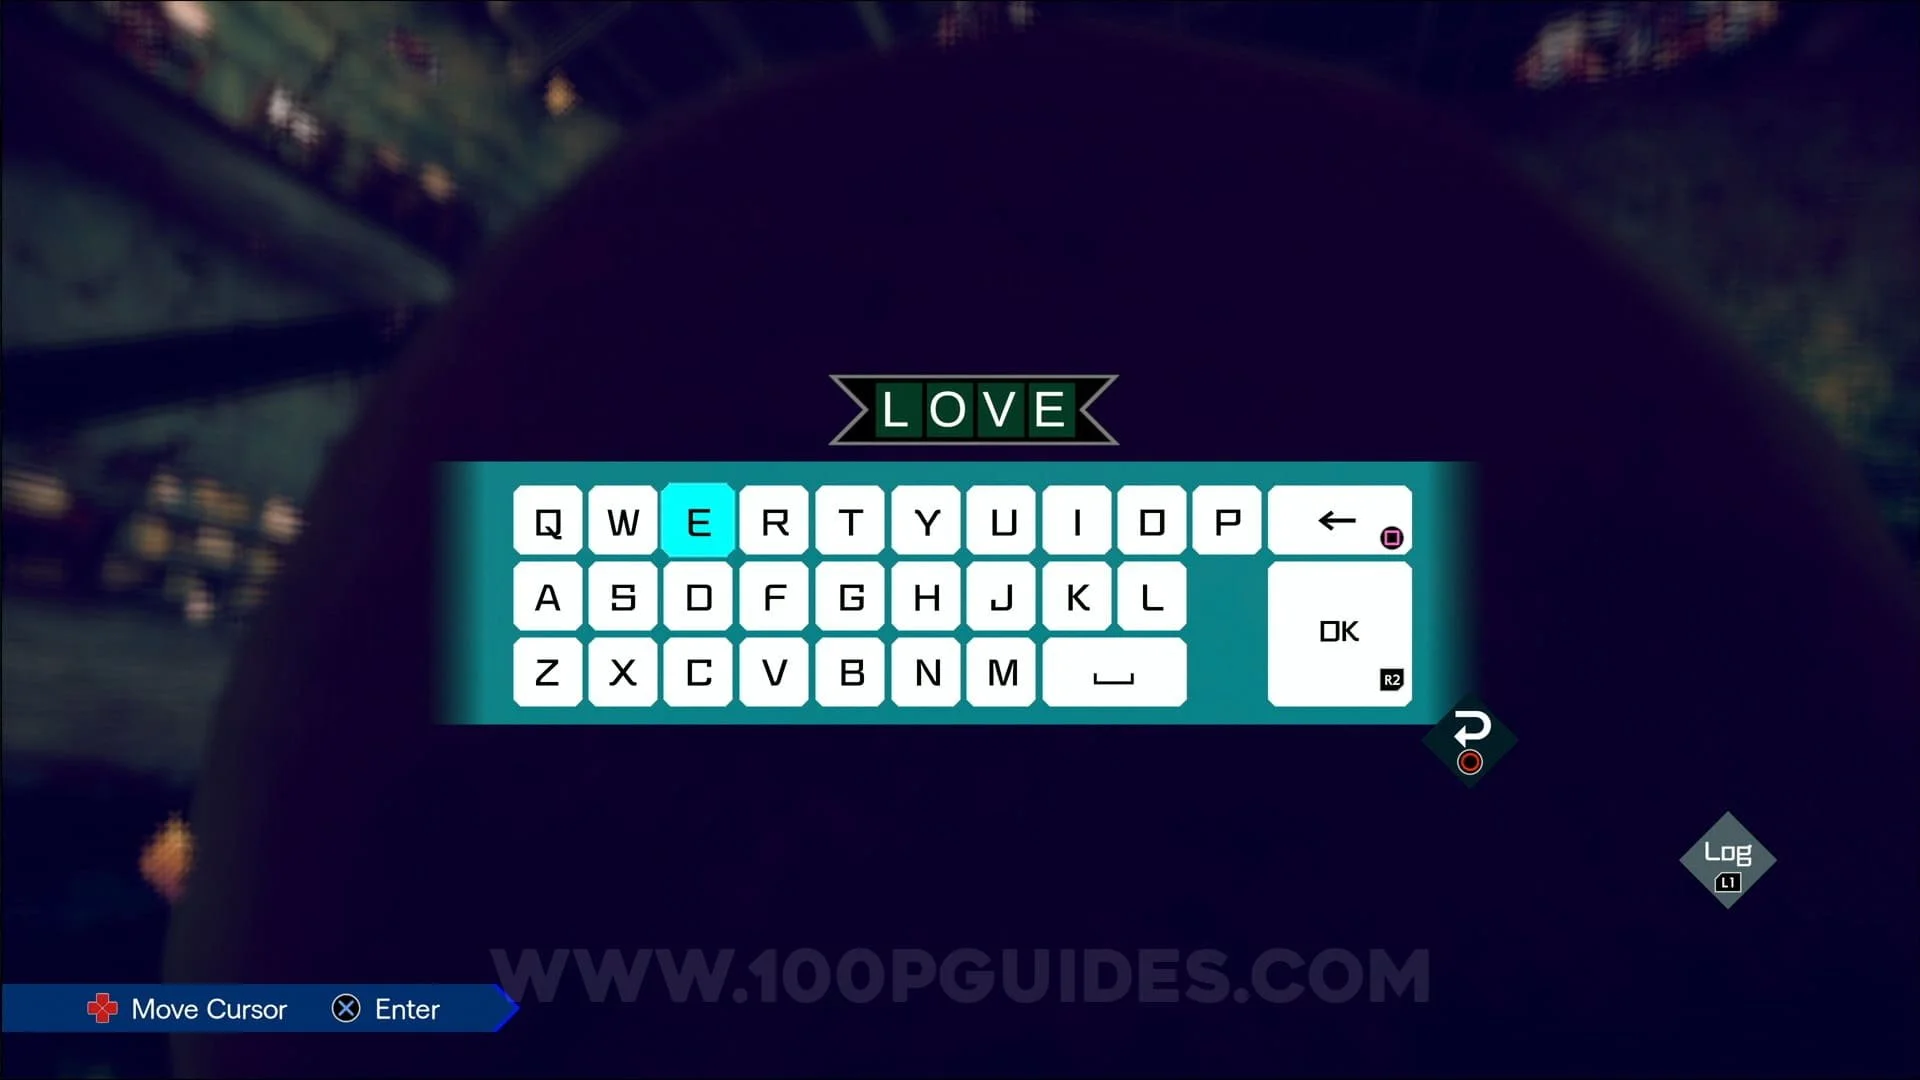
Once you are back in to the main room, interact with the sphere again and enter "LOVE" (RxGxB = 215x299x999 = 49185765, look at the table by pressing L2/LT to find that 49=L, 18=O, 57=V & 65=E).

Now interact with the sphere again and type "JIN" (use the same logic as the previous puzzle ☝).
Video Guide
If you found this guide helpful and would like to support our work, you can do so by pressing the Ko-fi button below