Vampire The Masquerade Swansong All Safe Zone Locations (Meet Me There Trophy Guide)
In this guide we will show you where to find all safe zones in Vampire The Masquerade Swansong.
🎮 Find more Vampire the Masquerade Swansong guides here.
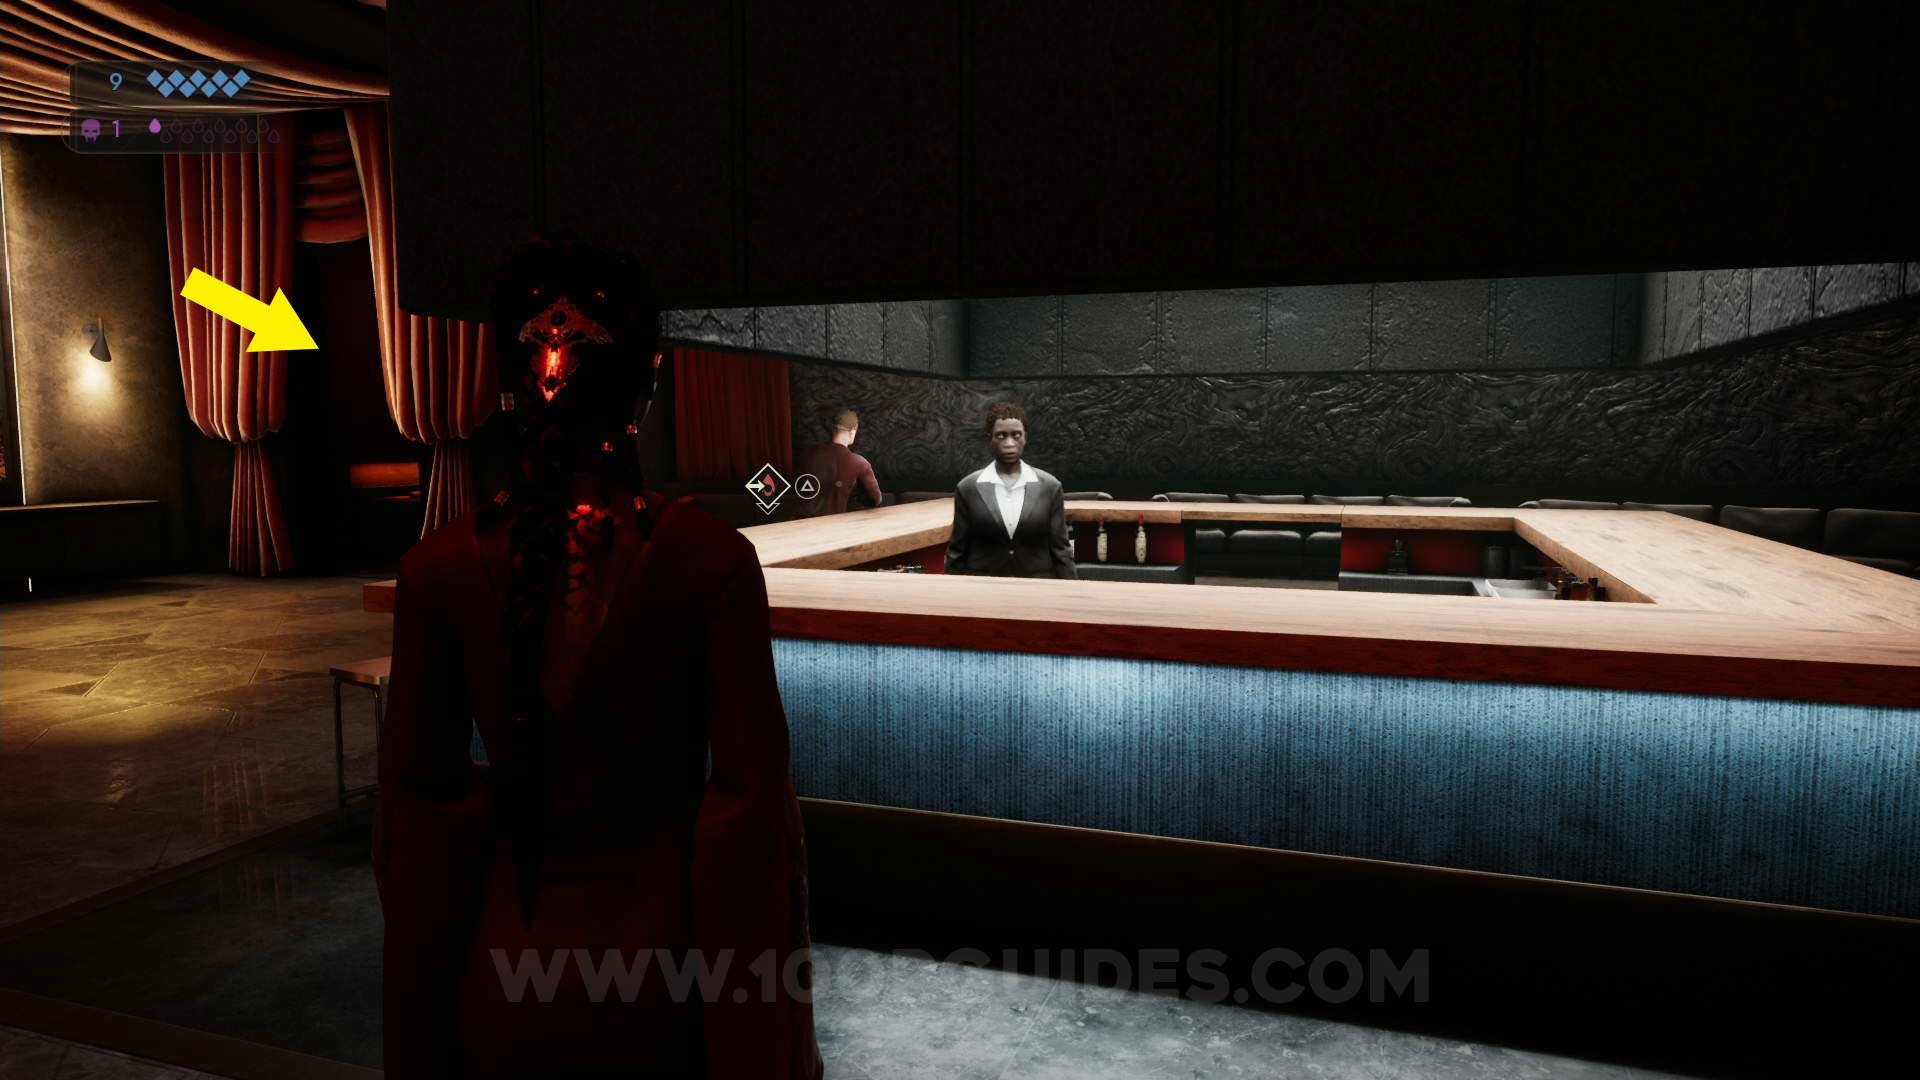
Scene 1 - Prince’s Quarters
Safe Zone #1
After talking to The Prince, you will be in a room with red curtains. The first safe zone can be found to the left of the bar (👀 small room with red curtains around the door).

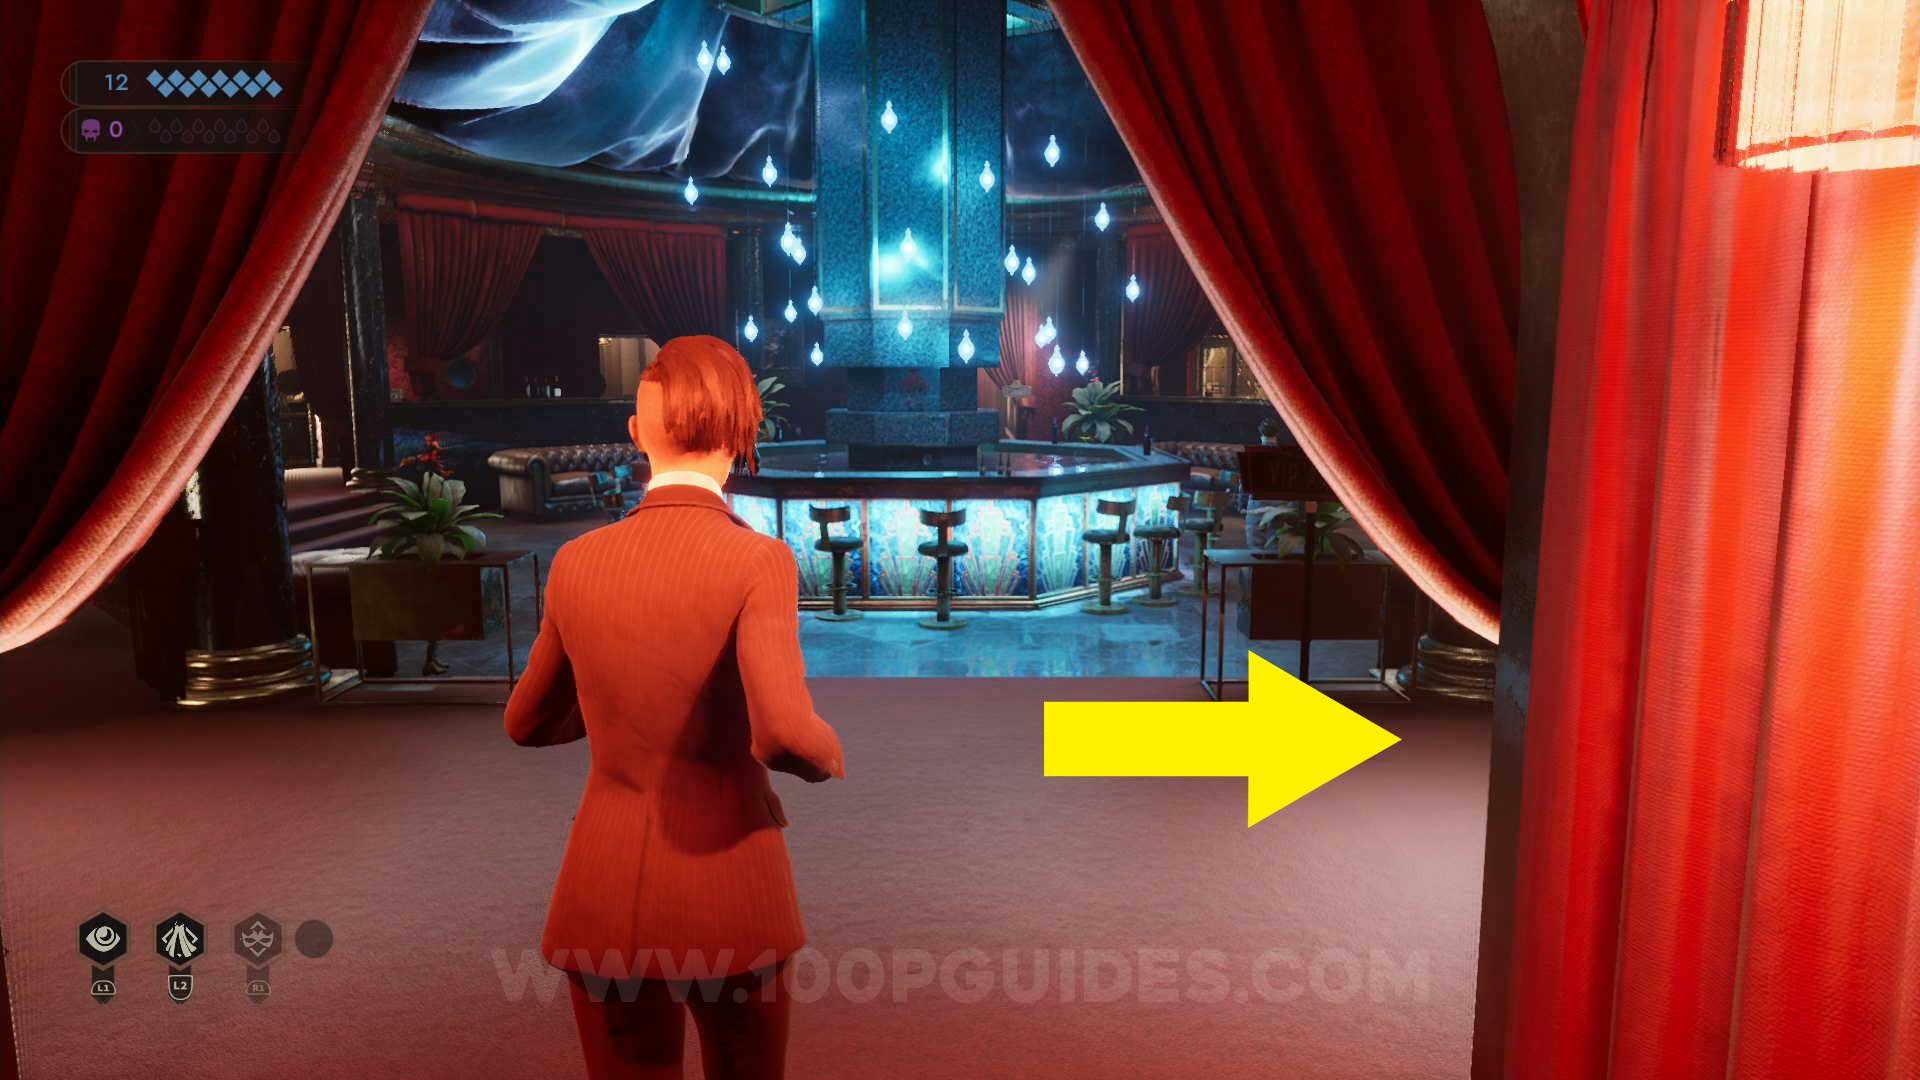
Safe Zone #2
Right in front of Safe Zone #1.

Scene 2 - Moore’s Apartment
Safe Zone #3
From the scene of the crime take the hall down to the left, then enter the last door on the left.


Safe Zone #4
First calm Ethan down (👀 he can be found in the main living room that is located right in front of you when you from the crime scene). Then ask about "The Parking Garage" to get the access key 🔑.
Now you will have to go to the right and throught the kitchen where you can find a door that requires the access card, you will then go through a small cellar and out to a hall where you will want to go to the end and take the elevator down to the parking garage.
Now go left and all the way to the end until you see the exit with skid marks on the floor where you will want to go left and enter the left side door at the end that takes you to the garbage room. Here you will see another door that gives you access to the safe zone! 🎯


Safe Zone #5
Head upstairs from the living room and the go all the wall to the double door on your left and enter it. Here go to the desk to the left next to the window and take the key from the draw. The use it on the other door found on the bottom floor in this same room to find the safe zone.


Scene 3 - Loft
Safe Zone #6
Door on the right in the hall you start in where the 2 cops are.

Safe Zone #7
From the room with the massive broken tv screen, take the door on the right and go up the hall on your left, the safe zone will be in the room at the end.


Safe Zone #8
From the room with the massive broken screen, go through the door to the right and then head to the yellow tape at the end to your right, just before reaching the tape go down the hall on your right and enter the right side door to find the safe zone.


Safe Zone #9
First enter the room on the opposite side of the hall from the Safe Zone #8 and look through the hole in the wall to scan the forensic disguise.
Now you will be able to cross the yellow tape that will allow you to get to the area where the forensics are working and a cutscene will take you in to the safe zone automatically.


Scene 5 - Prince’s Quarters
Safe Zone #10
A little room with red curtains off the room you start in.

Safe Zone #11
On the opposite side of the same room as the previous safe zone.
Safe Zone #12
The same room as safe zone #10 & 11 but when playing as Emem.

Safe Zone #13
On the opposite side of the room from the previous safe zone.
Scene 6 - Long Island
Safe Zone #14
From the main elevator, enter the door on the right, once inside pick up the red valve from the desk and place it on the canister that does not have a valve. Now turn all 3 valves for the door on the opposite wall to open, revealing a safe zone.


Safe Zone #15
From the main elevator, enter the door straight ahead, then go through any of the two side doors and go to the end where you can enter another door. Here look for a door in between the sheves that will take you to a safe room.


Safe Zone #16
From the main elevator, take the door to the left to enter the clinic area, here go through the door at the other end of the room, then through the door to your left, here enter code 1492 in the blue locker to open it. Now change into the hazmat suit and go through the other door.
After getting decontaminated and entering the room next to the clinic manager, interact with her using the "take implant" option, she will then send you off to the cold storage (and give you the key card to access it). You can find the cold storage room by taking the other door in the first big room in the clinic area, then looking right where you can find the door that will take you to the safe zone (cold storage room).


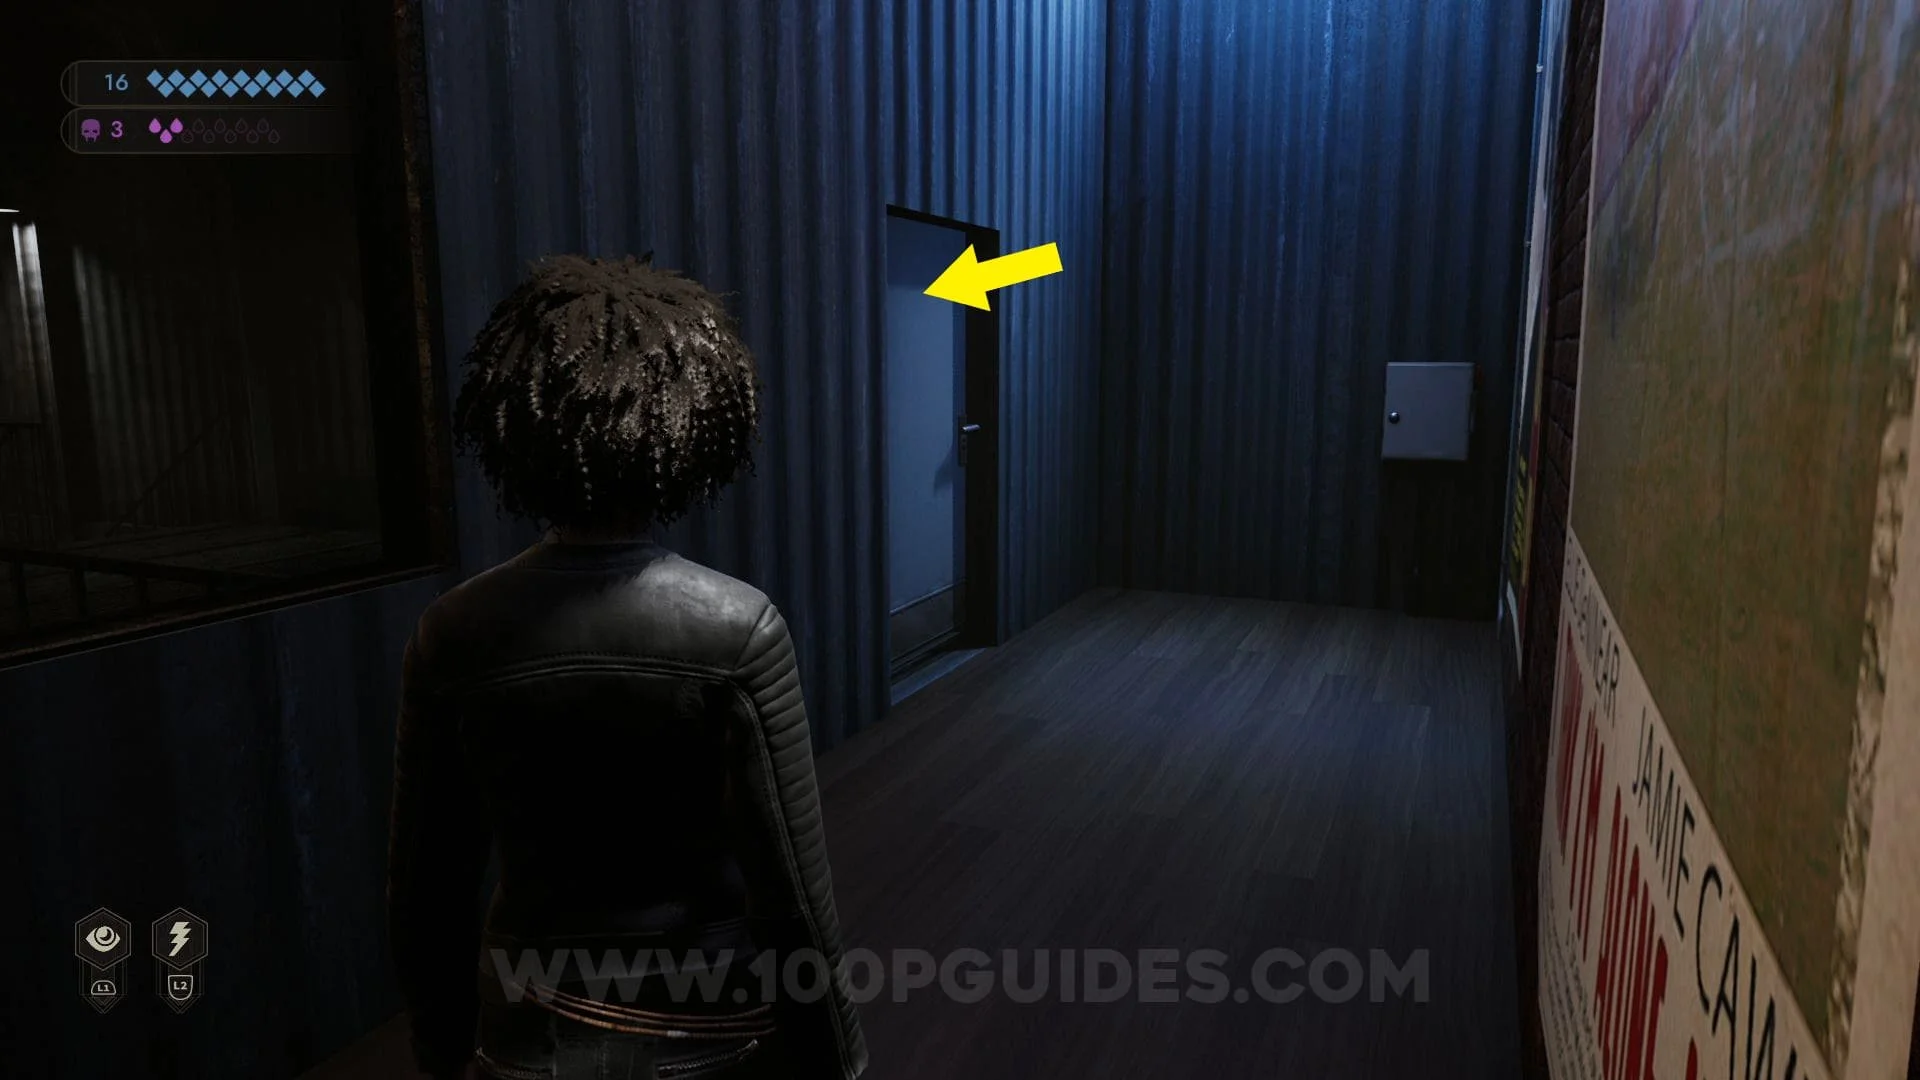
Scene 7 - Red Salon
Safe Zone #17
First pick up the access card from the corner of the bar in the first big room, then head in to the next circular room and open the door on the right (Staff Only door) with the access card. Next you will have to take the left down and go to your left, then go all the way to the end and enter the door down the short hall on your right to find the safe zone.


Scene 8 - Anarch Domain
Safe Zone #18
Through the middle door on the catwalk very close to the start of the level.

Safe Zone #19
Once you go outside for the first time, enter the building to the right (the one with a 19 on it) and go all the way to the back to find the safe zone.


Scene 9 — Part 1 (SAD BASE)
Safe Zone #20
Found to the left as soon as you leave the starting room.
Scene 10 — Part 1 (SAD BASE)
Safe Zone #21
Found behind the double door under the office in the area you start.
Safe Zone #22
Door to your right as soon as you enter the bunker area after making up your identity to get in.
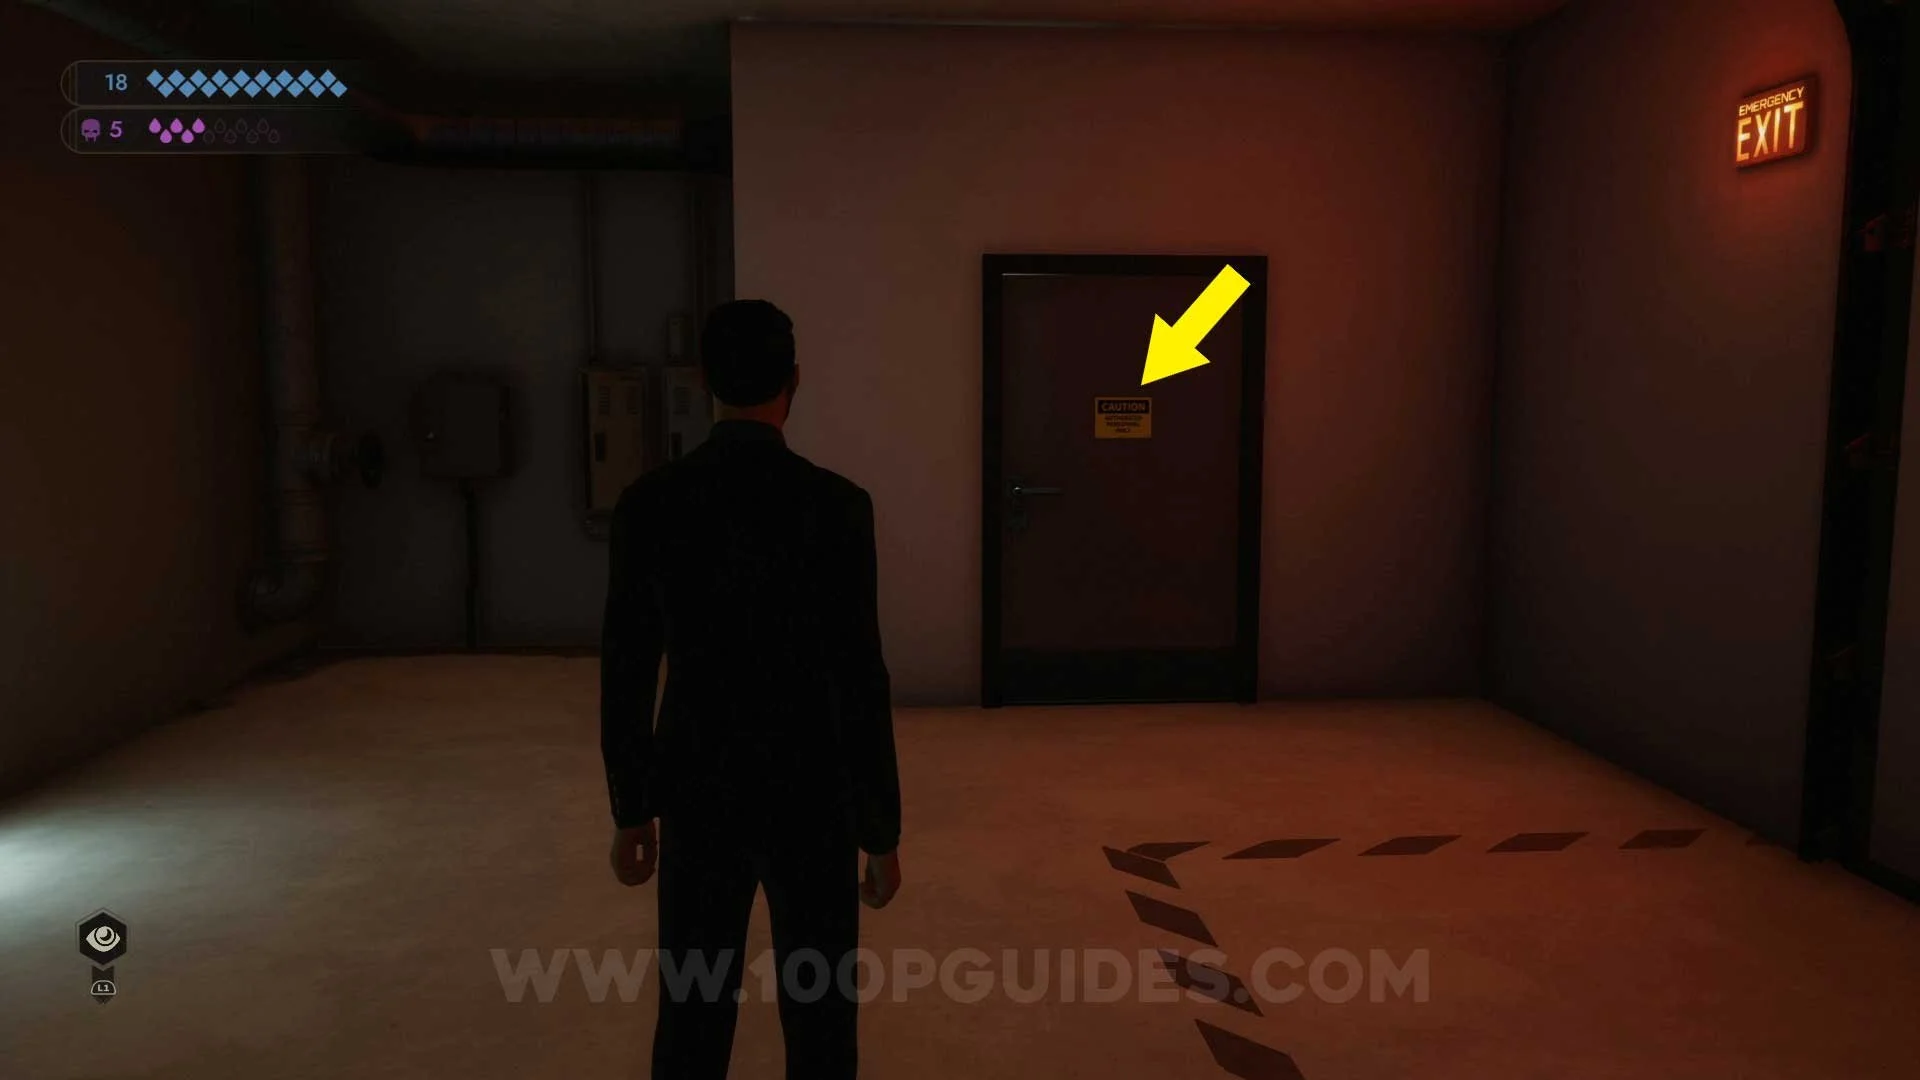
Scene 9 — Part 2 (SAD Base)
Safe Zone #23
Go through the the door to the right of Frank.
Safe Zone #24
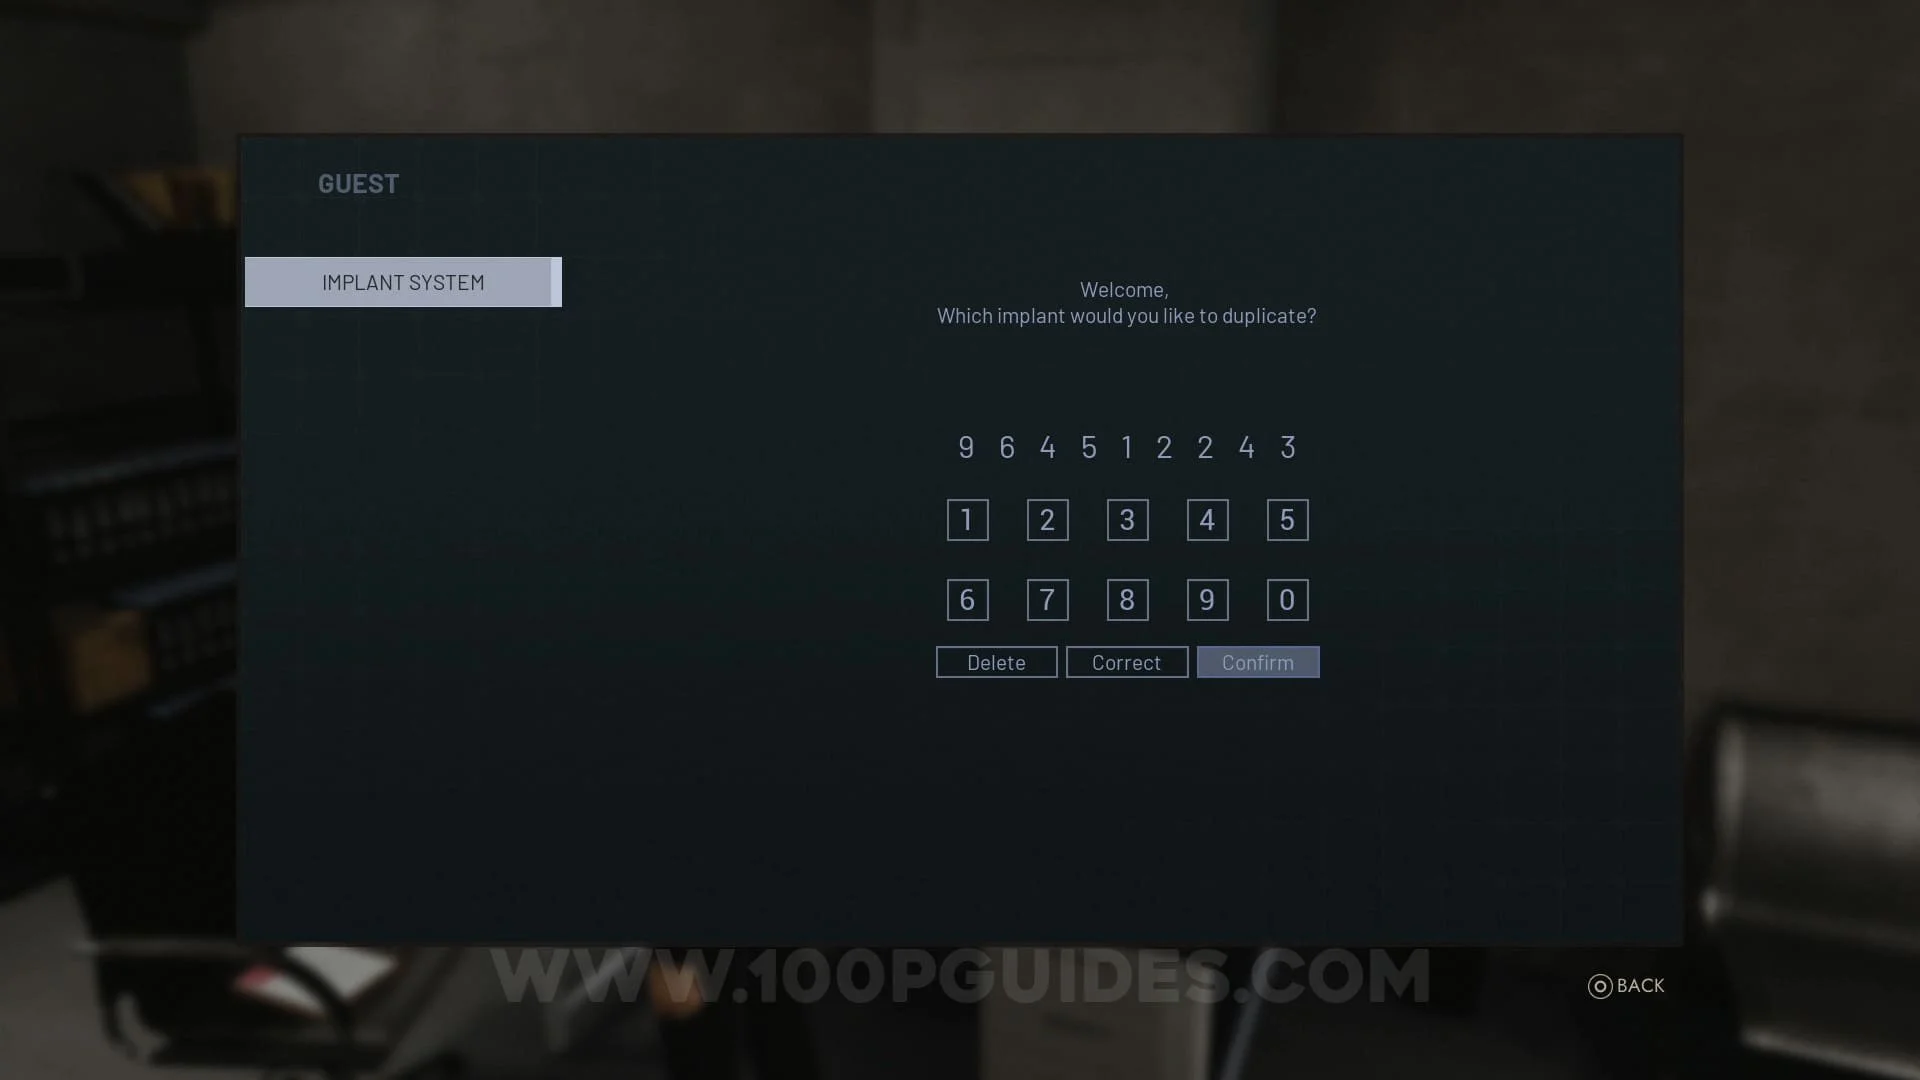
First go to Stanford's Office and enter the small backroom with the Implant machine. Here get one of the many black implants from the draws around the room and place it in the printer, then on the PC enter 964512243 to print a max clearance level implant. Now use the machine to update your implant to the new one.
Go back to stanford's main office room and open the right desk draw, then use your new implant to reveal the button that opens the observation room (this is the locked door just outside the office). Enter to unlock the final safe zone!


Video Guide
If you found this guide helpful and would like to support our work, you can do so by pressing the Ko-fi button below